User:Emma Rijk/UTC
Contents
Research Document

Introduction
Ceramic Memory contains three group members: Marjolein Stassen, Pascalle de Jager and Emma Rijk. In the previous quarter Marjolein Stassen and Emma Rijk have been looking for ways to remember precious memories. The focus was on memories that are made with several people together while having food. Because the moments we are with friends is to good for being behind a camera or waiting for that 'perfect' moment we were thinking about an automatic memory saver.
In this semester we took our idea to the next level. By creating a new tool to save memories on cutlery, the memory does not only last but also reminds the person daily while eating from their cutlery. The tool we use is an camera obscura, which is a dark space (can be anything) with a hole in the surface to let a little light in. The ceramic object will be placed in the small dark space after a lightsensitive formula treatment. The dark space (box) can be placed on the table while having dinner with friends. If the lighthole is opened during dinner, the picture will develop while having dinner. The picture of everyone having dinner will be visual on the object placed in the box, making the memory last forever without sacrificing precious time.


First tests with Rollei en camera obscura
pictures taken on the balcony of Marjolein Stassen in Rotterdam.


What these tests have shown us:
- The Rollei needs to be applied thick
- Movement causes fading
- Light from outside works better
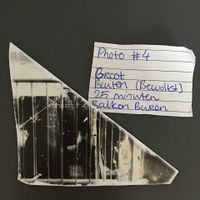
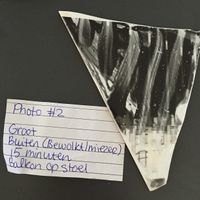
- 30 minutes exposure with cloudy weather works good
- If the Rollei is not completely dry, it will not develop
- During the developing the 'stop fix' should not be used, the sours in the formula break down the Rollei. Instead we used water and that works fine.
- The Rollei needs to be warm when applied on the tiles, we used 15 minutes with these tests but the Rollei was still granular. 30 minutes is the right heating time.
Checklist for working with Rollei
Checklist:
- 1. First you have to decide what type of material you want to coat (see chapter 8 for detailed information).
- 2. Check the contrast of the negatives you want to use - do you have different grades, then go for BLACK MAGIC VC emulsion RBM33, or do you have fairly consistent contrast negatives, then go for BLACK MAGIC hard RBM23.
- 3. For most coating applications the method of brushing will prove to be the best - get yourself a wide brush (5-10 cms/ 2"-4" width) made of natural hair, e.g. a Japan brush.
- 4. Keep small measures for quantities of 20- 50cc at hand, it will be useful for adding small amounts of RBM52.
- 5. For coating metal, plastic, glass or ceramic tiles, a precoat with alkyd resin primer or oil-based polyurethane paint should be carried out, these special primers are available at art shops.
- 6. If you have absorbent materials such as textile fabric, papers or wood it is recommendable to precoat these materials with BLACK MAGIC pure photographic gelatin RBM41.
- 7. For liquification, you will need a bucket to be filled with warm water (40-45°C / 100 - 115 F).
- 8. If you want to liquify just a small amount, you need BLACK MAGIC special bottle RBM60.
- 9. For keeping a bigger amount liquified in order to coat large areas or several objects, it is best to fill the liquified emulsion into a smaller bucket (plastic or stainless steel or enamel coated only only) and place this bucket into a larger container filled with warm water to keep the emulsion liquified.)
- 10. For improving mechanical resistance you need BLACK MAGIC ADDITIV HD RBM52.
- 11. In order to make coating easy and keep the problem of unwanted bubbles low you need spirit (grain alcohol).
- 12. Check your safelight before coating, in order to avoid unwanted fogging (see chapter 7 for details).
- 13. If you want to store materials coated with light-sensitive emulsion, have enough lighttight containers at hand, the containers should be designed in a way that these will cope with the wet emulsion (high moisture).
All the testing
Once our light sensitive Emulsion arrived in the mail we instantly started to do some testing. Especially before the christmas break our tests were all unsuccessful. To find the golden formula a lot of further testing needed to be done. Several variables were taken in account when starting to photograph.
- Which 'Camera' it was taken with
- Weather conditions to estimate how much light was present while making the photo.
- Exposure time
- What is photographed
Down below will be an overview from the first tests to the last.
Before the Christmas Break

Before the christmas break we started to photograph on small mugs provided by Pascalle. These ones were glazed and this was the first time we worked with the Rollei. Unfortunately we made several mistakes that resulted in a failed experiment. This mostly went wrong because of Marjolein because she didn't know how to develop. There was a small tree seen but late evidence was destroyed because the test object was held into the light too soon. Luckily that wasn't all the mistakes we made. Since the little cup was glazed the emulsion wouldn't stick, resulting it to get washed off the cup by the developer. To make this picture we used old paint containers provided by the photostudio.

8th, 9th & 12th of January
After the christmas holidays, and after Pascalle left for Manchester, we still had no successful testing. It was quite frustrating but we started with a new found motivation. We were pretty keen on getting a picture on ceramics. Later we found some white tiles in the Doka. Seeing that no one was using them we smashed them in smaller pieces so we could do more tests. Pascalle found on in the christmas break that we needed a primer for the emulsion to stay put. With this new found information new tests could be made.
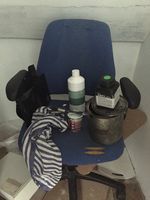
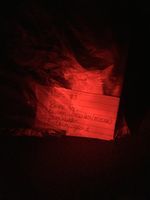
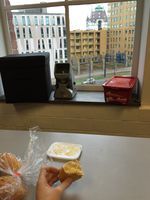
On the 8th of January Emma and Marjolein worked in Marjolein's house on the new batch of tests. In her house there is a small storage room without any windows. This would work perfect for our home made Doka. We used a Red Biking light to guide us through the darkness. There was a whole set up and supplies needed: Primer, Thinner, Paint Brushes, the tiles, Rollei Emulsion, Specialized light blocking bags, old towel and surface to work on. First a primer coating was applied to the tiles, not only to the glazed front but also on the biscuit back. Marjolein wanted to see what would work better, glazing or unglazed side. After priming the tiles the sensitive job started of applying the light sensitive emulsion. This was Emma's job to do this on Friday night. The tiles were left to dry all through the night to be used the next day.
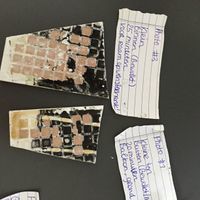
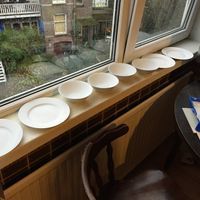
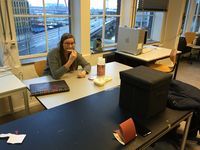
Marjolein dedicated the 9th of January to Digital Craft and making pictures. At the time we were still unsure if the Emulsion we bought had any success with the tiles we were using. To be safe Marjolein made some tests of trying to photograph the houses seen from her window. This would be a still life and hopefully result in a cleaner picture. Doing these tests all information needed to be noted down and kept together in a structured way. With Emma's idea of using sandwich bags Marjolein got to work. In each sandwich bag there would be the photographed tile with a note what the exposure time was, and the weather conditions and what was in the photo.
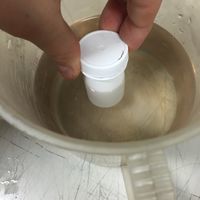
Set up Storage Room Marjolein's house
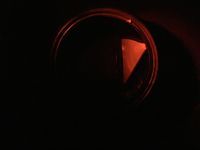
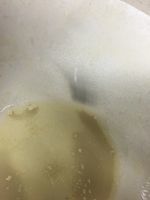
Shard in Camera
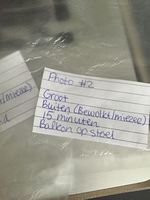
Sandwich bag with notes
Sandwich bag + notes + tile + Dark Room
Developers bag


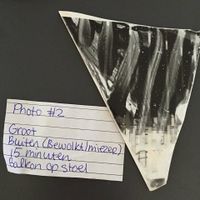
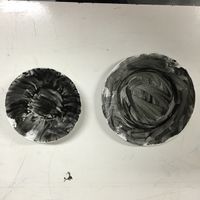
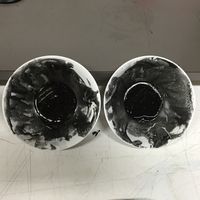
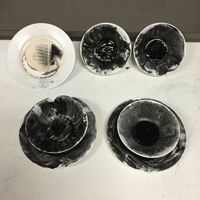
On the 12th of January Marjolein went to the Doka to develop the photos made on Saturday (4 in total). This time she knew how to develop and followed the baths in the right order. These tests were the first that showed some actual results. This time we could conclude how long we needed for a picture to be developed, how much light was needed and if the emulsion would work on ceramics. It was a huge relief to see that some pictures showed up on our testing shards. With this we could take the boxes inside and see how this would work with movement and indoor light. Another step forward was made! With these tests being on the front or the back of a tile it was also concluded that the glazed front worked the best! The developer was too strong for the primer. With the glazed side the primer would stick much better and had no problems being developed while the back was slowly eroding and most of the picture was lost. The other two were very successful and was quite a victory for us as a team.
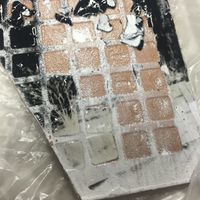
Tree visible in corner, backside

Balcony Neighbors Marjolein
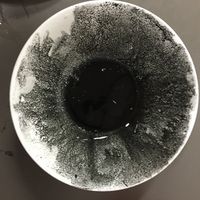
Black = Sky, Buildings from Window
Unglazed sides that failed to survive developer


13th, 14th, 15th of January
On Wednesday the 13th of January Marjolein worked with new shards to make a photo indoors while eating dinner with roommate. We figured that if outside needed 25 minutes max of exposure indoors you would only need 1 hour at least. This was not the case. All the test, including the picture below, all came out as white which means there was no light caught onto the tile while being exposed for an hour. We realized that we needed the light outside to make any photographs, or at least stronger light than a common house lamp. This was quite a step back since dinner often happens inside, and currently it is long dark when dinner starts. Marjolein was wondering if the emulsion might not have been applied right but after holding an unused shard of ceramic with emulsion by the window it changed in color instantly, proven on the pictures below.


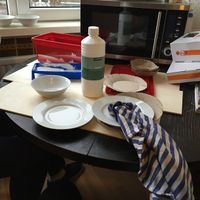
After the testing worked we needed to gear up to make some pictures on actual plates. We went to blokker for plates and bowls and some special boxes to make our own Camera with. On the 14th of January it was all about prepping for the next day. We started priming the newly bought cutlery and painting the inside of a box with black paint for our camera obscura. This time we worked with a roller instead of a paintbrush to apply the paint more evenly. Later that night our expert emulsion applier Emma went back to our dark room to apply the plates with emulsion to be used the next day for photographing.
Emma cleaning the plates with Thinner
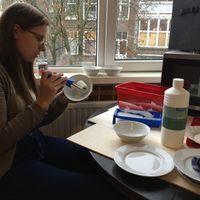
Marjolein Priming
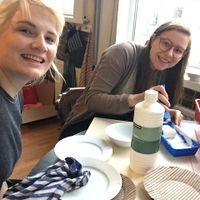
Emma & Marjolein
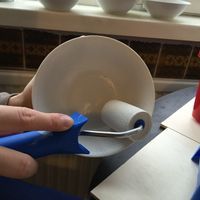
Roller + Bowl
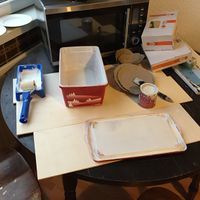
Working Space
Bowls & Plates


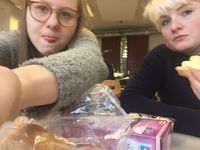
After all the preparations we held a dinner for us two (Emma&Marjolein) at school on the 15th of January. We had the food. We had our new cameras. We were good to go. Only we made one vital mistake. Light can't travel around a corner and we placed the boxes on the window sill, meaning that our camera's only had the indoor light exposed to them. Once again the plate and bowl turned out negative. It was very disappointing until Marjolein realized how stupid they were in forgetting that light can't bend around corners. Luckily we had some more plates ready to be photographed. With a new setting of course. We gathered our food again and had a new session. This time we had a success! Somewhat. Unfortunately the camera only captured the buildings outside instead of our movement that were lighted by the indoor light. We hoped to get silhouettes but we only captured the buildings outside the school. As we had the failed test we figured we could re-use the failed plates and bowls. We would just apply new emulsion and we would be good to go, Emma was in charge of cleaning the plates.
Set up + food
Perspective Camera
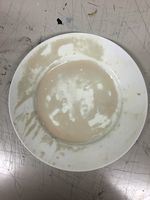
Plate fail, no black with means not enough light
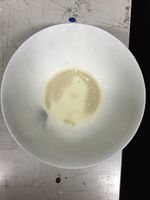
Tiny coloring on bowl! (exposure 1 hour)
Close up
New set up + Cookie

Hopeful Selfie
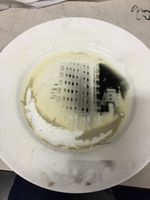
First photo on plate! (though not the one we intended to have)
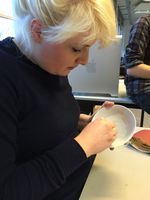
Emma cleaning failed test


17th, 18th of January

In the weekend of 17th of January Emma was in charge of our project since Marjolein had taken the project in her arms the weekend before. [Emma add more text about weekend] During this weekend all tests failed and we weren't sure why. This was all found out on the 18th of January. In the morning Emma went to develop in the morning finding that all the photos she had made during the weekend had failed. In the afternoon Marjolein took over by cleaning the plates and reapplying them with Emulsion to make more tests. However these failed too. The result was total blackness which means they are over exposed. The reason for this is because on Friday we made the holes of our camera's a bit bigger to 'catch more light' unfortunately this was a disaster and quite a step back in our development.
Ceramic Memory
Introduction
In a modern society how do we capture our memories?
Actually we know this. We have never before had so many options to save, share and re-watch our memories. We have an overload of memory data, and how does our brain sort through this? By ignoring/ forgetting about all the extra non impactful memories. So even though the memory is saved. It doesn’t necessarily mean that it needs to be. Our parents, grandparents and great grandparents didn’t have the same opportunity to save share and re-watch their memories.
So precious memories were stored in precious thing, and passed on to the next generation. And so the memory is preserved and remembered.
This physical tangible memory will become in time with every crack, and chipped edge become more and more valuable. We as a new generation should be more selective but can we? Would our grandparents be if they weren’t limited by technology? Perhaps, we will never know. What we do know are their lasting memories, because of the physical tangible connection. This was what was going through my mind when working on crafting memories. Emma Rijk and Marjolein Stassen were searching for a way to remember dinners. Combining our two subjects we had as objective:
- In the Netherlands we have an fast attitude towards food, It’s sometimes kind of a hassle and an impractical. It needs to be fast and easy, so you don’t “waste your time” cooking and eating. But what if we could redefine the way we have dinner? And save them through ceramics
By creating a new tool to save memories on cutlery, the memory does not only last but also reminds the person daily while eating from their cutlery. The tool we use is an camera obscura, which is a dark space (can be anything) with a hole in the surface to let a little light in. The ceramic object will be placed in the small dark space after a light sensitive formula treatment. The dark space (box) can be placed on the table while having dinner with friends. If the light hole is opened during dinner, the picture will develop while having dinner. The picture of everyone having dinner will be visual on the object placed in the box, making the memory last forever without sacrificing precious time.
Concept
We have an overload of memory data. Pictures are taken so often and frequently, without effort. We can immediately see the result of your picture, and have endless do overs, so you will always have the result you want. Contemporary technology is staged. By capturing memory through camera obscura we force people to be patient. There is an ongoing process of making the memory directly onto ceramics. All the while your dining experience is enriched. You have to move more slowly, as to become a sharp image on the ceramics. If you are on your phone constantly that will be seen on the ceramics. After your dinner you will have created a memory together, not just figuratively but physically as well and to be seen and enjoyed for generations to come.
All the testing
Once our light sensitive Emulsion arrived in the mail we instantly started to do some testing. Especially before the christmas break our tests were all unsuccessful. To find the golden formula a lot of further testing needed to be done. Several variables were taken in account when starting to photograph.
- Which 'Camera' it was taken with
- Weather conditions to estimate how much light was present while making the photo.
- Exposure time
- What is photographed
Down below will be an overview from the first tests to the last.
Before the Christmas Break
Before the christmas break we started to photograph on small mugs provided by Pascalle. These ones were glazed and this was the first time we worked with the Rollei. Unfortunately we made several mistakes that resulted in a failed experiment. This mostly went wrong because of Marjolein because she didn't know how to develop. There was a small tree seen but late evidence was destroyed because the test object was held into the light too soon. Luckily that wasn't all the mistakes we made. Since the little cup was glazed the emulsion wouldn't stick, resulting it to get washed off the cup by the developer. To make this picture we used old paint containers provided by the photostudio.
8th, 9th & 12th of January
After the christmas holidays, and after Pascalle left for Manchester, we still had no successful testing. It was quite frustrating but we started with a new found motivation. We were pretty keen on getting a picture on ceramics. Later we found some white tiles in the Doka. Seeing that no one was using them we smashed them in smaller pieces so we could do more tests. Pascalle found on in the christmas break that we needed a primer for the emulsion to stay put. With this new found information new tests could be made.
On the 8th of January Emma and Marjolein worked in Marjolein's house on the new batch of tests. In her house there is a small storage room without any windows. This would work perfect for our home made Doka. We used a Red Biking light to guide us through the darkness. There was a whole set up and supplies needed: Primer, Thinner, Paint Brushes, the tiles, Rollei Emulsion, Specialized light blocking bags, old towel and surface to work on. First a primer coating was applied to the tiles, not only to the glazed front but also on the biscuit back. Marjolein wanted to see what would work better, glazing or unglazed side. After priming the tiles the sensitive job started of applying the light sensitive emulsion. This was Emma's job to do this on Friday night. The tiles were left to dry all through the night to be used the next day.
Marjolein dedicated the 9th of January to Digital Craft and making pictures. At the time we were still unsure if the Emulsion we bought had any success with the tiles we were using. To be safe Marjolein made some tests of trying to photograph the houses seen from her window. This would be a still life and hopefully result in a cleaner picture. Doing these tests all information needed to be noted down and kept together in a structured way. With Emma's idea of using sandwich bags Marjolein got to work. In each sandwich bag there would be the photographed tile with a note what the exposure time was, and the weather conditions and what was in the photo.
Set up Storage Room Marjolein's house
Shard in Camera
Sandwich bag with notes
Sandwich bag + notes + tile + Dark Room
Developers bag
On the 12th of January Marjolein went to the Doka to develop the photos made on Saturday (4 in total). This time she knew how to develop and followed the baths in the right order. These tests were the first that showed some actual results. This time we could conclude how long we needed for a picture to be developed, how much light was needed and if the emulsion would work on ceramics. It was a huge relief to see that some pictures showed up on our testing shards. With this we could take the boxes inside and see how this would work with movement and indoor light. Another step forward was made! With these tests being on the front or the back of a tile it was also concluded that the glazed front worked the best! The developer was too strong for the primer. With the glazed side the primer would stick much better and had no problems being developed while the back was slowly eroding and most of the picture was lost. The other two were very successful and was quite a victory for us as a team.
Tree visible in corner, backside
Balcony Neighbors Marjolein
Black = Sky, Buildings from Window
Unglazed sides that failed to survive developer
13th, 14th, 15th of January
On Wednesday the 13th of January Marjolein worked with new shards to make a photo indoors while eating dinner with roommate. We figured that if outside needed 25 minutes max of exposure indoors you would only need 1 hour at least. This was not the case. All the test, including the picture below, all came out as white which means there was no light caught onto the tile while being exposed for an hour. We realized that we needed the light outside to make any photographs, or at least stronger light than a common house lamp. This was quite a step back since dinner often happens inside, and currently it is long dark when dinner starts. Marjolein was wondering if the emulsion might not have been applied right but after holding an unused shard of ceramic with emulsion by the window it changed in color instantly, proven on the pictures below.
After the testing worked we needed to gear up to make some pictures on actual plates. We went to blokker for plates and bowls and some special boxes to make our own Camera with. On the 14th of January it was all about prepping for the next day. We started priming the newly bought cutlery and painting the inside of a box with black paint for our camera obscura. This time we worked with a roller instead of a paintbrush to apply the paint more evenly. Later that night our expert emulsion applier Emma went back to our dark room to apply the plates with emulsion to be used the next day for photographing.
Emma cleaning the plates with Thinner
Marjolein Priming
Emma & Marjolein
Roller + Bowl
Working Space
Bowls & Plates
After all the preparations we held a dinner for us two (Emma&Marjolein) at school on the 15th of January. We had the food. We had our new cameras. We were good to go. Only we made one vital mistake. Light can't travel around a corner and we placed the boxes on the window sill, meaning that our camera's only had the indoor light exposed to them. Once again the plate and bowl turned out negative. It was very disappointing until Marjolein realized how stupid they were in forgetting that light can't bend around corners. Luckily we had some more plates ready to be photographed. With a new setting of course. We gathered our food again and had a new session. This time we had a success! Somewhat. Unfortunately the camera only captured the buildings outside instead of our movement that were lighted by the indoor light. We hoped to get silhouettes but we only captured the buildings outside the school. As we had the failed test we figured we could re-use the failed plates and bowls. We would just apply new emulsion and we would be good to go, Emma was in charge of cleaning the plates.
Set up + food
Perspective Camera
Plate fail, no black with means not enough light
Tiny coloring on bowl! (exposure 1 hour)
Close up
New set up + Cookie
Hopeful Selfie
First photo on plate! (though not the one we intended to have)
Emma cleaning failed test
17th, 18th of January
In the weekend of 17th of January Emma was in charge of our project since Marjolein had taken the project in her arms the weekend before. [Emma add more text about weekend] During this weekend all tests failed and we weren't sure why. This was all found out on the 18th of January. In the morning Emma went to develop in the morning finding that all the photos she had made during the weekend had failed. In the afternoon Marjolein took over by cleaning the plates and reapplying them with Emulsion to make more tests. However these failed too. The result was total blackness which means they are over exposed. The reason for this is because on Friday we made the holes of our camera's a bit bigger to 'catch more light' unfortunately this was a disaster and quite a step back in our development.
19th of January
On the 19th of January Marjolein went back to the Doka's determined to fox the boxes used for making the photos. Plus to rinse out the emulsion and apply new one to the washed off plates. After applying new Rollei Emulsion Marjolein went back to make new holes in the boxes making sure the other holes were not giving light too. After the rollei was dry three new tests were made.
- Test 1.0 - 15 minutes, Overcast, Outside, Eating on Bench.
- Test 2.0 - 2 minutes, Overcast, Outside, Standing.
- Test 3.0 - 15 minutes, Inside, Doka, Me Working.
All the three rounds of tests (9.30-12.30) failed and came out black. Black means that there was too much light. The curious thing about all these test is that they turned black after being developed. If they were over exposed by anything else they should have turned black before developing. Even the ones taken inside with an exposure for 15 came out black which in previous tests came out white because there wasn't enough light. We have quite a mystery on our hands here. The golden formula was so close to grasp and now it vanished before our eyes. Maybe it is the Emulsion that should have been kept in the fridge. Maybe it is the fact that we heated up the emulsion too much and that is why it is all black after being developed?
Heating up Emulsion
Failed Test 1.0
Failed Test 2.0
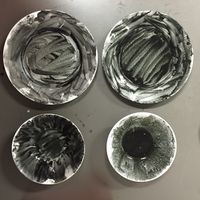
Failed Test "The Full Set!"
Failed Test 3.0
All the Tests.


PRESENTATION
Results Quarter 9


Results Quarter 9
Process making the box


Progress 04-10 Future Food
What happens when people eat and everything except for the food is registered? Wich things make our sitting together and having food an exceptional experience?
In this week we decided to take a more poetic approach to the future food concept. We mainly want to focus on the stories told while eating.
Poetry and food combined

During our conversations we decided to focus on the stories being told while having dinner together. Just like the program 'Man Bijt Hond' we will go to people and join them while having food together. The stories that are being told while function as a tool to create our memory machine.
We also found inspiration in the hitsong of Adele; Turning tables [1]
Adele found her inspiration for this song while having dinner with her friends in a restaurant that has turning tables.
Research about sound pitches: [2] [3]
Future Food
Insects, fake meat, seaweed and 3D-printed food all have the potential to address malnutrition.
- No cutlery needed, only powers and drinks.
- Mini-livestock (Insects)
- Lab-grown Meat
- Algae
- Seaweed
Earlier this year, Dutch scientists successfully produced in-vitro meat, also known as cultured meat. They grew strips of muscle tissue using stem cells taken from cows, which were said to resemble calamari in appearance. They hope to create the world's first "test-tube burger" by the end of the year.
- http://www.theguardian.com/global-development-professionals-network/2014/aug/12/insects-algae-lab-meat-food
- http://www.bbc.com/news/magazine-18813075
- https://www.youtube.com/watch?v=lCNSst-_z5c
- https://youtu.be/hZ8an4GHEfo
Underused and Overlooked
About 2,500 plant species have been domesticated for food. But today, almost half our food calories come from just three grains: wheat, maize, and rice. What about the thousands of overlooked plant species—and an untapped diversity of animals? These resources could provide solutions to problems like the need for resilience in our food production systems and the need to meet growing demands without depleting natural resources. Here are a few promising examples:
Algae: Seaweed and other algae, already popular in Japan, are highly nutritious and can be grown in both fresh water and salt water. Insects: Over 2,000 species of insects are already eaten worldwide, including mopane worms (Gonimbrasia belina) in South Africa. Insects are high in protein and require much less land, water, and food than animals raised for meat Quinoa: This grain (Chenopodium quinoa) from the Andes contains all the essential amino acids the human body needs for protein and has no gluten. Emmer wheat: While millions are spent on high-tech hybrids, neglected crops like the grain emmer (Triticum dicoccum), which requires less fertilizer and fewer pesticides than currently used breeds, are already being grown in places like Turkey. Minor millets: These cereals have been grown in Asia for 6,500 years. Many farmers in India and Nepal are now switching from growing crops like maize and rice back to traditional varieties bred to grow on local mountainsides. Peach palm: The peach palm (Bactris gasipaes) grows well in Central and South America and produces a large, nutritious fruit. The tree’s spiny trunk makes the fruit hard to harvest—but breeders are now developing spineless varieties. Giant swamp taro: The giant swamp taro (Cyrtosperma chamissonis), which grows well in the salty, sandy soil of many Pacific islands, is rich in vitamins and minerals. Yellow varieties are high in beta carotene, which can help prevent blindness. Sea buckthorn: Sea buckthorn (Hippophae rhamnoides) uses nitrogen from the air as fertilizer, thanks to specialized bacteria in its roots. These dense roots are also used to prevent soil erosion in China. The berries are hard to pick, but new machines should help with the harvest. Foods of Tomorrow?
Many foods we’ll eat in the future don’t yet exist. Researchers constantly tinker with plant and animal ingredients,
processed foods and even packaging, to improve flavor and nutrition. A few samples are below—but the biggest
changes may come from ideas we cannot yet imagine.
Breathable Chocolate: Want the flavor of real chocolate, without the calories? You can now inhale tiny particles of chocolate, as a mist. Patch in a Pinch: Some essential nutrients could soon be given to soldiers and astronauts through a patch on the skin, for quick absorption in emergencies. "Smart Packaging": In the near future, food packaging could monitor foods to detect ripeness or spoiling—or even actively prevent foods from spoiling.
Going from industrial model to ecological model
Cutlery / Tablewear
Cutlery refers to any hand implement used in preparing, serving, and especially eating food in the Western world. A "cutler" is a person who makes or sells cutlery. The city of Sheffield in England has been famous for the production of cutlery since the 17th century and a train - the Master Cutler - running from Sheffield to London was named after the industry.
Cutlery is more usually known as silverware or flatware in the United States, where cutlery usually means knives and related cutting instruments. Although the term silverware is used irrespective of the material composition of the utensils, the term tableware has come into use to avoid the implication that they are made of silver.
The major items of cutlery in the Western world are the knife, fork and spoon. In recent times, hybrid versions of cutlery have been made combining the functionality of different eating implements, including the spork (spoon / fork), spife (spoon / knife), and knork (knife / fork) or the sporf which is all three.
Tableware is the dishes or dishware used for setting a table, serving food and dining. It includes cutlery, glassware, serving dishes and other useful items for practical as well as decorative purposes. The quality, nature, variety and number of objects varies according to culture, religion, number of diners, cuisine and occasion. For example, Middle Eastern, Indian or Polynesian food culture and cuisine sometimes limits tableware to serving dishes, using bread or leaves as individual plates. Special occasions are usually reflected in higher quality tableware.
"Dinnerware" is another term used to refer to tableware and "crockery" refers to ceramic dishes in everyday use as differentiated them from the fine porcelain and bone china produced by makers such as Sèvres in France, Meissen in Germany, Royal Copenhagen in Denmark, Royal Doulton in England, or Belleek Pottery in Ireland.[4] Sets of dishes are referred to as a table service, dinner service or service set. Table settings or place settings are the dishes, cutlery and glassware used for formal and informal dining. In Ireland such items are normally referred to as delph, the word being an English language phonetic spelling of the word delft, the town from which so much delftware came. Silver service or butler service are methods for a butler or waiter to serve a meal.
Setting the table refers to arranging the tableware, including individual place settings for each diner at the table as well as decorating the table itself in a manner suitable for the occasion. Tableware and table decoration is typically more elaborate for special occasions. Unusual dining locations demand tableware be adapted.
https://en.wikipedia.org/wiki/Tableware
History
The first documented use of the term "cutler" in Sheffield appeared in a 1297 tax return. A Sheffield knife was listed in the King's possession in the Tower of London fifty years later. Several knives dating from the 14th century are on display at the Cutlers' Hall in Sheffield.[2]
Cutlery has been made in many places. In Britain, the industry became concentrated by the late 16th century in and around Birmingham and Sheffield. However, the Birmingham industry increasingly concentrated on swords, made by "long cutlers", and on other edged tools, whereas the Sheffield industry concentrated on knives.
At Sheffield the trade of cutler became divided, with allied trades such as razormaker, awlbladesmith, shearsmith and forkmaker emerging and becoming distinct trades by the 18th century.
Before the mid 19th century when cheap mild steel became available due to new methods of steelmaking, knives (and other edged tools) were made by welding a strip of steel on to the piece of iron that was to be formed into a knife, or sandwiching a strip of steel between two pieces of iron. This was done because steel was then a much more expensive commodity than iron. Modern blades are sometimes laminated, but for a different reason. Since the hardest steel is brittle, a layer of hard steel may be laid between two layers of a milder, less brittle steel, for a blade that keeps a sharp edge well, and is less likely to break in service.
After fabrication, the knife had to be sharpened, originally on a grindstone, but from the late medieval period in a blade mill or (as they were known in the Sheffield region) a cutlers wheel.
Tablewear As Memory Making Tools
Each thing on the table will record a certain pitch (connected to an emotion). The whole set on the table will record the conversation but to play the memory you will need all the table wear to re-play the conversation.
Under Tableware we see:
- Plate
- Knife
- Fork
- Spoon
- Placematt
- Drinking Glass / Karaf
- Food Dish
What you need:
- Table
- 4 Chairs
Object Use:
- Plate = Middle
- Knife = High Pitch (sharp)
- Fork = Middle//high
- Spoon = Low/Middle
- Placematt = Low Pitch (bottom)
- Drinking Glass / Karaf = Ultra High
- Food Dish = background noises. Other.
- Table = Speaker
- 4 Chairs + Complete tableware set = record
Instant Moment Recorder
As part of a dining experience we will design a cube that is always listening to your conversations. Once something memorable happens you can push over the cube and then it will play the last 15 secs. If you want to save it you can do so with a single tap.
Possible parts for the recording cube: