RTL-SDR
Contents
What is SDR (Software Defined Radio)?
The main idea behind SDR is to replace components in radios that are traditionally hardware (such as filters, mixers and amplifiers) by software algorithms. An SDR thus receives ‘everything’ it can receive and sends that to the computer to be processed. These datastreams take a lot of CPU to be processed, so it is not always ideal. However, SDR allows you to receive signals on frequencies which are otherwise very difficult to receive.
RTL-SDR
SDR became popular and affordable a few years ago through RTL-SDR. RTL-SDR uses DVB (digital television) dongles based on specific (Real Tek) chips which, as people found out by accident, can be made to receive a much wider band of signals than DVB. Depending on the chipsets RTL-SDR can receive roughly between 22mhz and 2200mhz.
To use it you need to get a RTL-SDR compatible dongle and install drivers and software to control it.
RTL-SDR Hardware

Arguably the most important piece of hardware of any radio receiver system is the antenna. As we've seen in workshop 1 the antenna's shape and size corresponds with the kind of radio wave you want to receive. Every antenna is thus relatively specialized and will only give high 'gains' for the frequency it was designed for. There is no antenna that can receive everything with good amplification. Your RTL-SDR receiver's reception is as good as its antenna. That means using the stock antenna is fine for introductory purposes, but you will quickly need to build your own for the signal you wish to receive.
Antenna Bulding
Generally speaking each frequency needs its own antenna. You can think of an antenna as the first in a series of filters for getting that one signal you want to receive. You need to carefully design this antenna to allow a good reception of your desired frequency, while attenuating other frequencies. However, an antenna will always 'work', it will always provide you with some amplification over having no antenna at all. However it is the relatively strong amplification of the desired frequency that you are after.
There are a few different antenna properties you need to consider when building an antenna.
Directional or Ommi-Directional
The first is whether you need a diretional or an omni-directional antenna. An omni-directional antenna provides high gains in all directions wheras a directional antenna only does so in one direction (e.g. you need to point it at your signal's source). Think of an omnidirectional antenna as a lightbulb without hood (lighting the entire room) and a directional one as a lightbulb with a hood (only lighting one specific direction).
An omnidirectional antenna is more useful for scanning (exploring different parts of the spectrum) or if the kind of signal that you want to receive can come from multiple directions, such as walkie talkies. The upside is that you don't need to point it anywhere, you can just set it up. The downside is you get less signal strength than you would with a directional antenna.
A directional antenna is usefull if you know the source of the signal. Once pointed at a signal's source the directional antenna will amplify the signal significantly. This obviously implies that you know the general direction of your signal's source. In the case of a moving source (such as a satellite passing overhead) you need to keep the antenna pointed towards the source.
Single Band or Multi-band
Generally you design antennas for a single band . That means that they will have the highest signal amplification for that specific frequency. In practice however you will discover that even single band antennas work on other frequencies, because antennas can be designed at fractions of the wavelength. So a half-wave antenna designed for 100Mhz will also work well on 50Mhz. Multi-band antennas are designed to cover a range of frequencies (ex. 50 - 500 mhz).
The advantage of a single band antenna is that it can be specifically made for the one signal you want to receive and as a consequence it will amplify quite well. Multi-band antennas amplify less but do so over a range of frequencies. Consequently single band antennas are most useful if you already know the wavelength of the source and multi-band antennas are best for scanning ranges of frequencies.
Further tips to improving reception
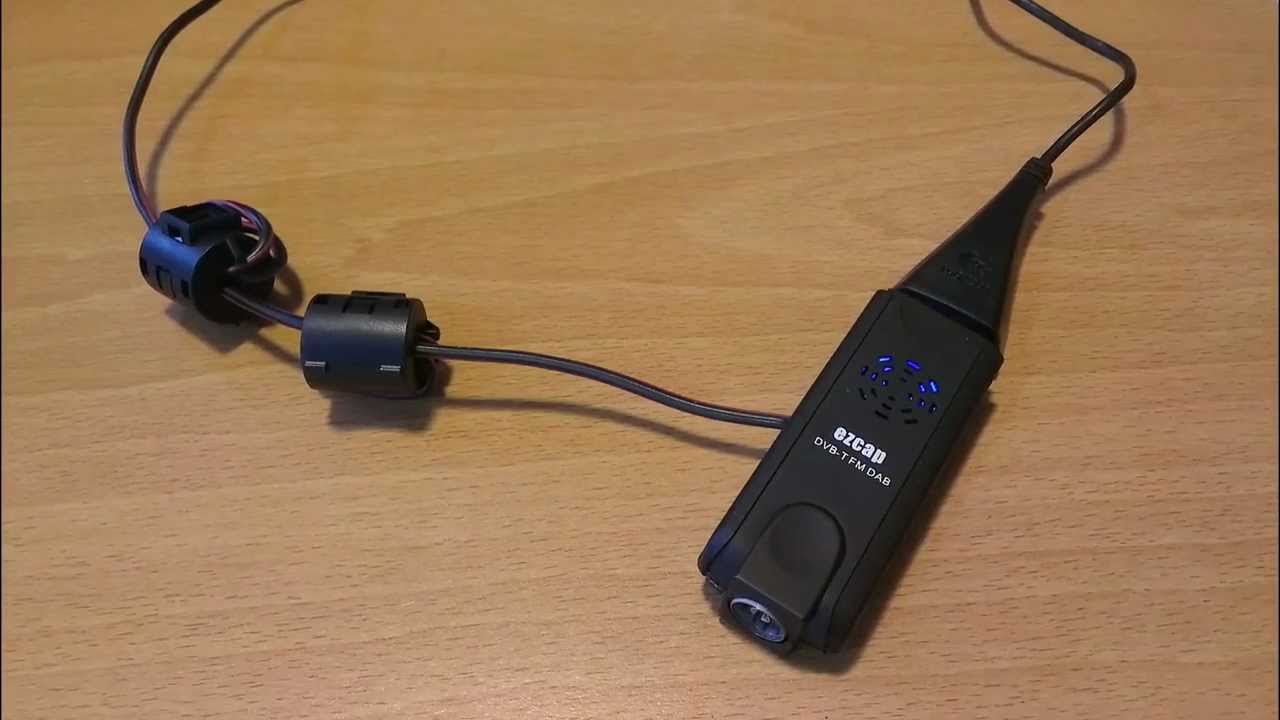
The RTL-SDR will pick up all kinds of electromagnetic radiation, especially if it is close to the source. It happens to be that your laptop is one of the biggest sources it will pick up. Many of the signals you will see are actually signals generated by your computer's hardware. These signals can be recognized because they are always on, have a high signal strength, make no sound when you tune into them and because they are usually found on whole numbers such as 50Mhz (the clock speed of USB). The best way to mitigate this is by putting distance between your receiver and your laptop. You can do this by using a high quality, shielded USB extension cable. Additionally you can wrap ferrite cores around your cable.
SDR Software
For the SDR to work you will need to install two types of software: drivers and the tuning software. The drivers allow your computer to talk to the SDR dongle, the tuning software allow you to interact with it and receive signals.
There is a variety of tuning software to control your SDR with, from the very complex to relatively simple suites. For this workshop we will focus on simple but powerfull visual software, for later projects you might want to look into specific terminal utilities.
The typical interface for most SDR tuning software is the so-called waterfall. This is a spectrogram of the signal to noise ratio on a given slice of the spectrum which plotted in time. Usually showing blue as the noise floor and any signals als yellow/red depending on the signal strength. As time passes the past signals scroll downwards like a waterfall. This allows you to visually discover signals, even after they have stopped transmitting, rather than having to be tuned in at the right time to hear them.
Recommended software
GQRX (MacOSX) http://gqrx.dk/
SDR# (Windows) http://airspy.com/download/
install tips windows: http://www.rtl-sdr.com/rtl-sdr-quick-start-guide/
the interface
The example below is for GQRX, however other waterfall software (SDR#, CubicSDR) will have all the same elements, just in different places.

Waterfall tuners have the following elements: 1 The waterfall shows your slice of spectrum in time, the top of the waterfall represents the most recent moment. The waterfalls usually shows the background noise as blue. 2 The signal, colored yellow to red depending on the intensity of the signal. 2a The same signal in a graph representation, the 'peaks' represent signals, the 'valleys' the noise floor. 3 The tuner, here you can input a frequency in MHZ to tune in to. Either by clicking, using the arrow keys or inputting a number. 4 This bar show which slice of the spectrum you are currently viewing. Scroll on it to 'zoom'. 5 This shows the strength of the signal (the closer to 0 the stronger). 6 The demodulated audio signal, use the slider increase the 'gain' (or volume) of the received audio. 7b Arguably the most important part: the tuner. If you click anywhere on the graph or waterfall, you will move this around. Try to click on the middle of your signal. 7: This shows the width of the filter, make sure this covers the entire signal, otherwise you are filtering out a part of the signal you want to hear.

7 You can change the width of the filter by dragging it sideways. 8 Alternatively you can use some widely used presets. 9 This lets you choose the demodulation, without it you will not hear anything. So always double check your modulation settings. 10 Squelch allows you to set a lower limit to when audio is played, this is very usefull for filtering out the noise floor so the receiver is quiet untill it receives a signal. The number corresponds with the numbers on the left of the graph. 11 The input tab lets you control some of the hardware settings of the USB dongle (depending on the model you have). 12 Receiver options contains important settings such as the demodulation scheme. 13 FFT Settings lets you change the look and resolution of the waterfall and graph. Especially usefull if the software is running slow for you. If that is the case change the FFT Size and Rate to lower numbers.
Some things to consider when buying an RTL-SDR
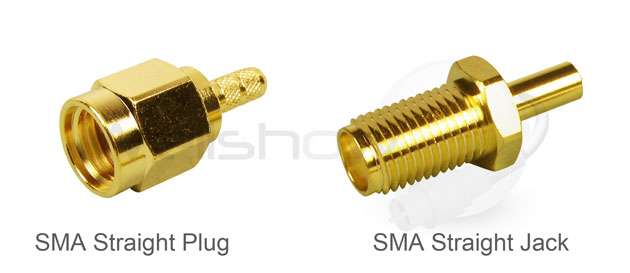
What antenna connector does it have? Usually it is either TV-coax or SMA. SMA is more standard for radio tools (so you will find it a lot on antennas) but Coax is easier to work with in case you decide to make your own antennas.
Does it have the right chipset? Here's a list.
Am I not paying too much? The most simple receivers could be as little as 6USD on ebay!
Good RTL-SDR sources on the web
A blog focused on RTL-SDR, always posts interesting projects and tutorials from around the web.
http://rtlsdr4everyone.blogspot.nl/
One of the earliest RTL-SDR blogs. Used to be focused on marine radio and was hence called RTL-SDR for Mariners.
http://hackaday.com/?s=rtl-sdr
Hackaday posts many projects, mods, hacks involving RTL-SDR. Good resource to learn more.
https://www.reddit.com/r/RTLSDR/wiki/index
The Reddit RTLSDR community + wiki are also good up-to date sources of information. People ask a lot of questions there so do a search there if you encounter any problems.
https://greatscottgadgets.com/sdr/
Michael Ossmann's blog and company. He created the HackRF, an advanced open hardware SDR interface. Part of the crowdfunding drive was a series of lectures on the concepts behind SDR such as digital signal processing. In case you want to go a bit more in depth, his lectures are a great place to start!
http://www.sigidwiki.com/wiki/Signal_Identification_Guide
The Signal Identification wiki. There are many signals you can pick up dat are difficult to place or understand. Use the SigID wiki to look for audio/visual similarities and get an idea of what your signal could be
Search for frequencies or their descriptions as a way to confirm or discover signals. Some of the entries in the database can be quite dated though..