User:Annemarie
Contents
- 1 Info
- 2 Digital Crafts 2018: Cybernetics
Info
Annemarie Daniel
Student number: 0911183
Major: Animation year 4
Social medias: Youtube Instagram
Digital Crafts 2018: Cybernetics
Project 1: Critical Making exercise
Re-imagining technology through a set of cards
Here. we. go. I've been putting off updating this wiki for way too long. So let's make up for that, and do some documenting.
06/09/18
The first project we started was all about getting loose and comfortable in the context of Digital Crafts. We got a set of cards to choose from, and needed to pick 3 of them to form our own assignment. But first, groups needed to be made. This is our team:
- Koen Dekker
- Dieke Berkhuizen ![]()
- Lot Mars
- Karlijn den Hoedt
- And me!
We also set up a Slack-channel, which we'll be using quite a lot (I know because I'm from the future :0).
_Slack_creatie.jpg)
07/09/18
Time to choose our cards, we got: "Make an object designed for a tree to use Social Networking. Use folded paper to create a physical model of this new thing."
After we had picked our cards, we started brainstorming. How can a plant use a computer? How can it make choices? And how can it even give an output? Plants aren't the most lively things, the only thing they really do, is grow... So we came to the conclusion that we had to use that growth as our output. First, we wanted to let a plant grow its roots over a keyboard, and make it press keys (and interact with the computer, aka. social networking, that way). Similarly to this project, which lets birds use Twitter: Real Birds Tweet On Twitter But we thought that might be too complex for just one week. We needed a simpler system, something that didn't need a whole keyboard to function, something with way less choices to make... Tinder! In the app Tinder, you can only swipe left, or right, to indicate if you like a person or not. Just two choices! To make our plant be able to use Tinder, we came up with a system of tubes, in which the plant could either grow left (to swipe left), or right (to swipe right. Here's a small sketch to show what it would look like:
_Schets_idee_voor_Clovis.jpg)
So we got to building. First, we bought a plant @STEK de stadstuinwinkel, which we quickly nicknamed 'Clovis Clematis'. He looked kind of sad at first, but after we gave him some water, he perked up.
_Clovis_voor.jpg)
We built our tubing-prototype around 1 branch of Clovis, so he'd still get enough light with his other branches.
While Lot, Karlijn and I worked on the prototype, Dieke created a Tinder account for Clovis, and Koen kept the Wiki up to date (which I'm referencing right now for dates and facts, thanks Koen!).
_Clovis_close-up.jpg)
_Clovis_na_1.jpg)
_Clovis_na_2.jpg)
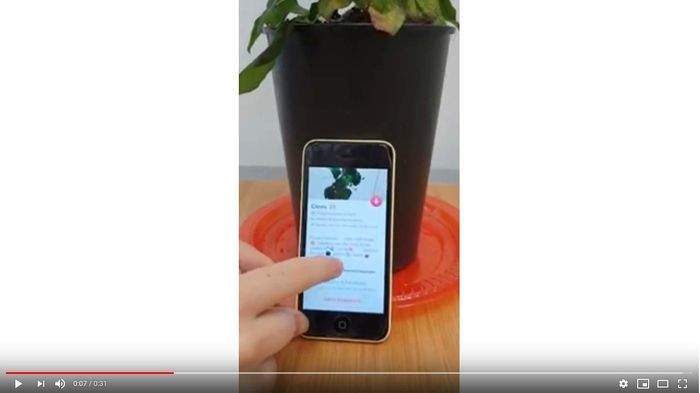
Sensors will pick up if our plant grows to the left or right (we're thinking of optical, infrared, sensors, that are attached inside the tube, and sense when something blocks their light-ray). If he grows left, the sensor will signal to a device that controls his Tinder-account to swipe left (aka. not interested), and if he grows right, the device will swipe right (aka. interested).
After building the prototype, I brought Clovis back home, to keep him alive until the presentation.
_Clovis_thuis.jpg)
Click the image below for a video of Clovis using his Tinder account!
13/09/18
This day, we held the presentation. The idea of a plant making choices, based on basically nothing, brought up a few interesting comparisons:
- Octopus predicting World Cup https://www.youtube.com/watch?v=3ESGpRUMj9E
- Similarly: Groundhog Day, the groundhog predicting the weather.
These are both events which are down to pure chance, same as with our plant. That was also the biggest point of improvement we could do with this project: find a way to communicate with the plant, so his "predictions" are based on something.
For project two, we can continue with what we did here, or start on something different. A couple of criteria:
- This time, the prototype has to be working.
- It has to be in some way related to what we did in this project.
- It has to incorporate a feedback loop (like what I said above: we need to communicate something with the plant, which has to influence its behavior, which in turn has to influence our communication, so there's a loop).
Project 2: Cybernetic Prosthetics
Exploring new relationships between a biological organism- and a machine
This second project was all about expanding on what we had done in the first. We decided to stay in the same team, and started brainstorming...
14/09/18
This Friday, we started thinking about where to go next with our project. We all agreed that we wanted to go further with "plants", but we didn't know which direction to take this subject in yet. Lot and Karlijn both had found some interesting articles, which helped to get us inspired;
- Plant and machine working together: https://vimeo.com/163436492
- On trees growing faster in cities: https://www.mnn.com/earth-matters/wilderness-resources/blogs/urban-trees-growing-faster-rural-trees
We were kind of stuck on where to go next, the articles were interesting, but we couldn't come up with an idea that incorporated a feedback loop (without blatantly ripping of the first video). We set to Googling, and after a while, Karlijn found this video:
- Creating heart-tissue out of spinach leaves: https://www.youtube.com/watch?v=6iUrxGo9gZs
We were still thinking of doing something with plants, and now got a new idea: What if we could somehow combine plants with meat? What if cows grew trees on their back, so their "gasses" get absorbed right away? Or, even better, what if trees grew cows? No, what if trees grew meat, instead of fruit? With this idea, we left for the weekend (during which I photo-shopped a watermelon to illustrate our idea).

17/09/18
Today we went back to our "roots" (Ha Ha). After some e-mail contact with Shailoh, we scrapped the plant-meat idea. We felt that it would be too difficult to make work, because we would have to research the biology of plants and animals in depth, and we all felt that combining meat and plant material, and keeping both alive, is pretty impossible. It just seemed like a little too much. So, we decided to go further with the idea of a plant making choices. We wanted to research if a plant has preferences for certain vibrations (like different kinds of music). There has already been an experiment that proves that plants can grow their roots based on sound:
- Plant-roots follow sound of running water: https://qz.com/959888/a-new-scientific-study-find-that-plant-roots-follow-acoustic-vibes-to-find-a-drink/
To start off, we would all do individual experiments with sound and plant-growth.
The Experiment
I decided to plant three pots of watercress (because that grows quickly). And have two earbuds dug into the soil of two of the pots. One earbud would play Bach, the other Death Metal. I accomplished this by making a custom song in which Bach plays in the left channel, and a Death Metal compilation in the right channel. Then I put this song on my MP3-player, and looped it forever. The third pot didn't have sound at all, just to see if that would make a difference in plant growth. It was sort of my control group. I also made sure to water each pot equally. I did this with a water sprinkler, using it for the same amount of seconds on each pot every day. Here are some pictures I took during the experiment:
My packet of watercress (I bought it once in Poland):
_Watercress_from_Poland_front.jpg)
_Watercress_from_Poland.jpg)
Setting up the experiment:
_The_pots_and_the_earbuds.jpg)
_Seeds_planted.jpg)
_MP3_player.jpg)
After one day, seeds sprouting (Death Metal sprouts came the highest, followed by Bach, followed by Silence):
_just_sprouted_all.jpg)
_just_sprouted_Metal.jpg)
_just_sprouted_Silence.jpg)
_just_sprouted_Bach.jpg)
At the end of the experiment, after one week, these are the results:
_experiment_after_1_week_2.jpg) From left to right: Silence, Bach, Death Metal
From left to right: Silence, Bach, Death Metal
_experiment_after_1_week_1.jpg)
Though the differences aren't that great, I'd say the Death Metal plants look the healthiest and grew the biggest.
It's also interesting to notice how the roots grew. Here as well, the plants seemed most attracted to the Death Metal sound:
_Roots_growing_around_Death_Metal_earbud.jpg) Roots growing on the Death Metal earbud
Roots growing on the Death Metal earbud
_Roots_growing_around_Bach_earbud.jpg) Roots growing on the Bach earbud
Roots growing on the Bach earbud
It seems the plants might have had a slight preference for the Death Metal music. Though that would be assuming that they all have the same taste. This experiment made me think of an episode of Mythbusters I once saw:
- Mythbusters, Growing plants with music & talking to them: https://www.youtube.com/watch?v=FhsbM9LxPAk&t=200s
In their experiment, they saw that plants growing WITH sound, preform better than plants growing WITHOUT sound. And of the different music-styles they tried, rock seemed to be the best for plants. There was a pretty big difference between the groups, which would indicate that all the plants (of the same species at least, the Mythbusters tried this with pea plants) share the same taste in music. And, that there is a difference in how a plant grows when it listens to its favourite music, versus silence.
20/09/18
(The experiment is going on in the background.)
Today we started working on a device that could measure a plants preference in music. We know plants send out tiny electrical signals, which you can read with the right equipment. Once again, Mythbusters is good for everything:
- Mythbusters, Can plants feel pain?: https://www.youtube.com/watch?v=fStmk7e9lJo
And of course Ivan has done something similar too!
- Living Machines: https://ivanhenriques.com/works/living-machines/
We wanted to see if plants would give electrical signals, when listening to different styles of music. So we set to coding and using sensors. We were inspired by this video:
- Touché by Nick Arner: https://www.youtube.com/watch?v=ZPsU6U54CRM
It looks like the plant is reacting to touch, and even feeling where it's being touched. So we thought we might be able to make it react to music. With the help of Javier, we tried to recreate the program of Nick Arner, but it didn't work. Turns out you need a different program that communicates with Arduino to get data out of it. Furthermore, it turned out that the program doesn't measure what the plant feels, but detects the electrical loop you create when you touch a leaf. So it's got nothing to do with the plants 'feelings'.
 Trying to recreate the program of Nick Arner
Some interesting sites Gavier connected us with:
- https://github.com/damellis/ESP/wiki/%5BExample%5D-Touch%C3%A9-swept-frequency-capacitive-sensing
- https://www.bright.nl/nieuws/artikel/4034676/disney-maakt-elke-plant-aanraakgevoelig
- https://www.nickarner.com/blog/2017/7/8/talking-to-plants-touch%C3%A9-experiments
After this, we went back again to our initial experiment, with Clovis Clematis. Is there another way to measure if a plant likes certain music? Thinking of Clovis, how we had let him grow in different directions, and the article saying plants grow their roots towards the sound of water, we decided to try something similar for this project. We'd design a plant pot, which plays two different music-numbers on each side of the pot. If the roots grow towards sound A, then sound B gets changed. And if the roots then decide to grow towards sound B, sound A gets changed. If the roots keep growing towards sound A, sound B gets changed again and again, until we find a song that's even better than sound A. In this way, the plant can choose its own music. There's a feedback loop!
 A design for the pot I drew up.
21/09/18
Today we started making our idea. Together with Lot and Karlijn, I worked on the code. Karlijn also helped Dieke and Koen to get started on the pot. We're making it out of wood. As for the code, we're using MAX7. First, we let the program grab a live image from our webcam. The webcam is pointed at the plant-pot. Then, the program detects whether there's more white on the left, or right side of the image. Since the roots of a plant are white, that way the program can see on which side the most roots are growing. We want to use some sort of see-through, fake "earth", which makes it possible to see all the roots of the plant. The inside of the pot will be black, so the roots stand out even more. Well, when the program has detected on which side the most roots are growing, it will change the music on the other side of the pot (every once a week or so, we programmed a delay on it, because roots don't grow that quickly). And only when the roots grow to the other side of the pot, the music on the first side will change.
This is what that looks like in MAX7:


26/09/18
Today we prepared for the presentation. Together with Koen, I worked on a couple of illustrations for the powerpoint (which Lot and Karlijn were making). Together, we decided on what we were going to say, and who would say what.
The illustrations Koen and I made:

 Koen worked on the Gif, and I on the see-through pot
27/09/18
This was the day of our presentation. There were some technical difficulties, but in the end we got it to work. Dieke had made the pot, I had finished the code and brought it on my laptop, and Karlijn brought the see-through, fake "earth". Oh, and I took a little plant to put in the "earth" with me too. We assembled everything beforehand, and then went up to present. Our project looked pretty cool! We got a bunch of compliments from 3rd years. Tbh, I still see some things I'd like to have improved (added webcam, earth more see-through), but for 2 weeks, it's a pretty good result I think.
After the presentation, we got a lot of references from Ivan and Shailoh to look up:
- Eirik Brandal, for inspiration on how to present your electronics. His electronic sculptures are very “spread out”, so you can see each individual part. Almost the opposite of a black box: http://eirikbrandal.com/category/sculptures/
- Sebastian Frisch, ‘Biophonic Garden’ is also a project on how vibrations influence the root growth of plants: http://neural.it/2016/01/sebastian-frisch-biophonic-garden/
- Fedde ten Berge, in ‘Coin|Switch’ visitors can combine different sounds by using various controls. This creates a new soundscape every time: http://www.feddetenberge.nl/coin-switch
- Lisa Park, ‘Eunoia II’ is an artwork about water, sound, and brainwaves: http://www.thelisapark.com/eunoia-ii/
Workshop Machine Choreogeraphy with Joana Chicau
On choreography of machines and organisms
Friday the 5th of October, there was a workshop by Joana Chicau. Joana uses digital interfaces to create "choreography". She sees human elements in digital structures like websites, texts, videos... I mean, we already say a text has a "head" and a "body", so why shouldn't we treat it that way? Joana thinks about human quirks, and tries to recreate them digitally.
Some interesting people who Joanna mentioned:
- William Forsythe: teaching the body things it didn't know before
- Lucinda Childs: occupying public space with "ordinary" movements
- Rudolf von Laban: Important in choreography history, plays a lot with effort. Designed notation system for ballet. --> in reaction to his work: breaking free from the rules (feminism)
Now back to the workshop. To get ourselves warmed-up, we started with a choreography of our own: everybody was moving through the room, following Joana's instructions. Moving quickly, slowly, lying down... That last part had some meditative qualities as well. After this, we split up into groups, and started discussing about choreography, what is, and what isn't choreography. It literally means "writing movement", so is all movement - that has somehow been designed - choreography? I'm not sure if I agree with that, but discussion aside, it was interesting to think about choreography in that way, since it made me open up to more and more possibilities.
The rest of the day, we worked in different groups on a choreography. Inspired by the mix between human elements and technology, our group decided to visualize what it would look like if a computer had a headache. This would become quite challenging, because nobody in our group knew how to code, but in the end we prevailed! :) This was the first time I did anything in processing, it was really fun to get a taste of all the different possibilities that program offers. Our group decided to take a live feed from the webcam of a laptop, and distort that video with processing, in such a way that it'd look like what a headache feels like. With the help of Brigitte (from the interaction station), we made our first code in Processing, woooo!

And the result:

Dieke programmed the one where the colours are distorted to red and white:


I tried to simulate the feeling of your head being pressed together, which you sometimes experience during a headache. And Dieke went for the "throbbing" sensation, there was also a heartbeat-sound playing from her laptop, as well as the colour reminding you of blood.
It was cool to try to simulate human experiences in machines during this workshop. It's a really unexpected and creative place to start. If I were to go on with this, I'd like to focus more on the movement part of choreography, I'm an animator after all. Making machines really dance, move around... That's something which has my imagination running wild.
Project 3: From device to systems
Opening a 'black box' and reworking its technology
This project was all about getting your hands dirty with technology, and getting a feel for electronics. I decided to dismantle an old, broken phone-set we had at home, and so it began...
08/10/18
My first goal was to figure out what was wrong with the phones. I came to the conclusion that their battery was very dead. When the phone was docked, electricity would go in through the battery, just enough to make the phone display the signal that it was "loading", but not enough to make it do anything else. This is what that looked like:

And a picture of all the lose parts:


To fix the battery issue, I decided to take out the middle man: taking out the batteries, and soldering the power supply directly on to the motherboard power intakes.
But the actual soldering had to wait for tomorrow!
09/10/18
So here was the plan:

And guess what? It worked!
.jpg)
(Also, the pizza box was an integral part to the plan coming together. Jk, it was just so that I could solder on a non-conductive surface, since our kitchen counter is metal.)
But I didn't find the connections stable enough, so I'd end up soldering them directly to the wires coming from the power supply. Which I'd do... the next day:
10/10/18
Today I soldered some more, to make the connections more stable. I also wanted to connect two phones together somehow. So they could call each other, and you could speak in the first one, and hear your own voice back through the second one. Unfortunately, the phones were broken in more ways than one: they couldn't "find" each other anymore, so couldn't call either... Their screens would keep displaying "searching", "searching" (but then in Dutch: "zoeken"). This was what the prototype looked like:
.jpg)
11/10/18
We presented our works today in class. My work didn't really inspire a lot of ideas, but hey, I sort of expected that (since it didn't fully work). But, I had an nice conversation about it with Ivan, which got ME inspired, hahah. He told me that I needed to start thinking about what it is I want to make for my final work (for Digital Craft). We talked a bit about animation, and he mentioned expanded cinema: a more involved way of creating film than just projecting it on a screen. How and what can we add to the experience of film?
Also, back on topic of my phone-hacking, I got some more resources and inspiration to look at:
- Alvin Lucier: I Am Sitting In A Room https://www.youtube.com/watch?v=fAxHlLK3Oyk
- Nacy Holt and Richard Serra: Boomerang https://www.youtube.com/watch?v=8z32JTnRrHc
Project 4: Cartography of Complex Systems & the Anthropocene
Digging deeper in the consequences of technologies, and the social forces that create them.
11/10/18
While speaking with Shailoh (and the rest of the fourth-years) today, I kinda had a brainwave. We were talking about what we wanted to do for our final DC work, and at first, I had no idea. But after hearing people talk about their interests for a while... I mean, you can't help but get inspired. :)
So I was thinking, what is it, that I'm the most interested in right now? Right, I know, the countryside! This was basically because I had been brainstorming about what I'd do after I finish Art School, and believe it or not, it seems amazing to work on farms for a year. Getting out there, maybe traveling around my favorite country (France), and just being in nature, working with animals, the whole shabang. My planning for gap years aside, the countryside was swirling through my head the past couple of weeks, and it only seemed logical to do something with it.
So what does the countryside have to do with technology... Uhhh, I'll just pick a farm-specific technology: tractors! And so my idea was born.
28/10/18
I've collected some articles that might be of interest to the topic of tractors. While searching around online, I sort of naturally fell into research about tractors and masculinity. I'm always interested in theories about gender, so I pursued this lead. (As an aside: I have to say that I don't feel the need to make feminist statements with my art. Though I'd definitely classify myself as a feminist, it's not something I want to make art about. My own feminism will work in a more subtle way: I want to hold my own and be successful in a male-dominated field. A field like animation, or game design, where there's mostly guys working. I think you can make a strong feminist statement by working as a lady in such a field, so that will be my way of expressing feminism. That's why I was kind of hesitant in choosing 'rural masculinity' as a topic, but I was just too curious NOT to read the articles.)
The first article I read was 'The Development of Feminist Perspectives in Rural Gender Studies' by Professor Jo Little (University of Exeter). It gave me a wealth of new ideas and interesting quotes. Here are the ones that I picked out of the article:
- “Brandth’s (1995) influential article on tractor advertisements shows how accepted notions of traditional masculinity, emphasising bodily strength and technical control, pervade the description of farm work.”
- “Moreover, women’s assumed closeness to nature is seen to impede their ability to control physical aspects of agriculture and to acquire the skills necessary to be a “good farmer”.”
- “While implicit in the farming masculinity is an ability to dominate nature, men are also at nature’s mercy, particularly in the way they are required to devote themselves to the farm at key times.”
29/10/18
The search went on, and I found the article that Jo Little mentioned: 'Rural masculinity in transition Gender images in tractor advertisements' by Berit Brandth. Berit talks about the gender a tractor is given: it's always a 'she'. As in: 'Yeah, Betsy's pretty old, but she can still pull her weight.' And that, by riding her, men demonstrate their manliness. So, to put it in Brandth's words: "The users, the men farmers, give the tractor gender, and the tractor makes the farmers into real men." So I was thinking, okay, a man rides his tractor, like he rides his wife. And this inspired me to make a drawing, connecting all the different mounts of men. :) Basically: a horse, a tractor, and a naked lady.
31/10/18
Inspired by M.C. Escher's style of morphing different shapes into one another, I designed this piece:

01/11/18
Today I showed my work in class, and got a bunch of positive feedback. Very cool to see that people are also interested in the countryside. I thought that this might not be the case, since most of our class is "city-people", but hey, turns out I was wrong. Dieke told me my project made her think of a video she once saw, 'all cars are girls': https://www.youtube.com/watch?v=sTmmoSvleWs Yep, cars have the same connotation as well. And Emiel gave me the name of the most renowned tractor brand on the market right now: John Deere. I'm now on a quest of finding one that I can ride myself. Furthermore, I had the idea of making a painting in diesel, to complete the tractor aesthetic. Tom told me about the tax-free diesel you can buy that's coloured red, specifically made for tractors. I knew of the red heating oil phenomenon, but didn't know it was also used in tractors. Though that makes sense, since tractors don't drive on roads, they wouldn't need to pay road tax.
All in all, lots of cool ideas. I'm curious to see where this project will take me next.
Position Paper
Defining the position of your practice in relation to newer technologies
Media:Position Paper Annemarie Daniel.pdf
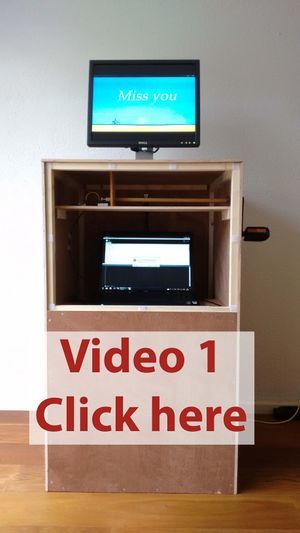
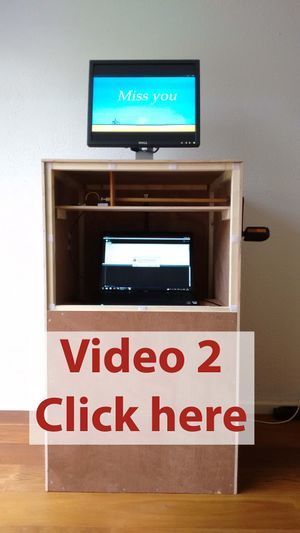
Final Project
Miss you
Sometimes fate takes weird and unexpected turns. I never thought you'd leave us so soon. I thought you'd be there for my graduation, that we would travel the world together. I thought you and Groentje would grow old together. But we had a spot of dumb, bad luck, and you got sick.
On nine November 2018, in the evening, while the sun was setting, Blauwtje passed away. My sweet bird, who would come to me when I was feeling sick or sad, who loved to fly so much, who was curious about everything, who cuddled and cuddled with Groentje... I've cherished every moment with you the past seven and a half years, the memories will always remain.
Question
For one week before she died, and two weeks afterwards, I couldn't do anything. I was sick with worry, which became pain and sadness when she was gone. I couldn't think about school, I couldn't think about anything, except her.
When I tried to think about my school project, with tractors, with the countryside, I couldn't find it in me to become excited for it. It first was on a Sunday, I believe Sunday the 18th of November, that I started to feel creative again, that I wanted to make things again. And I wanted to make something about Blauwtje. I still know that the idea came to me while I was lying in bed. A lot of pieces of ideas were swirling through my head and they came together. At the core of it all, was how my feeling of time was influenced by the death of Blauwtje. Because it would sometimes feel like a week was a month, while other times days would go by very quickly. And time would even move backwards every once in a while, where it would feel like my bird was still with me a second ago, and I'd just start crying. Besides that, there was the idea of animation, and expanded cinema that Ivan had mentioned. How can something be more than just a projection on a screen? And I was also thinking about technology and interactivity, two themes that we had already been exploring during the past projects of Digital Crafts.
'How can I make people feel the hops and stops in time, that accompany mourning?' I was thinking to myself, that evening in bed. That's where the interactivity came in, and combining that with animation, I wanted people to be able to control the time in an animation about loss and sadness. To show how time can fluctuate, and give an immersive experience of mourning.
Process & Experiments
When I started making a storyboard, I wanted it to reflect my experience, what it felt like those weeks after losing Blauwtje. This was interesting, because that meant that I didn't have an ending at first. I just started storyboarding my experiences up until then, but my mourning wasn't over, so my storyboard wasn't finished either. It was a very loose way of creating a story: adding to it whenever I'd feel some new emotion, and just seeing where it goes. During this time, I talked with people about my project, which helped to make my own thoughts and emotions more clear. The 24th of November I had a chat with Shailoh and some more Digital Crafts students. Up until that point, my animation had been very abstract, there were no birds in it, but grey blobs to symbolize sadness. Shailoh asked me why I didn't show any birds. I didn't know at first, but thinking about it, drawing birds was very harsh, and real, and the pain was still so fresh, it felt like too much for me. But eventually, as my storyboard evolved, and my sadness became less "thick", birds did find their way into my animation. I replaced the grey sadness-blobs by grey, still, lifeless birds, to make the animation more personal, and a bit more harsh, for sadness is harsh as well.
- So this:
 Became this:
- So this:


I still chose not to draw birds resembling my parakeet species, they're more like common sparrows, to be able to distance myself from it every once in a while. It was still difficult to draw and animate all these lifeless birds, but it felt good as well, to include them, and sort of care for them.
This helped me design an ending for my story as well. Though it's not really an "ending" ending, because the girl in the story (and the girl in real life) still carries a part of the sadness with her. But to show a bit of hope, to show a bit of happiness, I could now use flying, living birds at the end of my film, in contrast with the still and lifeless ones that were there at first.
So, after some weeks of changing, shuffling and tweaking, on December 5th, I had my final storyboard. (read from top to bottom, then left to right)

While working on the animation side of things, I also started with the technical side of my project. I wanted to make a pedestal, with a crank attached to it, and a monitor projecting an animation on top of it. If you turn the crank, the animation starts to play. If you turn it faster, the animation goes faster, and if you turn slowly, it goes slowly. I also wanted to program it, so that if you turned the crank backwards, the video would play in reverse. Here's a sketch of the setup:

To make the pedestal, I did some technical drawings with measurements of all the parts, and got the planks sawed by a local carpenter.


And, more technical things: I had to figure out how to connect a physical, rotary input (the crank turning), to a digital system. After a bunch of googling, I found a 'rotary encoder', which is basically a sensor that you can turn indefinitely (that's different from for example a potentiometer). Every turn, the encoder gives a set amount of clicks, and then through that, you can determine how quickly it's spinning, and if it's spinning forwards or backwards. Then this encoder would be connected to an Arduino Uno, which in turn would send the signal to a PC.
The connections from rotary encoder to Arduino:
- GND --> GND (ground)
- + --> 5V (5 volt)
- DT --> 2 (gives pulses on rotation)
- CLK --> 3 (gives pulses on rotation, two of these are needed to be able to determine if the encoder is spinning backwards, or forwards)


.jpg)
There were two parts to the code. In the Arduino software, the pulses were registered and converted into numbers. I also programmed a "pulses per second" counter, to measure the speed at which the rotary encoder was turning.

The second part was done in Processing. Here the numbers were converted into playspeed of the animation. Thanks so much to Brigitte from the Interaction Station for helping me figure out how to create a video player in Processing, and how to adjust its playspeed!

It was a cool experience, working with programs, coding, etc. while also working on an animation. It's two completely different workflows. While programming is very "thinking"-based, I mostly draw, storyboard an to some degree animate from my emotions. It was actually really nice. When I was drawing, I was sort of taking a break from the thinking, so that when I'd come back to programming, my mind would be fresh. And While I was programming and figuring out technical stuff, my creativity would recharge, so that I would have all new ideas and designs when I'd come back to drawing.
Speaking of new ideas and designs, I'm very proud of the final look of the animation. I feel like the style adds so much feeling to the story. The textured lines give life. The simple backgrounds add to a peaceful feeling (which I was looking for, because I wanted my animation to be very still, to say: it's okay to take your time, no need to rush). The design of the girl is fragile, yet strong (strong legs, thin arms and neck). And I'm also happy with how consistent it looks throughout the animation. To come to this style, I did a lot of experiments with techniques and textures:


The bike was first positioned in Maya, after which I animated on top of it.
Result
After a lot of blood, sweat and tears (and a lot of fun, but hey, that doesn't sound as dramatic), everything was built, animated, programmed and shipped to the exhibition space at Slash Gallery. A MASSIVE thank you to my mom, who helped me a ton in the last couple of days (after we picked up the planks, she built the biggest part of the pedestal, and she also helped me transport it to Rotterdam). Without her, I don't think I would've had enough time to do it all. But now, I was just able to finish the project.
At the expo:


 (Thanks Naïma for the picture. ;))
Some more shots of details taken at home:


.jpg)

And some video's of how it worked (taken at home):
Reflection & Conclusion
For me, this was the first time that a work of mine was being exhibited. That was super interesting and challenging at the same time. Up until now, most of my presentations would have been on a screen, presented from a USB. But now I had to make an installation. It was daunting, fun, exhausting and gratifying all at the same time. And to be able to show your work to a real life public, wow. That's amazing, you get so many new ideas and insights from these people. It's super nice if they're willing to talk to you for a bit, and luckily, the public at Slash/ Gallery was very outgoing and they gave their opinions heartily. I met people who had also lost pets or loved ones, it was pretty emotional. One person even started crying when he saw my animation, which was the biggest compliment I could ever have imagined. After that, we hugged, and had a really nice conversation.
Something I noticed, is that the majority of people didn't look inside the machine, but those that did, were very interested in its workings and loved to hear all the technical stuff. I also spoke with someone who works as an art-conservator, and he talked about how documentation of art is changing, and how they need to store more and more schemes, codes, programs, and other high-tech stuff. Because I had that talk with him, I documented everything about how my project works in detail on this wiki page.
I was happy to be at the exhibition most of the time, because I often saw people struggle with how my installation worked, and what it meant, but when I went and talked to them and explained what it was about, and how you had to turn the crank to move time forward/backward, I got a lot of enthusiastic reactions. For a next installation, I'd like it to be more stand-alone. Though I also like the "talking with people"-part, so let's not make it completely stand-alone.
During this project, I learned how much I enjoy telling stories, not just in my animations, but also when presenting my work to people. Ivan even commented on that during the final presentation ('Are you part of the installation?'). Hahah, yeah, pretty much! I plan on telling many more stories in the future, conveying emotions, and letting people be a part of them. So, to come back to my research question, 'How do you make people feel the hops and stops in time, that accompany mourning?' . Through a story, through a conversation, through interaction.
Inspiration
References for visual style, and emotional themes:
- Michael Dudok de Wit, 'Father and Daughter' - https://www.youtube.com/watch?v=wTIkvwwC23A
- Mamoru Hosoda, 'The Girl Who Leapt Through Time' - https://www.youtube.com/watch?v=ifsnD6AFEeA
References for just visual style:
- Siamés, 'The Wolf' - https://www.youtube.com/watch?v=lX44CAz-JhU
- Katsuhiro Otomo, 'Akira' - https://www.youtube.com/watch?v=7K8ujE7Z2EY&t=223s