User:Chantal Nassef
||||||||| PAGE IN PROGRESS |||||||
Hello!
My name is Chantal and I am a student from the AudioVisual design department. In this wiki page you will see both of my "digital Craft" and "Mimicking Machine" projects which are two separate courses having a lot in common. Following year: 2016/2017

Contents
Digital Craft
Group representative performance: Electricity
During class lesson we performed the Electron exchange all together: a choreography representing a valence electron becoming a free electron and becoming a valence electron again after smashing with the valence electron next to it.
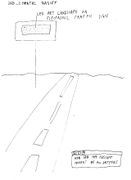
After this work we formed smaller group choosing a more complex example of electricity. We choose a simple circuit: Illuminating a Light Bulb.

Schematic: A battery (left) connecting to a lightbulb (right), the circuit is completed when the switch (top) closes. With the circuit closed, electrons can flow, pushed from the negative terminal of the battery through the lightbulb, to the positive terminal. [1]
Pictures from our coreography:
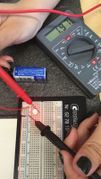
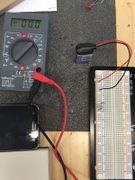
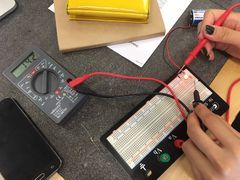
Measuring volts, current and resistance
After learning together how to use a breadboard and the Digital Multi Meter, we created a simple circuit and started measuring.
Documentation:
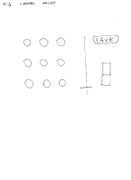
led
resistance
parallel circuit
group of resistance


Circuit making
Process:
- Printing the empty board at the Print Studio
- Etching with acid the printed board at the Public Station
Personal Project: presentation, brainstorm and feedback
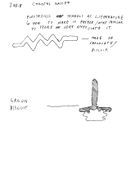
- Make an illustration of your most memorable insight of what you have learned/discovered;
- Make a drawing of how this insight can be made into a physical artefact;
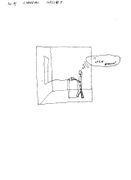
- Make a drawing of an independent idea you would like to build/construct;
- Make a drawing of this idea in its most minimal/essential form;
- Make a drawing of this idea in its most expansive/immersive form.
- Scanner digital craftdrawing1.jpg


Personal Project: Visual Controller
(in progress...)
Visual controller is the project I decided to focus on in the following weeks. Name of the work: PERFORMING-SHELL#4 During my last year I started building visual controllers and work with them in my AV (AudioVisual) projects.
Quick look at the past: The electronic and programming part was designed reprogramming a Mackey Mackey board interacting with a website. Mackey Mackey is a very basic board and was not the most appropriate. I want to code the next visual controller on a Raspberry Pi which would give me advantage of working without being connected to a computer.
Previous Shells I designed (9buttons):
- quail eggs shell: first prototype
- transparent shell: experimenting with the laser-cut allowed me to build a plexiglass box. The transparent material decision was made on two reason: first one is a tribute to the Open Source network which I will always thank for filling my knowledge. The second reason -more personal and informal- is that when I was a kid I was fascinated from transparent game boy and electronics. These objects where childishly making me wonder how many magicians were living in the cables to make image on screen happen.
- 3d printed shell: playing with the 3d print gave me the possibility to make a shell with a circular diameter. Unfortunately due to lack of parsonal time in contrast to the very long used by the 3dprinter I still have to finish the bottom part.
Mimicking Machines
References: