User:Danibanaani
Contents
Making is connecting project
- To find my work and research for my main course: [My Tumblr | http://daan-finearts.tumblr.com]
- Theory for this course: Making is connecting
Printing and Drawing

At the first lesson I was placed in the group printing and drawing, we had to choose a method to research. Me and my big mouth said 'Tattooing' since I love tattoo's I wish to research this method, luckily I have access to a great tattoo artist and a apprentice who can teach me the know and hows of tattooing. These fantastic people are Abigail Eijsbroek (the apprentice)and Pim de Rijk (the artist) Portfolio of Pim who both work at Art of Ethernity Their site under Stefan who specializes in realism. (I will come back to the different styles of tattooing later) I went there to learn the theory basics, see tattooing with an other perception and experience how this culture works in a tattoo shop.


Tattooing basics
First of all you need to know the basics of tattooing
- On a stencil you retrace your image so you can stick it temporarily on the skin, wen it's placed you can retrace it with the machine.

first steps with the machine
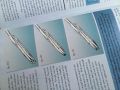
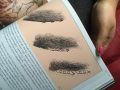
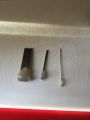
Shapes of needles
Purpose/difference of needles
Purpose/difference of needles
Purpose/difference of needles
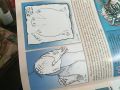
How to use a stencil
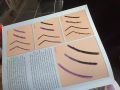
Which movements to make for what kinds of lines or effects
Which movements to make for what kinds of lines or effects
Which movements to make for what kinds of lines or effects
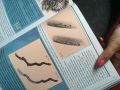
The 'flow' to make a tattoo look good it needs to flow with the body
The 'flow' to make a tattoo look good it needs to flow with the body
The 'flow' to make a tattoo look good it needs to flow with the body
The 'flow' to make a tattoo look good it needs to flow with the body
The 'flow' to make a tattoo look good it needs to flow with the body


The history of tattooing
For the history of tattooing please see the video's. Documentry about tattooing is a very broad documentary about different ways of tattooing, throughout history and gives loads of information. Short history of tattooing is a very short summary of the history of tattooing.
Stick and poke
Stick and poke is the 'analog version' of tattooing. Instead of working with a machine you use pressure, needles to penetrate the skin and push ink into the skin. This method has been around for ages (see documentary) plus done by a 'thuisprikker' (couldn't find the english word for it; someone who tattoos at home) and is a big part of the DIY culture an instructables about stick and poke
Tattooing with a machine
Tattooing with a tattoo machine is very different than it looks. (I still need to experience that which i will hopefully next Wednesday so I can proper update this page) A link which shows how the machine works in slowmotion. When tattooing with a machine you work with needles, which come in different shapes and sizes for different purposes. Also with a machine you can shade, without not (I'll come back to that later under Stick and poke) This link shows how to setup a tattoo machine.
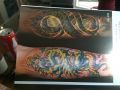
Tattooing styles
There are a lot of different styles to tattoo, loads and loads. Here I will list with links the most important styles of tattooing and in tattooing history.
Japanese (Yakuza) Documentary with somewhat bad voice over Background info
Old school (American traditional) Rick Walters one of the better old school artists background info
New school (Neo traditional) Background info
Biomechanical Background info
Tribal (many different cultures made these see the documentary in history) Again a little history lesson about tattooing
Photo realism Some advise Black&gray Color realism
Prison tattoo (single needle) great documentary about Russian prison tattoos Background info
How to be a tattoo artist
If you want to tattoo there isn't a school available to help you get there, it's years of training and being an apprentice. This job still goes by old methods, with a guild like system. At first you need to work at a shop, by cleaning or being bossed around for chores. However this part isn't easy to get into most people need to almost beg to get in even there, and already have some tattoos to prove your determination. Then when you clean you'll need to study, draw endlessly and study and draw even more. You need to buy supplies this without getting paid and being at the shop 24/7 mostly so it's hard to get by. This process usually takes years also, at one point you will have to start learning on skin, mostly this is a fake skin, pigskin or your own skin. Then when after years of training, learning you might finally get the chance to tattoo, usually tattoo artist are at youngest 20 something or end 20's. You need to have mad drawing skills and loads of patient and determination to get in.
However there are people who don't and study at home and work from home, these are called 'thuisprikkers' they don't apply the rules of tattoo shops mostly and who's to say what's better? The quality is main concern which most thuisprikkers don't have unfortunately, but it is interesting to see (some you can call) artists who make tattoos breaking the conventions of the shop. Also some background information about 'thuisprikkers' Vice made a documentary in dutch though link to docu
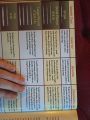
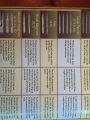
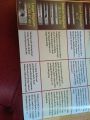
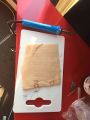
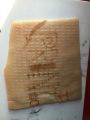
Test print
After the first few tries on pigskin with some advise I found a way to visualize my techniques in a more clear and logical way. I had to make a test print. I came to the tesprint a printer makes to shows it's working as a format sort of, however every technique asked for it's own design sort of I tried to make it unified. These are my test sheets.
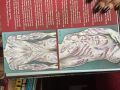
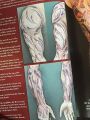
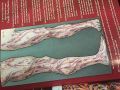
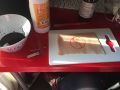
Tattooing the pigskin
Preps burning pigskin with hotliner
Burned pigskin
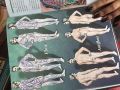
Preps on stick&poke DIY style
Stick&poke DIY tools

Stick&poke DIY tattoo


Skin as medium
Skin has been used for ages as a medium. For clothing, paper, rugs, shelter, musical interments, all kinds of furniture even as light cover. Hide extra info Vellum a sort parchment about Parchment Parchment is limed, which is a way different technique than tanning. Both however are ways to preserve the skin. Process of tanning An other link about tanning (Weird enough the word looien is tanning in english) About human skin used as medium Industrial way of tanning (A bit of a bad American commercial but informative) Tanning a hide at home with hair
Statement
Not here jet will be soon!
Describe in around 300 words what the broader cultural or historical > context is of the technique/craft/process/tool/material you've focused > on? Example: how does it relate to how that > technique/craft/process/tool/material has been traditionally used? or: > What meaning in culture does your technique/craft/process/tool/material > have? or: How does your technique/craft/process/tool/material relate to > the what we've read about in Making Is Connecting? > > Describe in around 100 words how can the > technique/craft/process/tool/material you've worked impact your > practice? Example: doe you now consider working with different > materials? or: do you think the technique/craft/process/tool/material > will allow you to explore new visual languages within your practice? > > Look back on what you've written so far (around 900 words!) and write a > 100 word statement on why you make. This can be a conclusion to your > text, a short manifesto or perhaps the text to use for those who are > making a booklet as their practical project?