Difference between revisions of "User:Kiarahoi"
| Line 30: | Line 30: | ||
Class started with an explanation from Jesse about the plotter and how it works. How the file is supposed to be sent, what programs we should use and some codes to make the plotter do what you want. Then the class was divided in there groups: painting, non painting and knifes. | Class started with an explanation from Jesse about the plotter and how it works. How the file is supposed to be sent, what programs we should use and some codes to make the plotter do what you want. Then the class was divided in there groups: painting, non painting and knifes. | ||
My group is painting. We want the plotter to make a drawing by dipping a brush in ink and make an illustration. The idea is that all the groupmembers make an illustration and then let the plotter mix them all together. | My group is painting. We want the plotter to make a drawing by dipping a brush in ink and make an illustration. The idea is that all the groupmembers make an illustration and then let the plotter mix them all together. | ||
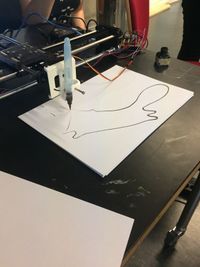
| − | [[File:Catimg.JPG|200px|thumb|right|Third lesson: | + | [[File:Catimg.JPG|200px|thumb|right|Third lesson: we made the plotter draw a cat!]] |
'''Fourth lesson:''' | '''Fourth lesson:''' | ||
| − | This lesson was a bit slower. I was in a little later because i had an open course, so i missed the intro. But my group made their illustrations. The other two groups experimented with the two plotters And we downloaded the programs. We discussed with Jesse that next week we are going to program the plotter to make it dip a brush in paint and make an illustration. | + | This lesson was a bit slower. I was in a little later because i had an open course, so i missed the intro. But my group made their illustrations. The other two groups experimented with the two plotters And we downloaded the programs. We discussed with Jesse that next week we are going to program the plotter to make it dip a brush in paint and make an illustration. |
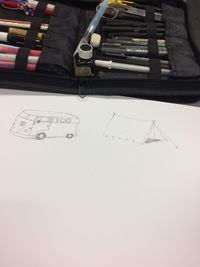
| + | [[File:Illustratie123.JPG|200px|thumb|left|Fourth lesson: drawing an illustration]] | ||
Revision as of 06:32, 9 June 2017
Hi! my name is Kiara de Goede
My e-mail:
\\\\\ kiara.degoede@gmail.com ||||| 0931740@hr.nl /////
First lesson:
We met our teacher, they talked about the things we can expect and what we are going to do. The goal is to build one or two plotter machines together. And everyone has to make something with it. The homework we got is to make 3D-prints for specific parts of the plotter. We are divided in groups, and every group prints their parts two times so we can go ahead with it next class.
Second lesson:
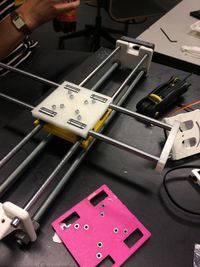
We went into the workshops to be able to make the machine from all of the 3D printed parts. For example we had to make the holes for the screws a little bit bigger by filing out the extra plastic. Then every group assembled their part of the machine and when class was over, my group has put the whole machine together.
Third lesson:
Class started with an explanation from Jesse about the plotter and how it works. How the file is supposed to be sent, what programs we should use and some codes to make the plotter do what you want. Then the class was divided in there groups: painting, non painting and knifes. My group is painting. We want the plotter to make a drawing by dipping a brush in ink and make an illustration. The idea is that all the groupmembers make an illustration and then let the plotter mix them all together.
Fourth lesson:
This lesson was a bit slower. I was in a little later because i had an open course, so i missed the intro. But my group made their illustrations. The other two groups experimented with the two plotters And we downloaded the programs. We discussed with Jesse that next week we are going to program the plotter to make it dip a brush in paint and make an illustration.


