User:Kirsten Fiol
E-mail: kirsten_fiol@outlook.com
School e-mail: 0900904@hr.nl
Contents
Examples of carving
commons:etching (Etching)
commons:Woodcut (Woodcut)
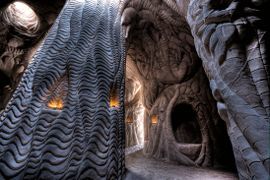
commons:Cavecarving (Cave carving)
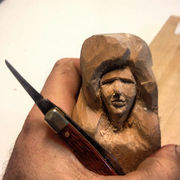
commons:whittling (Whittling)
commons:extreme (Extreme)


Traditional technique
The first example was to make an object with a traditional technique. I first wanted to start with wood or stone, but since I had never done that before, I decided to start a bit easier. I found soap carving tutorials online and decided to give that a try. Only to discover that it was much much much more difficult than it seemed. The flower bouquet that I had in mind was quickly replaced by a larger shape, which was easier to carve. When the main shape was done, I started to add some detail. Very carefully, because the soap would break easily. I used simple kitchen knifes, needles, pocketknifes and bookbinding needles. But you can use anything that's a bit sharp. When I was done with adding the details, I washed it carefully to make the surface smooth.


Comparing technique
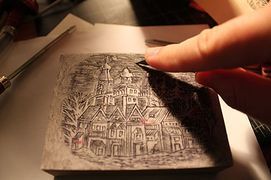
The second example was to make something by using two different materials, or by using two different making techniques or machines. I'm a big fan of hand crafted things, but I'm not very skilled. So I found it a good idea to carve two medieval letters by using two different making techniques. The letter C I drew and carved into lino, by hand and the letter D I drew in Illustrator and was engraved by the lasercutter.


New technique
For this example we had to make something by using a technique that we've never used before. For me this was the Milling machine. I was very happy about this because I've always wanted to use it, but never got the chance to. It was also the first time to work with 3D programs. This took me a lot of time, but it was fun to explore the programs and eventually I got somewhere. I turned the model of an Iphone into a trinket box. I wanted to make it out of wood, but since I bought the wrong wood, and was already late with this example, I decided to mill it out of foam. I learned that for the milling machine, you have to come fully prepared and also with knowledge about your model. The preparing of the machine and the block of wood takes a very long time.


Extreme technique
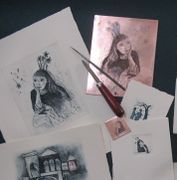
For this example, we had to push the material or technique to the limit. How far can this go. After looking for inspiration online, I came to the idea to lasercut a drawing in as many layers as I can, to get a 3D drawing.

I started with making a drawing on paper. I wanted to make a complex pattern, so I just had to draw one part of the pattern, so I could later duplicate it digitally. I scanned it in, and started tracing it in Illustrator. Finally I had the whole drawing, and gave it the colors that I wanted it to have. When that was done, I had to prepare the files for the lasercutter. This was the most difficult part, because I had to figure out which shape had to go on which layer. And which colour came after the next one. This made it very very complex, and it was easy to make a mistake. But finally I got all the layers sorted out, and I'm very pleased with the result.


Workshop
Our group got a workshop on Japanese joint-making at the digital lab. It was a lot of fun and super interesting to see how it works. Japanese joints are solely made out of wood, and no screws, bolts or glue are used to keep them together. That means that the design has to be precise on the millimeter. And it's way more work than just making a shape in Illustrator, duplicating it and mirroring. You have to know everything about the types of wood you're using, and how it reacts/works. You have to leave space around the shape, so it can fit together, but not too much! So it's a lot of trial and error, but if it works it's beautiful.
