User:MarjoleinStassen/MB
Contents
INTRODUCTION
Ceramic Memory contains three group members: Marjolein Stassen, Pascalle de Jager and Emma Rijk. In the previous quarter Marjolein Stassen and Emma Rijk have been looking for ways to remember precious memories. The focus was on memories that are made with several people together while having food. Because the moments we are with friends is to good for being behind a camera or waiting for that 'perfect' moment we were thinking about an automatic memory saver.
In this semester we took our idea to the next level. By creating a new tool to save memories on cutlery, the memory does not only last but also reminds the person daily while eating from their cutlery. The tool we use is an camera obscura, which is a dark space (can be anything) with a hole in the surface to let a little light in. The ceramic object will be placed in the small dark space after a lightsensitive formula treatment. The dark space (box) can be placed on the table while having dinner with friends. If the light hole is opened during dinner, the picture will develop while having dinner. The picture of everyone having dinner will be visual on the object placed in the box, making the memory last forever without sacrificing precious time.
FIRST PRESENTATION


Relevance
Enjoy the moment, and unknowingly saving them.
Research Question
How to integrate the 'memory box' in daily rituals?
Technical Plan
- Learn to work with MAX7
- Hack Keyboard.
- Write code
- Think of a way to store the sounds.
- Explore wireless connection
Next Step
- Researching Rituals - Communication in a different way
ALL THE TESTING
Once our light sensitive Emulsion arrived in the mail we instantly started to do some testing. Especially before the christmas break our tests were all unsuccessful. To find the golden formula a lot of further testing needed to be done. Several variables were taken in account when starting to photograph.
- Which 'Camera' it was taken with
- Weather conditions to estimate how much light was present while making the photo.
- Exposure time
- What is photographed
Down below will be an overview from the first tests to the last.
Before the Christmas Break

Before the christmas break we started to photograph on small mugs provided by Pascalle. These ones were glazed and this was the first time we worked with the Rollei. Unfortunately we made several mistakes that resulted in a failed experiment. This mostly went wrong because of Marjolein because she didn't know how to develop. There was a small tree seen but late evidence was destroyed because the test object was held into the light too soon. Luckily that wasn't all the mistakes we made. Since the little cup was glazed the emulsion wouldn't stick, resulting it to get washed off the cup by the developer. To make this picture we used old paint containers provided by the photostudio.

8th, 9th & 12th of January

After the christmas holidays, and after Pascalle left for Manchester, we still had no successful testing. It was quite frustrating but we started with a new found motivation. We were pretty keen on getting a picture on ceramics. Later we found some white tiles in the Doka. Seeing that no one was using them we smashed them in smaller pieces so we could do more tests. Pascalle found on in the christmas break that we needed a primer for the emulsion to stay put. With this new found information new tests could be made.
On the 8th of January Emma and Marjolein worked in Marjolein's house on the new batch of tests. In her house there is a small storage room without any windows. This would work perfect for our home made Doka. We used a Red Biking light to guide us through the darkness. There was a whole set up and supplies needed: Primer, Thinner, Paint Brushes, the tiles, Rollei Emulsion, Specialized light blocking bags, old towel and surface to work on. First a primer coating was applied to the tiles, not only to the glazed front but also on the biscuit back. Marjolein wanted to see what would work better, glazing or unglazed side. After priming the tiles the sensitive job started of applying the light sensitive emulsion. This was Emma's job to do this on Friday night. The tiles were left to dry all through the night to be used the next day.
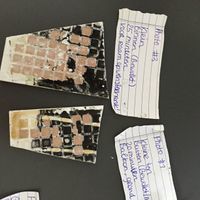
Marjolein dedicated the 9th of January to Digital Craft and making pictures. At the time we were still unsure if the Emulsion we bought had any success with the tiles we were using. To be safe Marjolein made some tests of trying to photograph the houses seen from her window. This would be a still life and hopefully result in a cleaner picture. Doing these tests all information needed to be noted down and kept together in a structured way. With Emma's idea of using sandwich bags Marjolein got to work. In each sandwich bag there would be the photographed tile with a note what the exposure time was, and the weather conditions and what was in the photo.
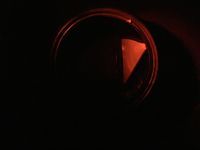
Shard in Camera
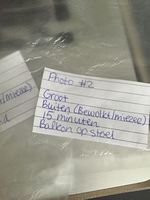
Sandwich bag with notes
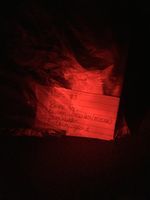
Sandwich bag + notes + tile + Dark Room
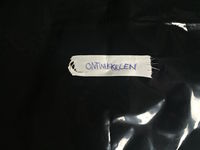
Developers bag


On the 12th of January Marjolein went to the Doka to develop the photos made on Saturday (4 in total). This time she knew how to develop and followed the baths in the right order. These tests were the first that showed some actual results. This time we could conclude how long we needed for a picture to be developed, how much light was needed and if the emulsion would work on ceramics. It was a huge relief to see that some pictures showed up on our testing shards. With this we could take the boxes inside and see how this would work with movement and indoor light. Another step forward was made! With these tests being on the front or the back of a tile it was also concluded that the glazed front worked the best! The developer was too strong for the primer. With the glazed side the primer would stick much better and had no problems being developed while the back was slowly eroding and most of the picture was lost.
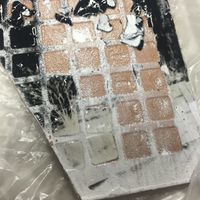
Tree visible in corner, backside
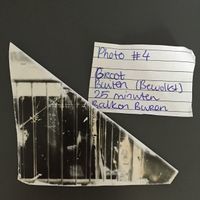
Balcony Neighbors Marjolein
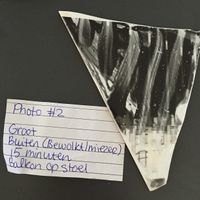
Black = Sky, Buildings from Window
Unglazed sides that failed to survive developer


