User:Max
Max Terpstra Illustratie
email 0908471@hr.nl
Contents
5 FUSING EXAMPLES
1 - Historical piece - Paper
The craft of paper making is an ancient craft that originated in China around 105 BC. The craft is based on turning water and natural products (consisting of wood scraps, rice, fibres and more), into a mixture that is called ‘pulp’. In the earliest way of papermaking the products would be beaten down with sticks to make it easier to combine with water, but later on mixers would take over this job. This pulp is then combined with water in a tub of water and using a deckle frame to form the sheets of pulp. After this process the sheets would be pressed to remove all water and dried, and used for many purposes.
So how would this be fusing? Well there is a critical part in the process that features fusing to make paper form and hold its form. That part is where the pulp is created. Combining raw materials, most likely other sorts of paper or natural products, with water turns it into a soft sloppy material used for papermaking, or known as pulp. On a fusing level this would be defined as: combining two or more entities to create a new whole. So because you need to combine water and these materials, it is seen, in my perspective, as fusing.
What impact this form of fusing made. It became possible to not only write on this material, it would also get rid of the older and less practical mediums ideas and notes could be written on. The creation of paper is an enormous invention, and the result of that is still here today.
First results:
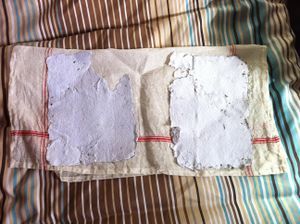
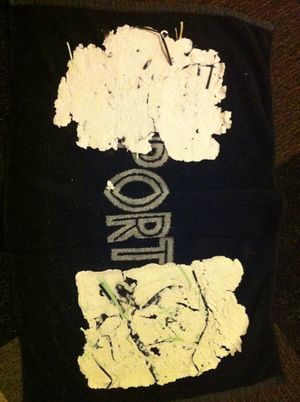
The first two sheets of paper were very fragile to handle. The would almost break if you would hold them while they were still wet. This can (possible/hopefully) be adjusted by finding the best correlation between the amount of water and paper used to for the pulp. This time the pulp was very thick and wouldn't flatten out on the frame. Next time i'll try to use colour and adjust the amounts of water and paper and I will be trying to add other materials and maybe even shape the paper during the process of making it. This can be possible because the pulp is still adjustable during the process and it can alter the shape of the paper at the end.
The use of this manual paper making is also an option for the 'why i make' statement poster, although the frame is a4 size it will need 16 pairs of a4, with some extra for possible failure. This will be a very time consuming, difficult task and can result into a very fragile poster. An option would be to divide the poster into 4 and align them afterwards. The printed statement could be printed at the publication station using the Mimaki flatbed printer.
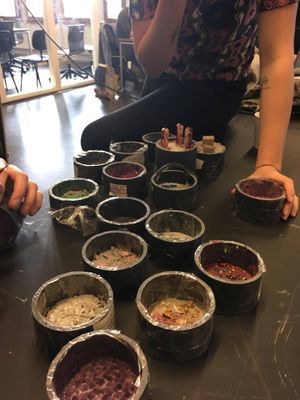
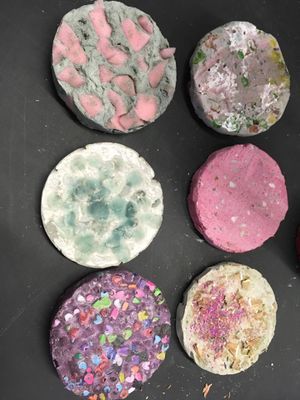
For our shared project we came up with the idea to mix concrete with various objects. The concrete would be mixed in different proportions. We decided to make small cylinder formed tiles, those were easy to fill and it wouldn't take much effort to remove the tiles afterwards. Isa and I made the moulds from a large pvc tube, and we covered the insides with tape, so the concrete wouldn't stick to the pvc. After that process we as a group just started filling the moulds with various combinations of concrete, some even mixed with paint, and added different kind of objects. Some of the items we used were: plastics, foam, wooden blocks, melted wax, glass, pencil material, nail polish and more. When we were done and the tiles ran out we stored the tiles to dry.
After a week or two we collected the tiles again to see the results. Some of the concrete in the tiles mixed better with the water we added and some of them not, those fragile ones were crumbling. But a few of them mixed quite well and gave an interesting result (see ...). The most interesting result was definitely the one with foam. The contrast it created with the concrete was great.
After we had the tiles out of the moulds, we decided to polish some of them at the ceramic station. Same as before, some had a better structure than the other ones and one even fell apart while polishing.
3 - Pushed to the limit - Collage
The most common form of collage is with cut-out pictures that were once in magazines, newspapers, adds and more. It's a process where these pictures are torn or cut out and collected. This collection of cut-out images is then put together again to form a new whole, also known as collage.
Collage is a interesting and different kind of art, because it can consist of multiple mediums to form an image. For example, it can consist of photographs, paint, glue, and many more materials. These materials are then 'fused' together. Collage is a form that also relies on composition. Anyone can place an image on top of another, or next to it, but that might not be appealing to its form altogether.
Switching back to the assignment of pushing it to the limit: Collage is work that is almost always done on a flat surface, it only fills in the space that it is placed on. Digging deeper on the topic of using space one can also use the material were the images are placed on as a sort of gate to let the objects go 'through' the material its placed on.
This takes collage to a whole new level, because it's now not only using one side of it's surface, but a whole 360 degrees spectrum to be viewed at. Not only the front of the object is now the centre of attention, but also the back, or even the sides, well heck, it could also be the view from beneath.
This way of collage breaks the boundery of using one side, there are now a million new ways of using a single a4 sheet to create collage.
The first results of the collage:
4 - Comparative example-within one experimental example - Video montage
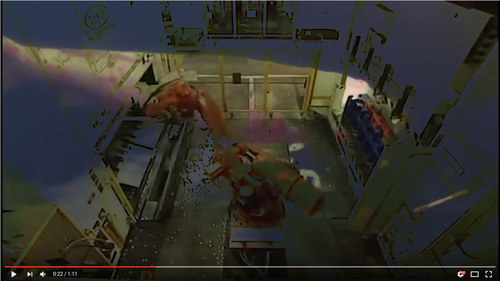
To try to experiment with the comparative example I decided to try working with video material. I recently shot some footage of nature sightings and at a botanical garden. Using this footage I already had I decided to combine and fuse that with factory footage I found on the web, to create a contrast. But even with the contrast I wanted to make the footage merge with each other to create a fused whole. The result came out quite surprisingly cool and it gave a visually interesting look. I also tried to fuse sound and music with the footage, which gave an sort of other world feel to the footage, or one could say an 'self-realization' feel. Which came from the combined nature and factory footage.
WHY I MAKE - MANIFESTO
well, yes
FINAL ARTEFACT
My final artefact will be a construction of fused material, being destroyed and fused back togheter in a whole new shape. The first fused material will be ply-wood, a layered kind of material. I will then 'destroy' the material by using the the lasercuter to cut out various shapes that can connect with each other. The connection will be permanent after I've attacted the glue. The form will not be a pre-determent form, and is therefor free to form, it will build up during the process, and adapt to previous actions.
