Difference between revisions of "Prepare files for screenprinting"
From Publication Station
Tag: visualeditor |
|||
| (25 intermediate revisions by the same user not shown) | |||
| Line 25: | Line 25: | ||
==Getting your design screenprint ready== | ==Getting your design screenprint ready== | ||
===Screenprinting an image Photoshop set up=== | ===Screenprinting an image Photoshop set up=== | ||
====One color image==== | ====One color image with grayscale==== | ||
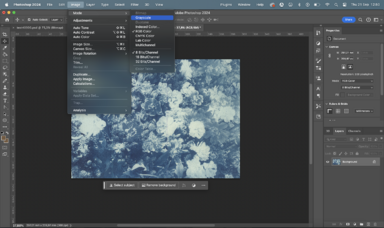
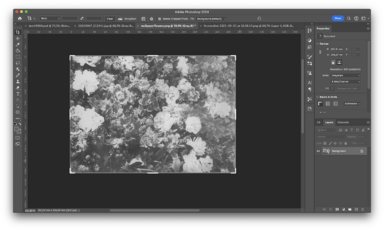
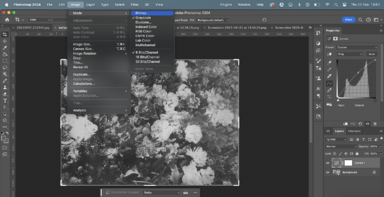
*Change your color mode to grayscale, Image>>Mode>>Grayscale | *Change your color mode to grayscale, Image>>Mode>>Grayscale | ||
[[File: modegrayscale.png|384x384px]] | [[File: modegrayscale.png|384x384px]] | ||
[[File: modegrayscaleset.png|384x384px]] | [[File: modegrayscaleset.png|384x384px]] | ||
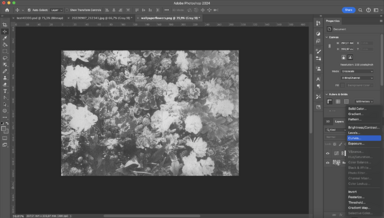
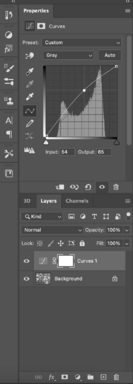
*You can adjust the curves to make your design lighter or darker | *You can adjust the curves to make your design lighter or darker | ||
[[File: curveswhere.png|384x384px]] | |||
[[File: curves.png|384x384px]] | |||
*Make your image into a bitmap Image>>Mode>>Bitmap | *Make your image into a bitmap Image>>Mode>>Bitmap | ||
[[File: bitmap.png|384x384px]] | |||
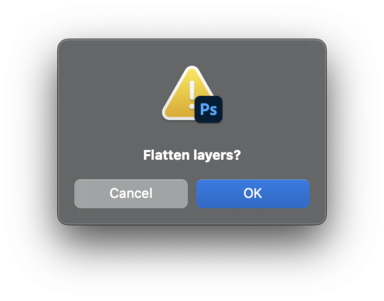
*Click okay on Flatten | |||
[[File: flatten.png|384x384px]] | |||
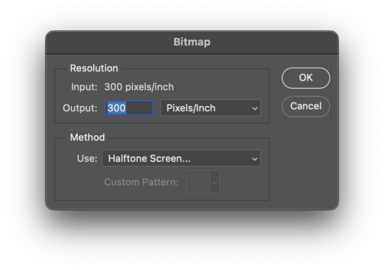
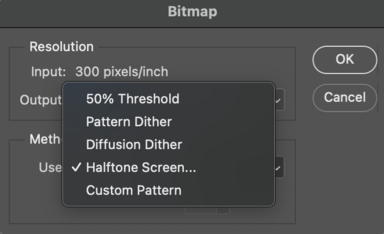
*Choose output 300px/in | |||
[[File: bitmapwindowoutput.png|384x384px]] | |||
*Choose Halftone Screen and click OK | |||
[[File: Halftonescreen.png|384x384px]] | |||
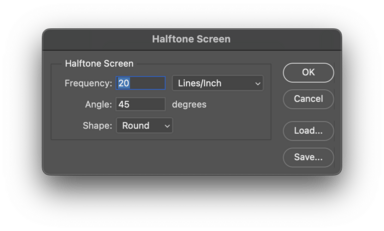
*Choose Frequency between 20-40 lines/inch, you can also change the angle of them | |||
[[File: Frequency.png|384x384px]] | |||
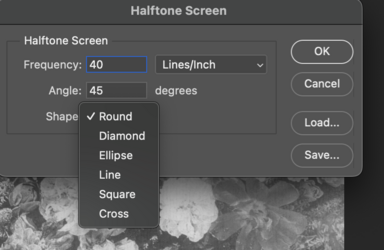
*Choose the shapes of the Halftone Screen and click OK | |||
[[File: Shapes.png|384x384px]] | |||
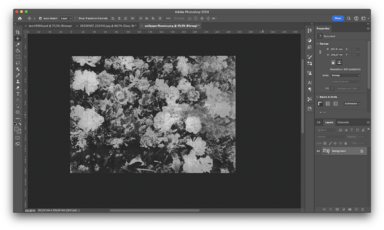
'''The higher the Frequency the more dots your image will have''' | |||
Frequency 40: | |||
[[File: dots40.png|384x384px]] | |||
Frequency 20: | |||
[[File: dots20.png|384x384px]] | |||
====One color image without grayscale==== | |||
*Change your color mode to grayscale, Image>>Mode>>Grayscale | |||
[[File: modegrayscale.png|384x384px]] | |||
[[File: modegrayscaleset.png|384x384px]] | |||
*You can adjust the curves to make your design lighter or darker | |||
[[File: curveswhere.png|384x384px]] | |||
[[File: curves.png|384x384px]] | |||
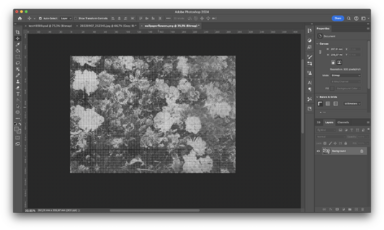
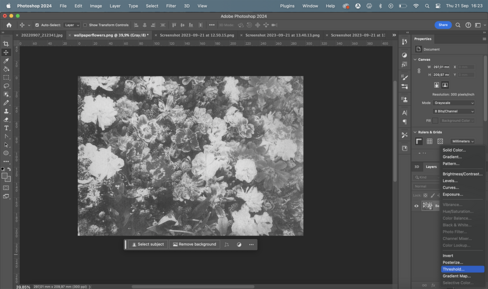
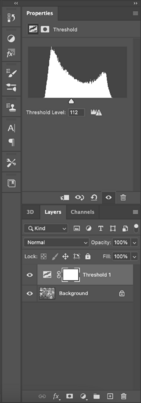
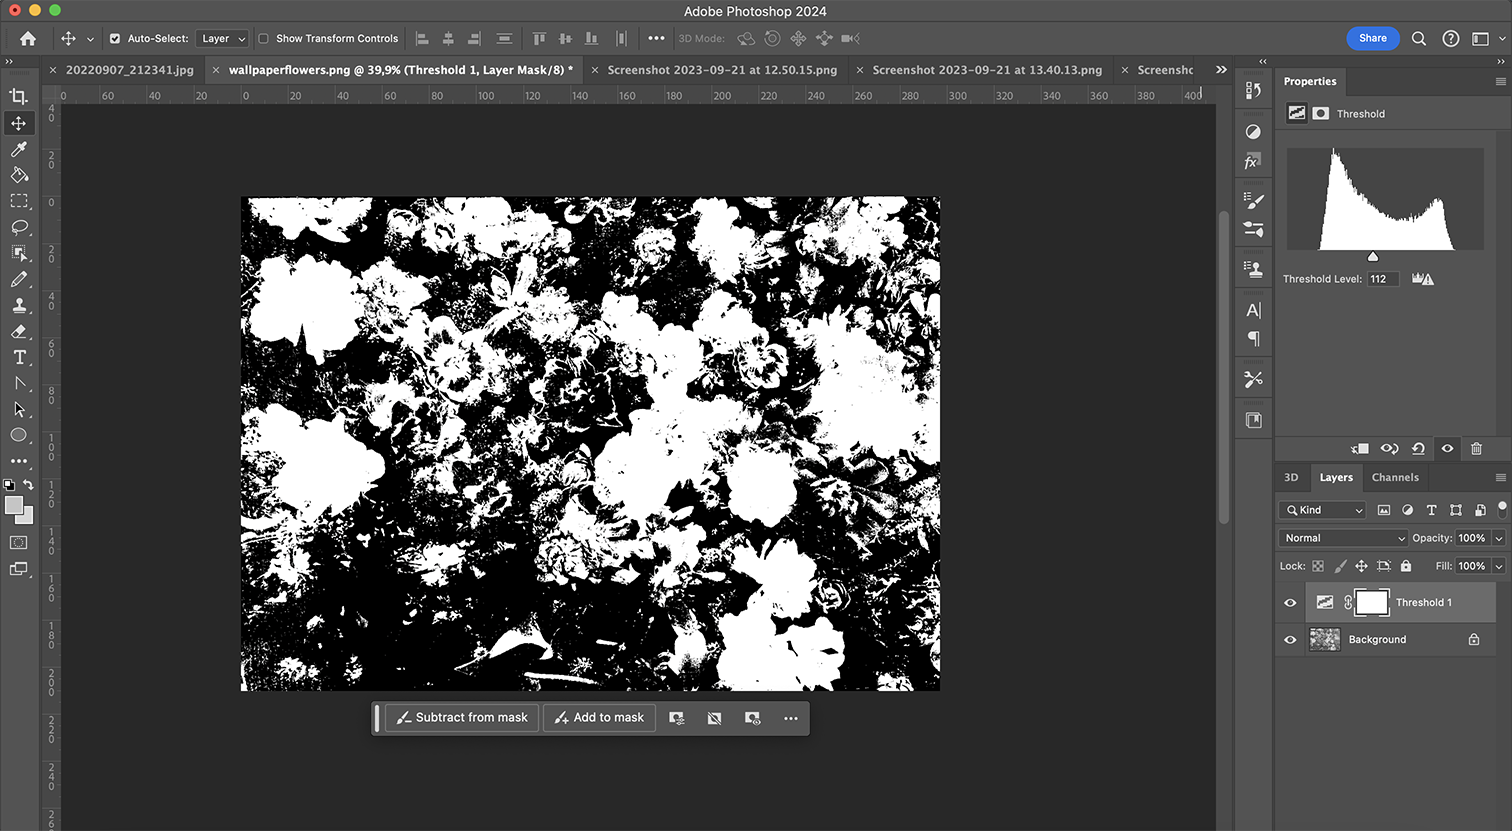
*Go to Treshhold and play with the slider until it looks how you want it | |||
[[File: Treshhold1.png|488x488px]] | |||
[[File: Treshhold2.png|403x403px]] | |||
[[File: Treshhold3.png]] | |||
====Multicolor image==== | ====Multicolor image==== | ||
=====CMYK===== | |||
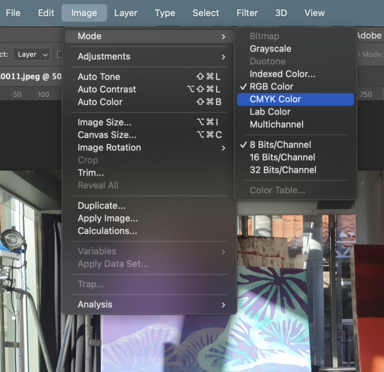
*Change your color mode to grayscale, Image>>Mode>>CMYK | |||
It will change to colors a bit from the RGB setting | |||
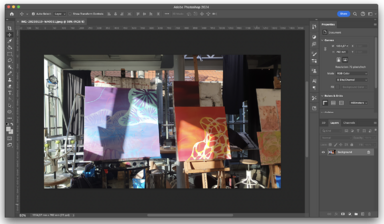
[[File: Fullcolorimage.png|384px]] | |||
[[File: cmyk.png|384px]] | |||
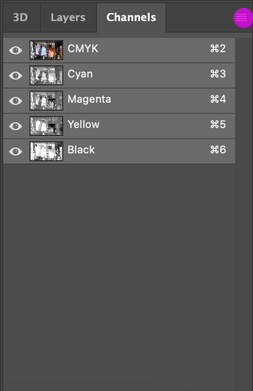
*Go to Channels section on the right and click on the burger menu | |||
[[File: channels.png|391x391px]] | |||
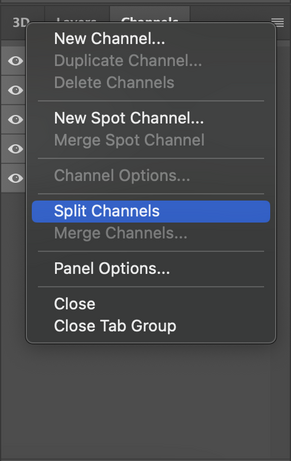
*Split Channels | |||
[[File: splitchannels.png|461x461px]] | |||
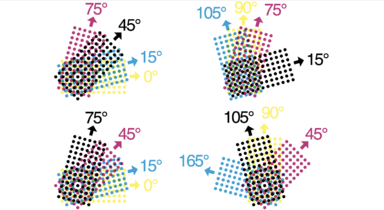
*Repeat steps 3-8 from One color with grayscale section of this page, changing the angles of each channels halftone bitmap but keeping the same frequency | |||
[[File: angles.png|384px]] | |||
=====CMY (Multichannel)====== | |||
You can also use the Multichannel settings, it does change the way the image looks but it is one layer(one screen) less | |||
[[File: multichannel.png|356x356px]] | |||
[[File: multicolor.png|384px]] | |||
*Then follow steps and 3 from the CMYK section of this page | |||
===Screen printing a design=== | ===Screen printing a design=== | ||
====Design without gradients==== | |||
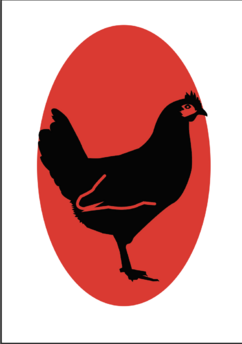
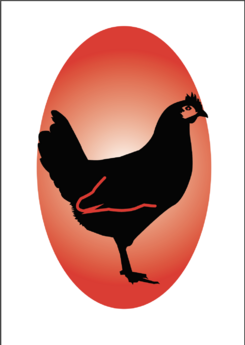
Visualisation of a 2 color screen print design: | |||
[[File: Screenshot 2023-09-21 at 15.13.48.png|344x344px]] | |||
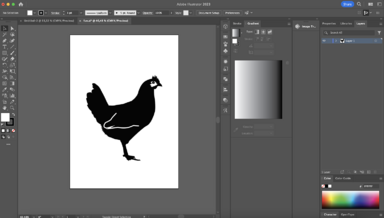
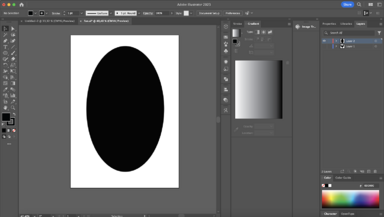
*Prepare your design only in black and white and if want to print multiple color design prepare the different colors on different layers and export as separate files/pages | |||
[[File: chickenscreen.png|384x384px]] | |||
[[File: egg.png|384x384px]] | |||
====Design with gradients==== | |||
Visualisation of a 2 color screen print design with a gradient: | |||
[[File: Screenshot_2023-09-21_at_15.32.44.png|345x345px]] | |||
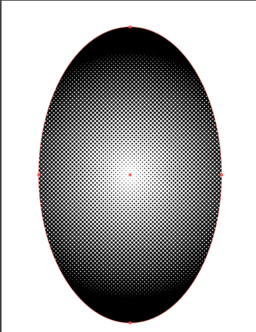
*Prepare your design only in black and white and if want to print multiple color design prepare the different colors on different layers and export as separate files/pages, when you want to have a gradient make sure to create a halftone out of it | |||
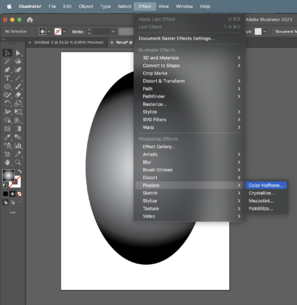
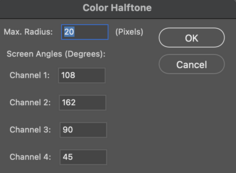
*In Illustrator you can do that by making a black to white gradient and the going to Effect>>Pixelate>>Color Halftone and the choose a radius of the dots | |||
[[File: illhalf.png|305x305px]] | |||
[[File: radius.png|236x236px]] | |||
[[File: halftonemadeegg.png|332x332px]] | |||
==PDF export== | ==PDF export== | ||
Latest revision as of 07:23, 5 October 2023
Dimensions
Are the dimensions of your file the same as the your paper size? Check if the dimensions of your file match the size of your paper. For A4 that should be 297 x 210mm.
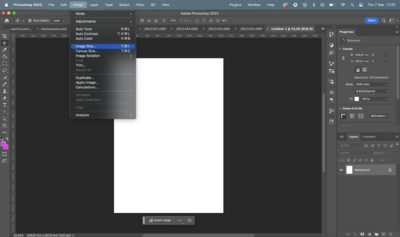
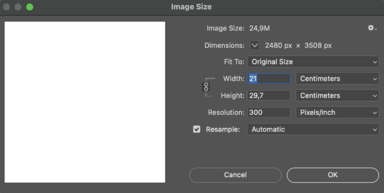
How to check file dimensions in Photoshop
- Go to Image>>Image Size and see if the width and height are correct.
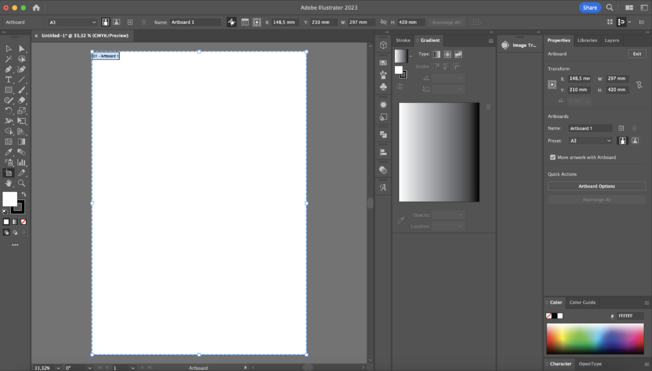
How to check file dimensions in Illustrator
- Click on the Artboard tool, Click on the Artboard and see the dimensions in the Properties window
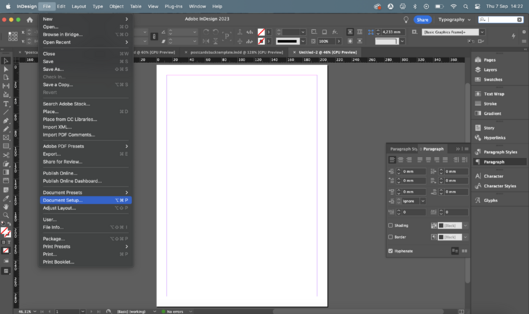
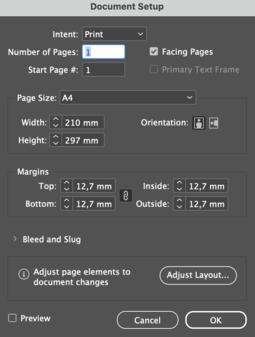
How to check file dimensions in Indesign
- Go to File>>Document Set up and see if the width and height are correct.
Quality
- For printing the best quality is 300dpi while maintaining the dimensions of the paper
Photoshop
- Go to Image>>Image Size
Getting your design screenprint ready
Screenprinting an image Photoshop set up
One color image with grayscale
- Change your color mode to grayscale, Image>>Mode>>Grayscale
- You can adjust the curves to make your design lighter or darker
- Make your image into a bitmap Image>>Mode>>Bitmap
- Click okay on Flatten
- Choose output 300px/in
- Choose Halftone Screen and click OK
- Choose Frequency between 20-40 lines/inch, you can also change the angle of them
- Choose the shapes of the Halftone Screen and click OK
The higher the Frequency the more dots your image will have
One color image without grayscale
- Change your color mode to grayscale, Image>>Mode>>Grayscale
- You can adjust the curves to make your design lighter or darker
- Go to Treshhold and play with the slider until it looks how you want it
Multicolor image
CMYK
- Change your color mode to grayscale, Image>>Mode>>CMYK
It will change to colors a bit from the RGB setting
- Go to Channels section on the right and click on the burger menu
- Split Channels
- Repeat steps 3-8 from One color with grayscale section of this page, changing the angles of each channels halftone bitmap but keeping the same frequency
CMY (Multichannel)=
You can also use the Multichannel settings, it does change the way the image looks but it is one layer(one screen) less
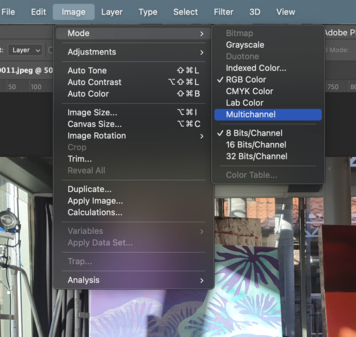
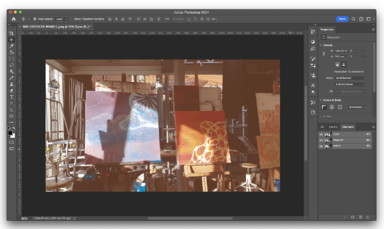
- Then follow steps and 3 from the CMYK section of this page
Screen printing a design
Design without gradients
Visualisation of a 2 color screen print design:
- Prepare your design only in black and white and if want to print multiple color design prepare the different colors on different layers and export as separate files/pages
Design with gradients
Visualisation of a 2 color screen print design with a gradient:
- Prepare your design only in black and white and if want to print multiple color design prepare the different colors on different layers and export as separate files/pages, when you want to have a gradient make sure to create a halftone out of it
- In Illustrator you can do that by making a black to white gradient and the going to Effect>>Pixelate>>Color Halftone and the choose a radius of the dots
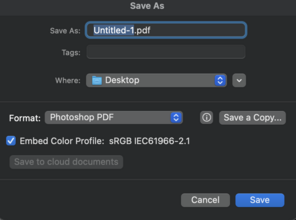
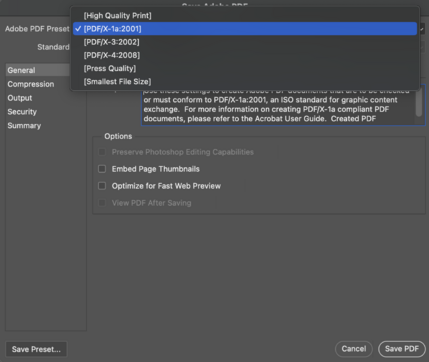
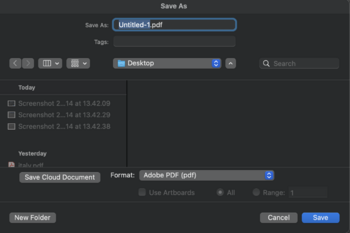
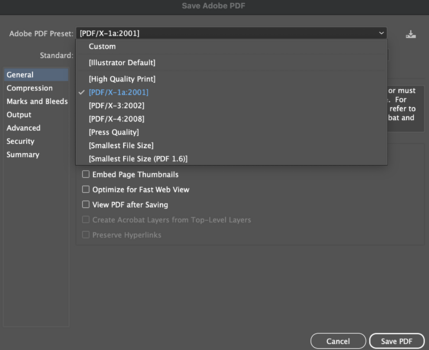
PDF export
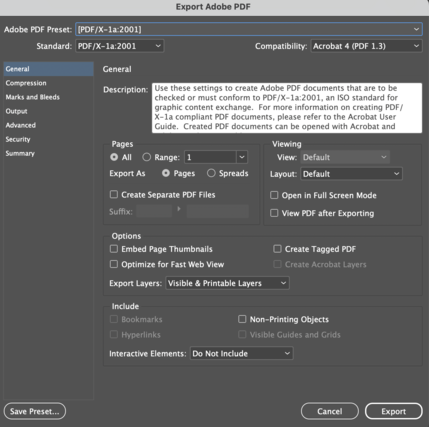
- Make sure your file is exported as a pdf 2001
Photoshop
- Save as>> Photoshop Pdf>> Pdf 2001
Illustrator
- Save>>Adobe Pdf>>Pdf 2001
Indesign
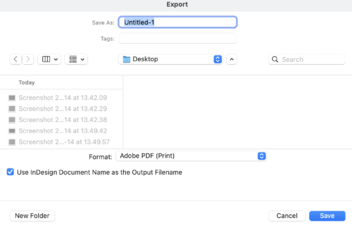
- Export>>Adobe Pdf>>Pdf 2001
- Still not sure how to do it? Check out the tutorial:http://ps.wdka.nl/wiki/Export_to_pdf'
