Businesscards
How to make business cards
Use Bleed
Prepare your design in InDesign: Make a new document with the dimensions 8,5 x 5,5 cm.
If you need a colour or picture for the background, make it larger than the dimensions of the business card. It should have at least 3 mm bleed.
Crop Marks
When exporting your file to PDF/X a:2011 set Crop Marks and Bleed on 3mm.
If you look at the PDF, you can see the crop marks.
Place multiple cards on one A4
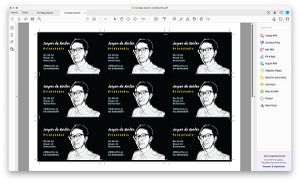
Next step is to put 9 cards on one A4.
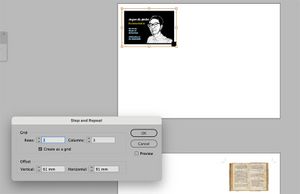
Make a new A4 InDesign document and place the card's PDF on the page [file>place].
Go to Edit> Step and Repeat and multiply your card. Put the distance on 91 mm horizontal and 61 vertical. That is the size of the card + 6mm on both sides. Rows and Columns on 3. Click on Create as a Grid and check the Preview button.
Export the new file with 9 cards as a pdf. This time do not use the bleed and cropmarks. Be sure that, when you have a double sided card, everything is centered on both sides of the card.
The more precise you work, the easier it is to cut later on. Keep in mind that 1 millimeter is a LOT on a business card and almost nothing on an A0 (A-zero) poster. So do not put text to close to the edge and do not try to align something on the front with the back. Printers have a tolerance of a few millimeters with printing on both sides.
Choose a nice, thick paper and put at least 10 sheets in the multipurpose tray. Go to the Paper catalogue after you double-clicked on your file in Fiery Command Workstation (held folder). Find the paper. Numbers match with the numbers on the drawers. Print one sample and cut it first to ensure you did not make a mistake. When it is okay, print some more. 10 sheets will give you 90 business cards.
Cut your sheets on the big cutting machine. Start with cutting off the white edges. Keep one sheet apart to measure. Start measuring from the edge of the paper to the cropmarks that are the most far away. Type this distance in on the grey keys on the machine and press '=' twice. This is your first cut. When the border is cut off, measure the distance for the next cut. That would be the three cards on the right. For the next cut (6 mm less, that is the space between the cards) you can type in –0.6 and twice the = button. After this, you do –8.5 cm and – 0.6. For the last row, type in 8.5 and '=' twice.
Now you have three strokes with three cards on each. Make one big pile and cut the cards to 85 x 55 mm.


