Captcha
From Publication Station
How to generate captchas
The easies way for generating captchas is through libraries in different programming languages (Python, Javascript, PHP, etc) dedicated to this task
Bellow is a list of different libraries used to produce different kind of captchas, dependencies, instructions of how to use them.
Python
3D Captcha
https://github.com/013231/3D-CAPTCHA
Run in the terminal:
python captcha.py
possible changes to script
captcha.py allows different parameters to be changed, namely
- font-face: fontPath = '/Library/Fonts/Arial.ttf'
- text used in captch
- image dimension and format
- image color
- image 3D position
Here is a modified, simplified, and commented version of the captcha.py script:
#!/usr/bin/env python
# encoding=utf-8

from random import uniform, shuffle
from cStringIO import StringIO
from PIL import ImageFont, Image, ImageDraw
import numpy, pylab
from mpl_toolkits.mplot3d import Axes3D

fontPath = '/Library/Fonts/Arial.ttf' # path to font used
img_ext = 'png' # image extension. Supported formats: eps, jpeg, jpg, pdf, pgf, png, ps, raw, rgba, svg, svgz, tif, tiff.

def makeImage(text, width=400, height=200, angle=None, ext='png', rgbcolor=(1,0,1)):
    '''Generate a 3d CAPTCHA image.
    Args:
        text: Text in the image.
        width: Image width in pixel.
        height: Image height in pixel.
        angle: The angle between text and X axis.
    Returns:
        Binary data of CAPTCHA image in PNG format.
    '''
    angle = angle if angle != None else uniform(-20, 20)
    try:
        font = ImageFont.truetype(fontPath, 24)
    except IOError:
        raise IOError(
            'Font file doesn\'t exist. Please set `fontPath` correctly.')
    txtW, txtH = font.getsize(text)
    img = Image.new('L', (txtW * 3, txtH * 3), color=255)
    drw = ImageDraw.Draw(img)
    drw.text((txtW, txtH), text, font=font)

    fig = pylab.figure(figsize=(width/100.0, height/100.0))
    ax = Axes3D(fig)
    X, Y = numpy.meshgrid(range(img.size[0]), range(img.size[1]))
    Z = 1 - numpy.asarray(img) / 255
    ax.plot_wireframe(X, -Y, Z, rstride=1, cstride=1, color=( rgbcolor ) ) # "plot_wireframe" can be replace by "plot_surface" to produce a surface
    ax.set_zlim((-3, 3))
    ax.set_xlim((txtW * 1.1, txtW * 1.9))
    ax.set_ylim((-txtH * 1.9, -txtH * 1.1))
    ax.set_axis_off()
    ax.view_init(elev=60, azim=-90 + angle)

    fim = StringIO()
    fig.savefig(fim, format=ext)
    binData = fim.getvalue()
    fim.close()
    return binData

if __name__ == '__main__':
    degrees = [i*10 for i in range(0,36)] # list different degrees
    for n in degrees: # for loop will produce 35 different images, each in a different angle
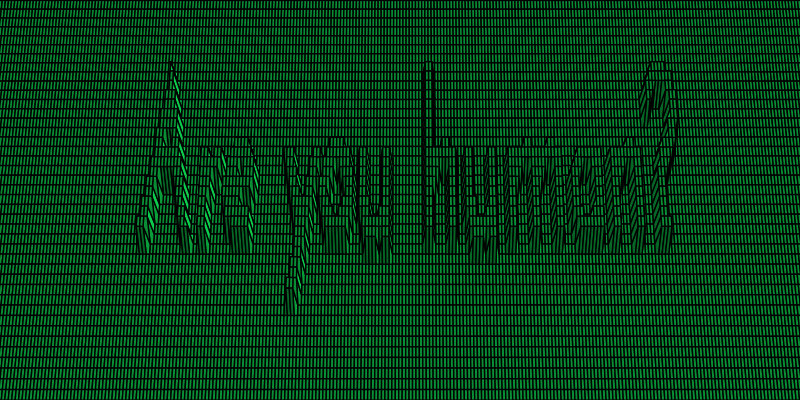
        img = makeImage(text='Are you human?', width=600, height=300, angle=n, ext=img_ext, rgbcolor=(0.05,0.8,0.3) ) # Essential command: text, width, height, angle, extension, color
        n = str(n).rjust(3, '0')
        filename = 'human_{}.{}'.format(n, img_ext)
        print filename
        with open(filename, 'wb') as f:
            f.write(img)
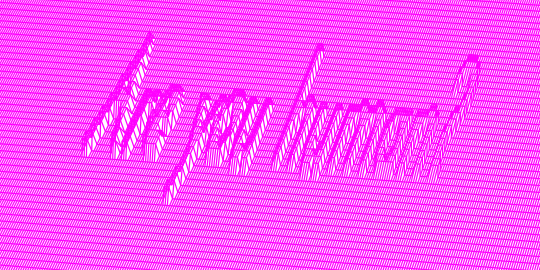
Example output: with makeImage set to:
img = makeImage(text='Are you human?', width=600, height=300, angle=n, ext=img_ext )
You can change the instruction to plot a wireframe,
ax.plot_wireframe(X, -Y, Z, rstride=1, cstride=1, color=( rgbcolor ) )
for one to plot a surface:
ax.plot_surface(X, -Y, Z, rstride=1, cstride=1, color=( rgbcolor ) )

