Difference between revisions of "Photoshop Script Gif"
From Publication Station
(Created page with " {{Template:Quickstartguide}} == 1. Import Files == File:PhotGifScript1.png<br> go to file> scripts> load files into stack <br> File:PhotGifScript2.png<br> click 'browse' to access your files<br> File:PhotGifScript3.png<br> File:PhotGifScript4.png<br> == 2. Create Frame Animation == File:PhotGifScript5.png<br> Open Timeline from Window> Timeline<br> click the "create frame animation" button to start a new animation> <br> the first frame is...") |
|||
| Line 25: | Line 25: | ||
[[File:PhotGifScript6.png]]<br> | [[File:PhotGifScript6.png]]<br> | ||
click the timeline's burger menu> make frames from layers <br> | click the timeline's burger menu> make frames from layers> <br> | ||
all your layers are now frames in the timeline<br> | |||
[[File:PhotGifScript8.png]]<br> | [[File:PhotGifScript8.png]]<br> | ||
Latest revision as of 10:00, 16 September 2022
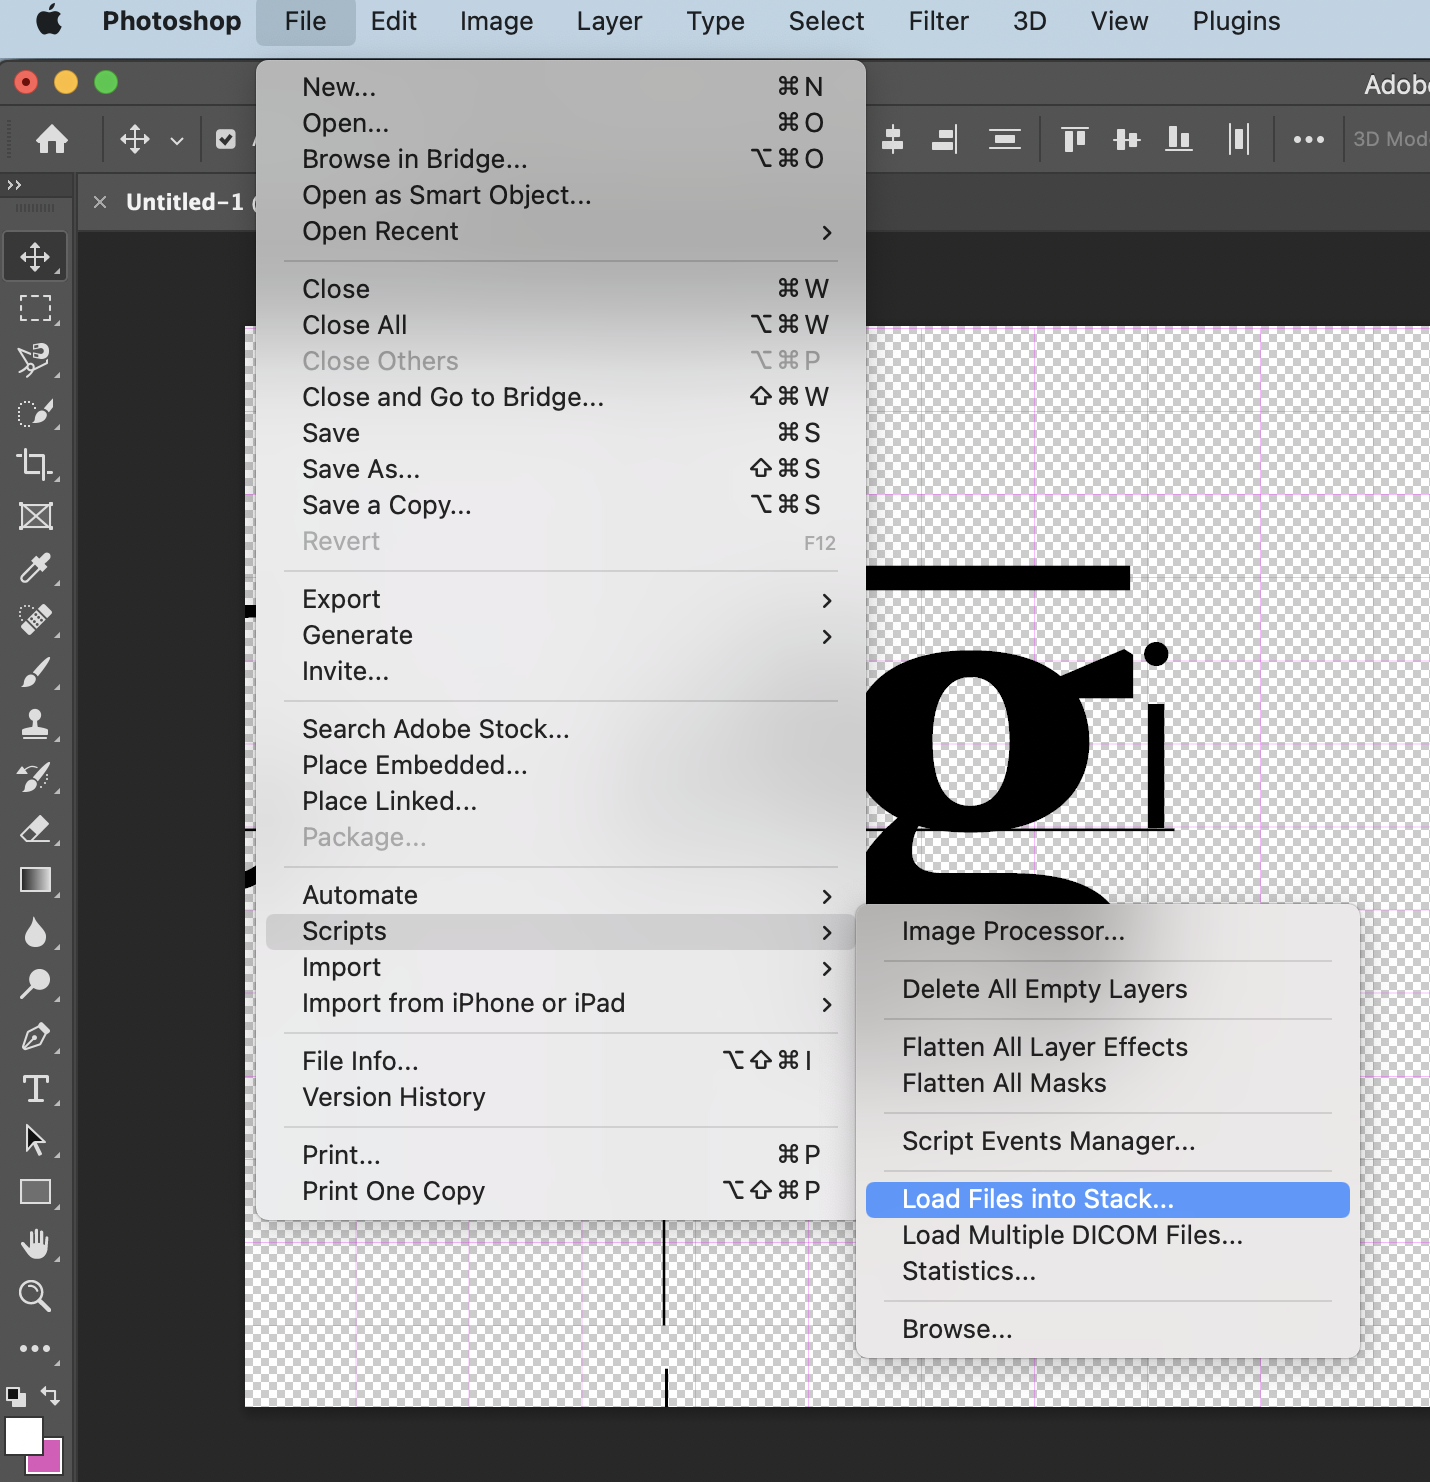
1. Import Files
go to file> scripts> load files into stack
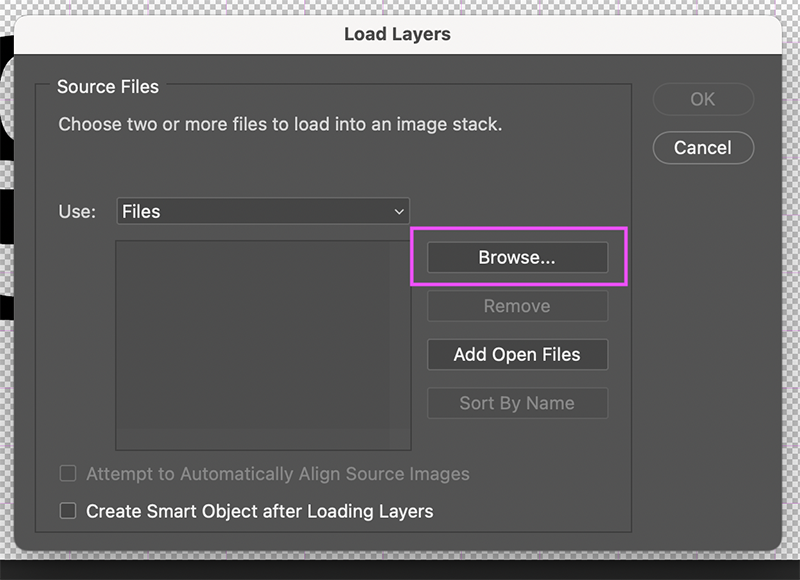
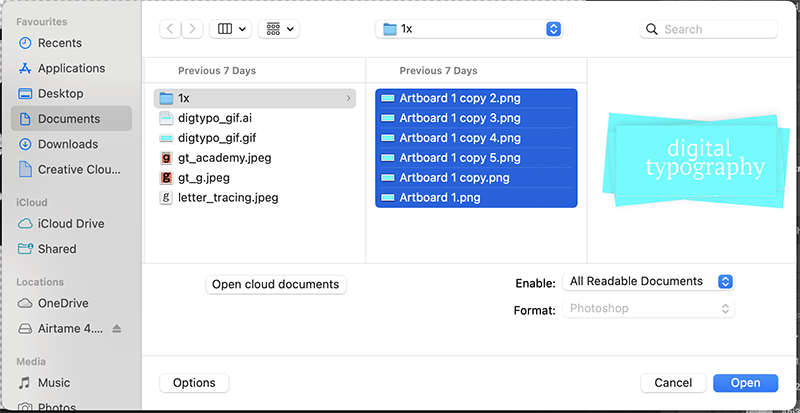
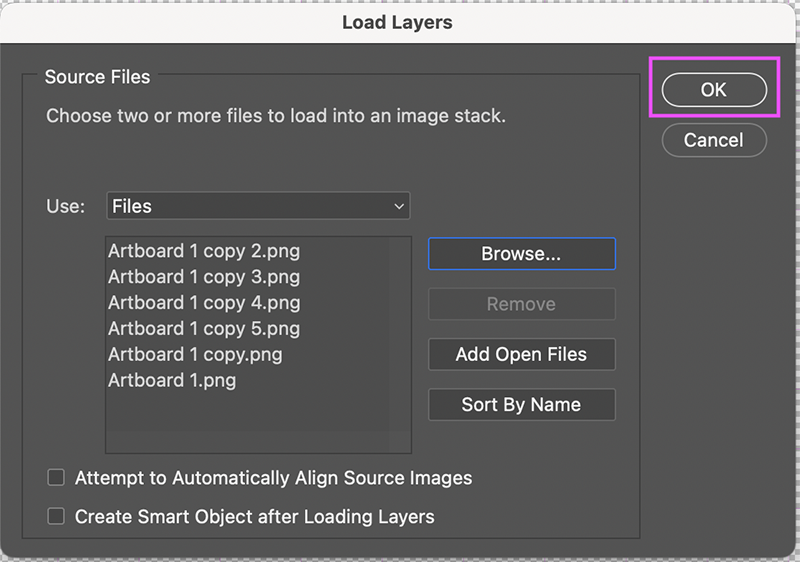
click 'browse' to access your files
2. Create Frame Animation
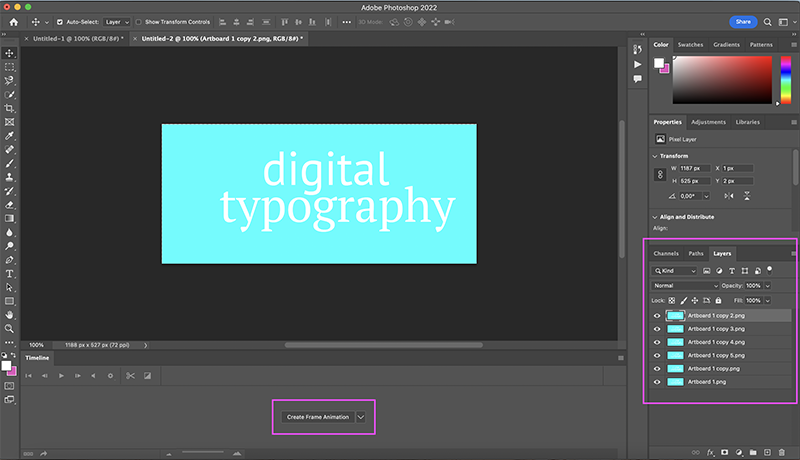
Open Timeline from Window> Timeline
click the "create frame animation" button to start a new animation>
the first frame is appearing in your timeline!
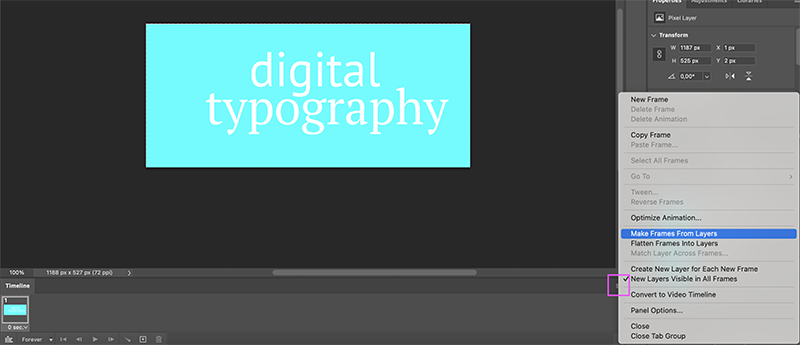
click the timeline's burger menu> make frames from layers>
all your layers are now frames in the timeline
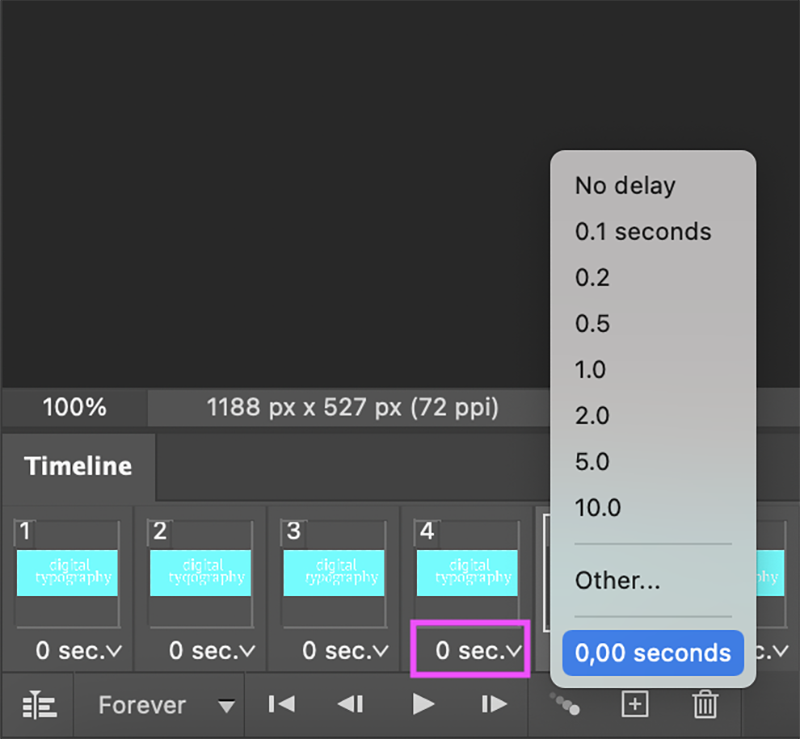
change the motion speed for each frame separately or for multiple frames
3. Export to GIF
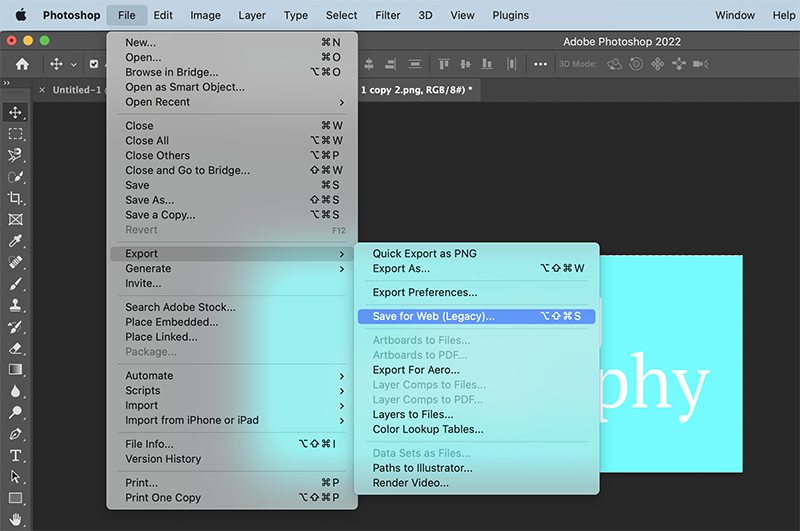
go to file> export> save for web
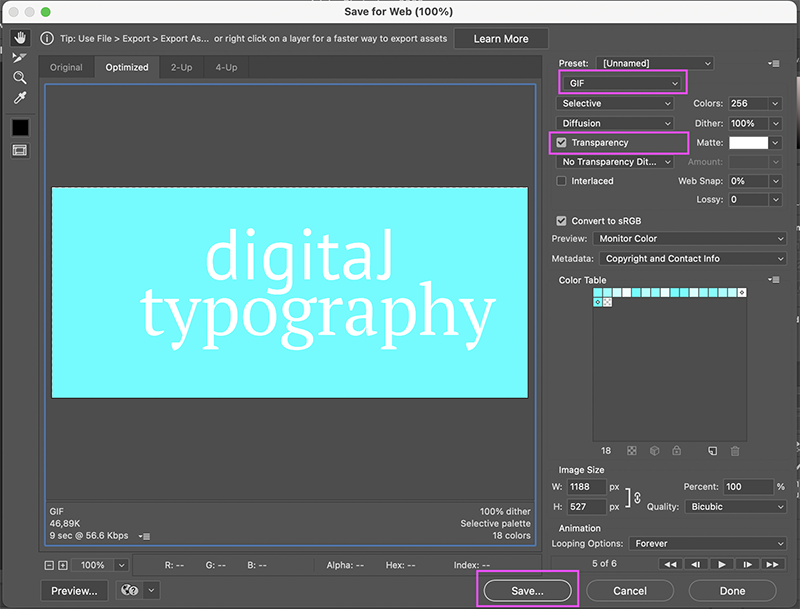
select "GIF" for format.
you can also create a transparent background by ticking the 'transparent' check-box.
save your gif!
