Difference between revisions of "Print Studio/screen printing"
(Created page with "== SCREEN PRINTING PREPARATIONS == When making a double-sided print ask yourself these questions and follow the instructions! === Before screen printing you need to digitally print your design on a transparent plastic sheet/ translucent tracing paper. You can do this in two sizes in A3 and A4, these can be found in drawers number 4-5 (A3) and 16-17 (A4). Remember the number of the drawer that you took your sheets from! === <br> File:Drawers.jpg <br> === After Air...") |
Tag: visualeditor-switched |
||
| (2 intermediate revisions by one other user not shown) | |||
| Line 1: | Line 1: | ||
<big>''' SCREEN PRINTING PREPARATIONS '''</big>''' | |||
=== Clear Film or Tracing Paper === | |||
=== | |||
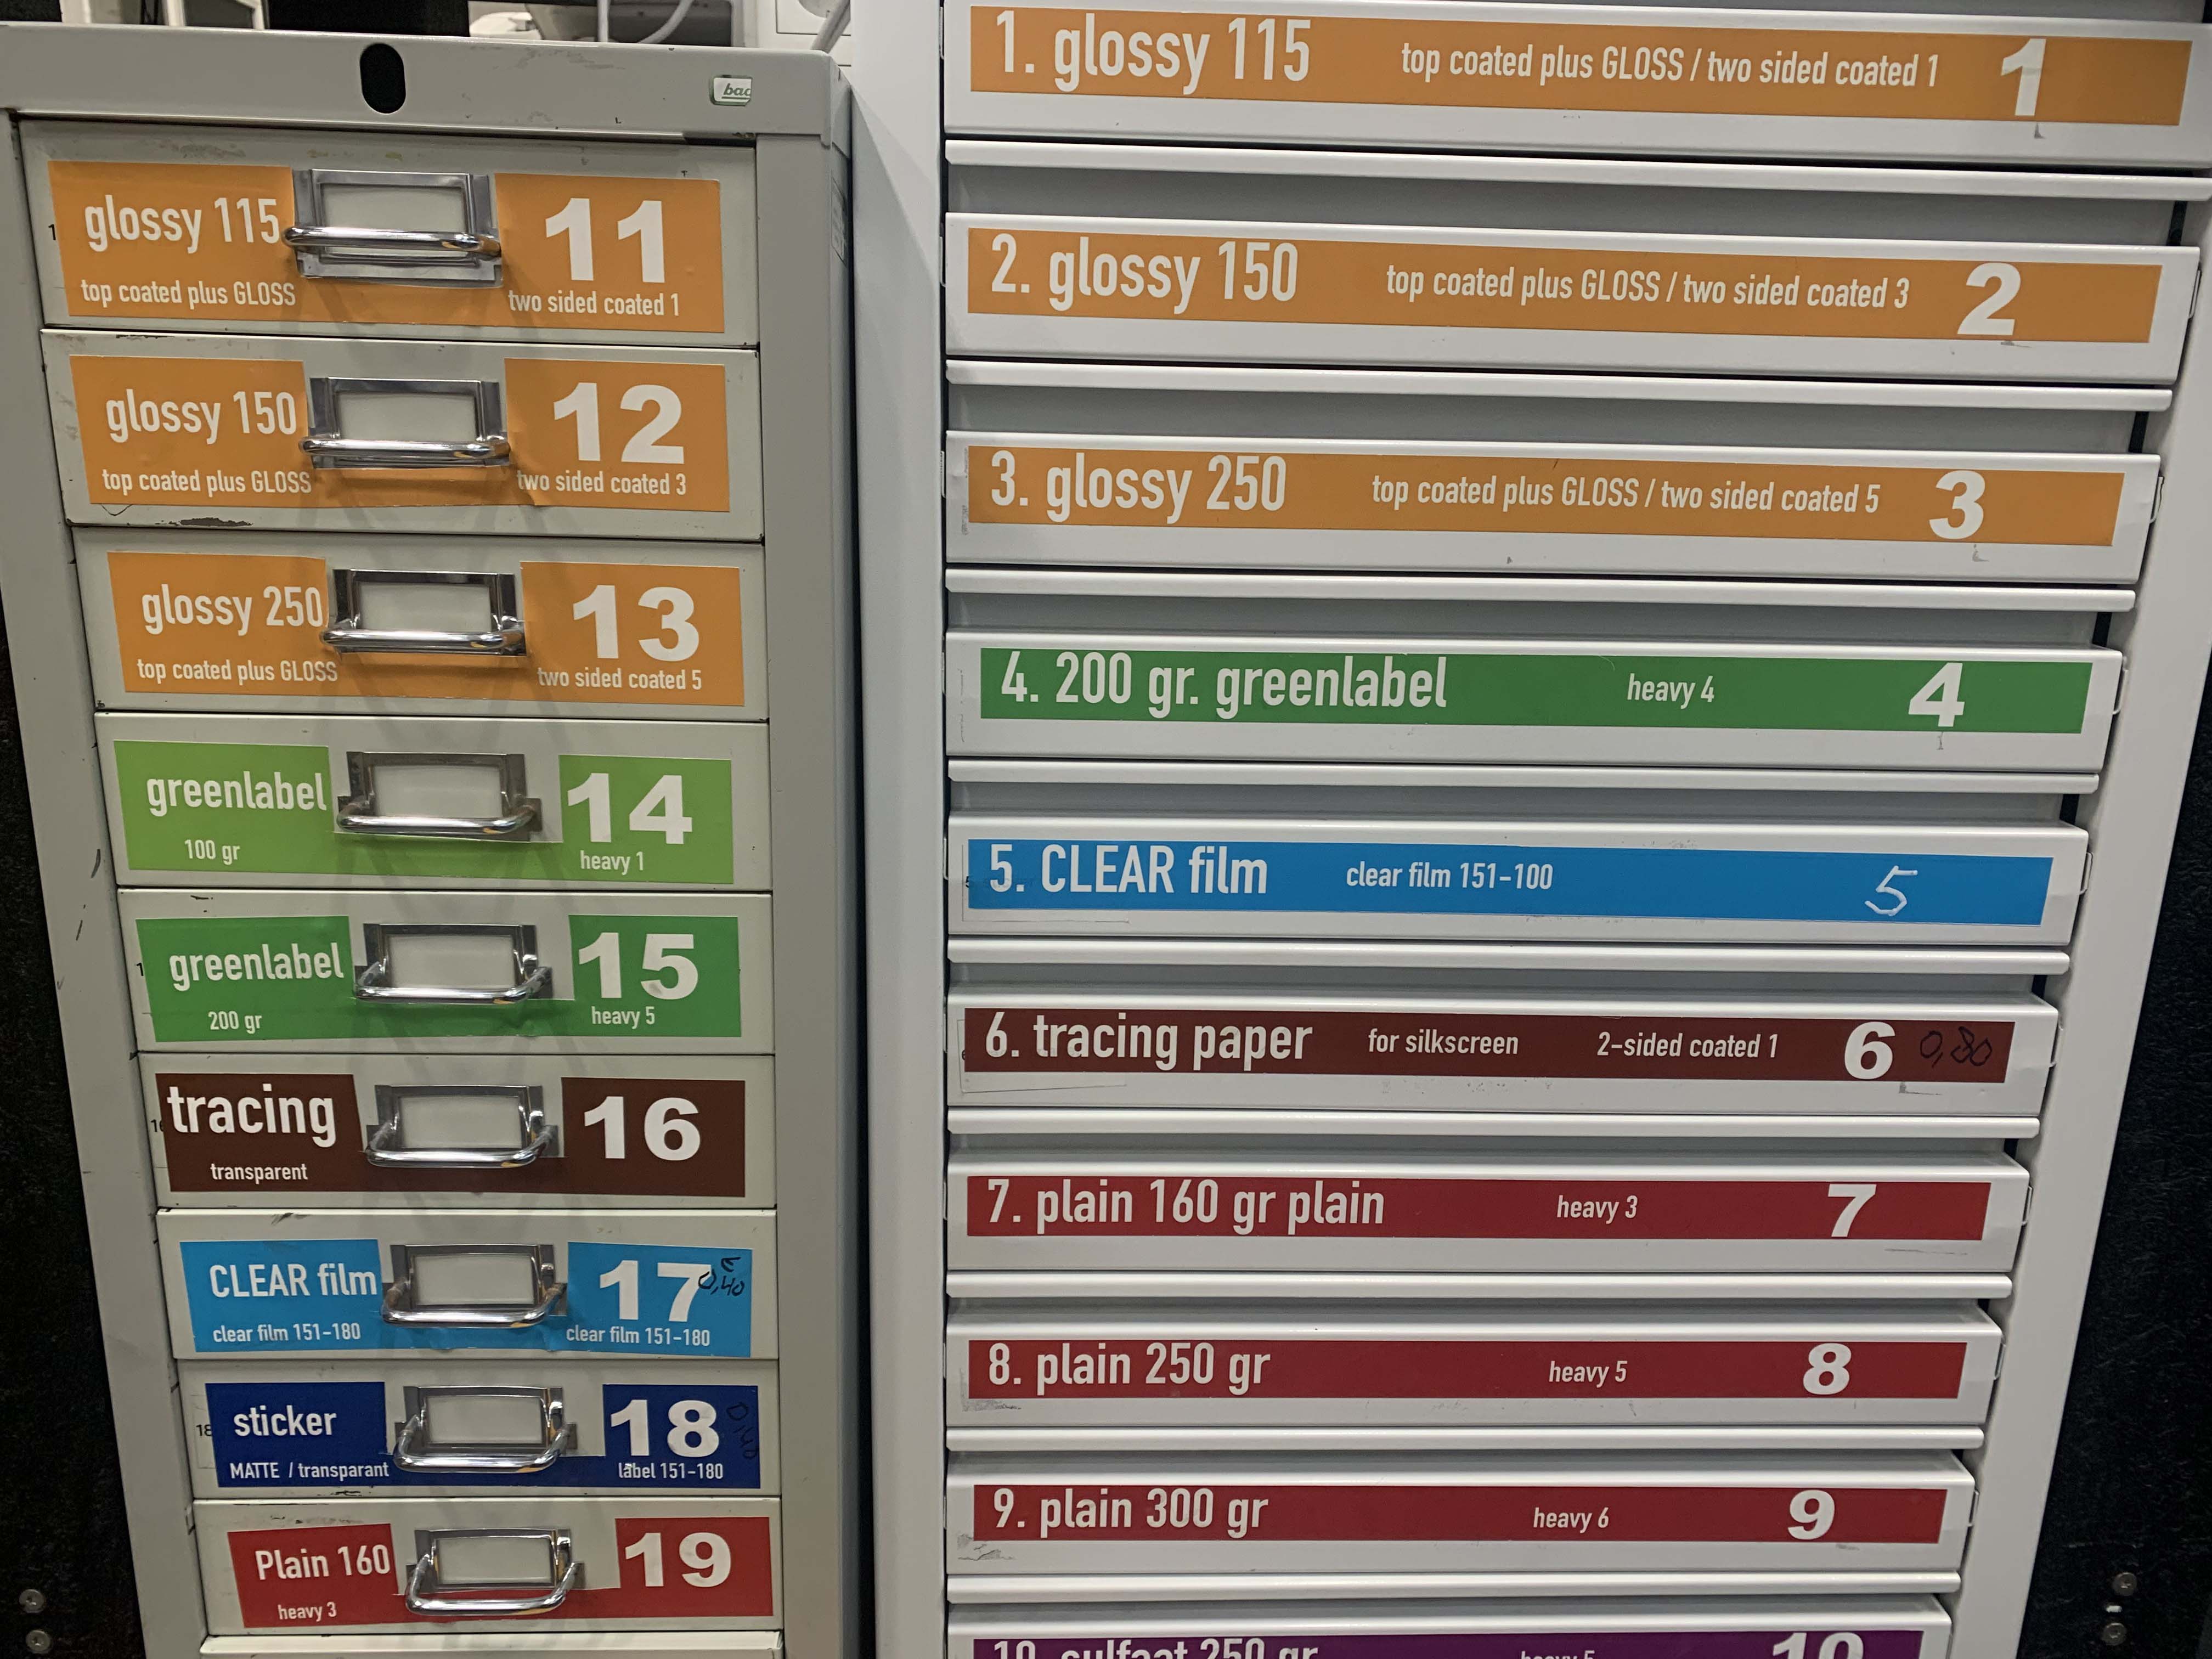
Before screen-printing you need to digitally print your design on CLEAR FILM which is a transparent plastic sheet or TRACING PAPER which is a translucent tracing paper. You can do this in two sizes in A3 and A4, these can be found in drawers number 5-6 (A3) and 16-17 (A4). Remember the number of the drawer that you took your sheets from! | |||
<br> | <br> | ||
[[File:Drawers.jpg]] | [[File:Drawers.jpg]] | ||
<br> | <br> | ||
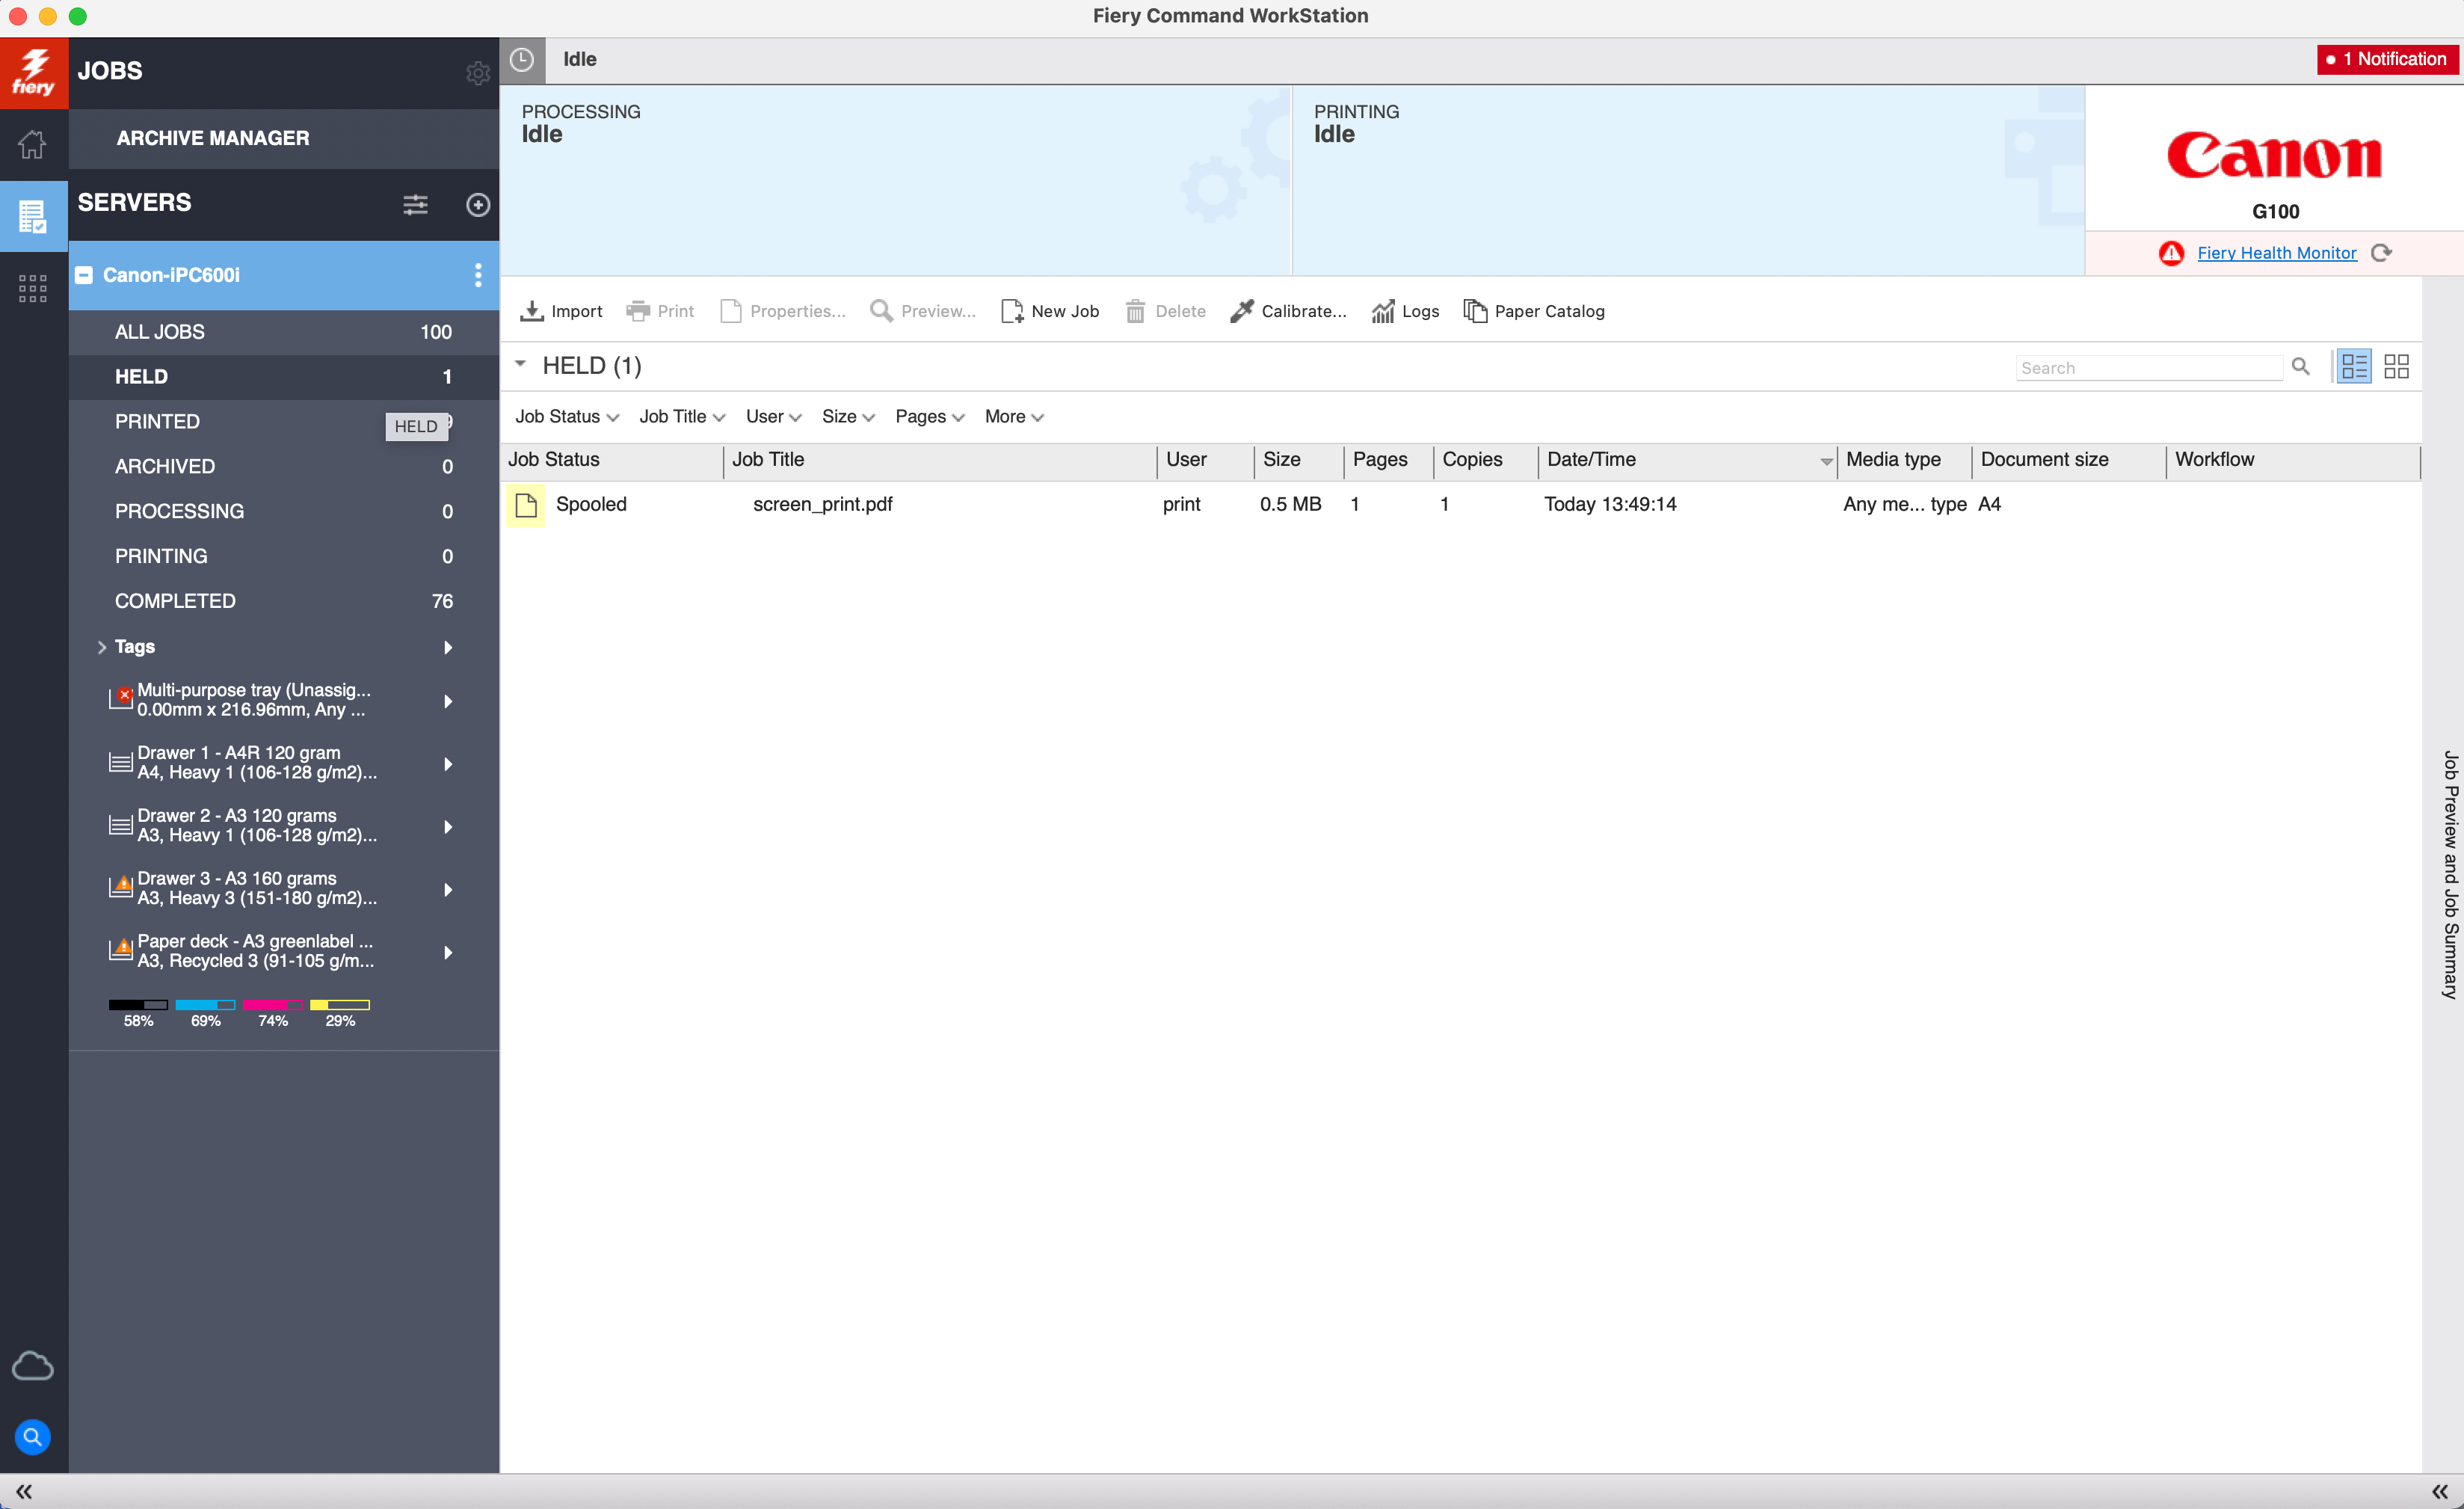
=== After Airdropping your file to the computer (eps…PrintR or eps…PrintL) you can approach by opening the Fiery Command WorkStation. (the red and white lightning icon) Within the WorkStation drop you file to the Held folder. | === Airdrop and Fiery Command WorkStation === | ||
After Airdropping your file to the computer (eps…PrintR or eps…PrintL) you can approach by opening the Fiery Command WorkStation. (the red and white lightning icon) Within the WorkStation drop you file to the Held folder. | |||
<br> | <br> | ||
| Line 17: | Line 18: | ||
<br> | <br> | ||
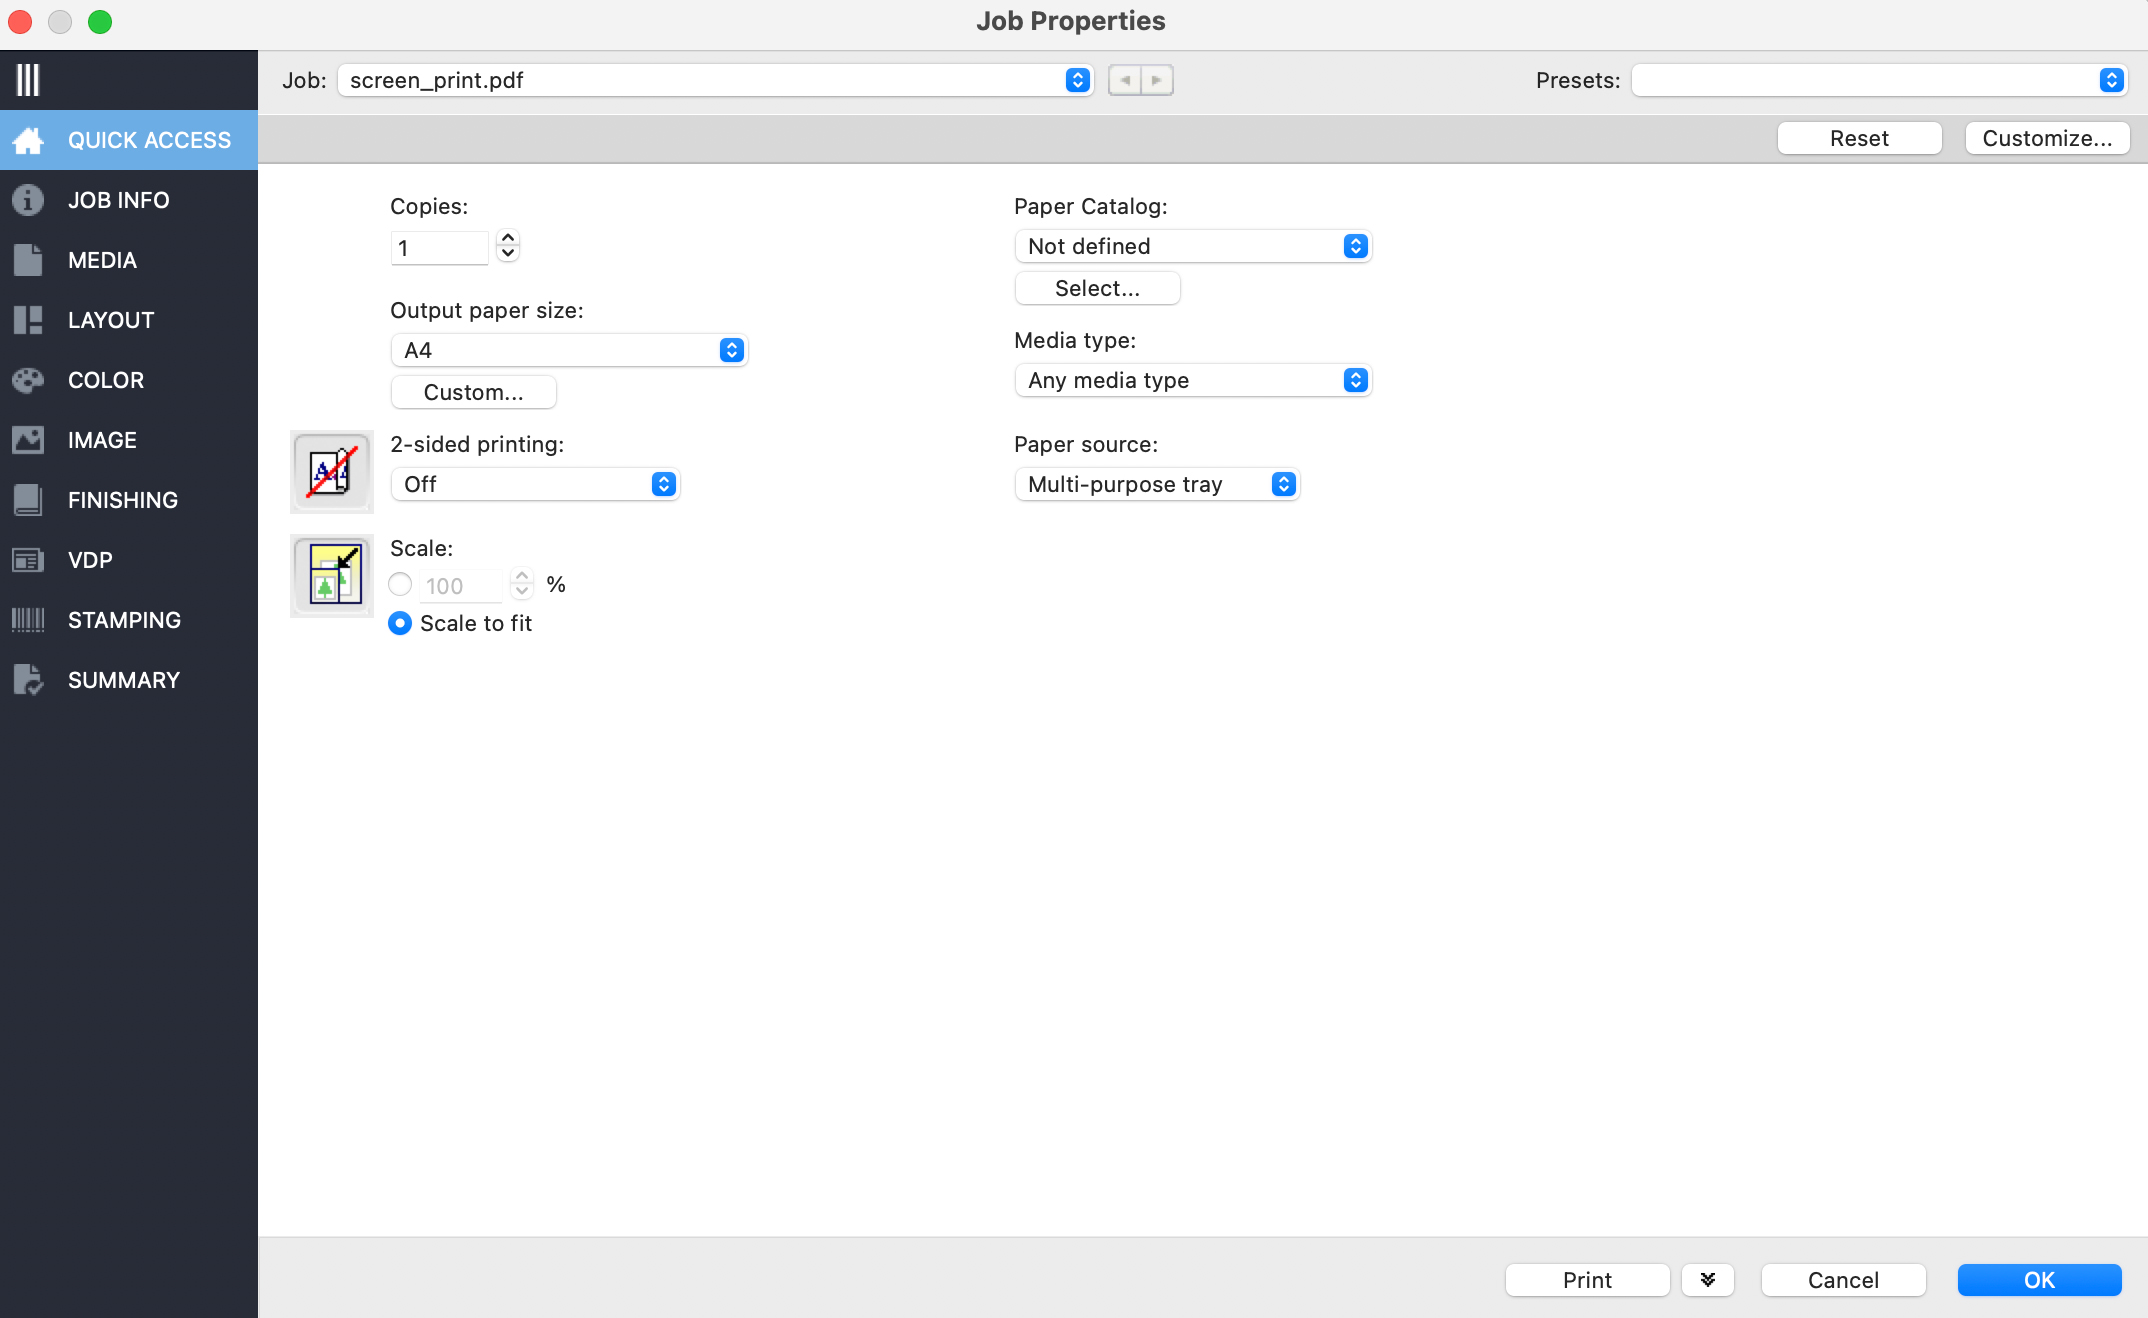
=== Double click on the file. This will open the Job Properties of the file and you can click on Quick Access to find all the settings that you will need for the following steps. | === Job Properties === | ||
Double click on the file. This will open the Job Properties of the file and you can click on Quick Access to find all the settings that you will need for the following steps. | |||
<br> | <br> | ||
| Line 23: | Line 26: | ||
<br> | <br> | ||
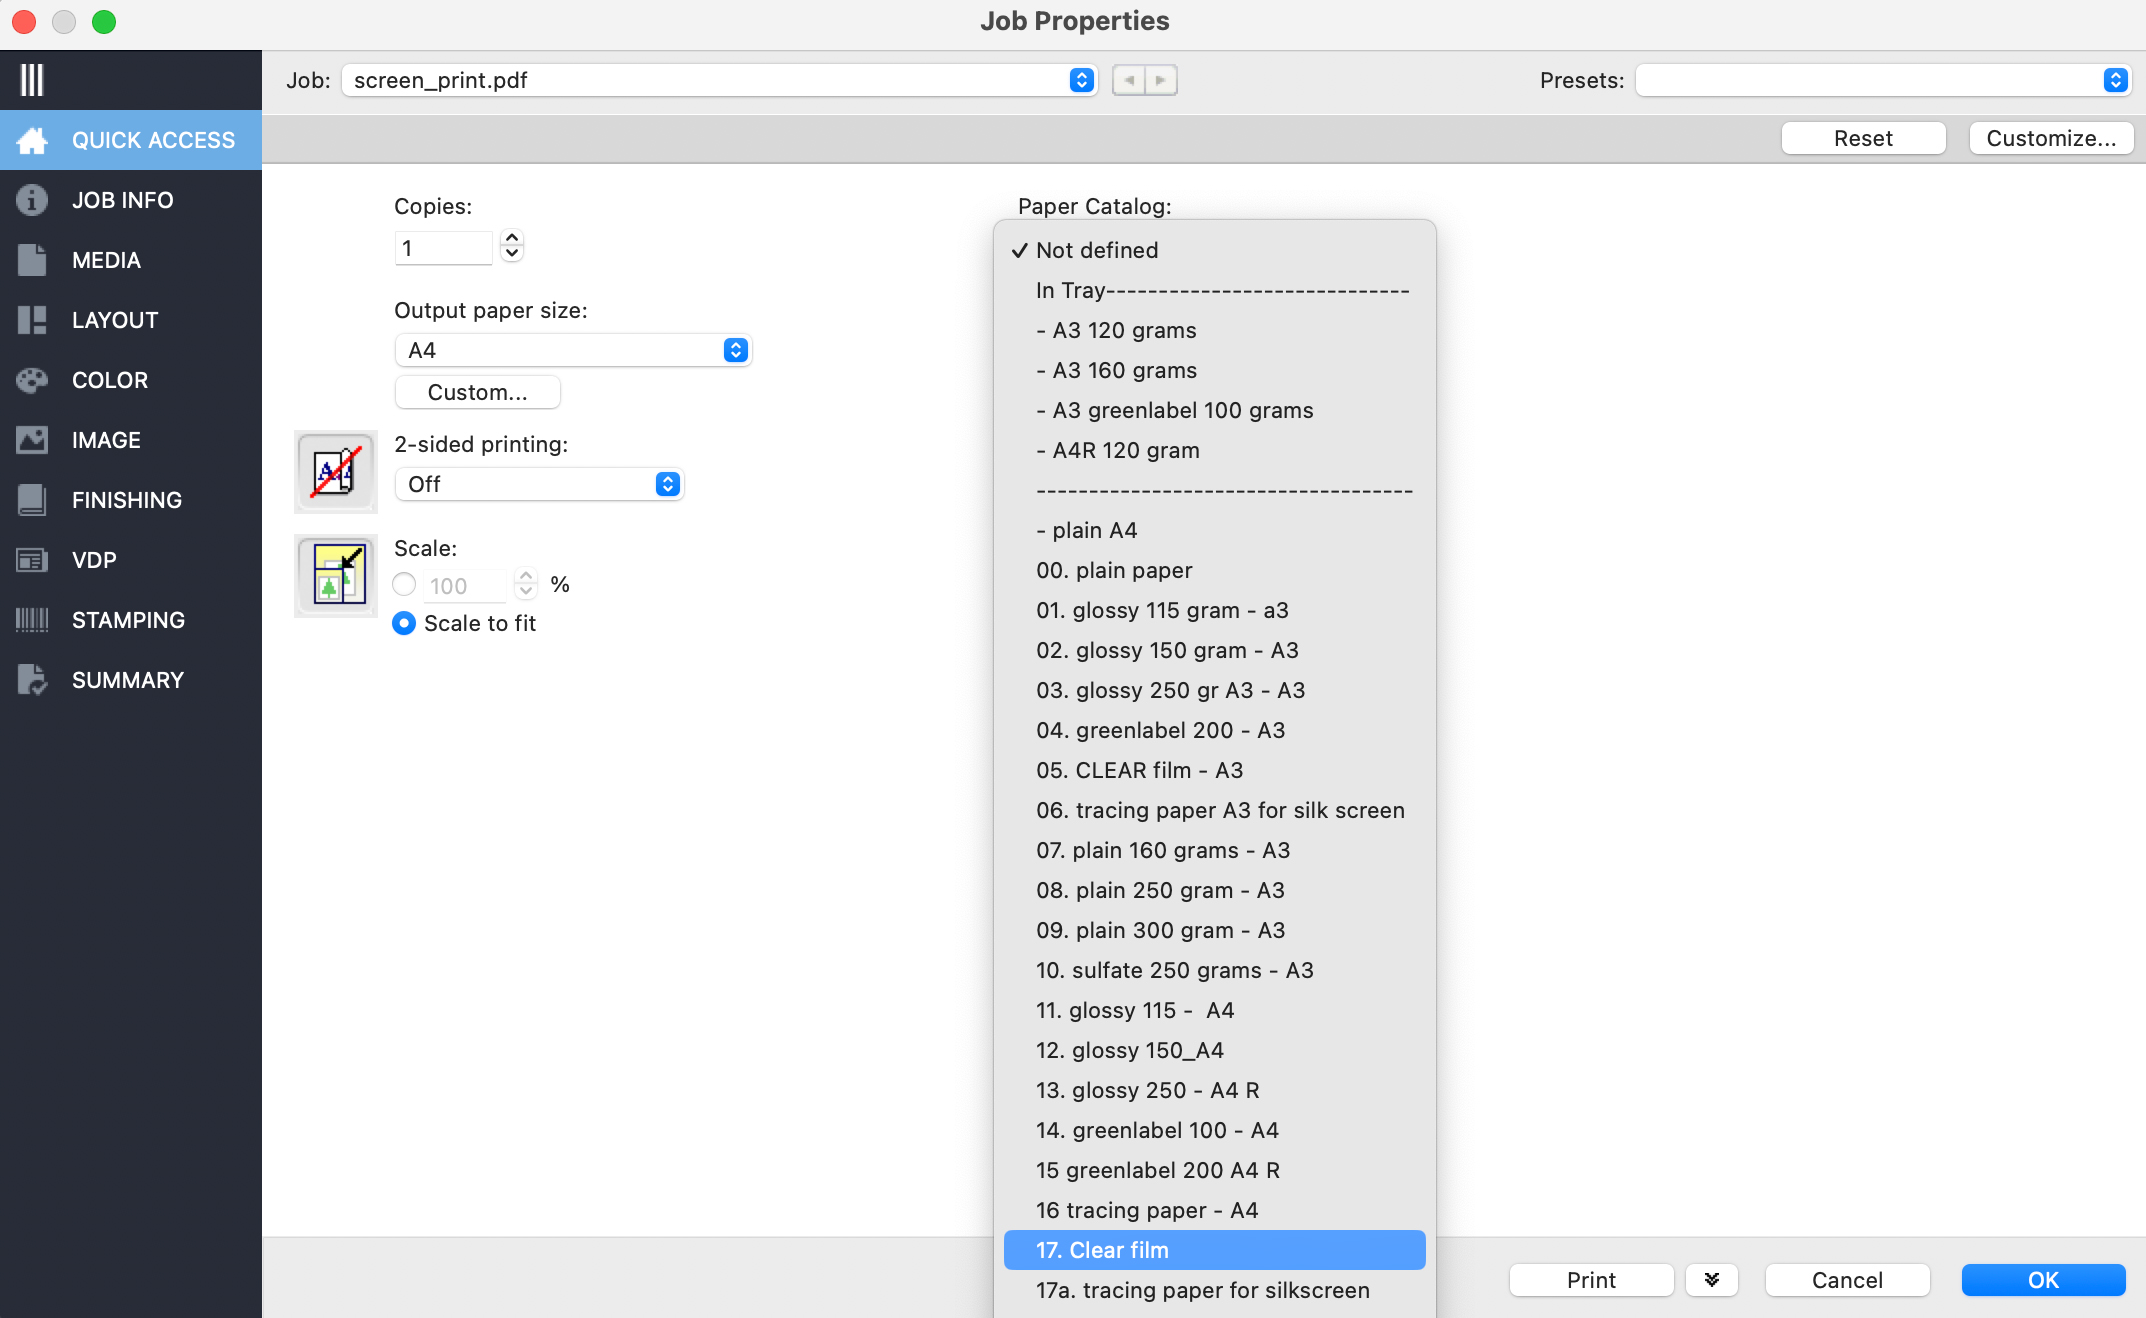
=== Open the Paper Catalogue and look for the same number that the drawer you took your paper from had too. (4-5, 16-17) | === Catalogue === | ||
Open the Paper Catalogue and look for the same number that the drawer you took your paper from had too. (4-5, 16-17) | |||
Press print and go to the Printer. | |||
<br> | <br> | ||
| Line 29: | Line 35: | ||
<br> | <br> | ||
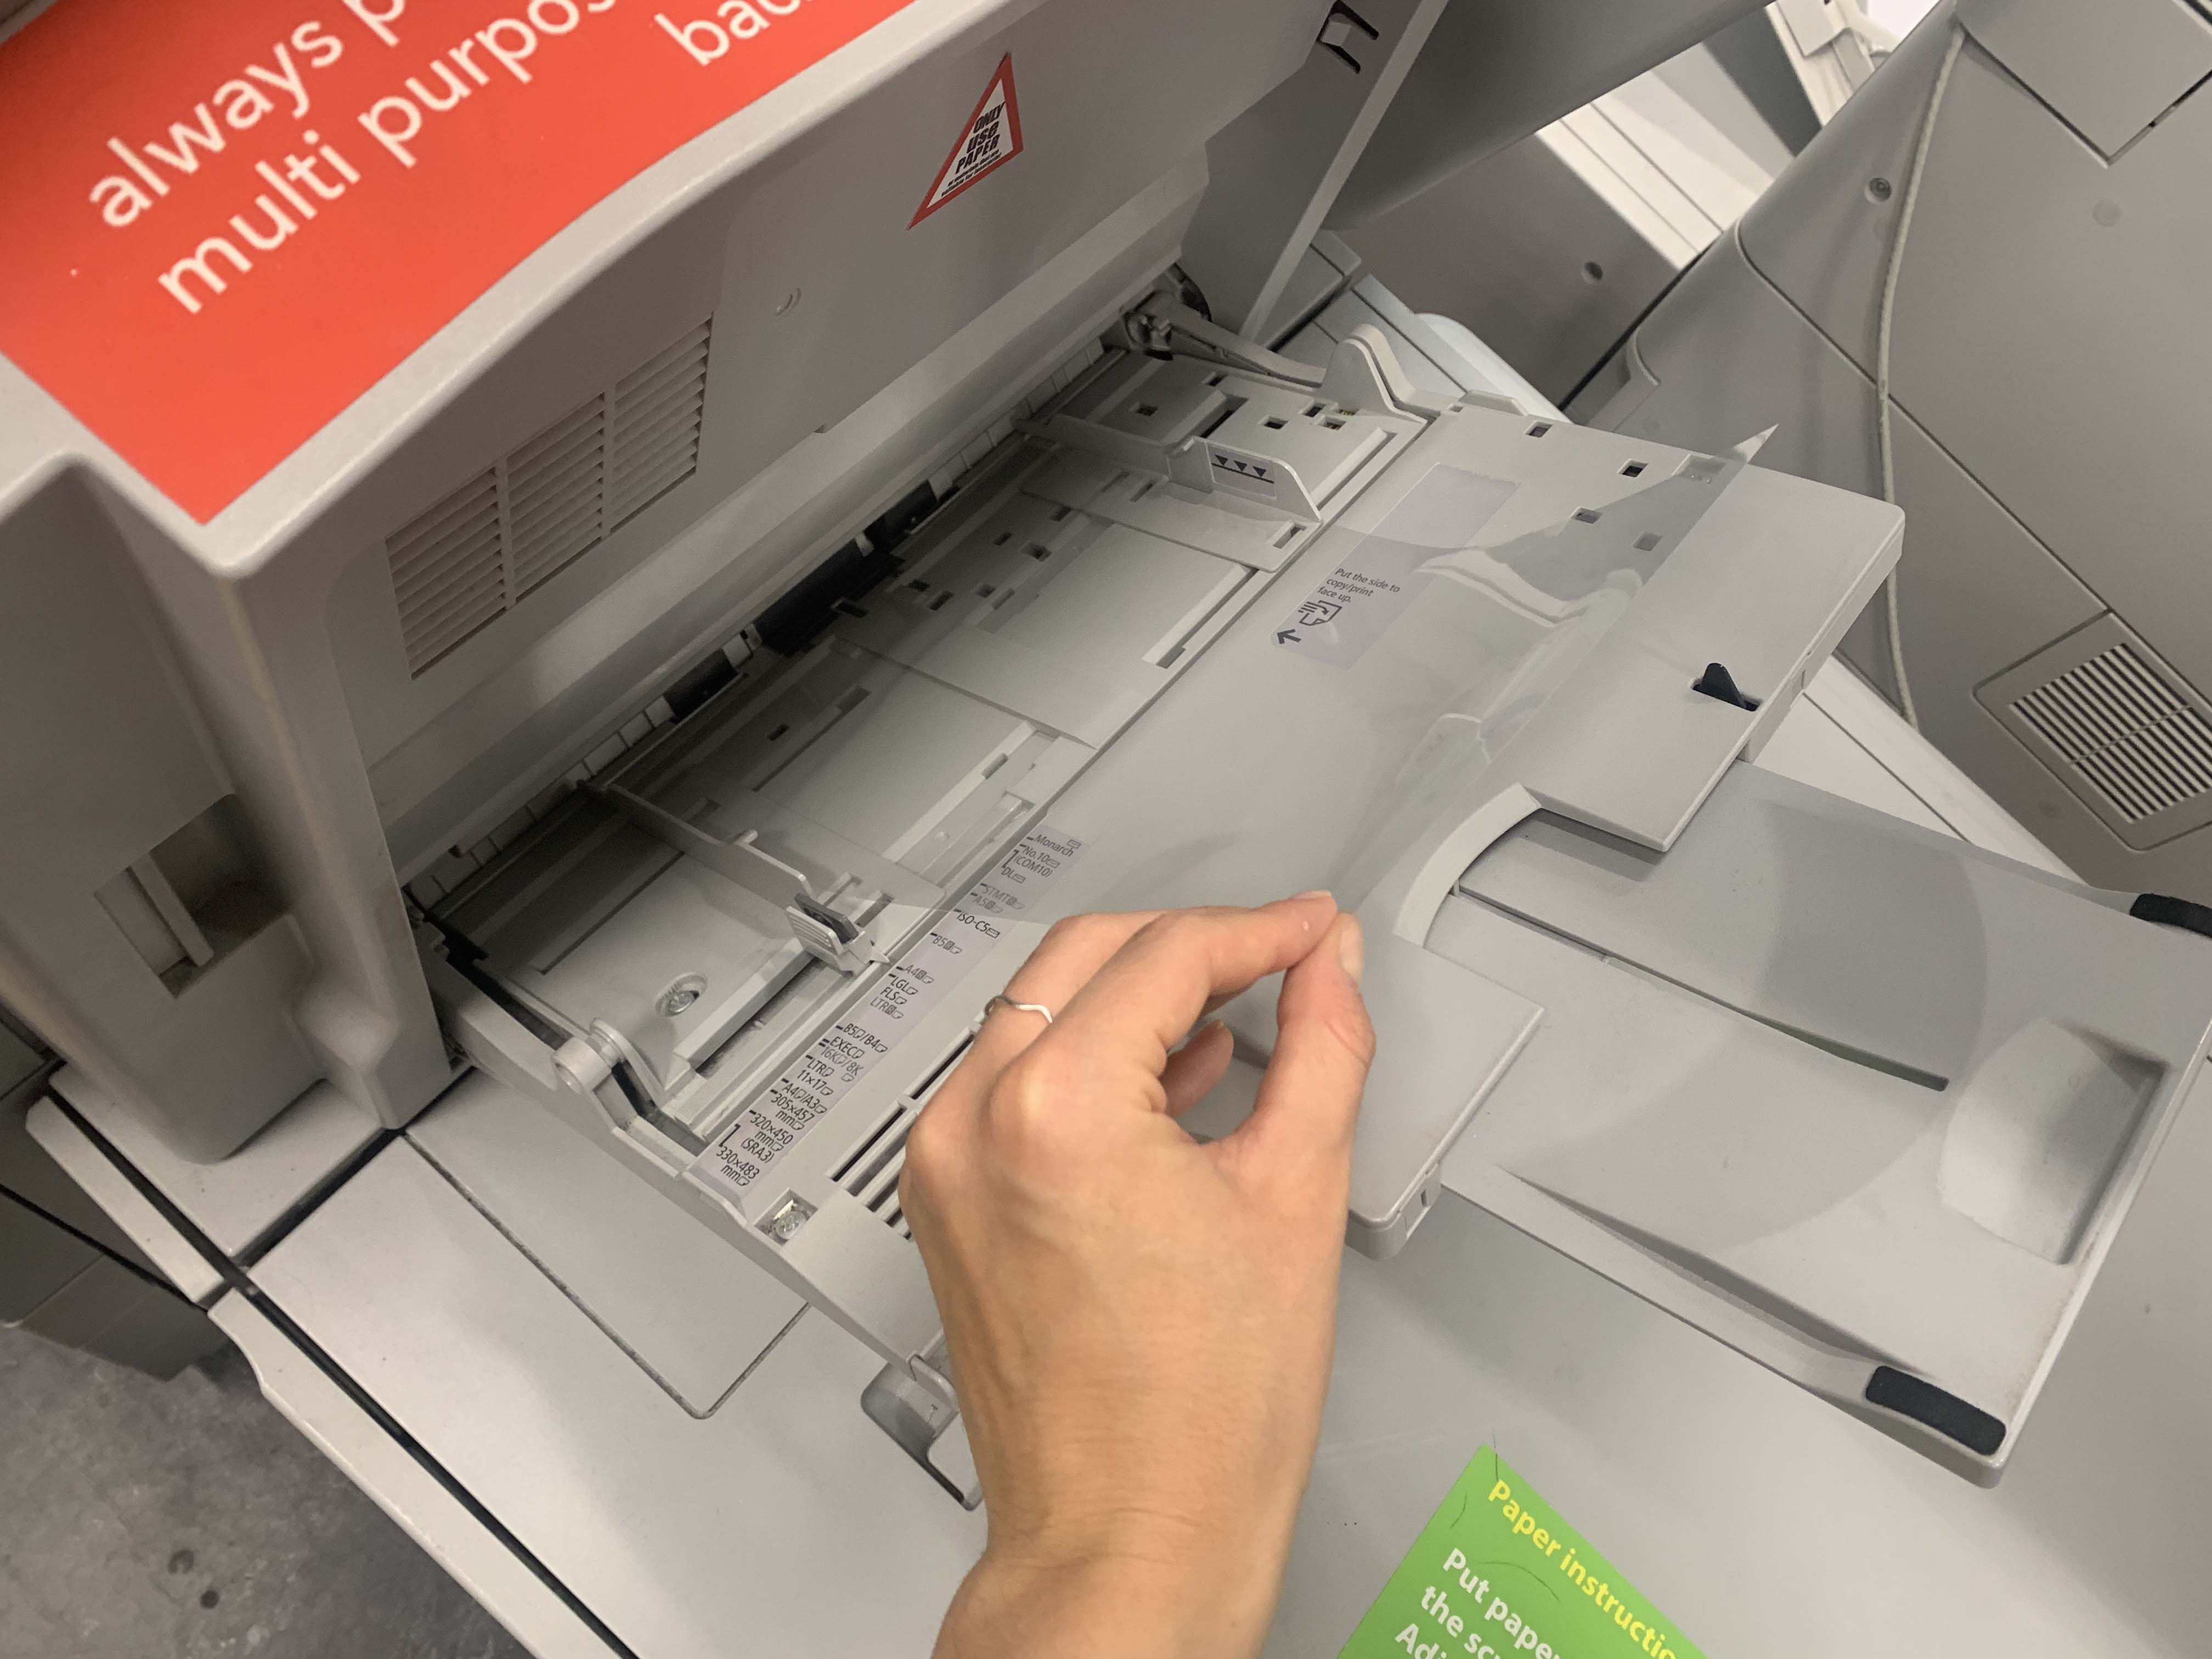
=== | === Add paper to the Canon printer === | ||
<br> | <br> | ||
Put your paper in the machine. | |||
<br> | <br> | ||
| Line 39: | Line 44: | ||
<br> | <br> | ||
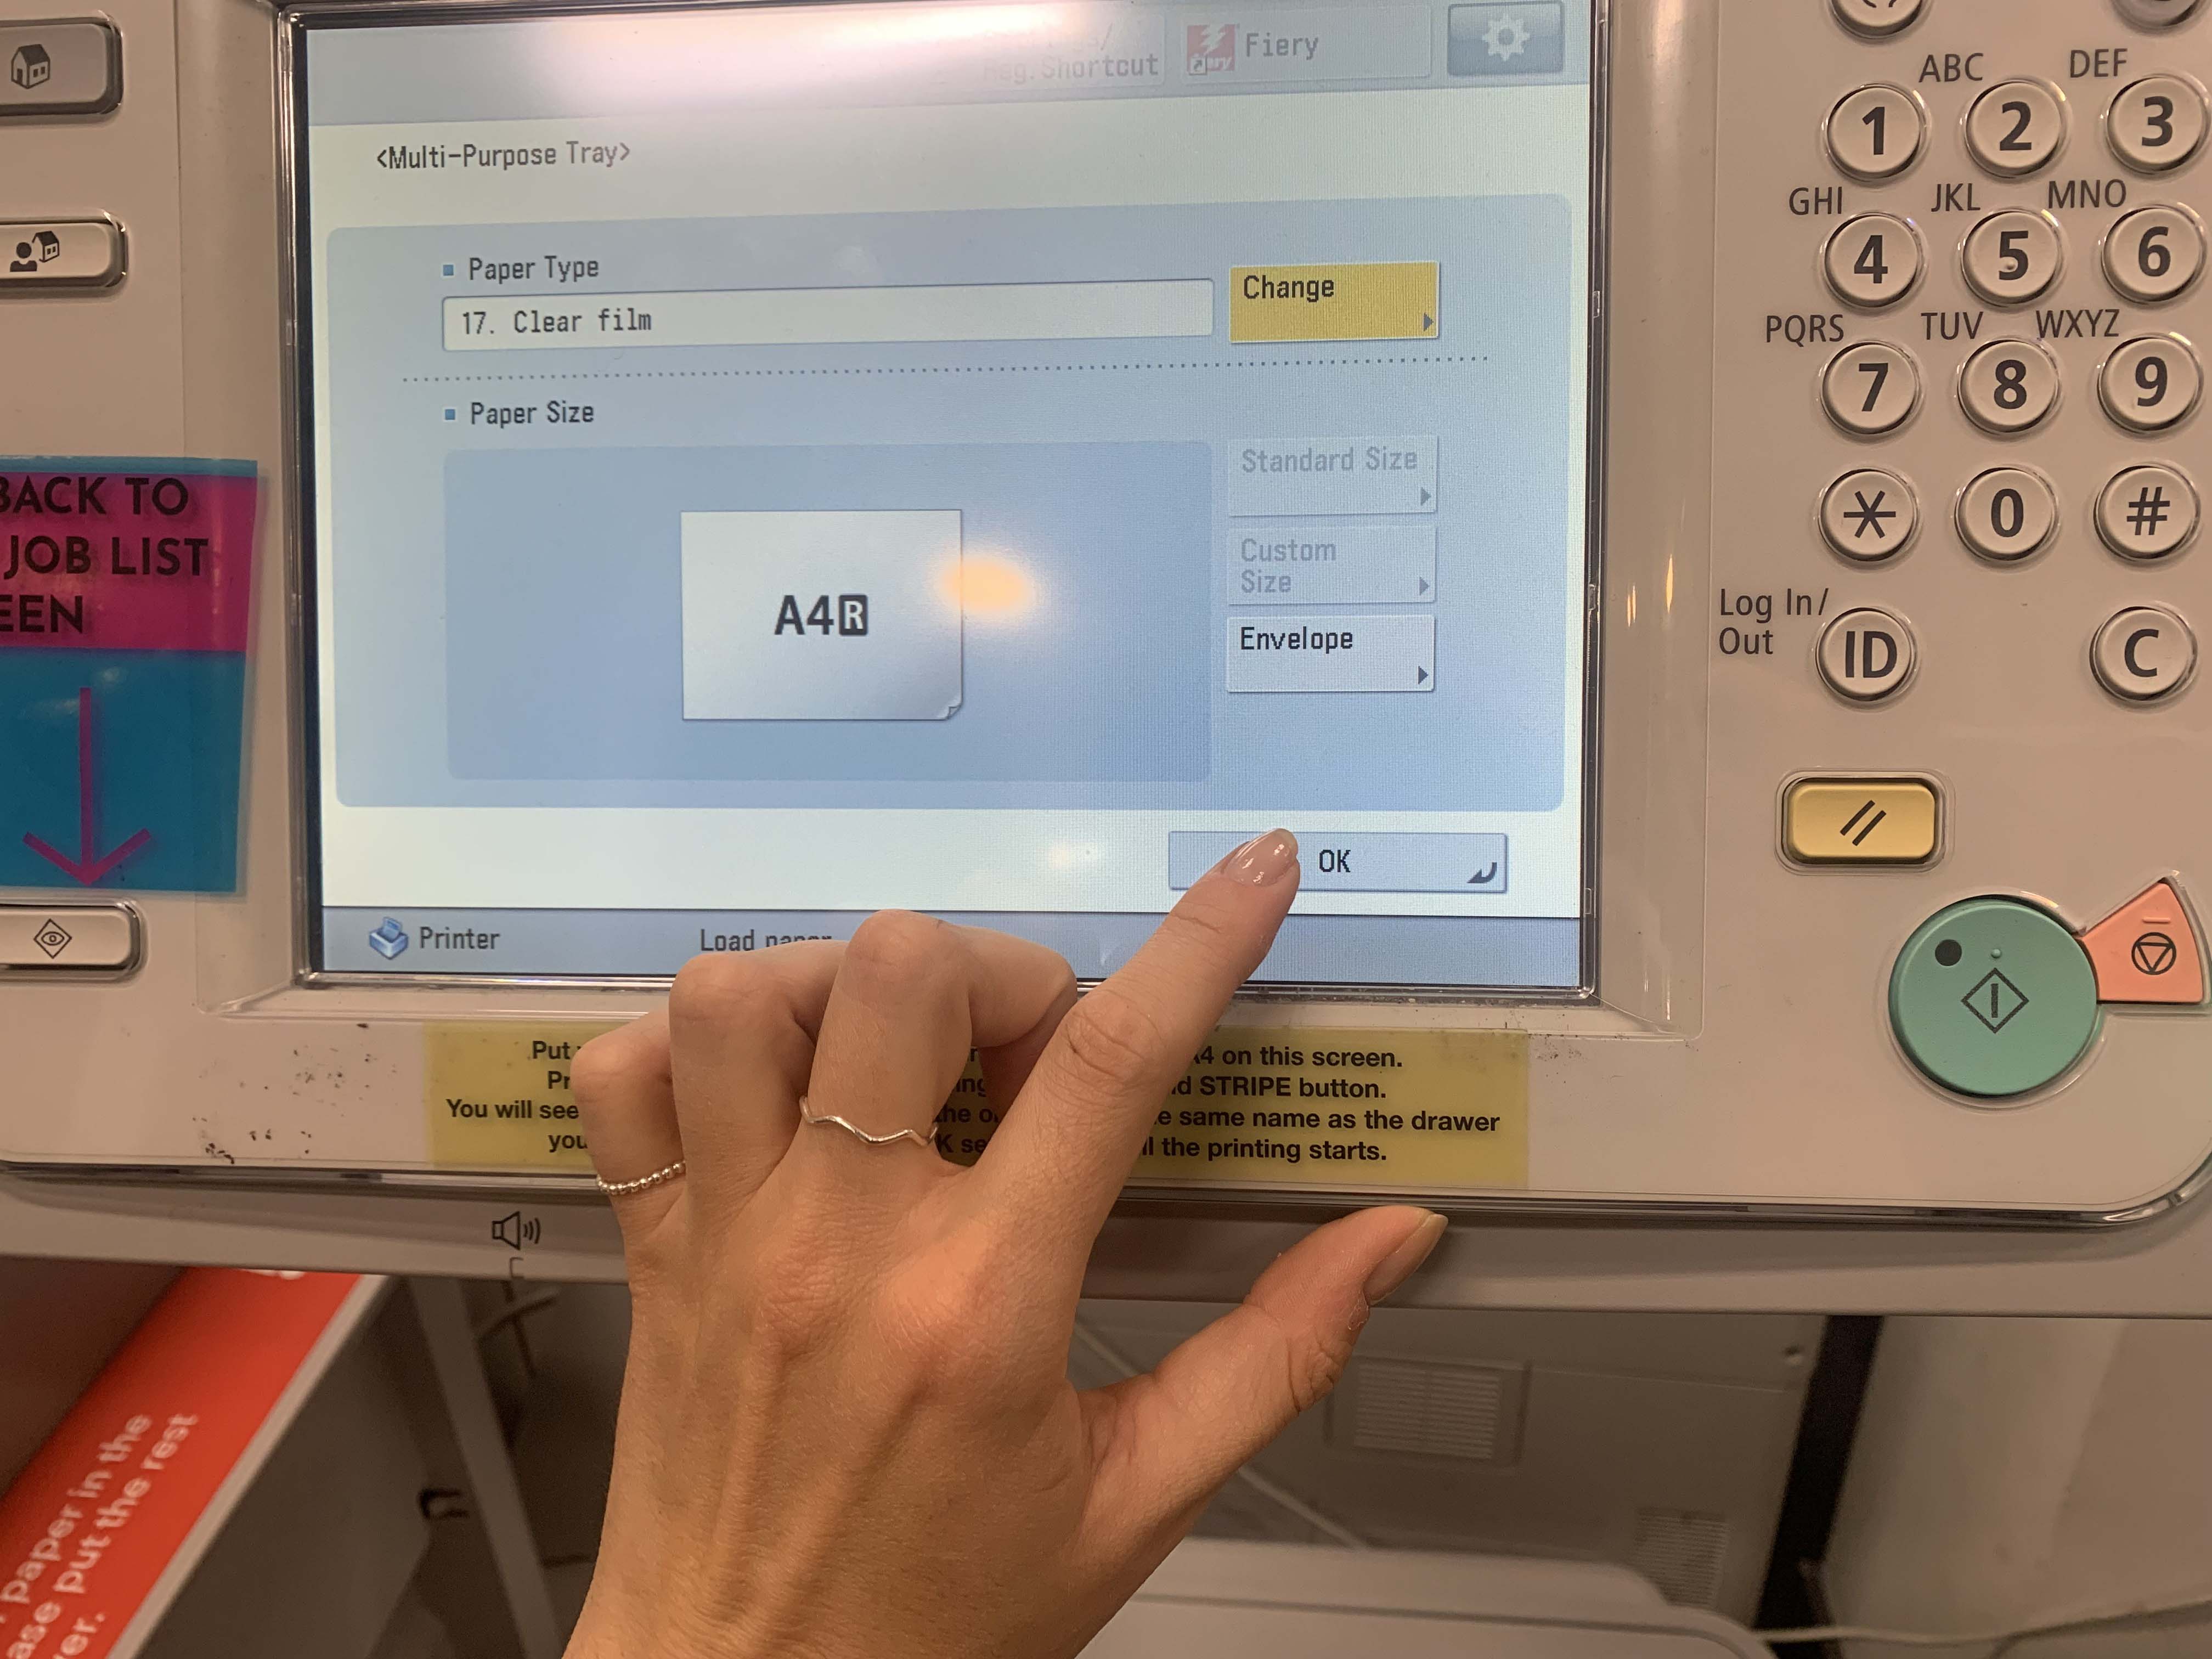
=== The printer will ask you to set your choice of paper. Press change and look for the same number again. (4-5, 16-17) | === Paper source === | ||
The printer will ask you to set your choice of paper. Press change and look for the same number again. (4-5, 16-17) | |||
<br> | <br> | ||
| Line 49: | Line 56: | ||
<br> | <br> | ||
=== Press OK and OK again. Your prints are now being processed. | === Printing === | ||
Press OK and OK again. Your prints are now being processed. | |||
<br> | <br> | ||
Latest revision as of 08:10, 15 September 2023
SCREEN PRINTING PREPARATIONS
Clear Film or Tracing Paper
Before screen-printing you need to digitally print your design on CLEAR FILM which is a transparent plastic sheet or TRACING PAPER which is a translucent tracing paper. You can do this in two sizes in A3 and A4, these can be found in drawers number 5-6 (A3) and 16-17 (A4). Remember the number of the drawer that you took your sheets from!
Airdrop and Fiery Command WorkStation
After Airdropping your file to the computer (eps…PrintR or eps…PrintL) you can approach by opening the Fiery Command WorkStation. (the red and white lightning icon) Within the WorkStation drop you file to the Held folder.
Job Properties
Double click on the file. This will open the Job Properties of the file and you can click on Quick Access to find all the settings that you will need for the following steps.
Catalogue
Open the Paper Catalogue and look for the same number that the drawer you took your paper from had too. (4-5, 16-17) Press print and go to the Printer.
Add paper to the Canon printer
Put your paper in the machine.
Paper source
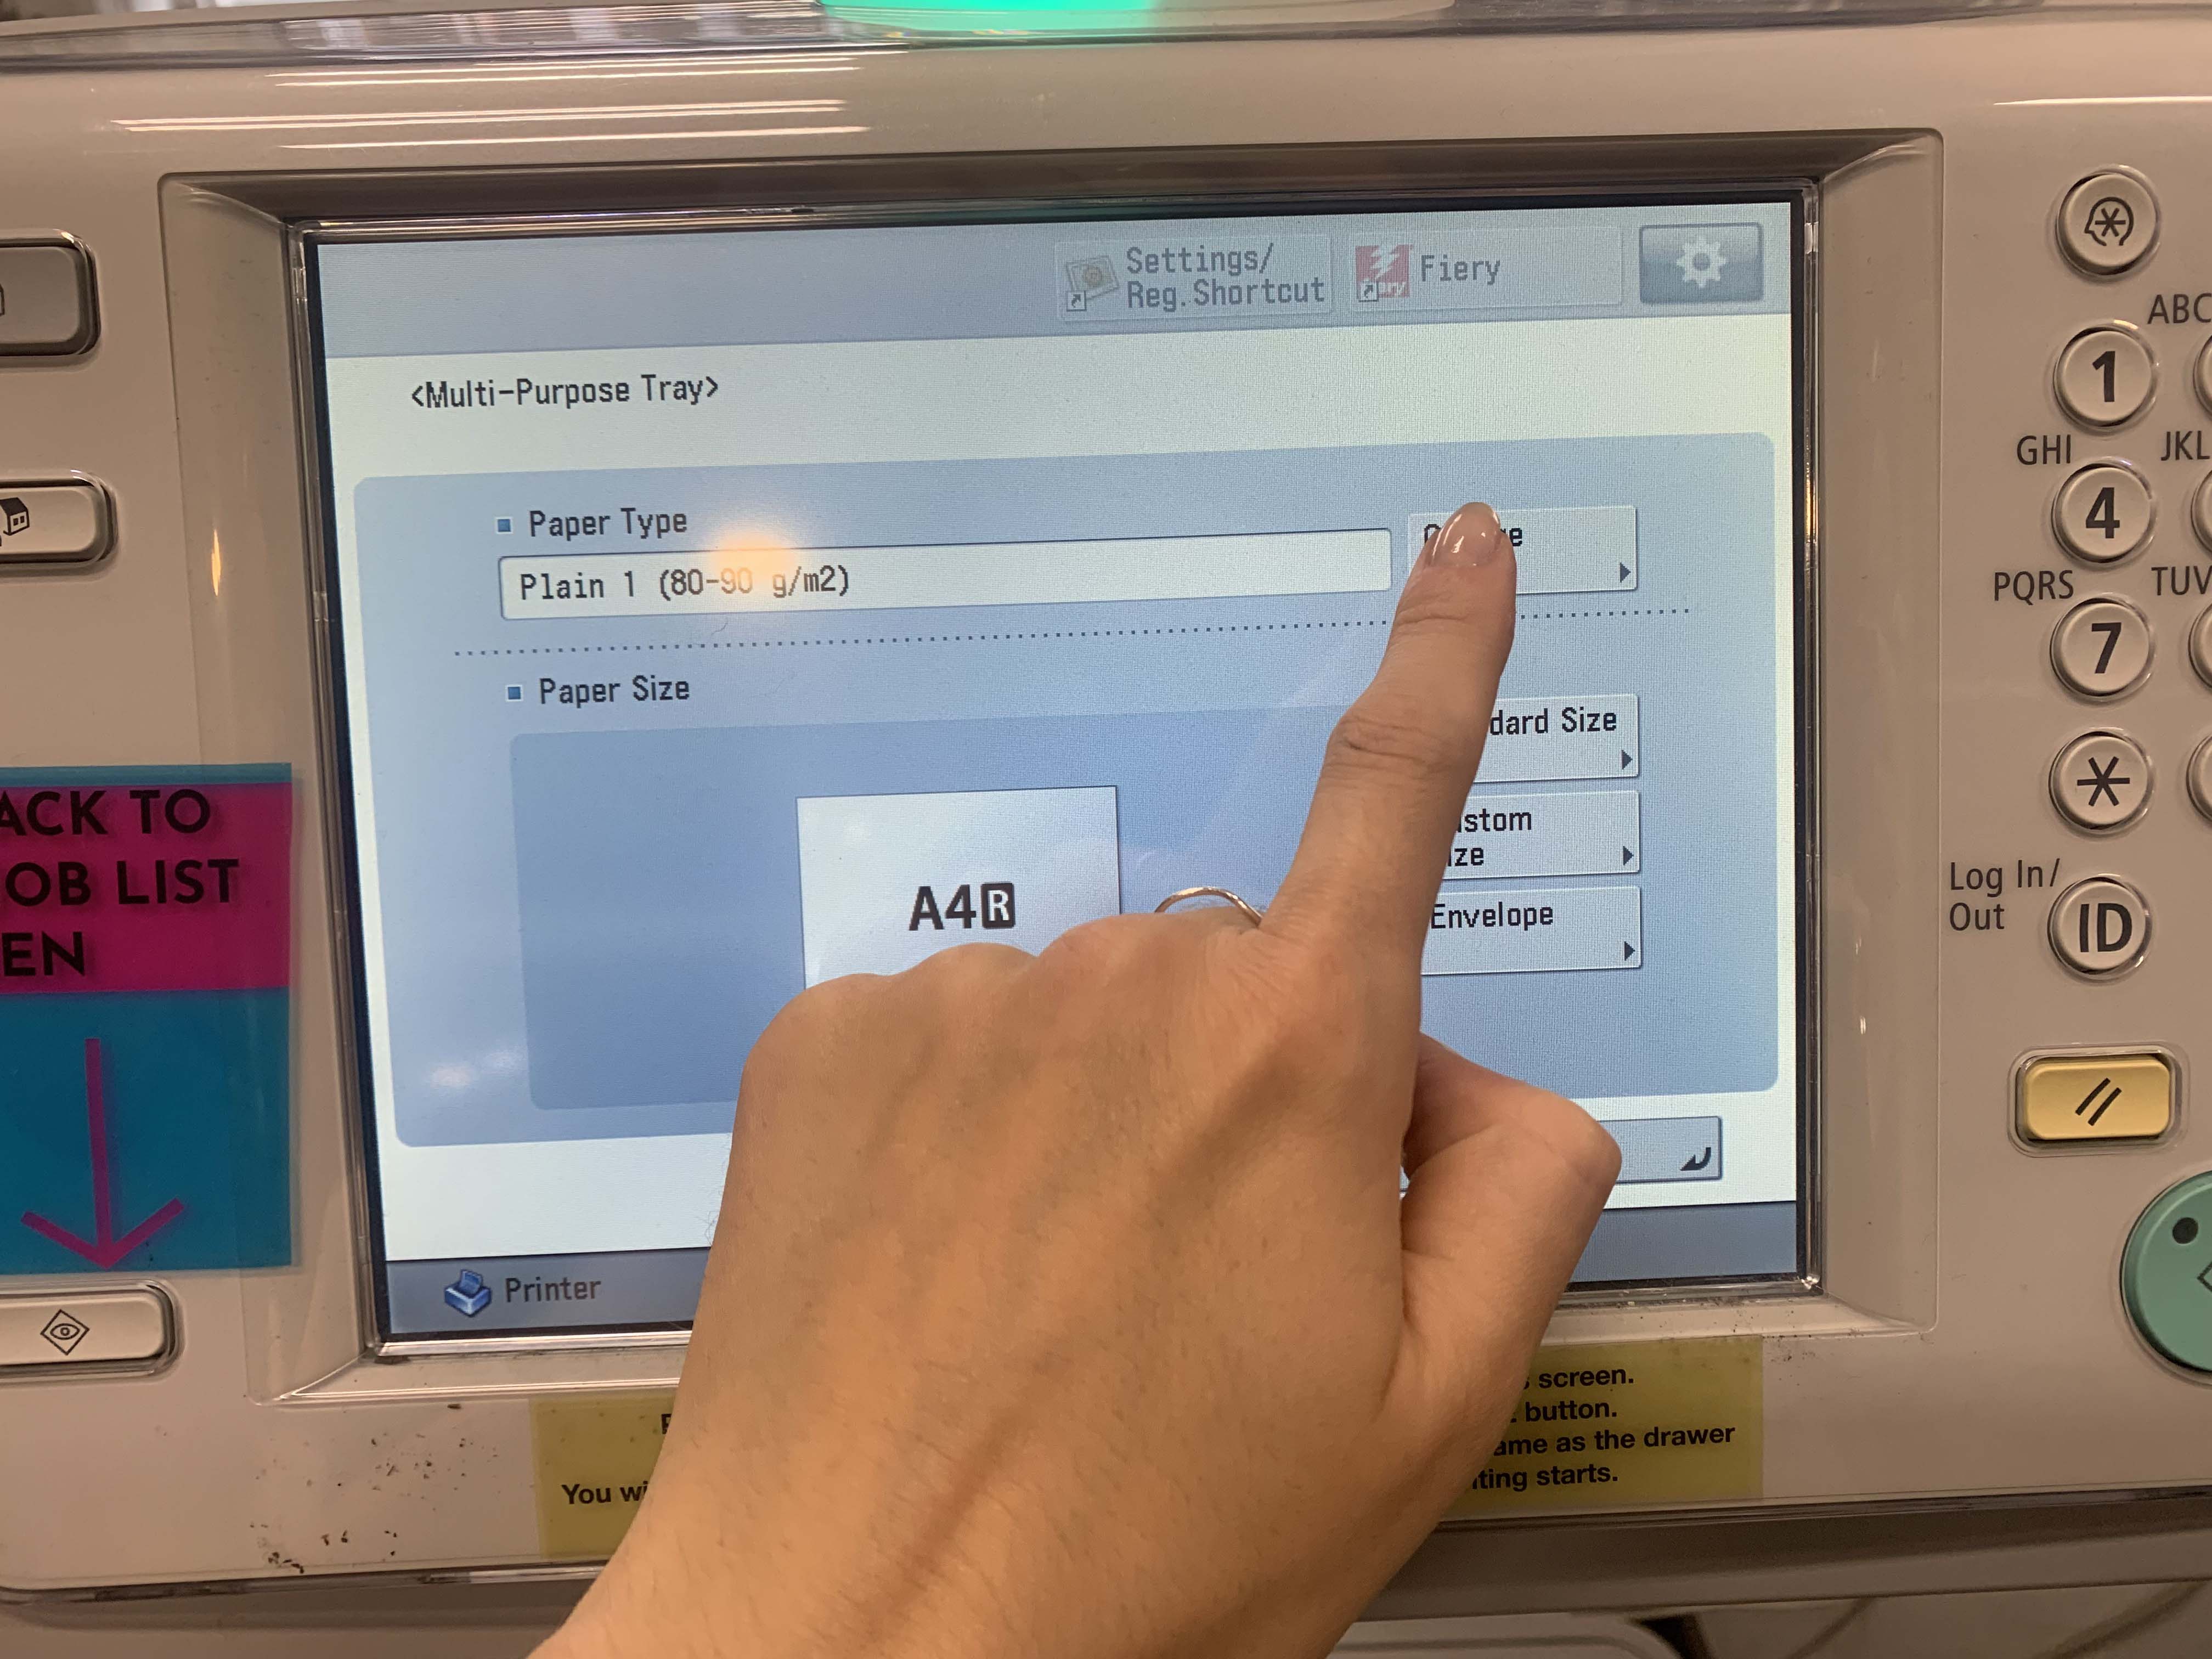
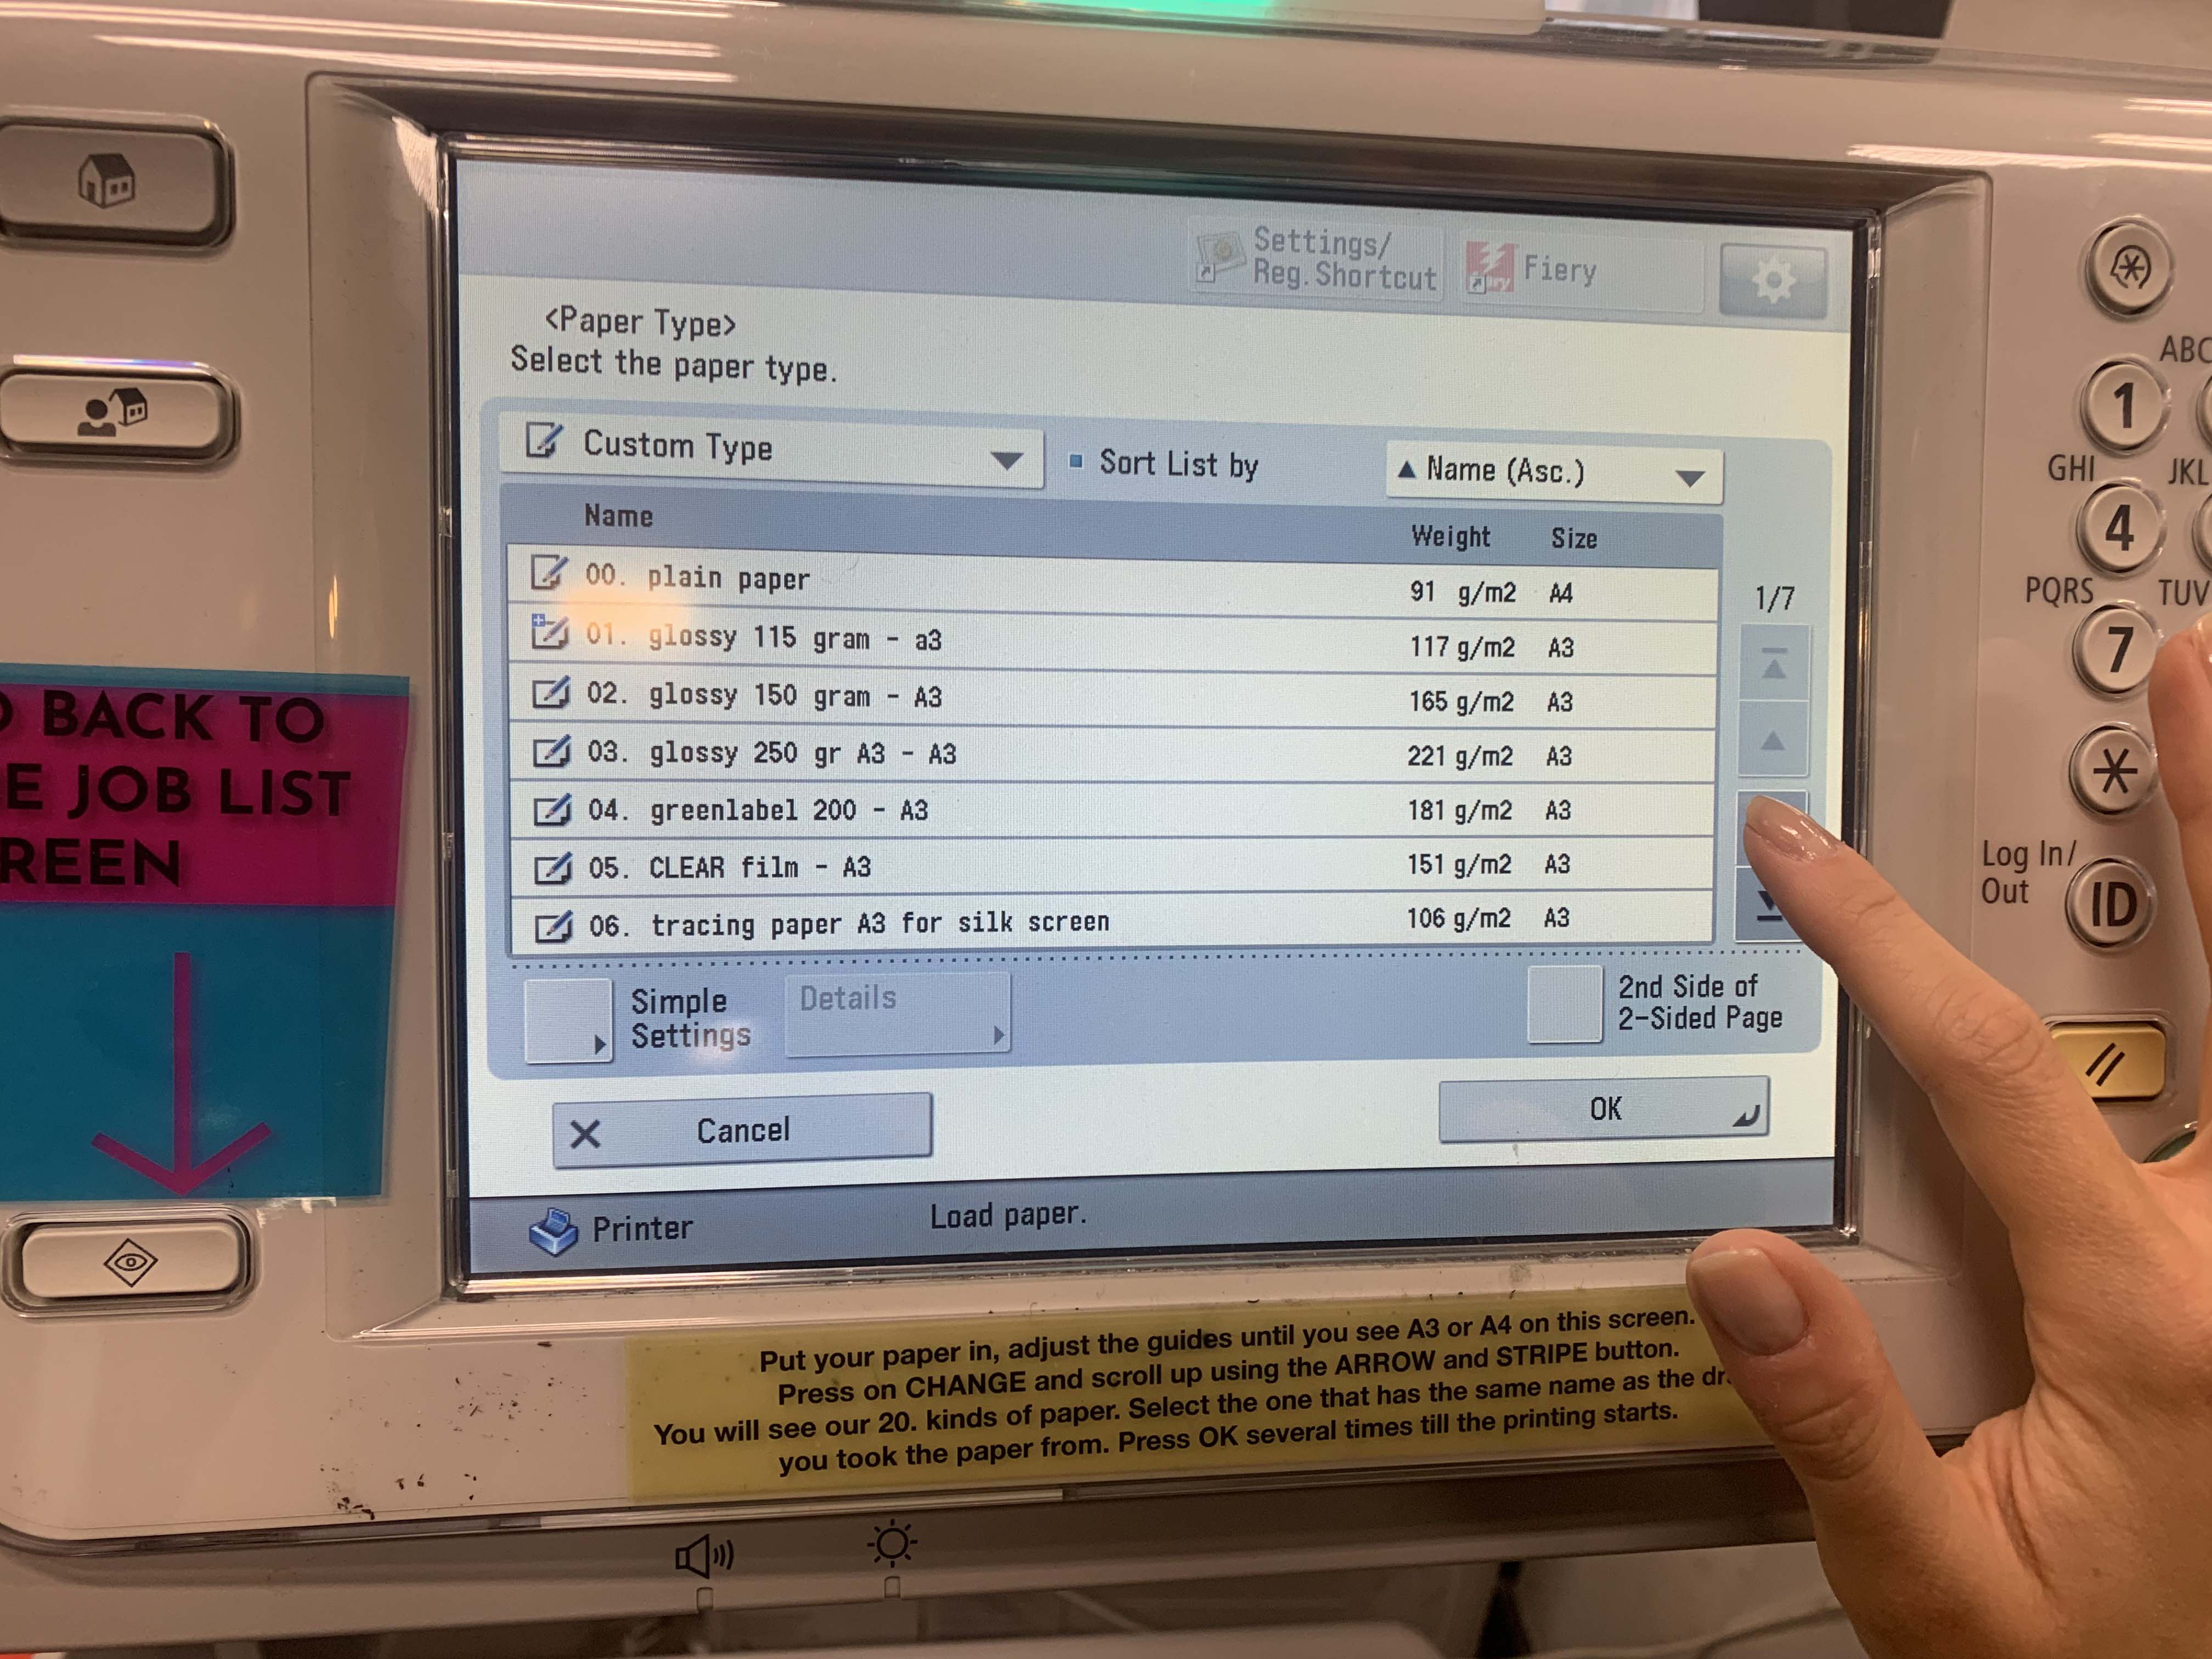
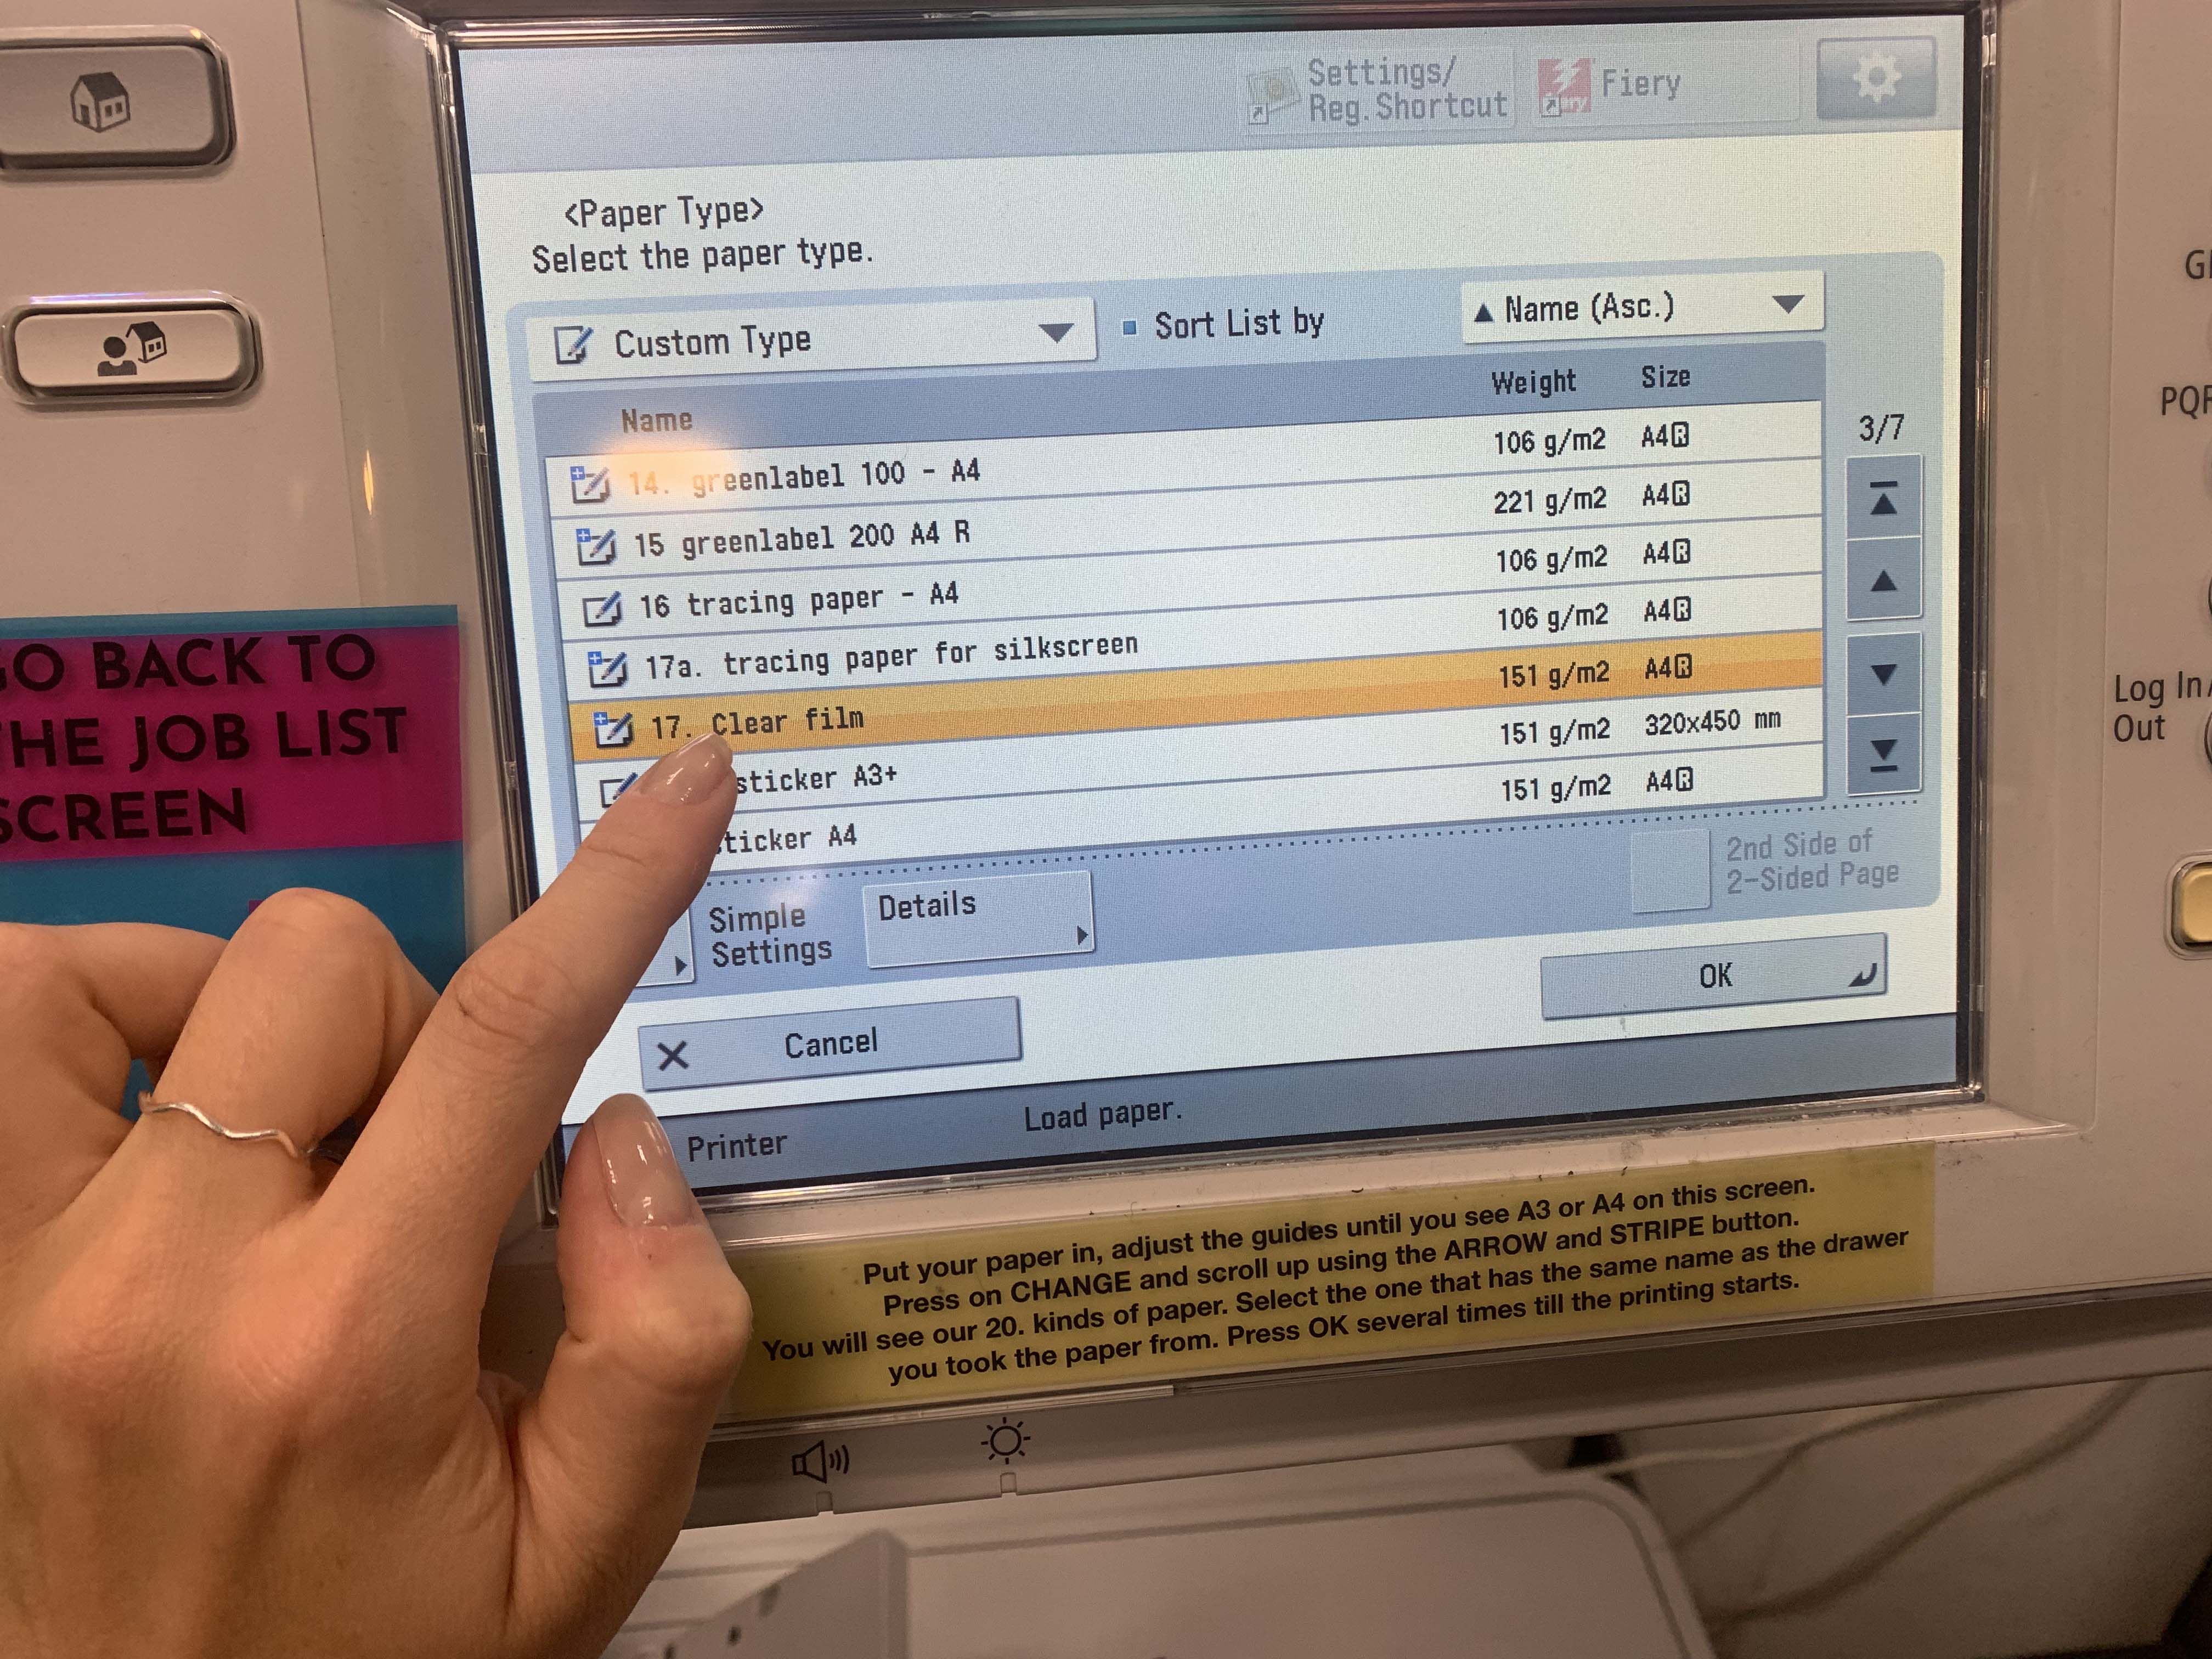
The printer will ask you to set your choice of paper. Press change and look for the same number again. (4-5, 16-17)
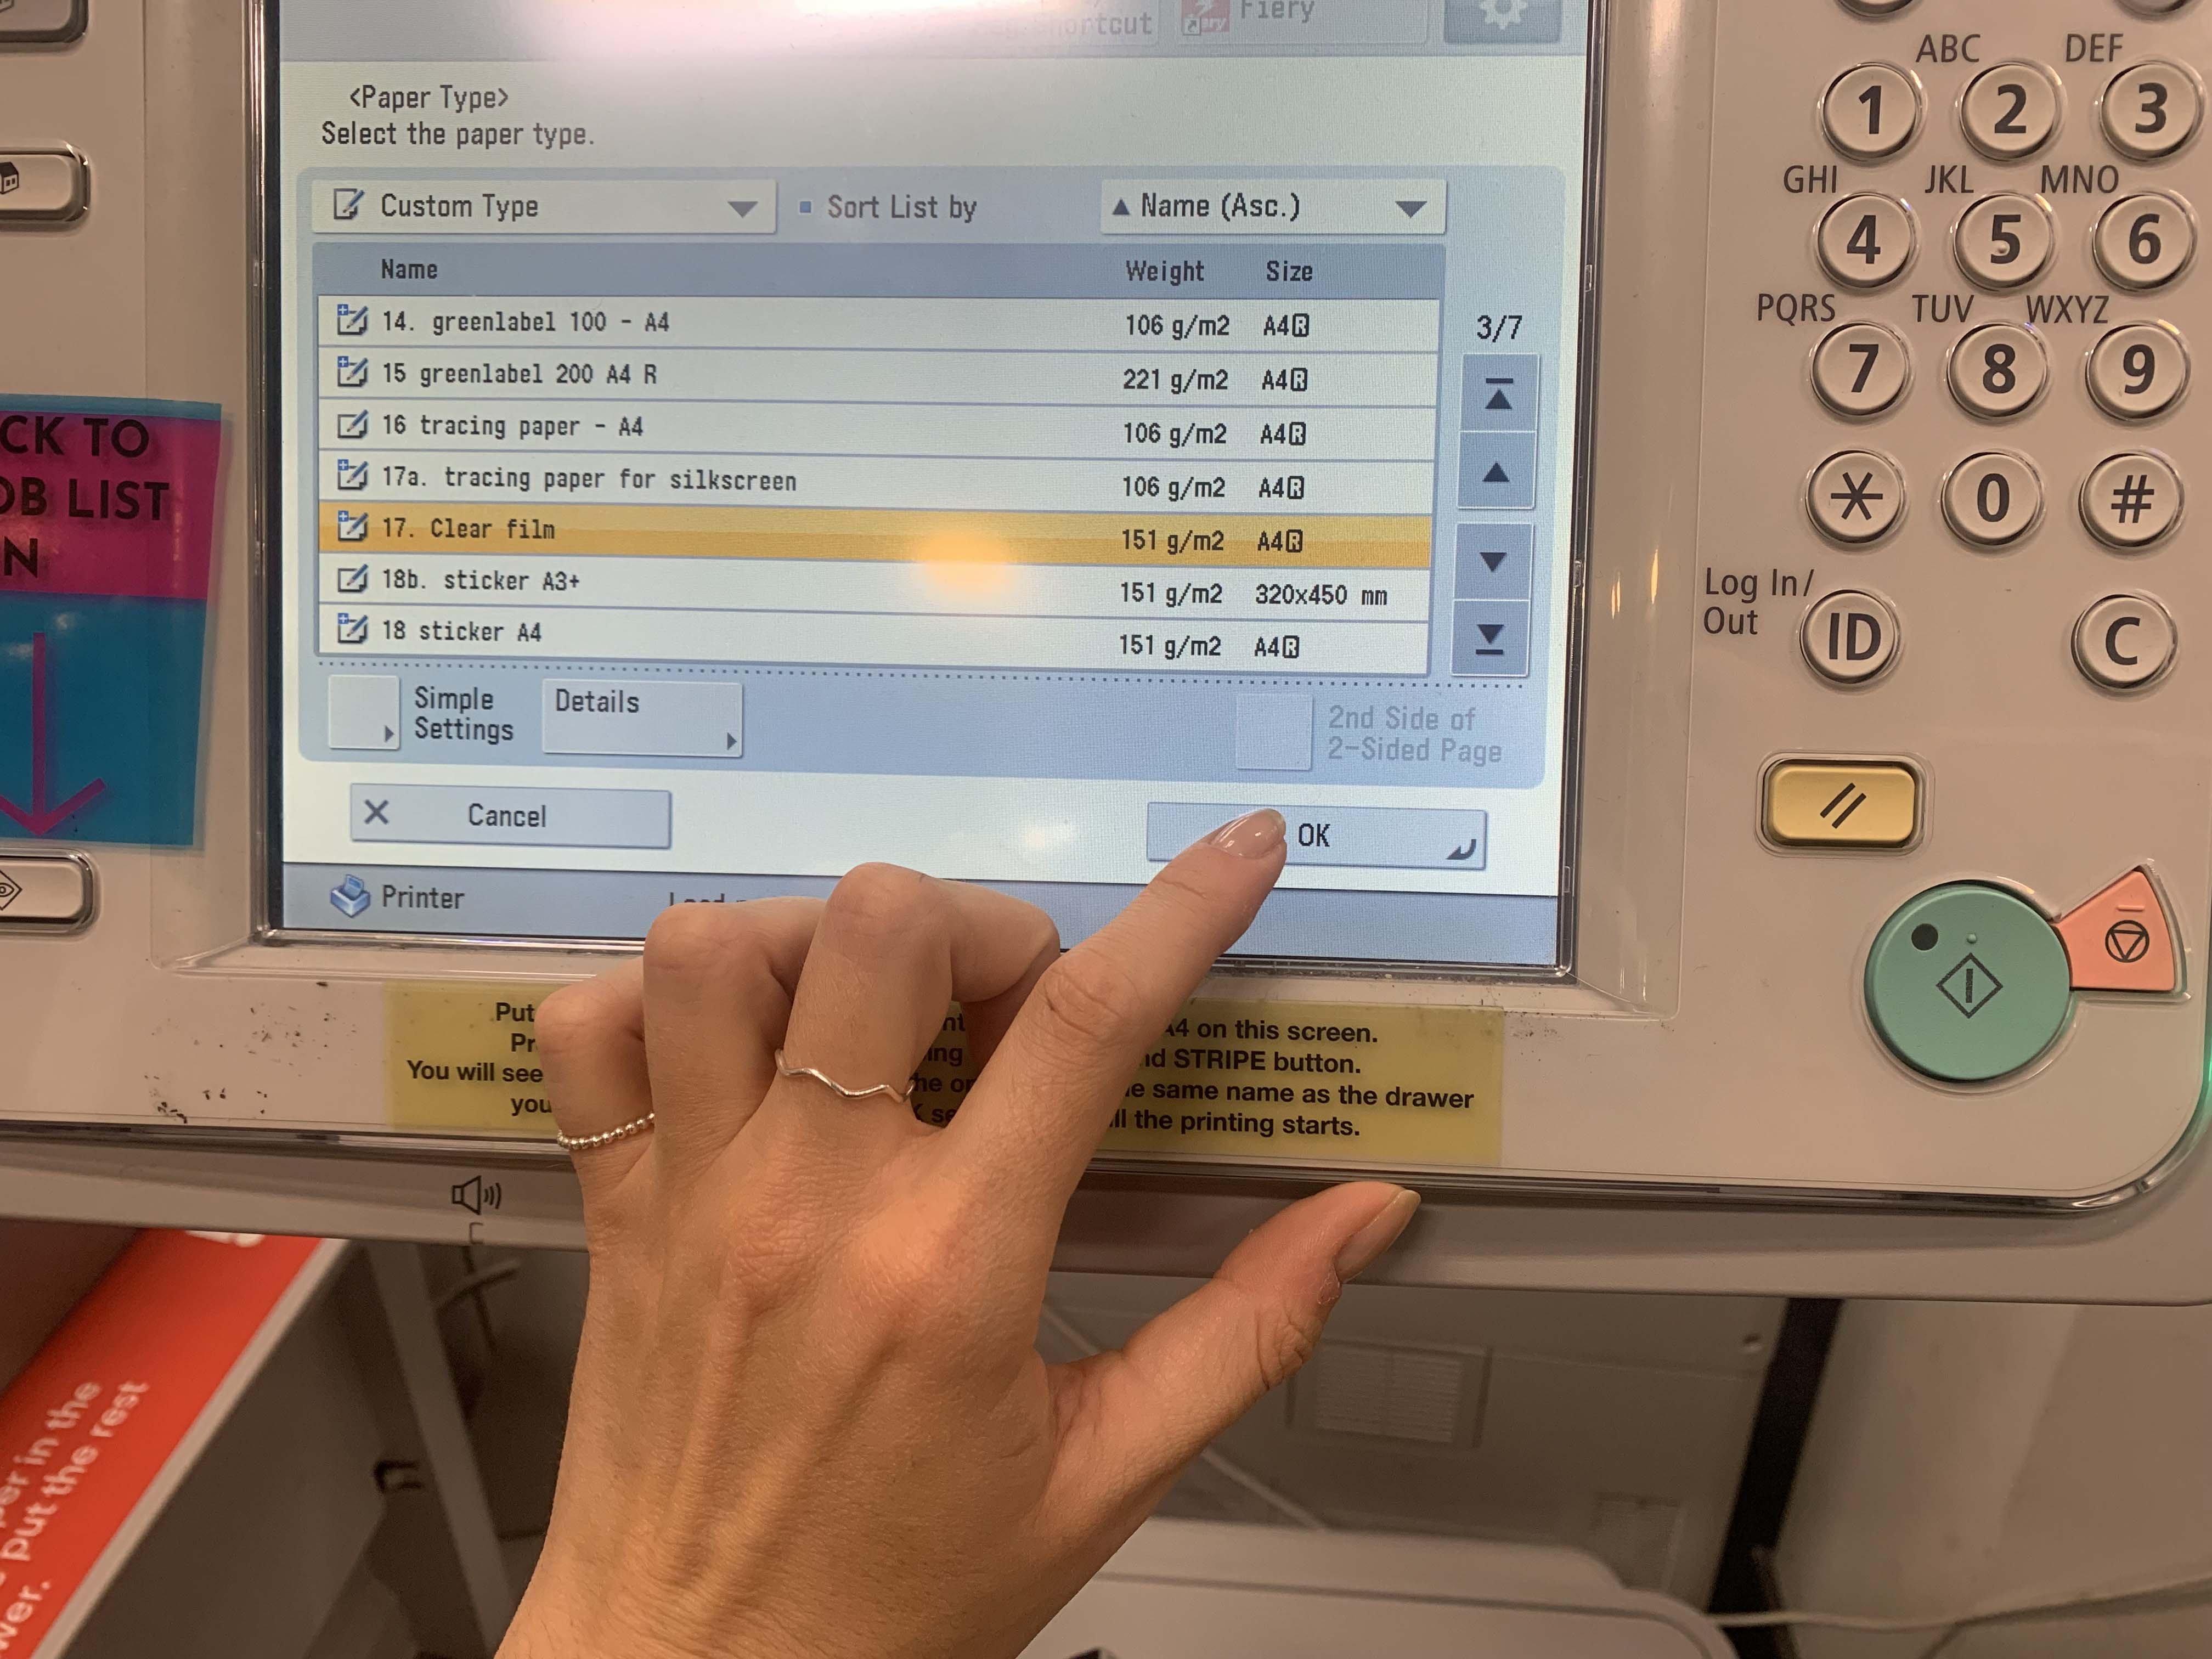
Printing
Press OK and OK again. Your prints are now being processed.
