Difference between revisions of "User:Pascalle/NOTES"
| (2 intermediate revisions by the same user not shown) | |||
| Line 12: | Line 12: | ||
The reason why I choose Digital Craft, was because I was curious to see how I could interpret the term 'craft' to my work; to get a new understanding of craft itself and the role it plays in society. | The reason why I choose Digital Craft, was because I was curious to see how I could interpret the term 'craft' to my work; to get a new understanding of craft itself and the role it plays in society. | ||
| − | The craft I was assigned to was carving. Carving being defined as “the act of using tools to shape something from a material by scraping away portions of that material”. Curious about my new given craft, I started researching the history of carving. I have found that by just knowing a little bit of the history on a subject gives a better understanding. I started to apply carving in different forms and experiments. I went to the wood workshop and experimented with woodturning. With a hot wire I cut through different kinds of foam. In the ceramic workshop I hollowed a sphere of clay, on the kickwheel I turned a cylinder and with different carving tools I carved the clay. After the orientation process in which it became increasingly clear there was going to be a ceramic process as part of my research and final pieces. Because of the lengthy process of ceramic, I knew planning was crucial if I wanted to have a finished piece in time for the deadline. I wanted something more challenging and I wanted to learn a new technique. So I started plaster turning. Plaster turning is when a cylinder of plaster is poured onto a electric turning wheel. By means of different parting tools, small ridges are made into the cylinder, then with a rounded chisel like tool, the ridges are smoothed out; a shape is formed. The shapes are typically round and obviously symmetric. The plaster forms are, what is called, a “mother form”, because they are the base for the mold making process. From this I had created a beautiful shape, that would become the base of my project. I wanted to create something with the shape, so I made a three piece mould. Mould making and the casting of the objects is a craft in itself. The making of the mould is a work intensive and complicated process, because you need to think in positives and negatives. The mould is a negative and the cast shape is a positive. I poured porcelain into the mold, because I find porcelain a fascinating material due to its high density, hardness and translucency. Once the porcelain is poured, I have found that the perfect thickness occurs after thirteen minutes. After which, a workshop assistant helps pour out the mold. Then the shape needs to dry and harden so that I can remove it from the mold, without it tearing or “denting”. Porcelein has a memory quality; If I remove the shape too soon and or incorrectly, I dent the shape unintentionally and even though I would smooth it out again, once fired there is a big chance that the dent returns to the shape. It takes about three hours for the shape to be ready to handle. During which, I pour the bottom support. Once I had figured out how to cast it, I started experimenting different kinds of carving onto the vases to see the variety that I could apply to the form that became the vase. After the shape is removed from the mold, I smooth out the blemishes and let the vase dry. The vase, with the bottom support, gets fired in the kiln at 960 degrees. This takes about a day and a half, after which the vase is ready for the laser cutter. During a workshop with Bert Simons I got inspired to apply the laser cutter to the ceramic vase I was working on. This was another journey in itself, because of the complex cone shape, and because neither one of the workshop assistants knew what going to happen, nobody had ever tried what I wanted to try before on the academy. The cone shape would mean that the laser would concentrate more on part of the form than other. So I did a lot of different tests on different stages of the porcelain at different angles. | + | The craft I was assigned to was carving. Carving being defined as “the act of using tools to shape something from a material by scraping away portions of that material”. Curious about my new given craft, I started researching the history of carving. I have found that by just knowing a little bit of the history on a subject gives a better understanding. I started to apply carving in different forms and experiments. I went to the wood workshop and experimented with woodturning. With a hot wire I cut through different kinds of foam. In the ceramic workshop I hollowed a sphere of clay, on the kickwheel I turned a cylinder and with different carving tools I carved the clay. After the orientation process in which it became increasingly clear there was going to be a ceramic process as part of my research and final pieces. |
| + | |||
| + | ==== GETTING STARTED IN CERAMICS ==== | ||
| + | |||
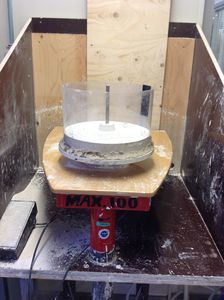
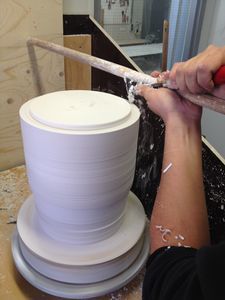
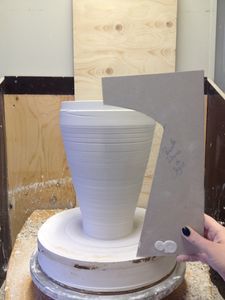
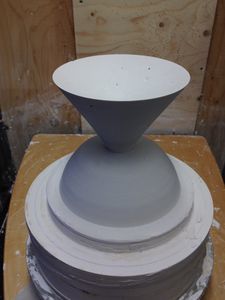
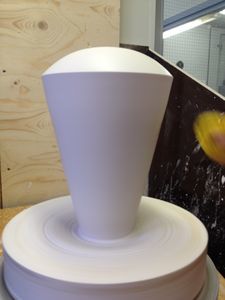
| + | Because of the lengthy process of ceramic, I knew planning was crucial if I wanted to have a finished piece in time for the deadline. I wanted something more challenging and I wanted to learn a new technique. So I started plaster turning. Plaster turning is when a cylinder of plaster is poured onto a electric turning wheel. By means of different parting tools, small ridges are made into the cylinder, then with a rounded chisel like tool, the ridges are smoothed out; a shape is formed. The shapes are typically round and obviously symmetric. The plaster forms are, what is called, a “mother form”, because they are the base for the mold making process. From this I had created a beautiful shape, that would become the base of my project. I wanted to create something with the shape, so I made a three piece mould. | ||
| + | |||
| + | ==== MOLD, CASTING AND FIRING ==== | ||
| + | |||
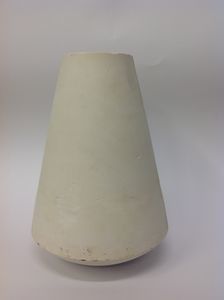
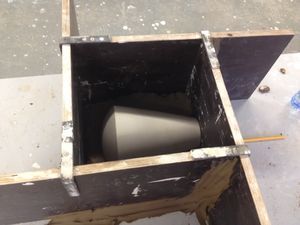
| + | Mould making and the casting of the objects is a craft in itself. The making of the mould is a work intensive and complicated process, because you need to think in positives and negatives. The mould is a negative and the cast shape is a positive. I poured porcelain into the mold, because I find porcelain a fascinating material due to its high density, hardness and translucency. Once the porcelain is poured, I have found that the perfect thickness occurs after thirteen minutes. After which, a workshop assistant (often Patricio Ferrada) helps pour out the mold. Then the shape needs to dry and harden so that I can remove it from the mold, without it tearing or “denting”. Porcelein has a memory quality; If I remove the shape too soon and or incorrectly, I dent the shape unintentionally and even though I would smooth it out again, once fired there is a big chance that the dent returns to the shape. It takes about three hours for the shape to be ready to handle. During which, I pour the bottom support. Once I had figured out how to cast it, I started experimenting different kinds of carving onto the vases to see the variety that I could apply to the form that became the vase. After the shape is removed from the mold, I smooth out the blemishes and let the vase dry. The vase, with the bottom support, gets fired in the kiln at 960 degrees. This takes about a day and a half, after which the vase is ready for the laser cutter. During a workshop with Bert Simons I got inspired to apply the laser cutter to the ceramic vase I was working on. This was another journey in itself, because of the complex cone shape, and because neither one of the workshop assistants knew what going to happen, nobody had ever tried what I wanted to try before on the academy. The cone shape would mean that the laser would concentrate more on part of the form than other. So I did a lot of different tests on different stages of the porcelain at different angles. | ||
It takes about 20 minutes to prepair the laser machine and another 70 minutes to laser cut a pattern. After which glaze is applied and the shape is fired for a second and last time; this time to a 1260 degrees over a period of three days. I kept a log book in which I had written down how long every step had taken with each individual vase. I did the same for my laser cut experiments. I didn’t want to be taken by surprise. Besides the ceramic and laser process, I had a difficult time trying to decide what to laser cut on my vase. First I wanted to do a mandala, because I thought it would be poetic that something which was usually done by monks, to let it be done by a machine. But after some time I realized that not everyone knew what a mandala was and that it would just be seen as pretty decoration, which I felt lacked context. Then I decided to do a delfts blue, then the Chinese blue pattern because that was one of the original paintings on ceramics. But I still wasn’t satisfied. After I laser cutted a intricate pattern on a vase (through a device that rotated the vase), I realized that everything distracted from my initial inspiration which was the shape. So I decided on geometric shapes that enhance the shape. Actually getting the vase through all the stages of firing posed a challenge as well. Because the bottom was completely round, I realized through experimentation that the vase needed a porcelain bottom holder to hold the round shape. | It takes about 20 minutes to prepair the laser machine and another 70 minutes to laser cut a pattern. After which glaze is applied and the shape is fired for a second and last time; this time to a 1260 degrees over a period of three days. I kept a log book in which I had written down how long every step had taken with each individual vase. I did the same for my laser cut experiments. I didn’t want to be taken by surprise. Besides the ceramic and laser process, I had a difficult time trying to decide what to laser cut on my vase. First I wanted to do a mandala, because I thought it would be poetic that something which was usually done by monks, to let it be done by a machine. But after some time I realized that not everyone knew what a mandala was and that it would just be seen as pretty decoration, which I felt lacked context. Then I decided to do a delfts blue, then the Chinese blue pattern because that was one of the original paintings on ceramics. But I still wasn’t satisfied. After I laser cutted a intricate pattern on a vase (through a device that rotated the vase), I realized that everything distracted from my initial inspiration which was the shape. So I decided on geometric shapes that enhance the shape. Actually getting the vase through all the stages of firing posed a challenge as well. Because the bottom was completely round, I realized through experimentation that the vase needed a porcelain bottom holder to hold the round shape. | ||
| + | |||
| + | ==== LOOKING BACK ==== | ||
The result of this extremely insightful quarter was a series of vases with different laser cut motives on them. A shape that is perfectly balancing. | The result of this extremely insightful quarter was a series of vases with different laser cut motives on them. A shape that is perfectly balancing. | ||
This process helped me with my reflective abilities, because the experimentation that I did was a constant reflection on the step I made before. It is a very direct effect. How did my action influence my outcome? Why didn’t that glaze work? Why is the shape inflated? The entire process was a constant reflection on the steps I did before, and how that influenced my next move. I feel like have gained new insight into what craft means to me personally, it means the freedom to create thoughtfully, consciously and curiously. | This process helped me with my reflective abilities, because the experimentation that I did was a constant reflection on the step I made before. It is a very direct effect. How did my action influence my outcome? Why didn’t that glaze work? Why is the shape inflated? The entire process was a constant reflection on the steps I did before, and how that influenced my next move. I feel like have gained new insight into what craft means to me personally, it means the freedom to create thoughtfully, consciously and curiously. | ||
| − | |||
== PHOTOGRAPHIC PROCESS == | == PHOTOGRAPHIC PROCESS == | ||
| Line 72: | Line 81: | ||
| − | + | ==== CERAMICS ==== | |
Learning plaster turning, mould making and working with porcelain | Learning plaster turning, mould making and working with porcelain | ||
| Line 80: | Line 89: | ||
[http://https://antiquities.library.cornell.edu/casts/a-short-history] | [http://https://antiquities.library.cornell.edu/casts/a-short-history] | ||
| − | + | ==== LASER CUTTER ==== | |
Converting digital 2D to tangible 3D | Converting digital 2D to tangible 3D | ||
Latest revision as of 22:55, 20 May 2015
Contents
INTRO
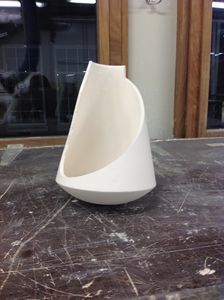
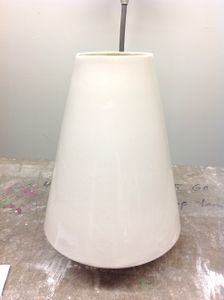
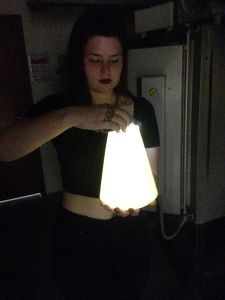
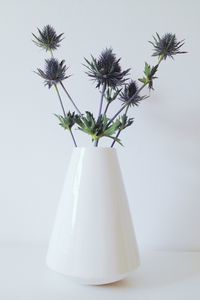
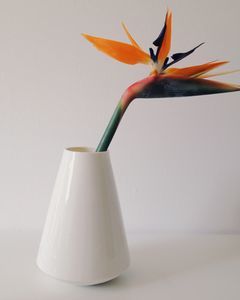
For the past few weeks I have worked on a vase. I started by beginning to learn a new skill, plaster turning, The shape I created was turned upside down as it were, in order to form the rounded bottom. Fascinated by this shape, I made a mold out of it, and from that I have made multiple porcelain examples. The vases look heavy but are lighter than expected. The bone white of the porcelain gives the vases a very clean, idealistic, balanced and appeasing look. The vases with lasercuts on them have a machine made uniqueness to them.
During this past quarter I have researched the combination of the labor of love that is ceramics with the hard industrial lines of the laser cutter.
THE PROCESS OF THE CERAMIC VASE & REFLECTION
The reason why I choose Digital Craft, was because I was curious to see how I could interpret the term 'craft' to my work; to get a new understanding of craft itself and the role it plays in society.
The craft I was assigned to was carving. Carving being defined as “the act of using tools to shape something from a material by scraping away portions of that material”. Curious about my new given craft, I started researching the history of carving. I have found that by just knowing a little bit of the history on a subject gives a better understanding. I started to apply carving in different forms and experiments. I went to the wood workshop and experimented with woodturning. With a hot wire I cut through different kinds of foam. In the ceramic workshop I hollowed a sphere of clay, on the kickwheel I turned a cylinder and with different carving tools I carved the clay. After the orientation process in which it became increasingly clear there was going to be a ceramic process as part of my research and final pieces.
GETTING STARTED IN CERAMICS
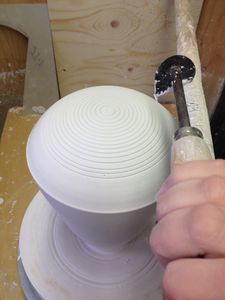
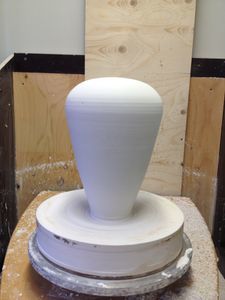
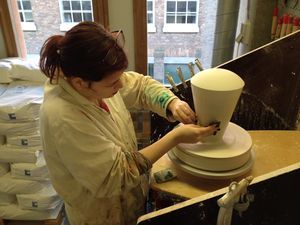
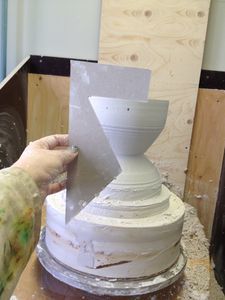
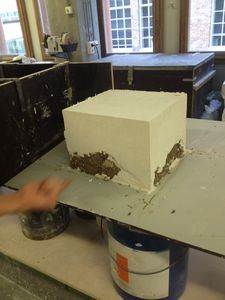
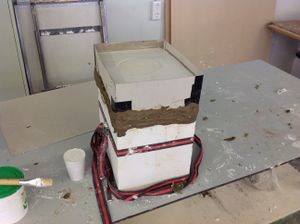
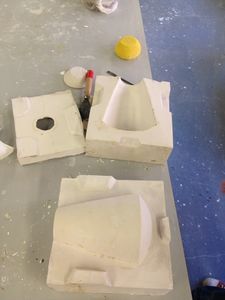
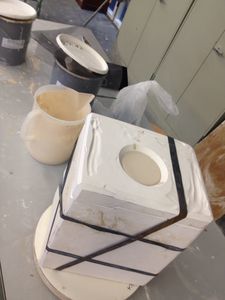
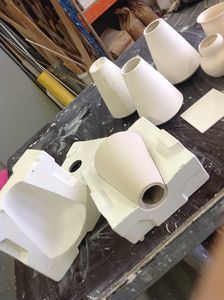
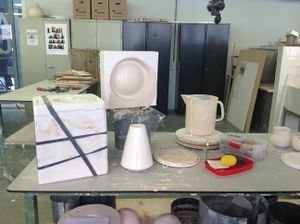
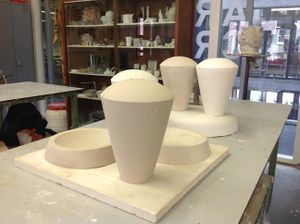
Because of the lengthy process of ceramic, I knew planning was crucial if I wanted to have a finished piece in time for the deadline. I wanted something more challenging and I wanted to learn a new technique. So I started plaster turning. Plaster turning is when a cylinder of plaster is poured onto a electric turning wheel. By means of different parting tools, small ridges are made into the cylinder, then with a rounded chisel like tool, the ridges are smoothed out; a shape is formed. The shapes are typically round and obviously symmetric. The plaster forms are, what is called, a “mother form”, because they are the base for the mold making process. From this I had created a beautiful shape, that would become the base of my project. I wanted to create something with the shape, so I made a three piece mould.
MOLD, CASTING AND FIRING
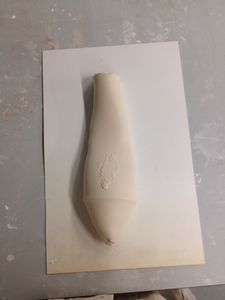
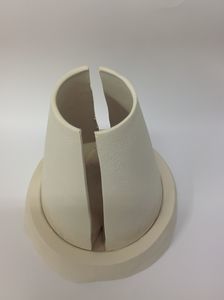
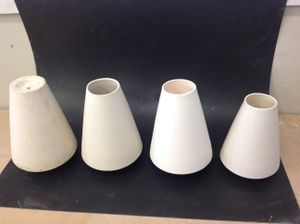
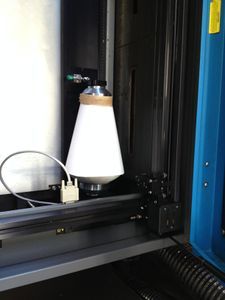
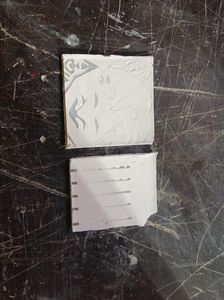
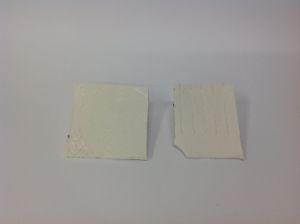
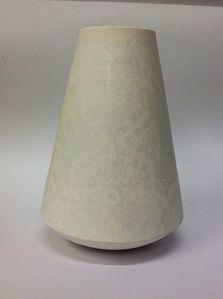
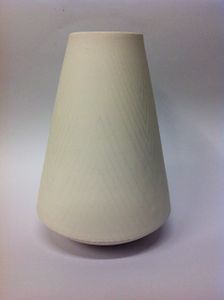
Mould making and the casting of the objects is a craft in itself. The making of the mould is a work intensive and complicated process, because you need to think in positives and negatives. The mould is a negative and the cast shape is a positive. I poured porcelain into the mold, because I find porcelain a fascinating material due to its high density, hardness and translucency. Once the porcelain is poured, I have found that the perfect thickness occurs after thirteen minutes. After which, a workshop assistant (often Patricio Ferrada) helps pour out the mold. Then the shape needs to dry and harden so that I can remove it from the mold, without it tearing or “denting”. Porcelein has a memory quality; If I remove the shape too soon and or incorrectly, I dent the shape unintentionally and even though I would smooth it out again, once fired there is a big chance that the dent returns to the shape. It takes about three hours for the shape to be ready to handle. During which, I pour the bottom support. Once I had figured out how to cast it, I started experimenting different kinds of carving onto the vases to see the variety that I could apply to the form that became the vase. After the shape is removed from the mold, I smooth out the blemishes and let the vase dry. The vase, with the bottom support, gets fired in the kiln at 960 degrees. This takes about a day and a half, after which the vase is ready for the laser cutter. During a workshop with Bert Simons I got inspired to apply the laser cutter to the ceramic vase I was working on. This was another journey in itself, because of the complex cone shape, and because neither one of the workshop assistants knew what going to happen, nobody had ever tried what I wanted to try before on the academy. The cone shape would mean that the laser would concentrate more on part of the form than other. So I did a lot of different tests on different stages of the porcelain at different angles.
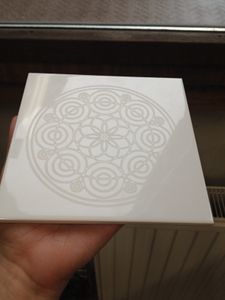
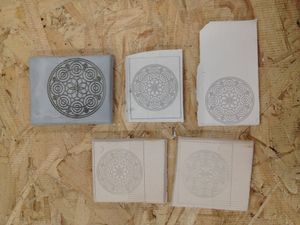
It takes about 20 minutes to prepair the laser machine and another 70 minutes to laser cut a pattern. After which glaze is applied and the shape is fired for a second and last time; this time to a 1260 degrees over a period of three days. I kept a log book in which I had written down how long every step had taken with each individual vase. I did the same for my laser cut experiments. I didn’t want to be taken by surprise. Besides the ceramic and laser process, I had a difficult time trying to decide what to laser cut on my vase. First I wanted to do a mandala, because I thought it would be poetic that something which was usually done by monks, to let it be done by a machine. But after some time I realized that not everyone knew what a mandala was and that it would just be seen as pretty decoration, which I felt lacked context. Then I decided to do a delfts blue, then the Chinese blue pattern because that was one of the original paintings on ceramics. But I still wasn’t satisfied. After I laser cutted a intricate pattern on a vase (through a device that rotated the vase), I realized that everything distracted from my initial inspiration which was the shape. So I decided on geometric shapes that enhance the shape. Actually getting the vase through all the stages of firing posed a challenge as well. Because the bottom was completely round, I realized through experimentation that the vase needed a porcelain bottom holder to hold the round shape.
LOOKING BACK
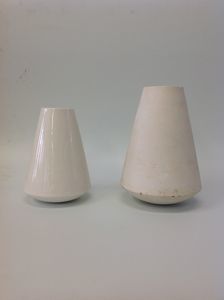
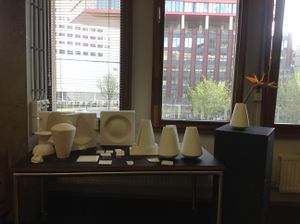
The result of this extremely insightful quarter was a series of vases with different laser cut motives on them. A shape that is perfectly balancing.
This process helped me with my reflective abilities, because the experimentation that I did was a constant reflection on the step I made before. It is a very direct effect. How did my action influence my outcome? Why didn’t that glaze work? Why is the shape inflated? The entire process was a constant reflection on the steps I did before, and how that influenced my next move. I feel like have gained new insight into what craft means to me personally, it means the freedom to create thoughtfully, consciously and curiously.
PHOTOGRAPHIC PROCESS
FINAL STATEMENT
The process I have gone through this last quarter is my love tribute to craft. Because even though it seems simplistic and easy, my vase is my labour of love to craft and exploring new techniques. Through this quarter I have gained a tremendous amount of knowledge concerning ceramics, plaster molding, plaster turning and working with the laser cutter.
TECHNIQUES
During this past quarter I have researched the combination of the labor of love that is ceramics with the hard industrial lines of the laser cutter.
CERAMICS
Learning plaster turning, mould making and working with porcelain
In ceramics, I learned plaster turning, which is when a cylinder of plaster is poured onto a electric turning wheel. By means of different parting tools, small ridges are made into the cylinder, then with a rounded chisel like tool, the ridges are smoothed out. A shape is formed. The shapes are typically round and obviously symmetric. The plaster forms are what is called a “mother form”, because they are the base for the mold making process. Plaster turning became relevant during the early nineteen century. Today it is still used in ceramic factories. Though the processes is not always the same, and varies between companies and countries.
From the form created I made a three piece mould. Mould making and the casting of the objects is a craft in itself. The making of the mould is a work intensive and complicated process, because you need to think in positives and negatives. The mould is a negative and the cast shape is a positive. Moulds have been made for centuries, it is a technique often used to make replica’s of famously known sculptures. As archaeologist Adolf Michaelis wrote in 1884: "such a (cast) museum is as necessary a supplement to archaeological lectures, as a laboratory is to lectures on physics or chemistry." [1]
LASER CUTTER
Converting digital 2D to tangible 3D
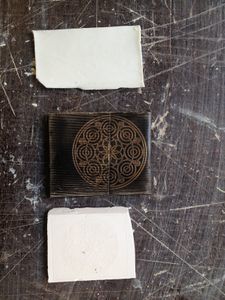
Even though the laser cutting at first may seem simple, it really isn’t. One size (or better said setup) laser printer does NOT fit all. After doing multiple test to find the right setup, I applied what I learned from my experiments to my ceramic work.
WHY I MAKE
I MAKE BECAUSE I CAN
I MAKE BECAUSE IT HELPS ME TO EXPRESS MY THOUGHTS
I MAKE BECAUSE I AM CURIOUS
I MAKE BECAUSE IT GIVES ME A SENCE OF FULLIMENT
I MAKE BECAUSE IT'S LIKE MEDITATION TO ME
I MAKE BECAUSE I WANT TO
I MAKE BECAUSE I NEED TO
I MAKE BECAUSE IT CONNECTS MY HEAD TO MY HANDS
I MAKE BECAUSE I ENJOY IT
LITERATURE
Making is connecting, : the social meaning of creativity, from DIY and knitting to YouTube and Web 2.0 by David Gauntlett
In the introduction the author begins by explaining his views on why making is connecting and states specific argumentation for it, which is later supported by examples he gives. Furthermore the introduction goes on to describe the three reason as to why the author felt compelled to write his book. The first is a personal statement on a academic and a sociologist was interested the freely shared creativity. Second, because of his personal experience in connecting to people through making. The third and final reason is the exploration of creativity in the “creative research method” he has developed. Moreover the author describe the concept of web 2.0 and in what he call the “sit back and be told culture” in which he argues the incline of creativity due to the television. From there he goes on about the up and coming DIY culture and his definition of creativity support by quotes from different philosophers. Add to his introduction he writes about the point of his book and the true meaning ending with a short description of the outline of the book.
In his second chapter the author start the topic:”The meaning of making I: Philosophies of craft”. In this chapter he discusses two important English philosophers on the subject of craft, John Ruskin and William Morris. These two philosophers where great believers in everyday creativity and believed in that a healthy and wealthy society could only exist when men were permitted to find joy in making and expressing their individualistic self while contributing to society.
