Difference between revisions of "User:Tiff"
| Line 4: | Line 4: | ||
| − | + | [[File:tiff.png|400px|top|frameless]] | |
| − | + | Tiffany Wederfoort | |
| + | <br> | ||
| + | ''tiffanyaw@live.nl'' | ||
| + | <br> | ||
| + | 0857145 | ||
==Assignments== | ==Assignments== | ||
| − | + | ===Acting out electrons=== | |
| − | |||
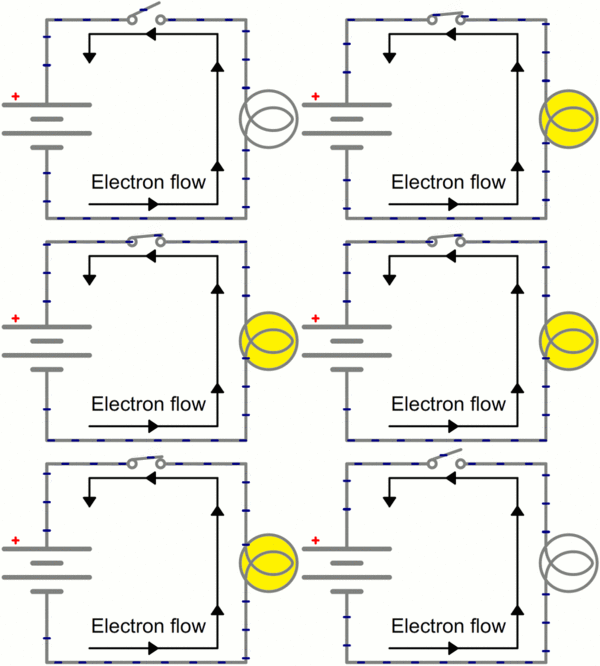
| − | [[File:01tiff.jpg]] [[File:02tiff.jpeg]] | + | After reading the article https://learn.sparkfun.com/tutorials/what-is-electricity, we chose the following image; |
| + | |||
| + | [[File:currentflow.gif|300px]] | ||
| + | |||
| + | |||
| + | |||
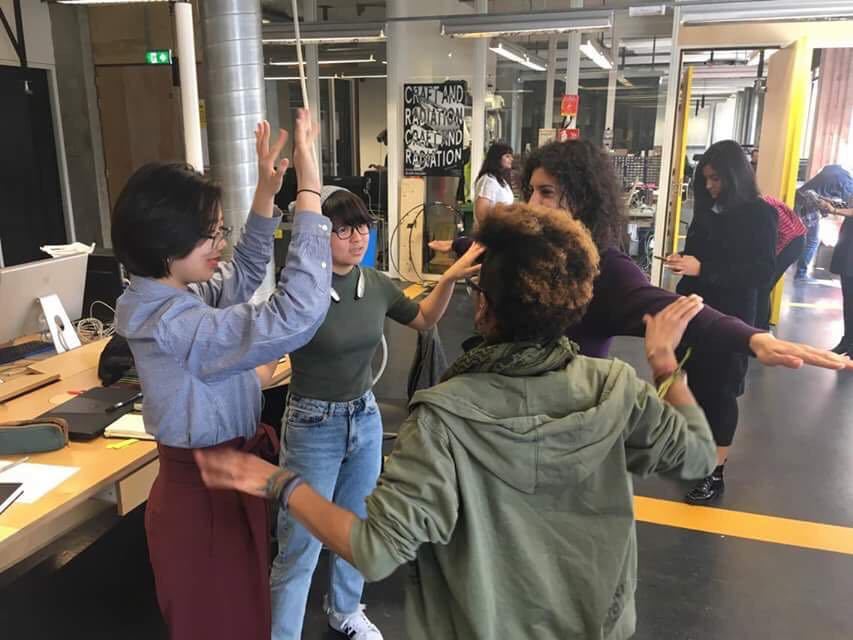
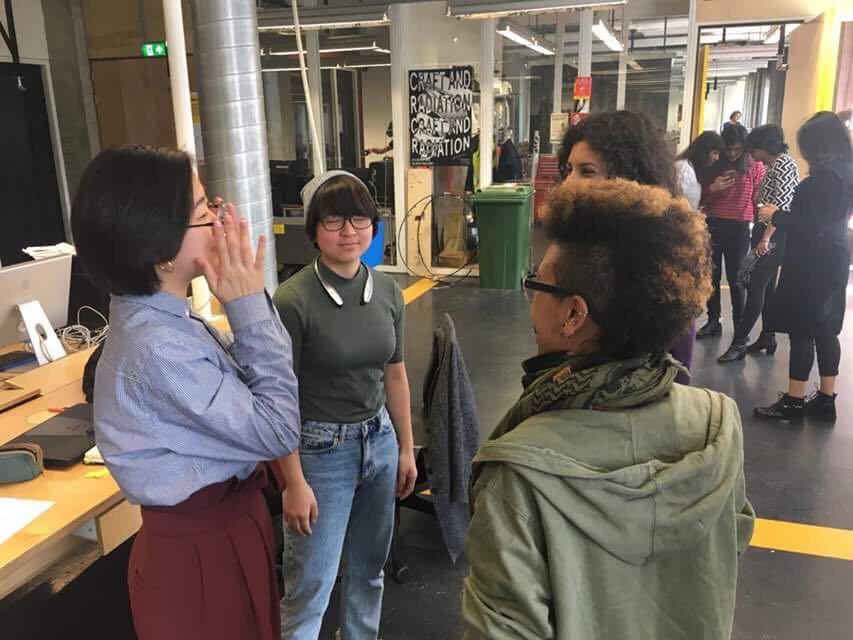
| + | and acted it out in this way; | ||
| + | |||
| + | |||
| + | [[File:01tiff.jpg|200px|frame|none|open]] | ||
| + | <br> | ||
| + | [[File:02tiff.jpeg|300px|frame|none|closed]] | ||
| + | |||
| + | |||
| + | |||
| + | ---- | ||
| + | |||
| + | |||
| + | |||
| + | ===Measuring volts, current and resistance=== | ||
| + | |||
| + | '''Measuring voltage''' | ||
| + | * Multimeter | ||
| + | * 9 Volt battery (5V in the tutorial) | ||
| + | * 9 Volt battery clip for in a breadboard | ||
| + | * 470 Ohm resistor (1K Ohm in the tutorial) | ||
| + | * LED | ||
| + | * breadboard | ||
| + | |||
| + | '''Measuring resistance''' | ||
| + | * Multimeter | ||
| + | * 3 random resistors | ||
| + | * 3 resistors of the same value | ||
| + | * breadboard | ||
| + | |||
| + | '''Measuring current''' | ||
| + | * Multimeter | ||
| + | * 9 Volt battery (5V in the tutorial) | ||
| + | * 9 Volt battery clip for in a breadboard | ||
| + | * 470 Ohm resistor (1K Ohm in the tutorial) | ||
| + | * LED | ||
| + | * breadboard | ||
| + | |||
| + | '''Measuring voltage and current in a series circuit''' | ||
| + | * Multimeter | ||
| + | * 9 Volt battery (5V in the tutorial) | ||
| + | * 9 Volt battery clip for in a breadboard | ||
| + | * 3 resistors random resistors | ||
| + | * breadboard | ||
| + | |||
| + | '''Measuring voltage and current in a parallel circuit''' | ||
| + | * Multimeter | ||
| + | * 9 Volt battery (5V in the tutorial) | ||
| + | * 9 Volt battery clip for in a breadboard | ||
| + | * 3 resistors random resistors | ||
| + | * breadboard | ||
| + | |||
| + | |||
| + | |||
| + | ---- | ||
| + | |||
| + | ===Making a circuit=== | ||
| + | |||
| + | !!Assignment | ||
| + | |||
| + | Form duo's | ||
| + | Collect all the parts of the BOM (get a helping hand) | ||
| + | Download the NE555 datasheet, read it. | ||
| + | Choose a schematic | ||
| + | Choose a desired method to make the circuit and make it (work)! | ||
| + | Read the How to Solder and maybe practice first. | ||
| + | Watch the polarity of components! Prevent short circuits, 'solder bridges', good luck! | ||
| + | |||
| + | ---- | ||
| + | |||
| + | ==DIY project== | ||
| + | |||
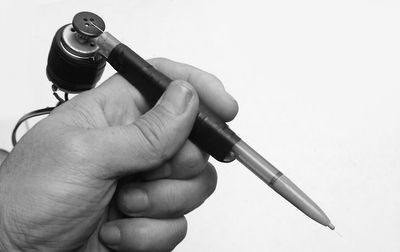
| + | Within the practice Digital Craft I'll be focussing on making a DIY tattoo gun, as this also connects with my ongoing project titled ''Vessel:pain=pleasure''. | ||
| + | This project kickstarted about six months ago, the first time I got a hold on a needle and some ink, since then I've been hand poking myself and others. | ||
| + | Currently I'm looking for other ways in which I can apply DIY tattoos (in a safe and hygienic way). | ||
| + | |||
| + | |||
| + | [[File:diygun.jpeg|400px]] | ||
| − | |||
| − | |||
| − | |||
| − | |||
Equipment; | Equipment; | ||
* RC motor 12 or 18 volts | * RC motor 12 or 18 volts | ||
| Line 29: | Line 110: | ||
* button | * button | ||
* power source | * power source | ||
| − | * on/off switch | + | * on / off switch |
* rubberbands | * rubberbands | ||
Revision as of 10:20, 23 May 2017
Contents
Intro
Discourse of autonomous practice Digital Craft ; "The Expanded Toolbox"
Tiffany Wederfoort
tiffanyaw@live.nl
0857145
Assignments
Acting out electrons
After reading the article https://learn.sparkfun.com/tutorials/what-is-electricity, we chose the following image;
and acted it out in this way;
Measuring volts, current and resistance
Measuring voltage
- Multimeter
- 9 Volt battery (5V in the tutorial)
- 9 Volt battery clip for in a breadboard
- 470 Ohm resistor (1K Ohm in the tutorial)
- LED
- breadboard
Measuring resistance
- Multimeter
- 3 random resistors
- 3 resistors of the same value
- breadboard
Measuring current
- Multimeter
- 9 Volt battery (5V in the tutorial)
- 9 Volt battery clip for in a breadboard
- 470 Ohm resistor (1K Ohm in the tutorial)
- LED
- breadboard
Measuring voltage and current in a series circuit
- Multimeter
- 9 Volt battery (5V in the tutorial)
- 9 Volt battery clip for in a breadboard
- 3 resistors random resistors
- breadboard
Measuring voltage and current in a parallel circuit
- Multimeter
- 9 Volt battery (5V in the tutorial)
- 9 Volt battery clip for in a breadboard
- 3 resistors random resistors
- breadboard
Making a circuit
!!Assignment
Form duo's Collect all the parts of the BOM (get a helping hand) Download the NE555 datasheet, read it. Choose a schematic Choose a desired method to make the circuit and make it (work)! Read the How to Solder and maybe practice first. Watch the polarity of components! Prevent short circuits, 'solder bridges', good luck!
DIY project
Within the practice Digital Craft I'll be focussing on making a DIY tattoo gun, as this also connects with my ongoing project titled Vessel:pain=pleasure. This project kickstarted about six months ago, the first time I got a hold on a needle and some ink, since then I've been hand poking myself and others. Currently I'm looking for other ways in which I can apply DIY tattoos (in a safe and hygienic way).
Equipment;
- RC motor 12 or 18 volts
- pencase
- spoon
- electrical tape
- button
- power source
- on / off switch
- rubberbands
