Difference between revisions of "User:MXMVS"
| Line 8: | Line 8: | ||
[[File: Image1-9.JPG|200px|thumb|left|1st assignment ---* how electricity works *]] | [[File: Image1-9.JPG|200px|thumb|left|1st assignment ---* how electricity works *]] | ||
| + | == '''First Class: Group exercise''' 20-04-2017 == | ||
| + | –––––––––––––––––––––––––––––––––––––––––––––––––––––––––––––––––––––––––––––––––––––––––––––––––––––––––––––––––––––––––––––––––––––––––––––––––––––––––––––––––––––––– | ||
| + | [[File:337px-Image1-9.JPG|100px|thumb|left|First class about electrons]]We are the Electrons. We learned that '+ and -' came together, in a dance we showed this with shaking our body but when '- and -' came together they would clash. How the Electrons react is explained further in this picture. | ||
| + | |||
| + | –––––––––––––––––––––––––––––––––––––––––––––––––––––––––––––––––––––––––––––––––––––––––––––––––––––––––––––––––––––––––––––––––––––––––––––––––––––––––––––––––––––––– | ||
| + | |||
| + | == First Ideas == | ||
| + | |||
| + | –––––––––––––––––––––––––––––––––––––––––––––––––––––––––––––––––––––––––––––––––––––––––––––––––––––––––––––––––––––––––––––––––––––––––––––––––––––––––––––––––––––––– | ||
== T E S L A B O L == | == T E S L A B O L == | ||
| Line 23: | Line 32: | ||
Binnen onze groep kwamen we erachter dat velen iets willen maken dat interactief is, waar de toeschouwer een gebruiker wordt. | Binnen onze groep kwamen we erachter dat velen iets willen maken dat interactief is, waar de toeschouwer een gebruiker wordt. | ||
We willen dan ook een expositie maken met als thema: Interactivity by the people. | We willen dan ook een expositie maken met als thema: Interactivity by the people. | ||
| + | –––––––––––––––––––––––––––––––––––––––––––––––––––––––––––––––––––––––––––––––––––––––––––––––––––––––––––––––––––––––––––––––––––––––––––––––––––––––––––––––––––––––– | ||
| + | |||
| + | == No Class: Holidays 27-04-2017 == | ||
| + | |||
| + | –––––––––––––––––––––––––––––––––––––––––––––––––––––––––––––––––––––––––––––––––––––––––––––––––––––––––––––––––––––––––––––––––––––––––––––––––––––––––––––––––––––––– | ||
| + | |||
| + | == No Class: Hacking 04-05-2017 == | ||
| + | |||
| + | –––––––––––––––––––––––––––––––––––––––––––––––––––––––––––––––––––––––––––––––––––––––––––––––––––––––––––––––––––––––––––––––––––––––––––––––––––––––––––––––––––––––– | ||
| + | |||
| + | == ''' Second Class: Measuring''' 11-05-2017 == | ||
| + | |||
| + | –––––––––––––––––––––––––––––––––––––––––––––––––––––––––––––––––––––––––––––––––––––––––––––––––––––––––––––––––––––––––––––––––––––––––––––––––––––––––––––––––––––––– | ||
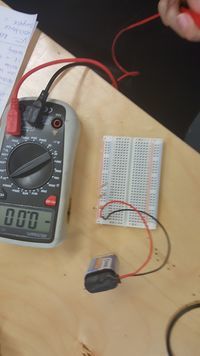
| + | In this class we started with a summary of the first class. In a battery the elektrons go from the + side to the - side. A Led light has a long and a short, the long side is the + side and is called Anode, the short side is the - side and is called Cathode. A resistor is to limit the presure of the battery for a Led light for example. A resistor = Ohm. You can calculate how much the resistor resists with a dutch"donkey bridge": Zij bracht rozen op gerrits graf bij vies grauw weer | ||
| + | |||
| + | -------------------1-2-X------- | ||
| + | Zij = Zwart = 0-0-1 | ||
| + | |||
| + | Bracht = Bruin = 1-1-10 | ||
| + | |||
| + | Rozen = Rood = 2-2-100 | ||
| + | |||
| + | Op = Oranje = 3-3-1000 | ||
| + | |||
| + | Gerrits = Geel = 4-4-10K | ||
| + | |||
| + | Graf = Groen = 5-5-100K | ||
| + | |||
| + | Bij = Blauw = 6-6-1M | ||
| + | |||
| + | Vies = Violet = 7-7-10M | ||
| + | |||
| + | Grauw = Grijs = 8-8-100M | ||
| + | |||
| + | Weer = Wit = 9-9-1000M | ||
| + | |||
| + | ------------------------------- | ||
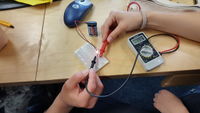
| + | Further in this class we did some small experiments in a group. We made a circuit on a plugboard with a 9 volt battery, a resistor and a LED. the rest of the experiments were about measuring with a volt meter. | ||
| + | What you need (ask at the Interaction Station): | ||
| + | * Multimeter | ||
| + | * 9 Volt battery ''(5V in the tutorial)'' | ||
| + | * 9 Volt battery clip for in a breadboard | ||
| + | * 470 Ohm resistor ''(1K Ohm in the tutorial)'' | ||
| + | * LED | ||
| + | * breadboard | ||
| + | |||
| + | '''Outcome:''' | ||
| + | Voltage 7 | ||
| + | |||
| + | Resistance 465 | ||
| + | |||
| + | Ampere 19.3 | ||
| + | |||
| + | |||
| + | === Measuring resistance === | ||
| + | What you need (ask at the Interaction Station): | ||
| + | * Multimeter | ||
| + | * 3 random resistors | ||
| + | * 3 resistors of the same value | ||
| + | * breadboard | ||
| + | |||
| + | '''Series Resistance Outcome:''' | ||
| + | Volt 1th restitor 2.38 | ||
| + | |||
| + | Volt 2nd/3th 2.39 | ||
| + | |||
| + | Volt 1th + 2nd together 4.77 | ||
| + | |||
| + | Volt 2nd + 3th together 4.78 | ||
| + | |||
| + | Volt 1th +2nd +3th together 7.16 | ||
| + | |||
| + | I = V/R | ||
| + | |||
| + | 9,11: 2,38 = 3,83 | ||
| + | |||
| + | 9,11 : 7,16 = 1,27 | ||
| + | |||
| + | |||
| + | '''Parallell Resistance Outcome''' | ||
| + | |||
| + | Voltage van de drie restitors 8.41 | ||
| + | |||
| + | |||
| + | === Measuring Current === | ||
| + | What you need (ask at the Interaction Station): | ||
| + | * Multimeter | ||
| + | * 9 Volt battery ''(5V in the tutorial)'' | ||
| + | * 9 Volt battery clip for in a breadboard | ||
| + | * 470 Ohm resistor ''(1K Ohm in the tutorial)'' | ||
| + | * LED | ||
| + | * breadboard | ||
| + | |||
| + | '''Outcome''' | ||
| + | Volt 7 | ||
| + | |||
| + | Resistance 465 | ||
| + | |||
| + | Ampere 19.3 | ||
| + | |||
| + | === Measuring voltage and current in a series circuit === | ||
| + | What you need (ask at the Interaction Station): | ||
| + | * Multimeter | ||
| + | * 9 Volt battery ''(5V in the tutorial)'' | ||
| + | * 9 Volt battery clip for in a breadboard | ||
| + | * 3 resistors random resistors | ||
| + | * breadboard | ||
| + | |||
| + | '''Outcome''' | ||
| + | Volt 9.11 | ||
| + | |||
| + | Ampere 3.83 | ||
| + | |||
| + | I = V/R | ||
| + | |||
| + | 9,11: 2,38 = 3,83 | ||
| + | |||
| + | 9,11 : 7,16 = 1,27 | ||
| + | |||
| + | === Measuring voltage and current in a parallel circuit === | ||
| + | What you need (ask at the Interaction Station): | ||
| + | * Multimeter | ||
| + | * 9 Volt battery ''(5V in the tutorial)'' | ||
| + | * 9 Volt battery clip for in a breadboard | ||
| + | * 3 resistors random resistors | ||
| + | * breadboard | ||
| + | |||
| + | '''Outcome:''' | ||
| + | |||
| + | Battery voltage: 8.58 | ||
| + | |||
| + | Voltage van de drie restitors : 8.41 | ||
| + | |||
| + | I=V/R | ||
| + | |||
| + | 8.58/8.41 = 1.02 | ||
| + | |||
| + | |||
| + | |||
| + | –––––––––––––––––––––––––––––––––––––––––––––––––––––––––––––––––––––––––––––––––––––––––––––––––––––––––––––––––––––––––––––––––––––––––––––––––––––––––––––––––––––––– | ||
| + | |||
| + | == '''Third Class: Keyboard '''18-05-2017 == | ||
| + | |||
| + | –––––––––––––––––––––––––––––––––––––––––––––––––––––––––––––––––––––––––––––––––––––––––––––––––––––––––––––––––––––––––––––––––––––––––––––––––––––––––––––––––––––––– | ||
| + | In the third class we had to make a Keyboard. in this assignment we could show what we have learned about circuits with resistors and LEDs, and about measuring voltage. we also learned new things about how to adjust a copper plate, and how to solder a microchip. First we picked a schematic. Axel Verwee and I had schematic 1 so we teamed up for this assignment. We had to draw the circuit on a copper plate. Ad first we tried to iron a image on the copper. this only worked for half of the image. Then we grinded our version of the schematic on the copper plate. The soldering of the chip was the hardest part, this went wrong the first time as the paws of the chip broke when we tried to attach the treads to other componends. We attached all the parts of the keyboard to each other and on the kopper plate. We designed our keyboard in such a way that the chip was floating in the air. It was very nice to look at and it worked! you only had to hold the speaker up because we placed it upside down, the metal part under the speaker made contact to the copper plate which we could solve with a small piece of tape underneed the speaker. | ||
| + | |||
| + | |||
| + | –––––––––––––––––––––––––––––––––––––––––––––––––––––––––––––––––––––––––––––––––––––––––––––––––––––––––––––––––––––––––––––––––––––––––––––––––––––––––––––––––––––––– | ||
| + | |||
| + | == No Class: Holiday ‘Hemelvaart’ 25-05-2017 == | ||
| + | |||
| + | –––––––––––––––––––––––––––––––––––––––––––––––––––––––––––––––––––––––––––––––––––––––––––––––––––––––––––––––––––––––––––––––––––––––––––––––––––––––––––––––––––––––– | ||
| + | |||
| + | == '''Fourth Class: Own Assignment ''' 01-06-2017 == | ||
| + | |||
| + | –––––––––––––––––––––––––––––––––––––––––––––––––––––––––––––––––––––––––––––––––––––––––––––––––––––––––––––––––––––––––––––––––––––––––––––––––––––––––––––––––––––––– | ||
| + | |||
| + | |||
| + | –––––––––––––––––––––––––––––––––––––––––––––––––––––––––––––––––––––––––––––––––––––––––––––––––––––––––––––––––––––––––––––––––––––––––––––––––––––––––––––––––––––––– | ||
| + | |||
______________________________________________ | ______________________________________________ | ||
| Line 41: | Line 210: | ||
Vies | Vies | ||
Weer | Weer | ||
| − | ( | + | (google this for translation and meaning;)) |
De opdracht was om Volt, Current en Resistance te meten. | De opdracht was om Volt, Current en Resistance te meten. | ||
Revision as of 06:19, 21 June 2017
Maxime van Strijland contactmecontactme 0919905@gmail.com
Contents
- 1 First Class: Group exercise 20-04-2017
- 2 First Ideas
- 3 T E S L A B O L
- 4 No Class: Holidays 27-04-2017
- 5 No Class: Hacking 04-05-2017
- 6 Second Class: Measuring 11-05-2017
- 7 Third Class: Keyboard 18-05-2017
- 8 No Class: Holiday ‘Hemelvaart’ 25-05-2017
- 9 Fourth Class: Own Assignment 01-06-2017
- 10 Electronics basics
First Class: Group exercise 20-04-2017
––––––––––––––––––––––––––––––––––––––––––––––––––––––––––––––––––––––––––––––––––––––––––––––––––––––––––––––––––––––––––––––––––––––––––––––––––––––––––––––––––––––––
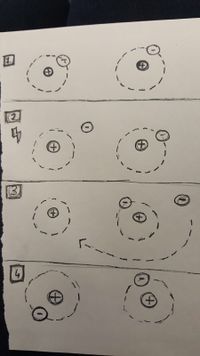
We are the Electrons. We learned that '+ and -' came together, in a dance we showed this with shaking our body but when '- and -' came together they would clash. How the Electrons react is explained further in this picture.
––––––––––––––––––––––––––––––––––––––––––––––––––––––––––––––––––––––––––––––––––––––––––––––––––––––––––––––––––––––––––––––––––––––––––––––––––––––––––––––––––––––––
First Ideas
––––––––––––––––––––––––––––––––––––––––––––––––––––––––––––––––––––––––––––––––––––––––––––––––––––––––––––––––––––––––––––––––––––––––––––––––––––––––––––––––––––––––
T E S L A B O L
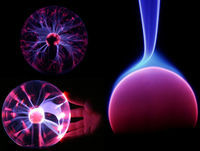
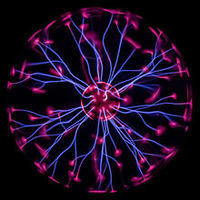
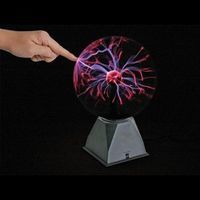
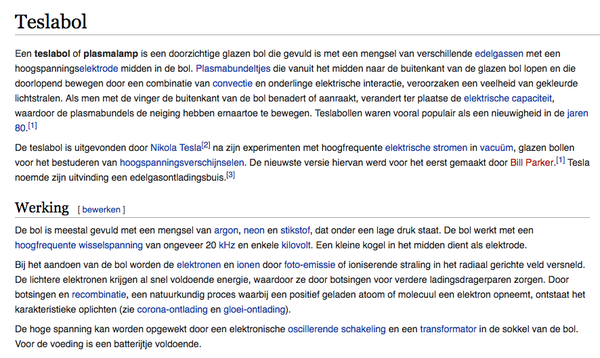
Mijn idee is om een Teslabol na te maken. Naastdat dit esthetisch is en een bijzondere manier om energie waar te nemen, ben ik erg benieuwd hoe dit werkt. Kan een Teslabol alleen een bol zijn? of ook vlak? Zou ik een installatie kunnen maken met meerdere Teslabollen, die reageren als je langsloopt en zo een pad creeren?
Binnen onze groep kwamen we erachter dat velen iets willen maken dat interactief is, waar de toeschouwer een gebruiker wordt. We willen dan ook een expositie maken met als thema: Interactivity by the people. ––––––––––––––––––––––––––––––––––––––––––––––––––––––––––––––––––––––––––––––––––––––––––––––––––––––––––––––––––––––––––––––––––––––––––––––––––––––––––––––––––––––––
No Class: Holidays 27-04-2017
––––––––––––––––––––––––––––––––––––––––––––––––––––––––––––––––––––––––––––––––––––––––––––––––––––––––––––––––––––––––––––––––––––––––––––––––––––––––––––––––––––––––
No Class: Hacking 04-05-2017
––––––––––––––––––––––––––––––––––––––––––––––––––––––––––––––––––––––––––––––––––––––––––––––––––––––––––––––––––––––––––––––––––––––––––––––––––––––––––––––––––––––––
Second Class: Measuring 11-05-2017
–––––––––––––––––––––––––––––––––––––––––––––––––––––––––––––––––––––––––––––––––––––––––––––––––––––––––––––––––––––––––––––––––––––––––––––––––––––––––––––––––––––––– In this class we started with a summary of the first class. In a battery the elektrons go from the + side to the - side. A Led light has a long and a short, the long side is the + side and is called Anode, the short side is the - side and is called Cathode. A resistor is to limit the presure of the battery for a Led light for example. A resistor = Ohm. You can calculate how much the resistor resists with a dutch"donkey bridge": Zij bracht rozen op gerrits graf bij vies grauw weer
1-2-X-------
Zij = Zwart = 0-0-1
Bracht = Bruin = 1-1-10
Rozen = Rood = 2-2-100
Op = Oranje = 3-3-1000
Gerrits = Geel = 4-4-10K
Graf = Groen = 5-5-100K
Bij = Blauw = 6-6-1M
Vies = Violet = 7-7-10M
Grauw = Grijs = 8-8-100M
Weer = Wit = 9-9-1000M
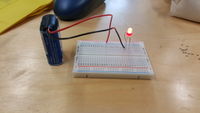
Further in this class we did some small experiments in a group. We made a circuit on a plugboard with a 9 volt battery, a resistor and a LED. the rest of the experiments were about measuring with a volt meter. What you need (ask at the Interaction Station):
* Multimeter
* 9 Volt battery (5V in the tutorial)
* 9 Volt battery clip for in a breadboard
* 470 Ohm resistor (1K Ohm in the tutorial)
* LED
* breadboard
Outcome: Voltage 7
Resistance 465
Ampere 19.3
Measuring resistance
What you need (ask at the Interaction Station):
* Multimeter
* 3 random resistors
* 3 resistors of the same value
* breadboard
Series Resistance Outcome: Volt 1th restitor 2.38
Volt 2nd/3th 2.39
Volt 1th + 2nd together 4.77
Volt 2nd + 3th together 4.78
Volt 1th +2nd +3th together 7.16
I = V/R
9,11: 2,38 = 3,83
9,11 : 7,16 = 1,27
Parallell Resistance Outcome
Voltage van de drie restitors 8.41
Measuring Current
What you need (ask at the Interaction Station):
* Multimeter
* 9 Volt battery (5V in the tutorial)
* 9 Volt battery clip for in a breadboard
* 470 Ohm resistor (1K Ohm in the tutorial)
* LED
* breadboard
Outcome Volt 7
Resistance 465
Ampere 19.3
Measuring voltage and current in a series circuit
What you need (ask at the Interaction Station):
* Multimeter
* 9 Volt battery (5V in the tutorial)
* 9 Volt battery clip for in a breadboard
* 3 resistors random resistors
* breadboard
Outcome Volt 9.11
Ampere 3.83
I = V/R
9,11: 2,38 = 3,83
9,11 : 7,16 = 1,27
Measuring voltage and current in a parallel circuit
What you need (ask at the Interaction Station):
* Multimeter
* 9 Volt battery (5V in the tutorial)
* 9 Volt battery clip for in a breadboard
* 3 resistors random resistors
* breadboard
Outcome:
Battery voltage: 8.58
Voltage van de drie restitors : 8.41
I=V/R
8.58/8.41 = 1.02
––––––––––––––––––––––––––––––––––––––––––––––––––––––––––––––––––––––––––––––––––––––––––––––––––––––––––––––––––––––––––––––––––––––––––––––––––––––––––––––––––––––––
Third Class: Keyboard 18-05-2017
–––––––––––––––––––––––––––––––––––––––––––––––––––––––––––––––––––––––––––––––––––––––––––––––––––––––––––––––––––––––––––––––––––––––––––––––––––––––––––––––––––––––– In the third class we had to make a Keyboard. in this assignment we could show what we have learned about circuits with resistors and LEDs, and about measuring voltage. we also learned new things about how to adjust a copper plate, and how to solder a microchip. First we picked a schematic. Axel Verwee and I had schematic 1 so we teamed up for this assignment. We had to draw the circuit on a copper plate. Ad first we tried to iron a image on the copper. this only worked for half of the image. Then we grinded our version of the schematic on the copper plate. The soldering of the chip was the hardest part, this went wrong the first time as the paws of the chip broke when we tried to attach the treads to other componends. We attached all the parts of the keyboard to each other and on the kopper plate. We designed our keyboard in such a way that the chip was floating in the air. It was very nice to look at and it worked! you only had to hold the speaker up because we placed it upside down, the metal part under the speaker made contact to the copper plate which we could solve with a small piece of tape underneed the speaker.
––––––––––––––––––––––––––––––––––––––––––––––––––––––––––––––––––––––––––––––––––––––––––––––––––––––––––––––––––––––––––––––––––––––––––––––––––––––––––––––––––––––––
No Class: Holiday ‘Hemelvaart’ 25-05-2017
––––––––––––––––––––––––––––––––––––––––––––––––––––––––––––––––––––––––––––––––––––––––––––––––––––––––––––––––––––––––––––––––––––––––––––––––––––––––––––––––––––––––
Fourth Class: Own Assignment 01-06-2017
––––––––––––––––––––––––––––––––––––––––––––––––––––––––––––––––––––––––––––––––––––––––––––––––––––––––––––––––––––––––––––––––––––––––––––––––––––––––––––––––––––––––
––––––––––––––––––––––––––––––––––––––––––––––––––––––––––––––––––––––––––––––––––––––––––––––––––––––––––––––––––––––––––––––––––––––––––––––––––––––––––––––––––––––––
______________________________________________
Electronics basics
Electrodes float from + to -
a led wants to conduct electricity super quick, so it need a resistor to slow down.
Zij Bracht Rozen Op Gerrits Graf Bij Grijs Vies Weer (google this for translation and meaning;))
De opdracht was om Volt, Current en Resistance te meten.
uitkomst: Volt = 9,11 Resistance = 465 Current = 19,3
Na deze los te hebben gemeten, hebben we de volt en current gemeten in series. uitkomst: Volt = 1400 (zonder batterij) met 1 resistor = 2,38 2 resistors = 4,78 3 resistors = 7,16 Hetgeen wat opvallend is, is dat het aantal volt afneemt (van 9,11 naar 7,16)
Hoe je current kunt berekenen: I = V / R voor individuele resistor: 9,11/2,38=3,38 voor totale resistors: 9,11/7,16=1,27

