Difference between revisions of "Cybernetic Prosthetics"
| (19 intermediate revisions by the same user not shown) | |||
| Line 7: | Line 7: | ||
8 Hours of Whale Sounds Deep Underwater: https://www.youtube.com/watch?v=nDqP7kcr-sc | 8 Hours of Whale Sounds Deep Underwater: https://www.youtube.com/watch?v=nDqP7kcr-sc | ||
| − | ===Testing=== | + | ===First Time Testing=== |
| + | |||
| + | The first (and only) prototype. | ||
[[File:IMG 8751.jpg|500px]] | [[File:IMG 8751.jpg|500px]] | ||
| + | |||
| + | We first used a plastic bucket to contain water, and leave the material problem to the later stage. We didn't get an underwater microphone, instead, we used a condom on a normal microphone for water prove. During the test on the desk, we realised the vibration transmitted by the attached material is extremely strong. To reduce it, we had a thick scarf. Afterwards, we decided to bring the device outside the studio to check the effect. | ||
[[File:IMG 8752.jpg|500px]] | [[File:IMG 8752.jpg|500px]] | ||
| Line 17: | Line 21: | ||
[[File:IMG 8757.jpg|500px]] | [[File:IMG 8757.jpg|500px]] | ||
| + | The result of testing outside fitted our anticipation. And it also showed some improvement to be done. | ||
| + | |||
| + | ===Process=== | ||
| + | |||
| + | The device consisted of two parts, the analogue part and the digital part. | ||
| + | |||
| + | The bent metal is the main and constructed component, it was covered and patted with thick foam board in order to reduce the transmitted vibration. A big clip attached to the top of metal for hanging and stabilizing the microphone. | ||
| + | |||
| + | [[File:IMG 8770.jpg|500px]] | ||
| − | + | The microphone was placed in a condom for waterproof, connected to a sound recorder for adjusting and a set headphone. | |
[[File:IMG 8788.jpg|500px]] | [[File:IMG 8788.jpg|500px]] | ||
| − | https://vimeo.com/292687674 | + | |
| + | ===Second Time Testing and Filming=== | ||
| + | |||
| + | ===Product and Video=== | ||
| + | |||
| + | Aquatic Acoustic | ||
| + | |||
| + | |||
| + | |||
| + | <span style="color:#f65f73;">V</span><span style="color:#f56976;">i</span><span style="color:#f57379;">d</span><span style="color:#f47d7b;">e</span><span style="color:#f4877e;">o </span><span style="color:#f39181;">L</span><span style="color:#f29b84;">i</span><span style="color:#f2a486;">n</span><span style="color:#f1ae89;">k</span> : https://vimeo.com/292687674 | ||
Latest revision as of 11:56, 1 October 2018
Inspired by whales that the sound they made underwater is so dim and distanced. We were standing in the entrance of blaak and hearing sharp noises from the surroundings, an idea of making analogue filter came up in our minds.
Contents
Research
Sound and light waves: https://www.youtube.com/watch?v=Io-HXZTepH4&t=1013s
8 Hours of Whale Sounds Deep Underwater: https://www.youtube.com/watch?v=nDqP7kcr-sc
First Time Testing
The first (and only) prototype.
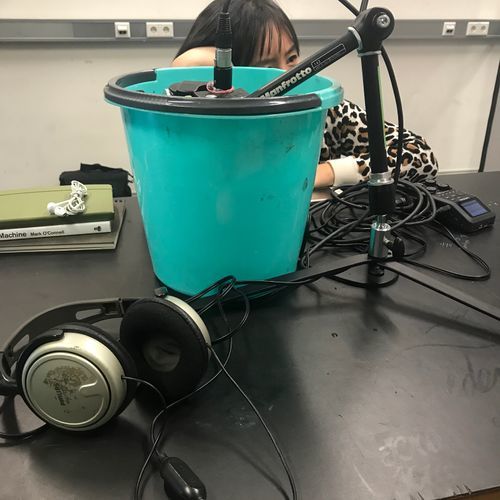
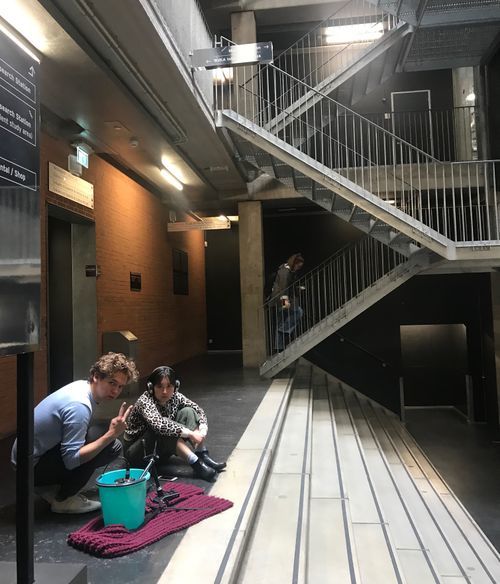
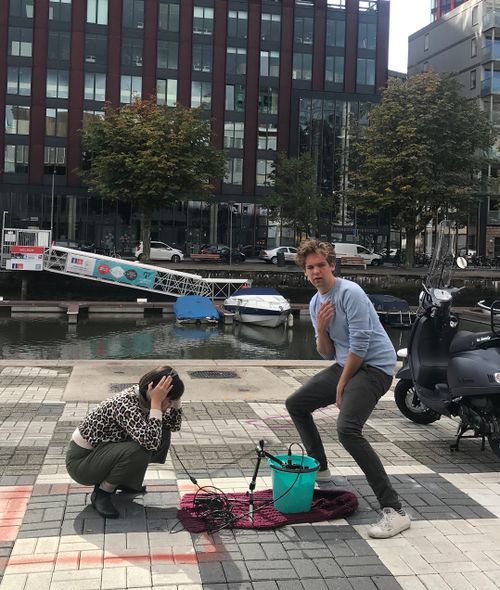
We first used a plastic bucket to contain water, and leave the material problem to the later stage. We didn't get an underwater microphone, instead, we used a condom on a normal microphone for water prove. During the test on the desk, we realised the vibration transmitted by the attached material is extremely strong. To reduce it, we had a thick scarf. Afterwards, we decided to bring the device outside the studio to check the effect.
The result of testing outside fitted our anticipation. And it also showed some improvement to be done.
Process
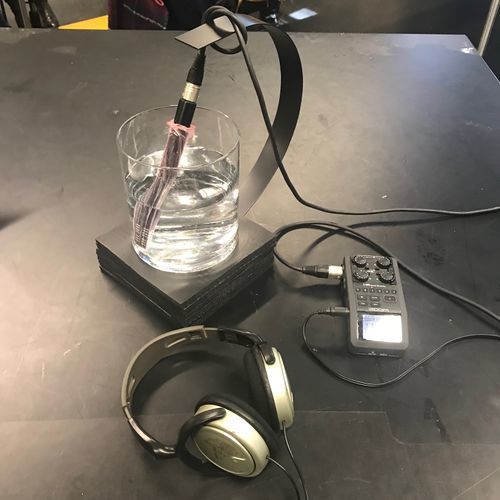
The device consisted of two parts, the analogue part and the digital part.
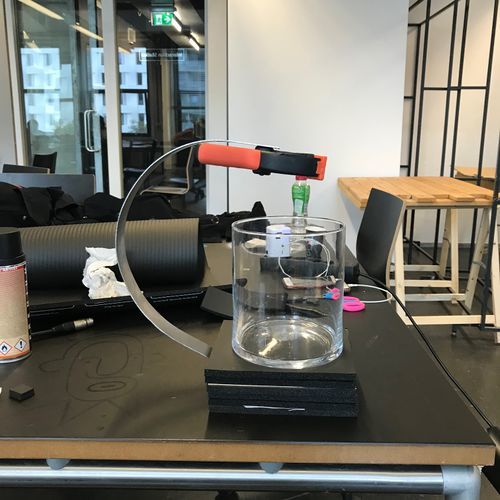
The bent metal is the main and constructed component, it was covered and patted with thick foam board in order to reduce the transmitted vibration. A big clip attached to the top of metal for hanging and stabilizing the microphone.
The microphone was placed in a condom for waterproof, connected to a sound recorder for adjusting and a set headphone.
Second Time Testing and Filming
Product and Video
Aquatic Acoustic
Video Link : https://vimeo.com/292687674
