Difference between revisions of "Cybernetic Prosthetics : The Sixth sense project"
| Line 11: | Line 11: | ||
Coming to think of our future perspectives and the constant expanding of The internet of things around us. We came to the subject of electronic magnet fields and projects like "white spots" from Richard Vijgen. | Coming to think of our future perspectives and the constant expanding of The internet of things around us. We came to the subject of electronic magnet fields and projects like "white spots" from Richard Vijgen. | ||
| − | |||
[[File:sixth-sense3.png|300px]] | [[File:sixth-sense3.png|300px]] | ||
[[File:sixth-sense4.png|300px]] | [[File:sixth-sense4.png|300px]] | ||
| Line 84: | Line 83: | ||
== Aesthetics and finalizing == | == Aesthetics and finalizing == | ||
| − | + | ||
| − | |||
| − | |||
[[File:sixth-sense11.JPG|300px]] | [[File:sixth-sense11.JPG|300px]] | ||
[[File:sixth-sense12.JPG|300px]] | [[File:sixth-sense12.JPG|300px]] | ||
[[File:sixth-sense13.JPG|300px]] | [[File:sixth-sense13.JPG|300px]] | ||
Latest revision as of 10:17, 11 October 2018
Contents
Starting point
After endless discussions and mindmapping:
We still could not find an exact interest so we decided we would do something we were all excited about: Cyborgs. After discussing what would be the merge between nature and technology we came to senses. How we have 5 natural senses and the ability to add a sense would create a new merge between tech and nature.
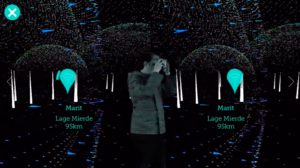
Coming to think of our future perspectives and the constant expanding of The internet of things around us. We came to the subject of electronic magnet fields and projects like "white spots" from Richard Vijgen.
Focus point
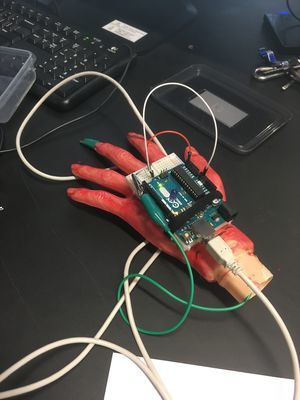
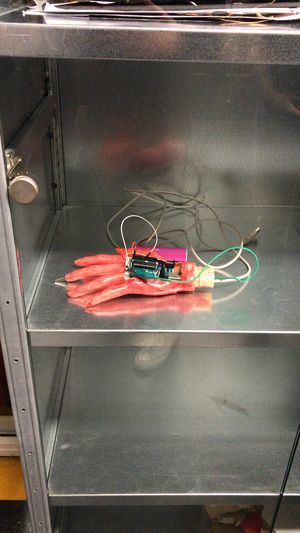
We decided to create an extension of our hands, that would be able to show on touch that you are near an electro magnetic field.
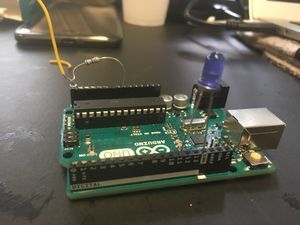
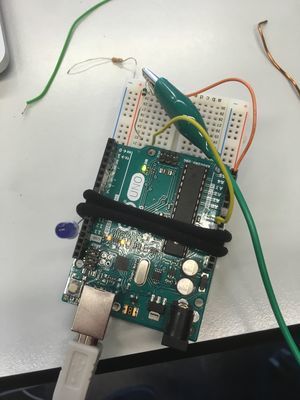
We found a tutorial on how to create an easy EMF detector from Aaron Lai. With just the use of an external battery, LED light, resistor and piece of current lead wire. 300px 300px
Prototype process
Our prototype process:
Code and practicalities
The LED light goes in digital input 11 and Ground The current lead wire is attachted to Analog output 1 and attached to a 1M resistor stated in analog output 5.
We used this code for the Arduino Software: // Aaron ALAI EMF Detector April 22nd 2009 VERSION 1.0 // aaronalai1@gmail.com // *future note, put in averaging function to average val which should result in a more // smooth response from the led. I will give you a hint on how to make an averaging function; // it involves the use of an array
int inPin = 5; // analog 5
int val = 0; // where to store info from analog 5
int pin11 = 11; // output of red led
void setup() {
Serial.begin(9600);
}
void loop() {
 val = analogRead(inPin);                    // reads in the values from analog 5 and
                                                                  //assigns them to val
 if(val >= 1){

   val = constrain(val, 1, 100);               // mess with these values
   val = map(val, 1, 100, 1, 255);        // to change the response distance of the device
   analogWrite(pin11, val);                    // *note also messing with the resistor should change
                                                                  // the sensitivity
  }else{                                                     // analogWrite(pin11, val); just tuns on the led with
                                                                 // the intensity of the variable val
   analogWrite(pin11, 0);                     // the else statement is just telling the microcontroller
                                                                // to turn off the light if there is no EMF detected
 }

Serial.println(val);                                // use output to aid in calibrating
}
You can use a variety of materials to use as an EMF antenna, all with different sensitivities and possibilities.\
We also used a variety of different materials but found that a simple alligator clip attached to the resistor works best and finds a good balance between the sensitivities.

