Difference between revisions of "User:LV/PRACTICE RESEARCH"
| (33 intermediate revisions by the same user not shown) | |||
| Line 1: | Line 1: | ||
| − | + | =CARVING EXAMPLES= | |
| − | |||
| − | |||
| − | |||
| − | |||
| − | |||
| − | |||
| − | |||
| − | |||
| − | |||
| − | |||
| − | |||
| − | |||
| − | |||
| − | |||
| − | |||
| − | |||
| − | |||
| − | |||
| − | |||
| − | |||
| − | =CARVING= | ||
| − | |||
| + | [[File:CarvingG.jpg | 500px]] | ||
| + | [[File:CarvingG2.jpg | 500px]] | ||
[[File:Caroline_Slotte.jpeg]] | [[File:Caroline_Slotte.jpeg]] | ||
'''Caroline Slotte''' | '''Caroline Slotte''' | ||
| Line 44: | Line 24: | ||
[[File:Alvin Lucier.jpg]] | [[File:Alvin Lucier.jpg]] | ||
'''Alvin Lucier''' | '''Alvin Lucier''' | ||
| + | |||
| + | [[File:Eric Standley.jpg]] | ||
| + | '''Eric Standley''' | ||
| + | |||
| + | [[File:Carvingmonopoly.JPG| 100px ]] | ||
| + | [[File:carvingmetal.PNG]] | ||
| + | |||
| + | <br> | ||
| + | <br> | ||
| + | |||
| + | |||
| + | =HISTORICAL EXAMPLE= | ||
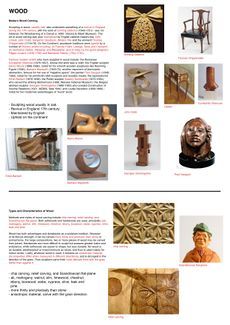
| + | For the historical example I chose woodcarving, because this is something I tried at a young age and I wanted to see how it would go now. <br> | ||
| + | I found these beautiful woodcarvings on Tumblr and was instantly hooked, the simplicity and the smoothness oboy. | ||
| + | <br> | ||
| + | Here is some research I did: <br> | ||
| + | {|style="margin: 0 auto;" | ||
| + | | [[File:historisch research.jpeg|thumb|upright]] | ||
| + | | [[File:historisch research2.jpeg|thumb|upright]] | ||
| + | | [[File:historisch research4.jpeg|thumb|upright]] | ||
| + | | [[File:historisch research3.jpeg|thumb|upright]] | ||
| + | |} | ||
| + | <br> | ||
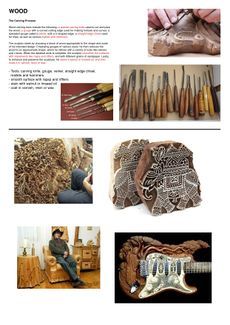
| + | Here are the carvings I experimented with: | ||
| + | <br> | ||
| + | [[File:Historical carving.jpg | 300px]] | ||
| + | [[File:Historical carving2.jpg | 300px]] | ||
| + | [[File:Historical carving 3.jpg | 300px]] <br> | ||
| + | <br>[[File:Historical carving4.jpg | 300px]] | ||
| + | <br> Got some tools from my mother and bought a hammer and clamps. <br> | ||
| + | This was not as easy as I thought it would be.<br> | ||
| + | After a whole day carving my body was bruised and pained.<br> | ||
| + | But the thing was I kept on going, although it did not go according to what I had in mind. <br> | ||
| + | I am an impatient person and want things to be finished asap so this took too long in my opinion. <br> | ||
| + | It was addictive. <br> | ||
| + | MUST MAKE THIS WORK.<br> | ||
| + | It was frustrating.<br> | ||
| + | I am a perfectionist. | ||
| + | <br>It gives satisfaction to get a little bit further every carve.<br> | ||
| + | It was a thinkfree zone.<br> | ||
| + | I got obsessed, woodcarving is everywhere around us and now I notice everything. | ||
| + | <br> | ||
| + | =COMPARATIVE EXAMPLE= | ||
| + | Perspex for me is a wonderful material, it comes in different colors and is very clean. <br> | ||
| + | Most of all i like the transparant perspex. <br> | ||
| + | Whenever i use perspex it needs to be dust-free and unscratched, a smooth surface. <br> | ||
| + | Going against that wish i wanted to see what happend when i scratched it. <br> | ||
| + | At first is was very hard to assault my perspex but later i got the hang of it. <br> | ||
| + | As techniques i used: scratching, scrubbing with sandpaper, carving with different sizes, laser engraving (digital) and burning with a lighter. <br> | ||
| + | By assaulting my perspex an interesting structure emerged, most of all i like the one that is carved with the big carver. <br> | ||
| + | By doing this i take the ordinary material to a next level. <br> | ||
| + | This was my first draft: <br> | ||
| + | <br> | ||
| + | [[File:comparative.jpg | 500 px]] | ||
| + | [[File:comparative2.jpg | 500 px]] | ||
| + | <br> | ||
| + | The small surfaces of structure looked too frumpy for me, so according to my own instinct i increased the surface of some. <br> | ||
| + | And also, the assembled cube will take away the action of feeling the structure, because the structures are in the inside. MUWHAHA. <br> | ||
| + | <br> | ||
| + | Alright, the gluing of the perspex with chloroform eventually worked out, but it was definitely not ment to be. <br> | ||
| + | I decided to turn the box into a lampshade so that it had more connection with the ordinary objects. <br> | ||
| + | But once I got it on there were no special effects in the shadow and it looked just silly. <br> | ||
| + | [[File:lamp.jpg | 400 px]] <br> | ||
| + | [[File:lamp2.jpg | 400 px]] <br> | ||
| + | While trying to create another lamp, I let my cube fall so it broke, and that was the last sign for me. <br> | ||
| + | I went to the lasercutter and cut of the corners and now I will let the structure be the beauty on its own. <br> | ||
| + | |||
| + | =NEW SKILL= | ||
| + | <br>Since woodcarving by hand is such a pain in the ass I decided to work with the wood turning table. <br> | ||
| + | This gives me the joy of woodcarving but doesn't wear my body out.<br> | ||
| + | Things are slightly different now: <br><br> | ||
| + | |||
| + | It is addictive. <br> | ||
| + | I AM MAKING THIS WORK.<br> | ||
| + | It is slightly frustrating sometimes.<br> | ||
| + | I am a perfectionist, I can use that in my power to create the fluent lines. <br> | ||
| + | But also can put it aside when a chunk of wood breaks of, or if I carve to much. <br> | ||
| + | It gives A LOT satisfaction, it makes me feel proud of what I've made. <br> | ||
| + | [[File:imadedis.jpg | 100 px]] <br> | ||
| + | It is a thinkfree zone, I can let myself get lost with the wood and let it lead me to a new form.<br> | ||
| + | I get in a focus-zone. <br> | ||
| + | I still am obsessed, woodcarving is everywhere around me and now I notice everything. <br> | ||
| + | There is so much beauty in the wood and the prints in it. <br> | ||
| + | <br> | ||
| + | <br> | ||
| + | I was to late for an open aanbod, but luckily the teacher was so sweet to give us a brief instruction. <br>Beforehand we had to read the instructions: <br> | ||
| + | [[File:houtdraaibank1.JPG | 200px]] | ||
| + | [[File:houtdraaibank2.JPG | 200px]] | ||
| + | [[File:houtdraaibank3.jpeg | 200px]] | ||
| + | [[File:houtdraaibank4.jpg | 200px]] | ||
| + | [[File:houtdraaibank5.JPG | 200px]] <br> | ||
| + | 1. Get a piece of wood (fine wood, dried wood, or fresh wood for extreme thin carving) <br> | ||
| + | 2. Cut it in a square form, if the diameter is under 45mm you don't have to make a pin. <br>[[File:houtdraaibank7.jpg | 200px]] | ||
| + | 3. If your diameter is above, make a pin. <br> | ||
| + | 4. If your diameter is above, flatten the corners. <br> [[File:houtdraaibank8.jpg | 200px]] | ||
| + | 5. On the other side, mark down a centerpoint and stick something(priem) in it.<br> | ||
| + | 6. Put your wood in the machine and tighten carefully.<br> [[File:houtdraaibank9.jpg | 300px]] | ||
| + | 7. Start with the big round carving thing to make the wood fully round.<br> | ||
| + | 8. Continue with the smaller carvers for details.<br> | ||
| + | 9. When satisfied with form, start polishing, start with 120 or so, and around 600 put some oil on your wood and continue till 1200 or so.<br> | ||
| + | [[File:houtdraaibank11.jpg | 300px]] <br> | ||
| + | 10. oyeah: when you want to hollow something, don't turn your wood to thin. what you see down here is 'officially' wrong. <br> | ||
| + | 12. Cut of the rest wood. <br> | ||
| + | 13. TADAAA. <br> | ||
| + | <br>[[File:houtdraaibank12.jpg | 300px]] [[File:houtdraaibank13.jpg | 300px]] [[File:houtdraaibank14.jpg | 300px]] | ||
| + | <br>[[File:houtdraaibank15.jpg | 500px]] | ||
| + | |||
| + | =PUSHED TO THE LIMIT= | ||
| + | Inspired by my own comparative cube and the fascinating prints that emerged there i started searching for interesting and ordinary objects for me to assault. <br> | ||
| + | Walking through Scrap i found a box of CD's and got reminded of the beautiful rainbows on there.<br> | ||
| + | I decided to experiment with the same technique i used on the cube on this CD, and the outcome is amazing. <br> | ||
| + | You can still see the rainbow in a certain light-angle and the places where I slipped show a interesting second layer of the CD. <br> | ||
| + | The parts where I had slipped or broken of a piece of CD can be seen as a push for the limit, but they don't necessarily bring the object down. <br> | ||
| + | [[File:regenboog9.jpg | 500 px]] | ||
| + | |||
| + | =SHARED EXAMPLE= | ||
| + | Unfortunately I missed the first lesson of the workshop due to my bruised foot. So when I came in the second lesson people were already working on something. <br> | ||
| + | Something that caught my eye was what Kars was working on, cutting styrofoam. <br> | ||
| + | He used a tool that cut trough styrofoam with the use of electricity that created a filament. <br> | ||
| + | When using that tool you got a very smooth and mesmerizing surface, right in my alley because is was busy with creating beauty with ordinary materials. <br> | ||
| + | Kars was creating a tool that could cut bigger surfaces which was almost finished, from there I joined him. <br> | ||
| + | We went to the interaction station to find a way to make it mobile, but all the chargers we could find didn't give enough power.<br> | ||
| + | The best way was for us to plug the tool in the labpowersupply, and use a volt from 5 to max 7. <br> | ||
| + | For me it was an interesting switch in the direction of electricity, something i have never done before. <br> | ||
| + | We found out that getting the supplies for your project takes most of the time haha. <br> | ||
| + | We started experimenting with our styrofoam to create sculptures that show the beauty of the tool. <br> | ||
| + | First we worked with our intuition and tried out different motions in cutting, after that we tried to work with pre-made forms but that didn't give us the pleasure of working by hand. <br> | ||
| + | Our most interesting piece is the one where we let the tool create its own forms by hanging it in the material. <br> | ||
| + | For our next step we don't want to mechanize our process but point out the beauty of the structure and form with lighting. <br> | ||
| + | [[File:shared.jpg | 400 px]] | ||
| + | [[File:shared2.jpg | 500 px]] | ||
| + | [[File:shared3.jpg | 500 px]] <br> | ||
| + | [[File:shared4.jpg | 500 px]]<br> | ||
| + | Our next step turned out to be as great as I hoped it would. <br> | ||
| + | With 2 lamps, an infrared and some transparant color-sheets, our sculptures create a whole new image, almost surreal. <br> | ||
| + | [[File:shared5.jpg | 500 px]] <br><br> | ||
| + | [[File:shared6.jpg | 500 px]] <br><br> | ||
| + | [[File:shared7.jpg | 500 px]] <br><br> | ||
| + | [[File:shared8.jpg | 500 px]] <br><br> | ||
| + | [[File:shared9.jpg | 500 px]]<br><br> | ||
| + | [[File:shared10.jpg | 500 px]]<br><br> | ||
| + | [[File:shared11.jpg | 500 px]]<br><br> | ||
| + | [[File:shared12.jpg | 500 px]]<br><br> | ||
| + | [[File:shared13.jpg | 500 px]] <br> | ||
| + | In the theme of my collection I decided to (try) to print my favorite picture (that fucks with perspective) by silkscreen on perspex. <br> | ||
| + | This turns the picture into an object again. It was very frustrating and the end result is not as clear as the picture, but the result makes it even more abstract, what I like in it. <br> | ||
| + | [[File:shared14.jpg | 600 px]] | ||
| + | =GALLIUM= | ||
| + | As seen in my 'inspiration' section, there is this metal that 'melts in your hand'. <br> | ||
| + | Well I bought some (expansive shit dude) and it doesn't melt in your hand but it does melt very easy. <br> | ||
| + | And when it is melted is has the structure of water. <br> | ||
| + | My first experiment with this material was using the previously carved CD as a cast for my gallium: <br> | ||
| + | [[File:gallium7.jpg | 400 px]]<br> | ||
| + | Then I tried to make a cast of a key and than poor the gallium in, this turned out pretty neat, but not perfect at all. <br> | ||
| + | [[File:cast1.jpg | 400 px]] <br> | ||
| + | There was some leftover from the casting on which I used the woodcarving technique again, to see if it would give me the same structure. <br> | ||
| + | [[File:cast2.jpg | 400 px]] | ||
| + | [[File:cast3.jpg | 400 px]] <br> | ||
| + | Gallium also leaves traces, that create a mirror or a silver plated look on ordinary objects. <br> | ||
| + | So the next step was to apply this on ordinary objects and materials, to make them even prettier. <br> | ||
| + | [[File:gallium.jpg | 400 px]] | ||
| + | [[File:gallium2.jpg | 400 px]] | ||
| + | [[File:gallium3.jpg | 400 px]] | ||
| + | [[File:gallium4.jpg | 400 px]] | ||
| + | [[File:gallium5.jpg | 400 px]] | ||
| + | [[File:gallium6.jpg | 400 px]] The last one was an accident.. <br> | ||
| + | |||
| + | =RAINBOWS= | ||
| + | [[File:larrybell.jpg | 400px]] | ||
| + | [[File:larrybell2.jpg | 400px]] | ||
| + | <br><br> | ||
| + | Also inspired by Larry Bell (one of my favorite artist at the time), I started a research about creating rainbows on metals. <br> | ||
| + | Looks like this is also a thing that I'm highly interested in because i can't stop thinking about it, and I need to figure this out. <br> | ||
| + | https://youtu.be/xBPFP2IkIYM<br> | ||
| + | Most metals can be colored with heat oxidation, so I thought hmm that is easy. <br> | ||
| + | To the gas torch we go! I brought a random bunch of metal/steel objects and started heating them up. <br> | ||
| + | Seems this oxidation is not so easy to steer. <br> | ||
| + | Besides that I got some awesome colors, but the problem is that the colors appear when you take the gas torch away from the metal. <br> | ||
| + | When the colors start to appear you can't stop them anymore. <br> | ||
| + | And the bigger problem is that you can swipe the colors of with your finger, so now I have to varnish them. <br>And the idea was to take this ordinary objects and make them more beautiful and than still be able to use them. <br> | ||
| + | [[File:heatoxidation.jpg | 400 px]] | ||
| + | <br> | ||
| + | A metal that can't be colored with heat is titanium, this needs an electrolytic anodizing process. <br> | ||
| + | You can color the upper layer of titanium by putting the metal in a mixture of water and a sodium and connecting it with electricity. <br> | ||
| + | The color you get depends on the amount of voltage. <br> | ||
| + | At the moment i am waiting for my 9v battery's and for the shops to open so i can get some scrap-titanium. <br> | ||
| + | [[File:regenboog2.png | 400 px]] | ||
| + | [[File:regenboog3.jpg | 500 px]] | ||
| + | [[File:regenboog5.png | 400 px]] | ||
| + | [[File:regenboog6.jpg | 500 px]] | ||
| + | [[File:regenboog7.jpg | 800 px]] | ||
| + | <br> | ||
| + | <br> | ||
| + | ''titanium: batterijen, water, sodiumhydroxide/soda/zuiversingszout/cola https://youtu.be/3PO0LpdoGvo <br> | ||
| + | zilver: extra nodig zwavel: https://youtu.be/VrA7Jyw1uOs<br> | ||
| + | http://www.hinmeijer.nl/product/118887/zwavel_99_.aspx <br> | ||
| + | http://www.hinmeijer.nl/product/66825/natriumhydroxide_.aspx<br> | ||
| + | http://www.kh-metals.nl/producten/speciale-metalen/titanium<br> | ||
| + | http://www.ijzerhandelvandenberg.com/Bruikbaar-IJzer/ <br>'' | ||
| + | <br> | ||
| + | Yesterday I tried to do this with one 9v battery and some old crocodile clams (because i was too impatient) on a doorkey (don't even know if this is titanium for sure), but this failed. <br> | ||
| + | The old clams got a bit cleaner though. <br> | ||
| + | [[File:regenboog8.jpg | 600 px]]<br> | ||
| + | There is also an interesting technique you can use to create rainbow/oil colors on black paper, only using warm water and transparant nail polish. <br> | ||
| + | The moment you drop the nail polish in the water it creates a colorful surface on the water that you can apply to black paper, or anything else that will stick. <br> | ||
| + | [[File:nailpolish.jpg | 400 px]] | ||
| + | [[File:nailpolish2.jpg | 400 px]]<br> | ||
| + | <br> | ||
| + | It is very hard to find titanium, but I contacted a few metal trade company's and luckily there was one that had some scrap titanium for me. <br> | ||
| + | An interesting experience, going to a place like that, where all sorts of metal are stored in big piled up containers. The guy had to climb all the way up for me. <br> | ||
| + | [[File:metaalhandel.jpg | 400px]] <br> | ||
| + | Well my battery's finally came in and I did everything just like the internet says, but it didn't work. <br> | ||
| + | Nothing happend to the parts in the water, then I remembered you could also use a sponge to paint with, and that worked! <br> | ||
| + | I'm so stoked, the colors are amazing, the colors just change in time when you make contact. <br> | ||
| + | It is a pity that it only works on one of my titanium plates, I guess the other ones aren't pure titanium. I also found out that you can use niobium for this proces. <br> | ||
| + | [[File:anodizing.jpg | 800 px]] | ||
| + | [[File:anodizing2.jpg | 800 px]] <br> | ||
| + | |||
| + | =STATEMENT= | ||
| + | [[File:imadedis.jpg | 500 px]] <br> | ||
| + | |||
| + | Content and focus:<br> | ||
| + | What I’ve been working on and what materials and techniques I’ve been using can be read above (the process). <br> | ||
| + | Somewhere in this quarter i decided to stop with most of the conceptual thinking in my practice. <br> | ||
| + | In the quarter before I did a lot of thinking and i am totally fed up with that for the moment.<br> | ||
| + | I just want to create beautiful things for now.<br> | ||
| + | I also took the choice to spend less time on the computer and more time in the stations. <br> | ||
| + | This course fits perfectly with my practice ideals. <br> | ||
| + | In my practice I gain the best work and the most pleasure by experimenting, I like to let myself get surprised by the outcome and then work further on that. <br> | ||
| + | For my competention assessment I composed these sentences about my practice essence: I want to be obstructive in this culture and communicate my believing’s. <br> | ||
| + | I want to make people conscious of our own imagining and how we are being manipulated in that. <br> | ||
| + | These sentences are still actual for my practice but in this course I focused on a more specific theme. <br> | ||
| + | My main motive for this course was to create and experiment with materials, expanding my knowledge in this. <br> | ||
| + | By doing this I found out that what I tend to do and like the most is creating beauty in something ordinary. <br> | ||
| + | To create more than that already exists, to break with the conventions of our expectations. <br> | ||
| + | Within this practice I actually found a technique that I enjoy a lot, turntable woodcarving! Since woodcarving by hand is such a pain in the ass I decided to work with the wood turning table. <br> | ||
| + | This gives me the joy of woodcarving but doesn't wear my body out. These are the feelings i get when in action:<br> | ||
| + | It is addictive. <br> | ||
| + | I AM MAKING THIS WORK.<br> | ||
| + | It is slightly frustrating sometimes.<br> | ||
| + | I am a perfectionist; I can use that in my power to create the fluent lines. <br> | ||
| + | But also can put it aside when a chunk of wood breaks of, or if I carve to much. <br> | ||
| + | It gives ALOT satisfaction, it makes me feel proud of what I've made. <br> | ||
| + | It is a think free zone, I can let myself let lost with the wood and let it lead me to a new form.<br> | ||
| + | I get in a focus-zone. <br> | ||
| + | I am obsessed, woodcarving is everywhere around me and now I notice everything. <br> | ||
| + | There is so much beauty in the wood and the prints in it. <br> | ||
| + | <br> | ||
| + | Cultural context:<br> | ||
| + | We live in a world of materialism and consumerism. <br> | ||
| + | By ‘we’ I mean our culture, the Western culture. <br> | ||
| + | We are manipulated into buying things that will make us happy. <br> | ||
| + | I am very fond of the spiritual teacher Eckhart Tolle, whom has made me aware of this.<br> | ||
| + | Through time our brains developed so much that it controls us, it has created the ‘ego’. <br> | ||
| + | The ego lives in the past and in the future, but not in the now. <br> | ||
| + | It worries about what has happened in the past and focuses on the future to make things right. ‘When I get this job I will be happy’. <br> | ||
| + | But by living like this, you are always waiting to be happy and you are never enjoying the present moment.<br> | ||
| + | But the present moment is all there is, the future and the past only exists in our brains, as thoughts. <br> | ||
| + | Acknowledging this can change your perspective in live, and has certainly changed my perspective. <br> | ||
| + | As I am trying to live up to these ideals, I am also connecting this with my own practice. <br> | ||
| + | People don’t look around them anymore and don’t enjoy and notice the beauty in everything, because they are to busy in their heads thinking about where they have to be. <br> | ||
| + | I want to make them see the beauty, and I also want to see the beauty for myself. <br> | ||
| + | The great thing is, that when I’m creating, I forget the world around me, I lose track of time, forget what needs to be done and I ascend in the beauty. <br> | ||
| + | When I start to think about what I’ve made and how I want to present it to the world to communicate my ideals, I get stuck. <br> | ||
| + | I never look forward to making selections, decisions and communicating strategies. I do look forward to creating my ass of. <br> | ||
| + | So why do what I don’t enjoy? When I don’t enjoy something it will have the same quality. <br> | ||
| + | The main reason I stopped high school at the third year of VWO, because doing what I don’t like puts me in a downwards spiral. <br> | ||
| + | You can call me pigheaded, because yeah well, we all have to do things we don’t like sometimes, I know. <br> | ||
| + | But this is my life, and when I get to choose what I want to do with that, I will. <br> | ||
| + | You come alone on earth and you leave alone. So better do what I like instead of pleasing the system. <br> | ||
| + | I know these are big words, but at least I try to live up to them. In this collection I am showing the public the beauty in already existing materials and objects by editing it. <br> | ||
| + | <br> | ||
| + | Impact: <br> | ||
| + | As I have already mentioned, beginning this quarter I made a changing decision within my own practice. <br> | ||
| + | I made a pact with myself: doing what I like most and only that. <br> | ||
| + | Experimenting with materials, preferably analogue materials, and continuing on the outcomes of that. <br> | ||
| + | That is what I did, and I have never been more proud of my own work. <br> | ||
| + | That is the greatest feeling ever, that you are getting closer to find out your pure interests and fascinations. <br> | ||
| + | I will certainly continue to work with analogue materials, work with my hands, and enjoy the ‘I MADE DIS’ feeling. <br> | ||
| + | <br> | ||
| + | Summary:<br> | ||
| + | In my practice I gain the most pleasure in experimenting, and letting myself get surprised by the outcome. <br> | ||
| + | My main motive is to create and experiment with materials, and expand my knowledge in this. <br> | ||
| + | What I tend to do and like the most to do is creating beauty in the ordinary, to create more than that already exists, to break with the conventions of our expectations.<br> | ||
| + | People don’t look around them anymore and don’t notice the beauty in everything, they are to busy in their heads thinking about where they have to be next. <br> | ||
| + | I want to make them see the beauty, as much as I want to for myself. <br> | ||
| + | The great thing is, that when I’m creating, I forget the world around me, I lose track of time, forget what needs to be done and I ascend in the beauty. <br> | ||
| + | Making for me is addictive, slightly frustrating, satisfying, mind freeing and anger therapy.<br> | ||
| + | <br> | ||
| + | <br> | ||
| + | |||
| + | 1. Give up your need to be always right. <br> | ||
| + | 2. Give up your need for control.<br> | ||
| + | 3. Give up blame.<br> | ||
| + | 4. Give up your self-defating self-talk.<br> | ||
| + | 5. Give up complaining.<br> | ||
| + | 6. Give up your need to impress others.<br> | ||
| + | 7. Give up your fears.<br> | ||
| + | 8 Give up on living your life to fit other people’s expectations.<br> | ||
| + | 9. Give up your future.<br> | ||
| + | 10. Give up your past.<br> | ||
| + | <br><br> | ||
| + | |||
| + | De samenleving wil dat je volgens hun conventies leeft. <br> | ||
| + | Je zal uit het veld geslagen worden wanneer je dit niet doet. <br> | ||
| + | Blijf bij jezelf. <br> | ||
| + | Beïnvloed hun manier van kijken.<br> | ||
| + | Weergeef je eigen observaties. <br> | ||
| + | Wees eigenzinnig.<br> | ||
| + | Verdedig je standpunt en blijf daar bij.<br> | ||
| + | Dit is de kern van je kunstenaarschap.<br> | ||
Latest revision as of 10:57, 23 April 2015
Contents
CARVING EXAMPLES
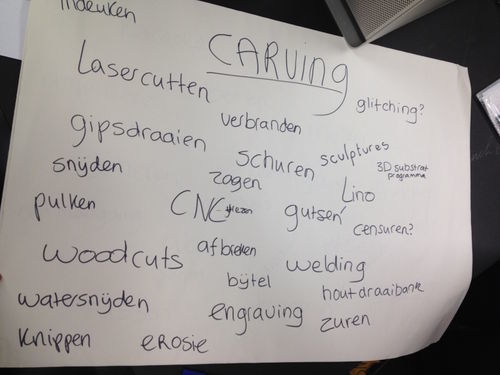
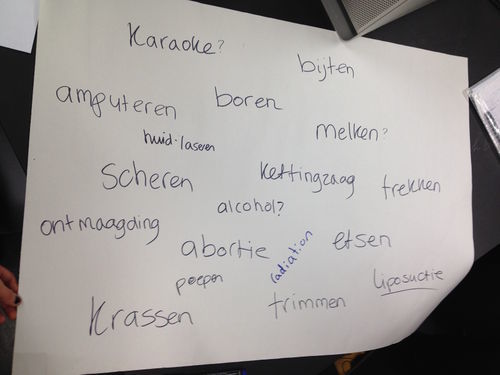
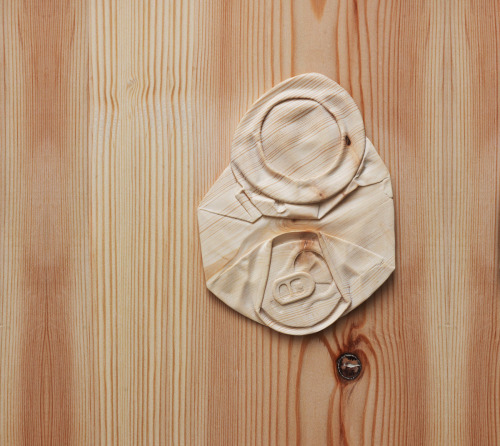 Caroline Slotte
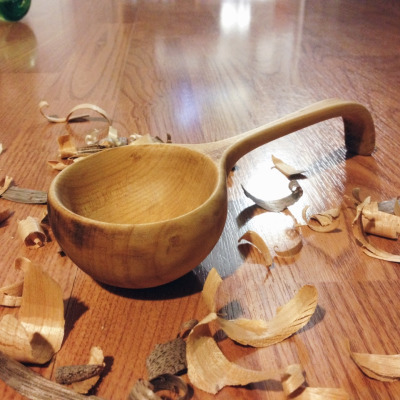 Jackalopedesign
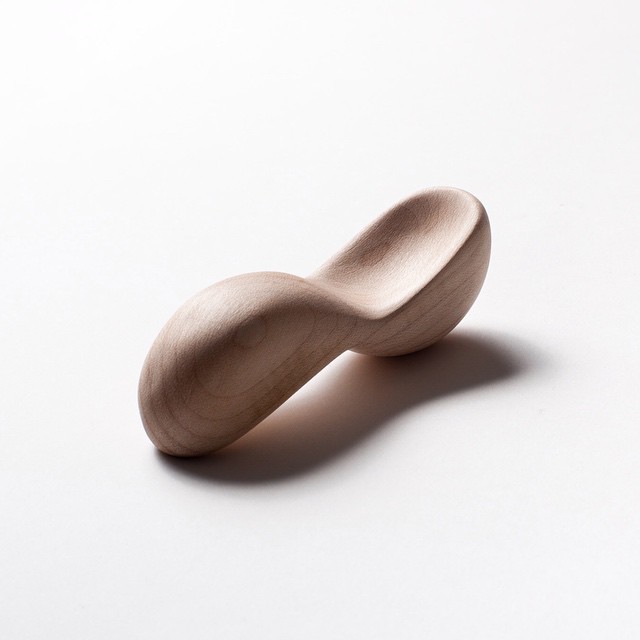
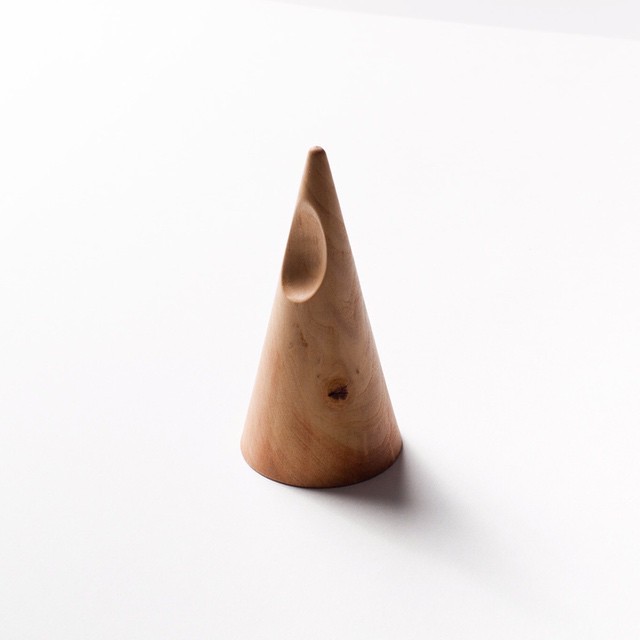
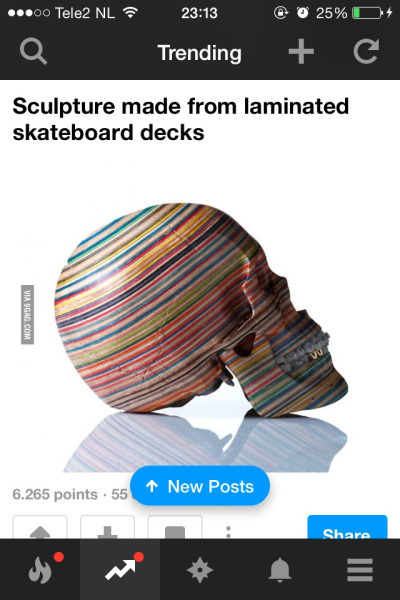
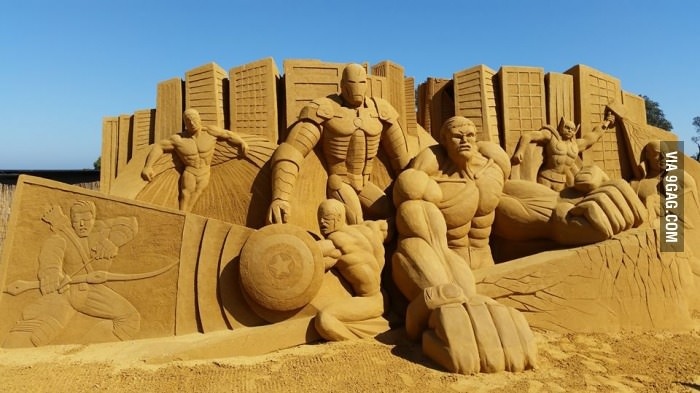
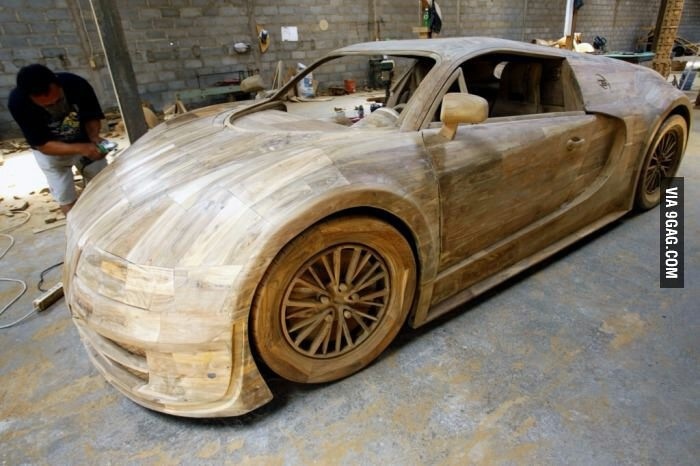
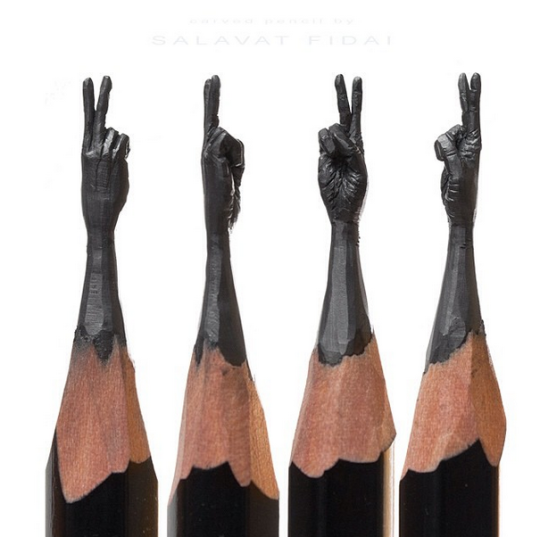 Salavat Fidai
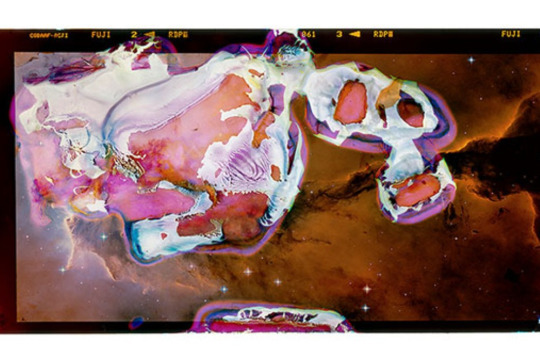 Marcus deSieno
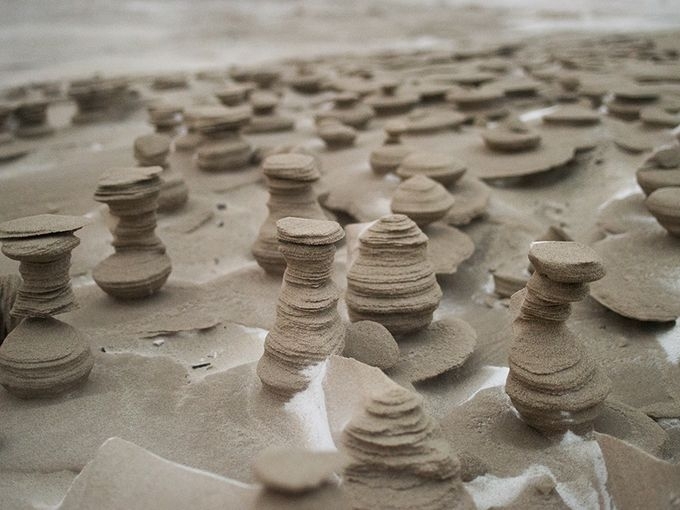
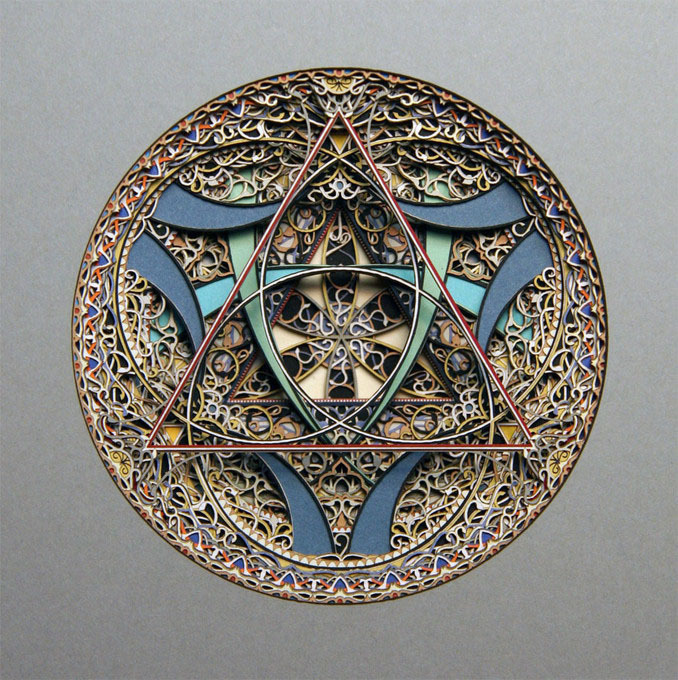
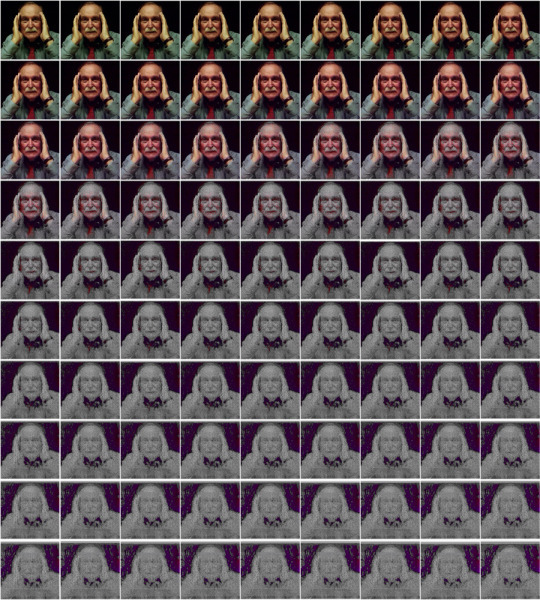 Alvin Lucier
HISTORICAL EXAMPLE
For the historical example I chose woodcarving, because this is something I tried at a young age and I wanted to see how it would go now.
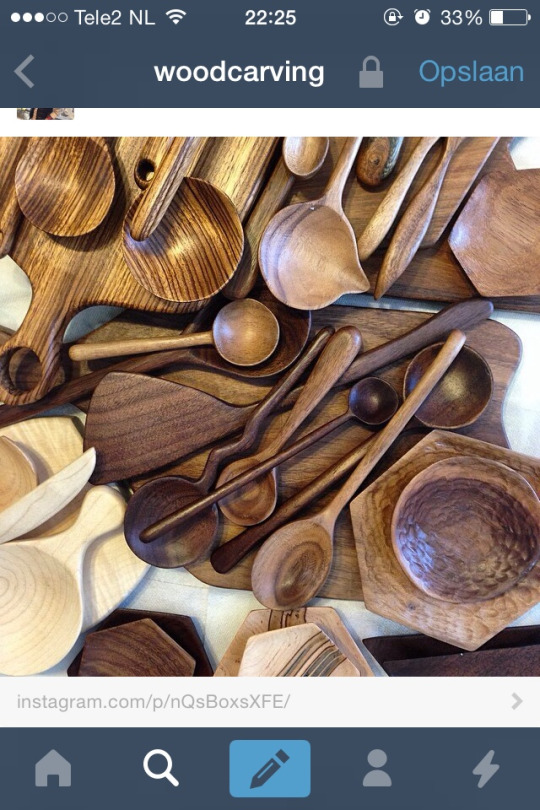
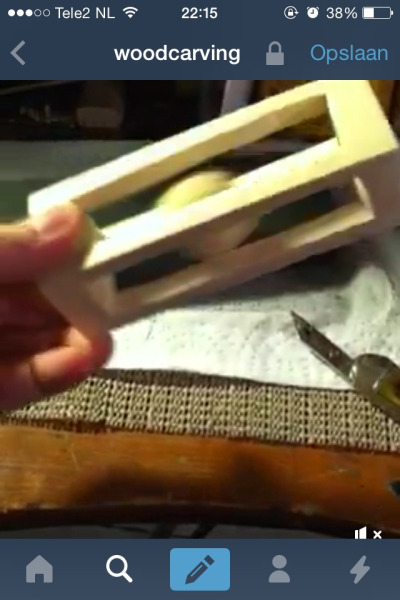
I found these beautiful woodcarvings on Tumblr and was instantly hooked, the simplicity and the smoothness oboy.
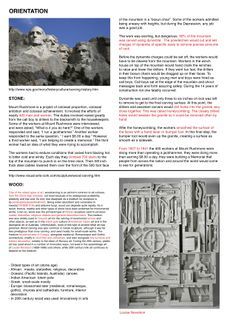
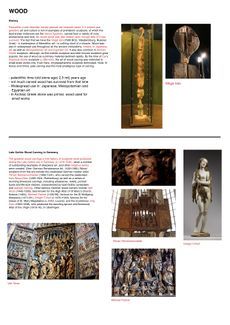
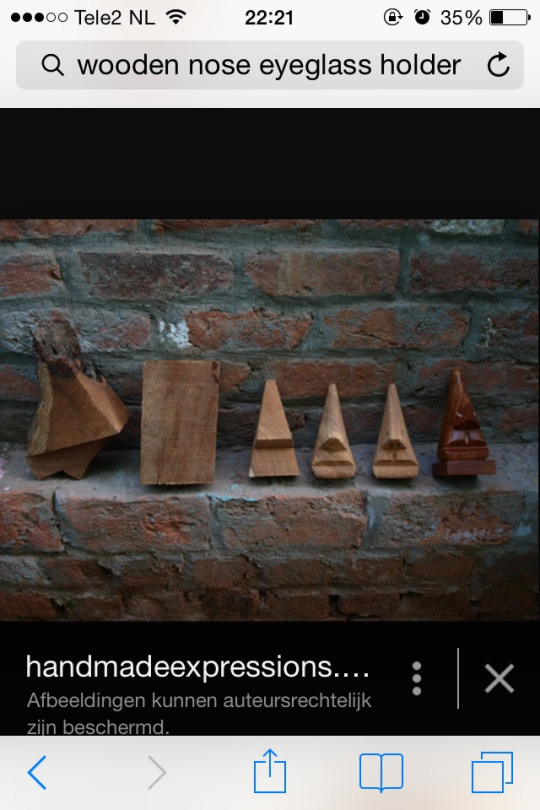
Here is some research I did:
Here are the carvings I experimented with:
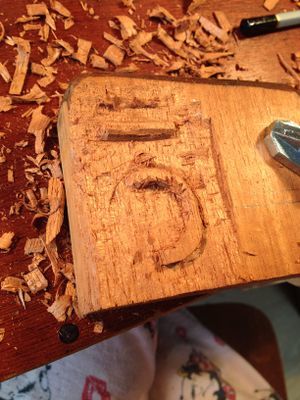
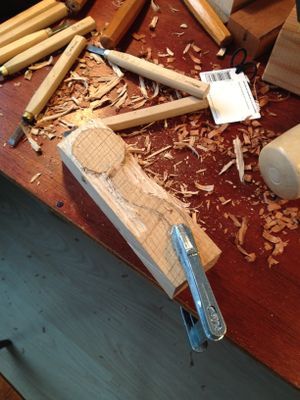
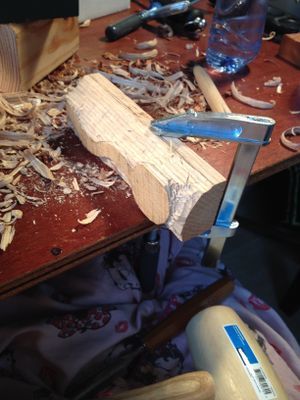
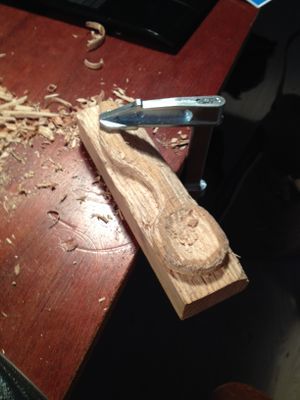
Got some tools from my mother and bought a hammer and clamps.
This was not as easy as I thought it would be.
After a whole day carving my body was bruised and pained.
But the thing was I kept on going, although it did not go according to what I had in mind.
I am an impatient person and want things to be finished asap so this took too long in my opinion.
It was addictive.
MUST MAKE THIS WORK.
It was frustrating.
I am a perfectionist.
It gives satisfaction to get a little bit further every carve.
It was a thinkfree zone.
I got obsessed, woodcarving is everywhere around us and now I notice everything.
COMPARATIVE EXAMPLE
Perspex for me is a wonderful material, it comes in different colors and is very clean.
Most of all i like the transparant perspex.
Whenever i use perspex it needs to be dust-free and unscratched, a smooth surface.
Going against that wish i wanted to see what happend when i scratched it.
At first is was very hard to assault my perspex but later i got the hang of it.
As techniques i used: scratching, scrubbing with sandpaper, carving with different sizes, laser engraving (digital) and burning with a lighter.
By assaulting my perspex an interesting structure emerged, most of all i like the one that is carved with the big carver.
By doing this i take the ordinary material to a next level.
This was my first draft:
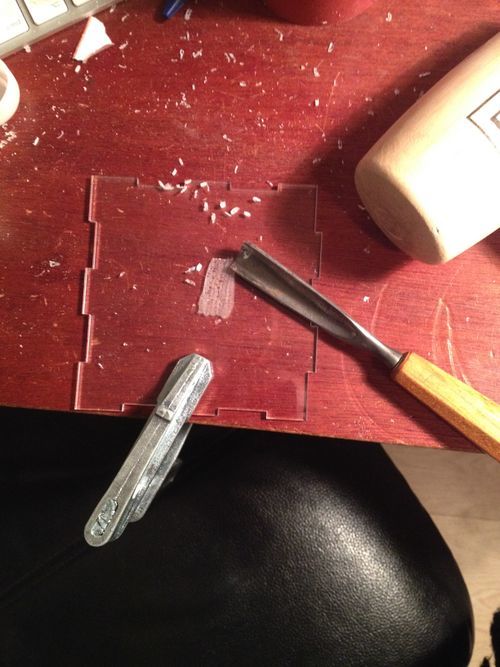
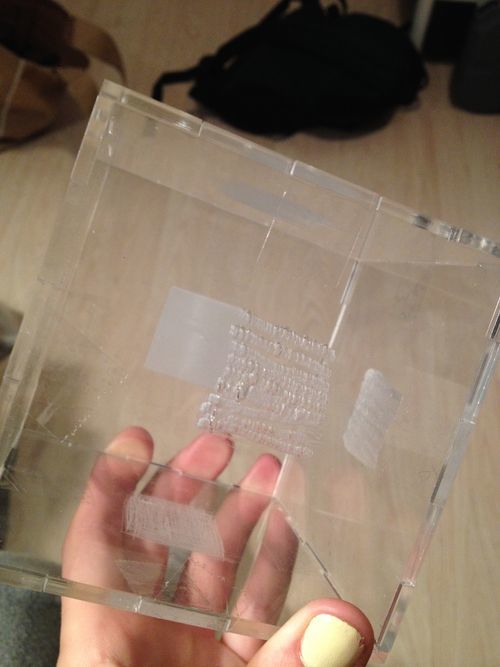
The small surfaces of structure looked too frumpy for me, so according to my own instinct i increased the surface of some.
And also, the assembled cube will take away the action of feeling the structure, because the structures are in the inside. MUWHAHA.
Alright, the gluing of the perspex with chloroform eventually worked out, but it was definitely not ment to be.
I decided to turn the box into a lampshade so that it had more connection with the ordinary objects.
But once I got it on there were no special effects in the shadow and it looked just silly.
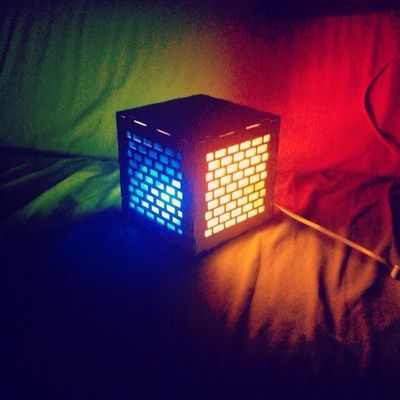
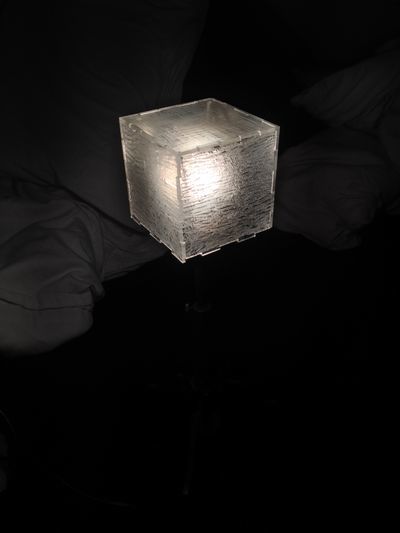
While trying to create another lamp, I let my cube fall so it broke, and that was the last sign for me.
I went to the lasercutter and cut of the corners and now I will let the structure be the beauty on its own.
NEW SKILL
Since woodcarving by hand is such a pain in the ass I decided to work with the wood turning table.
This gives me the joy of woodcarving but doesn't wear my body out.
Things are slightly different now:
It is addictive.
I AM MAKING THIS WORK.
It is slightly frustrating sometimes.
I am a perfectionist, I can use that in my power to create the fluent lines.
But also can put it aside when a chunk of wood breaks of, or if I carve to much.
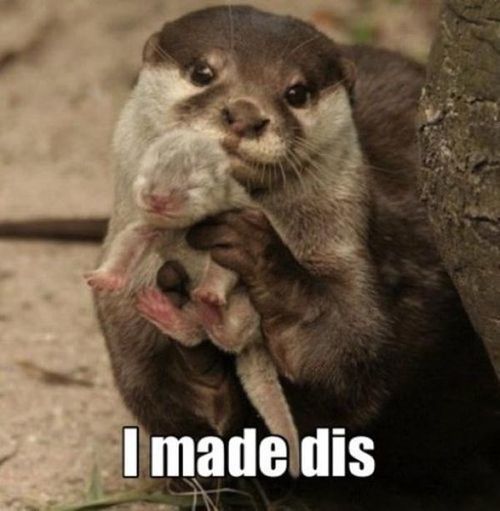
It gives A LOT satisfaction, it makes me feel proud of what I've made.
It is a thinkfree zone, I can let myself get lost with the wood and let it lead me to a new form.
I get in a focus-zone.
I still am obsessed, woodcarving is everywhere around me and now I notice everything.
There is so much beauty in the wood and the prints in it.
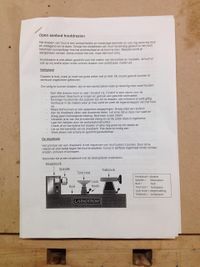
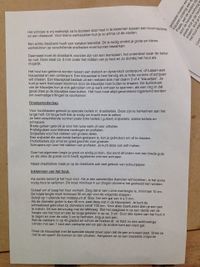
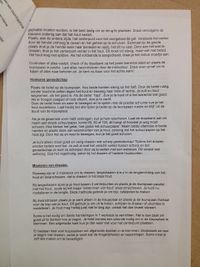
I was to late for an open aanbod, but luckily the teacher was so sweet to give us a brief instruction.
Beforehand we had to read the instructions:
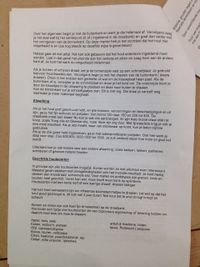
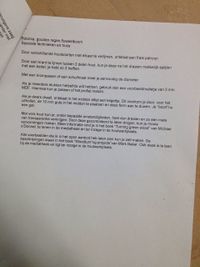
1. Get a piece of wood (fine wood, dried wood, or fresh wood for extreme thin carving)
2. Cut it in a square form, if the diameter is under 45mm you don't have to make a pin. 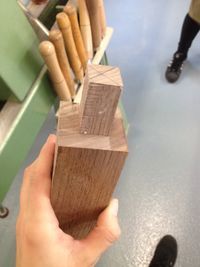 3. If your diameter is above, make a pin.
4. If your diameter is above, flatten the corners.
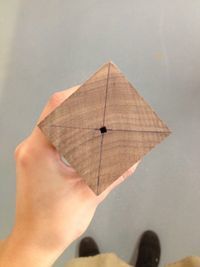 5. On the other side, mark down a centerpoint and stick something(priem) in it.
6. Put your wood in the machine and tighten carefully.
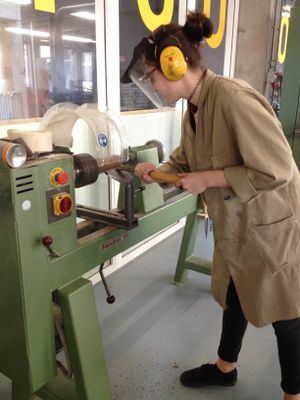 7. Start with the big round carving thing to make the wood fully round.
8. Continue with the smaller carvers for details.
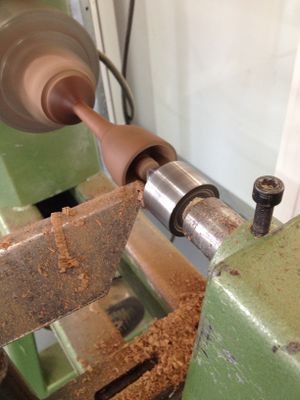
9. When satisfied with form, start polishing, start with 120 or so, and around 600 put some oil on your wood and continue till 1200 or so.
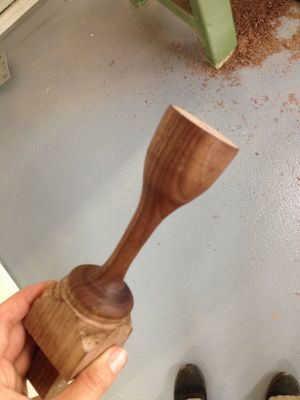
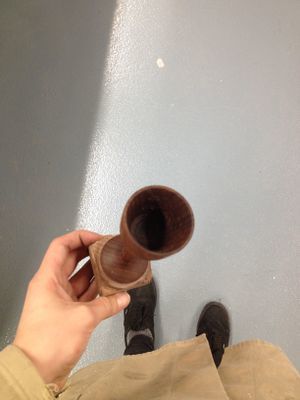
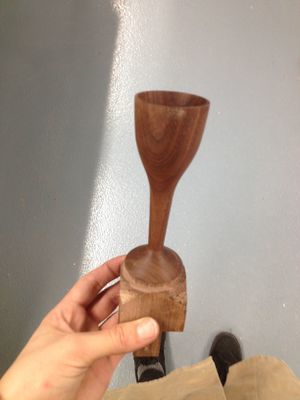
10. oyeah: when you want to hollow something, don't turn your wood to thin. what you see down here is 'officially' wrong.
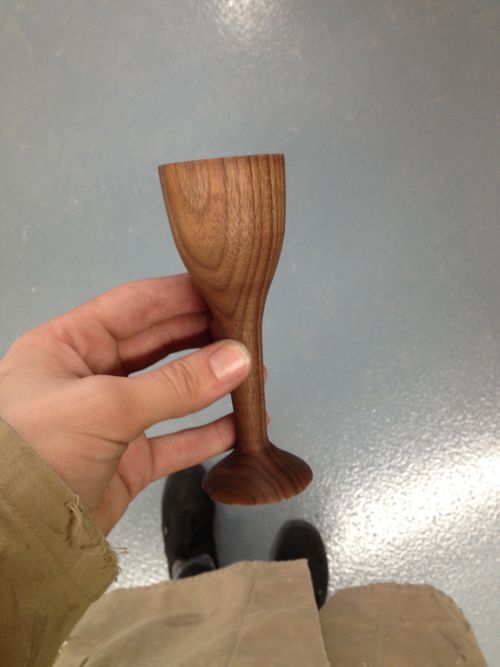
12. Cut of the rest wood.
13. TADAAA.
PUSHED TO THE LIMIT
Inspired by my own comparative cube and the fascinating prints that emerged there i started searching for interesting and ordinary objects for me to assault.
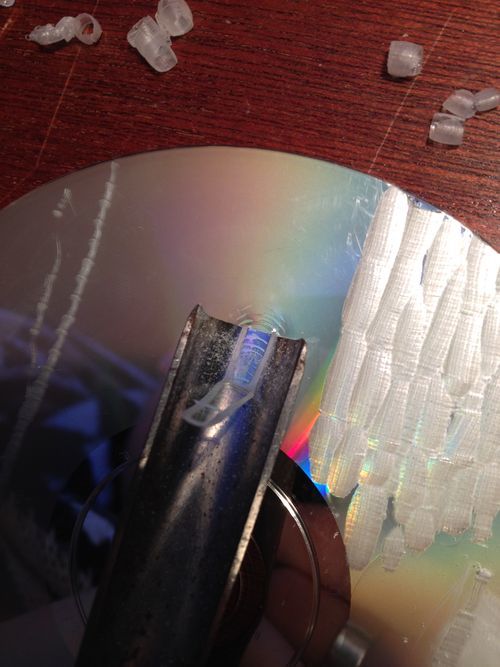
Walking through Scrap i found a box of CD's and got reminded of the beautiful rainbows on there.
I decided to experiment with the same technique i used on the cube on this CD, and the outcome is amazing.
You can still see the rainbow in a certain light-angle and the places where I slipped show a interesting second layer of the CD.
The parts where I had slipped or broken of a piece of CD can be seen as a push for the limit, but they don't necessarily bring the object down.
SHARED EXAMPLE
Unfortunately I missed the first lesson of the workshop due to my bruised foot. So when I came in the second lesson people were already working on something.
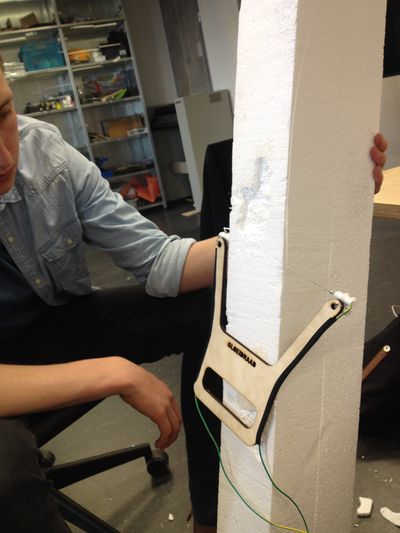
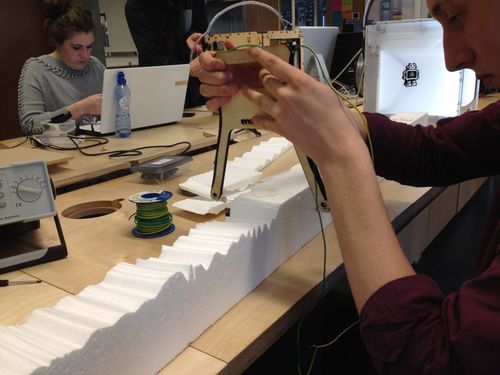
Something that caught my eye was what Kars was working on, cutting styrofoam.
He used a tool that cut trough styrofoam with the use of electricity that created a filament.
When using that tool you got a very smooth and mesmerizing surface, right in my alley because is was busy with creating beauty with ordinary materials.
Kars was creating a tool that could cut bigger surfaces which was almost finished, from there I joined him.
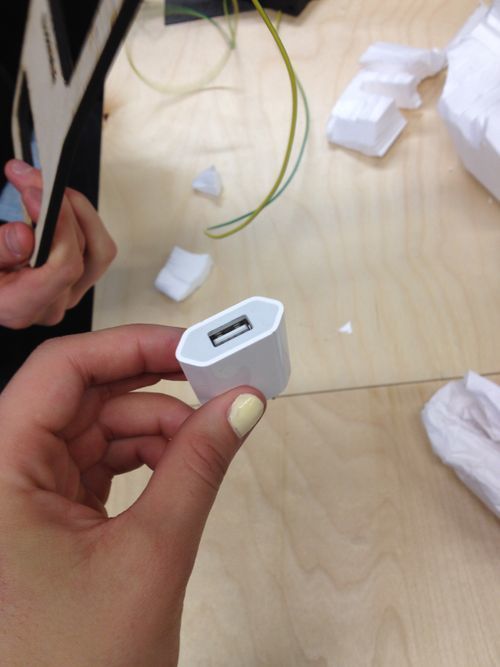
We went to the interaction station to find a way to make it mobile, but all the chargers we could find didn't give enough power.
The best way was for us to plug the tool in the labpowersupply, and use a volt from 5 to max 7.
For me it was an interesting switch in the direction of electricity, something i have never done before.
We found out that getting the supplies for your project takes most of the time haha.
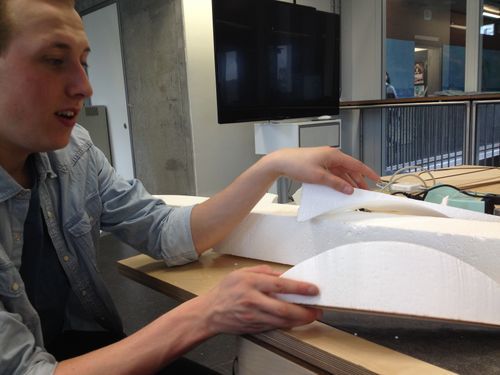
We started experimenting with our styrofoam to create sculptures that show the beauty of the tool.
First we worked with our intuition and tried out different motions in cutting, after that we tried to work with pre-made forms but that didn't give us the pleasure of working by hand.
Our most interesting piece is the one where we let the tool create its own forms by hanging it in the material.
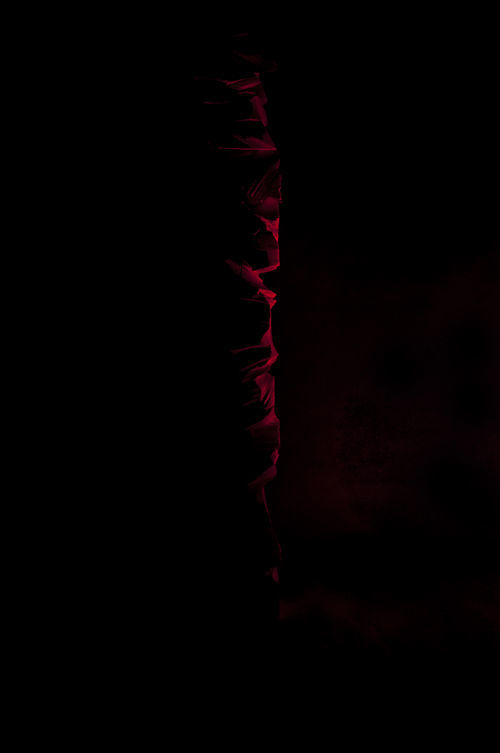
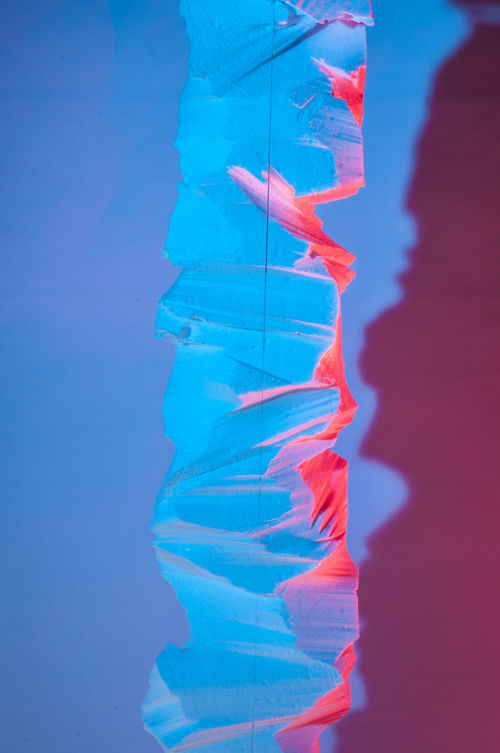
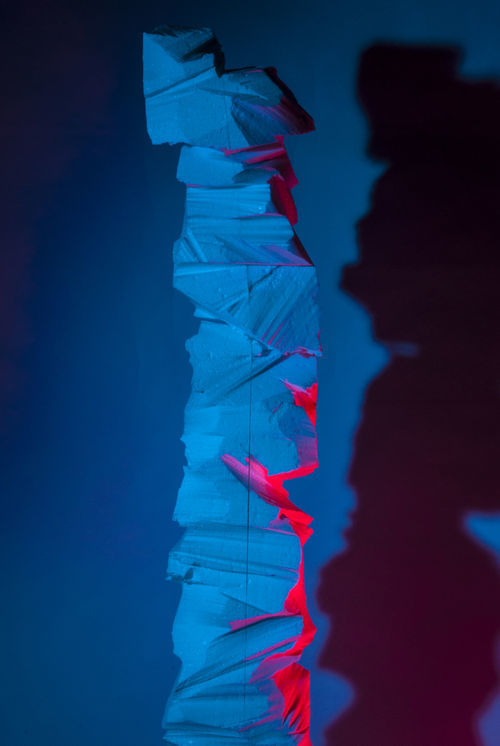
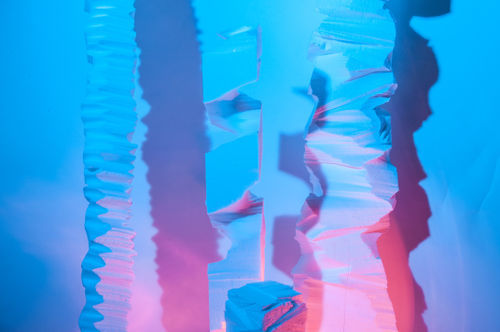
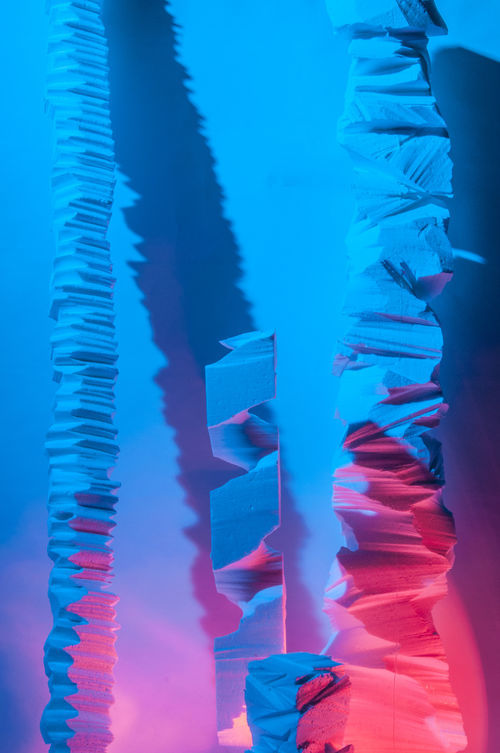
For our next step we don't want to mechanize our process but point out the beauty of the structure and form with lighting.
Our next step turned out to be as great as I hoped it would.
With 2 lamps, an infrared and some transparant color-sheets, our sculptures create a whole new image, almost surreal.
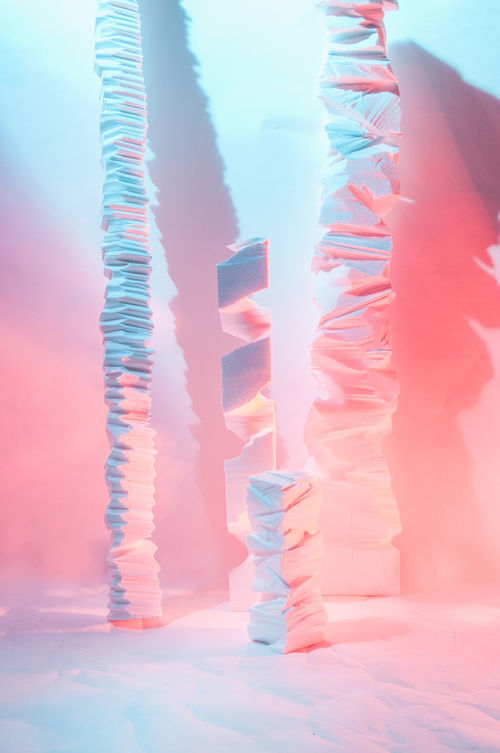
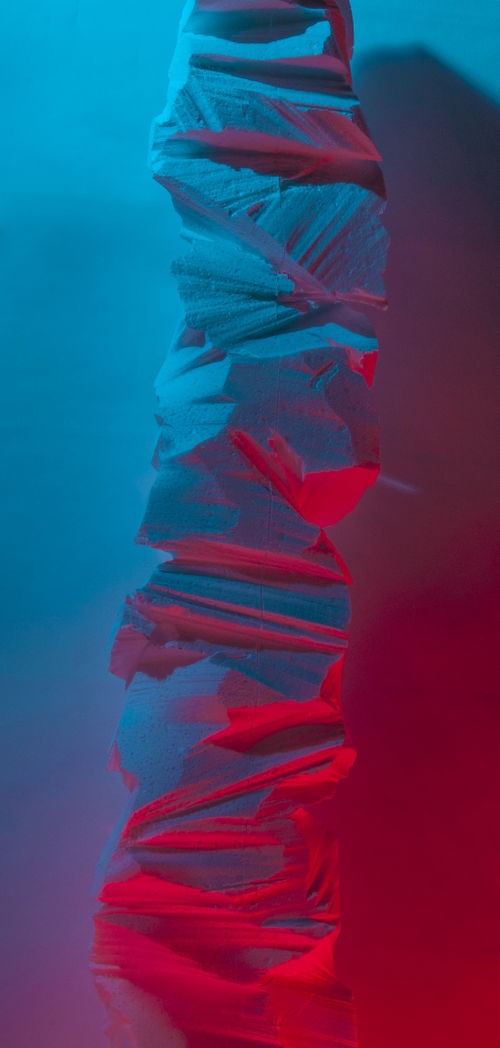
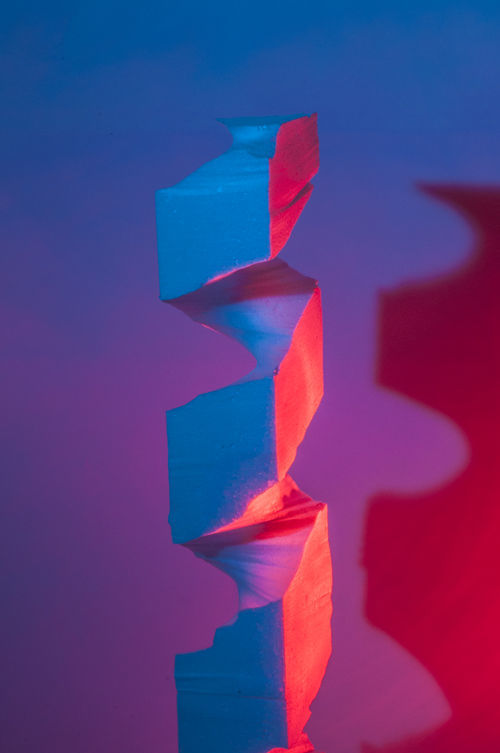

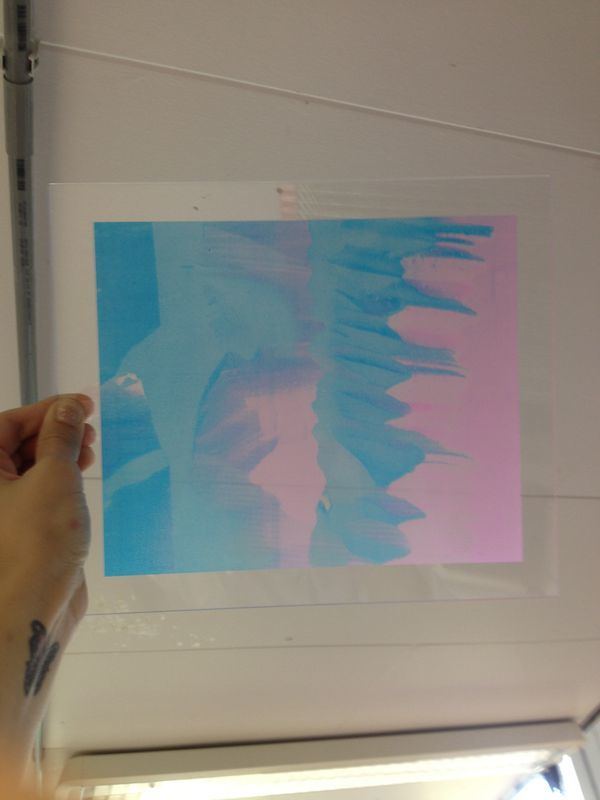
In the theme of my collection I decided to (try) to print my favorite picture (that fucks with perspective) by silkscreen on perspex.
This turns the picture into an object again. It was very frustrating and the end result is not as clear as the picture, but the result makes it even more abstract, what I like in it.
GALLIUM
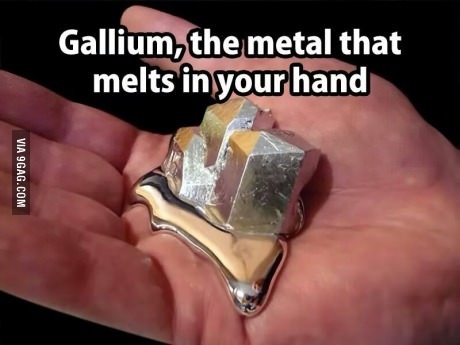
As seen in my 'inspiration' section, there is this metal that 'melts in your hand'.
Well I bought some (expansive shit dude) and it doesn't melt in your hand but it does melt very easy.
And when it is melted is has the structure of water.
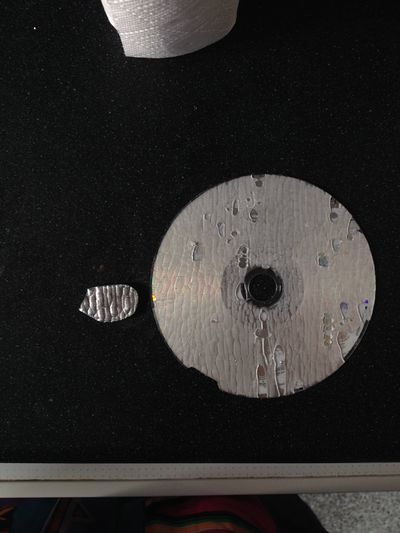
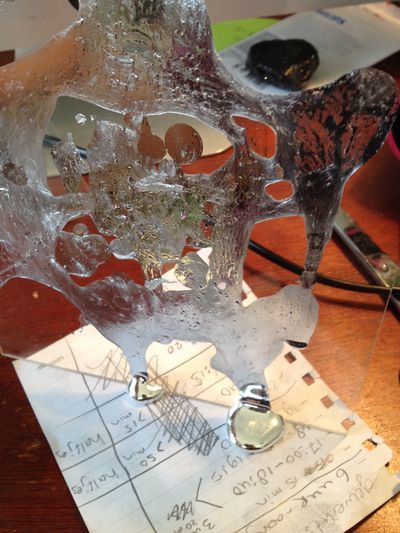
My first experiment with this material was using the previously carved CD as a cast for my gallium:
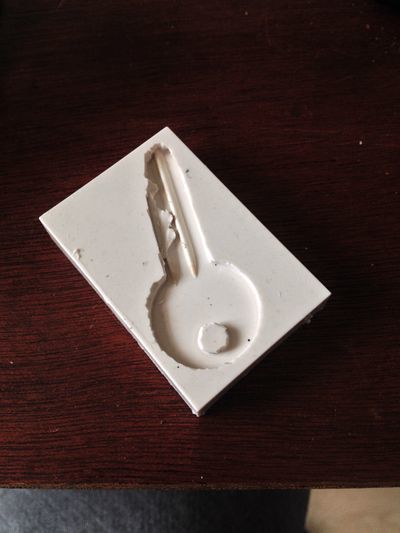
Then I tried to make a cast of a key and than poor the gallium in, this turned out pretty neat, but not perfect at all.
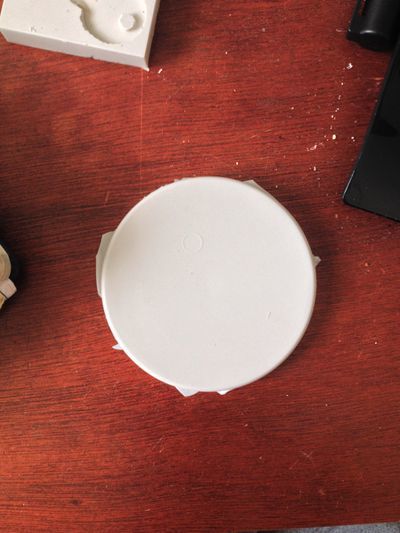
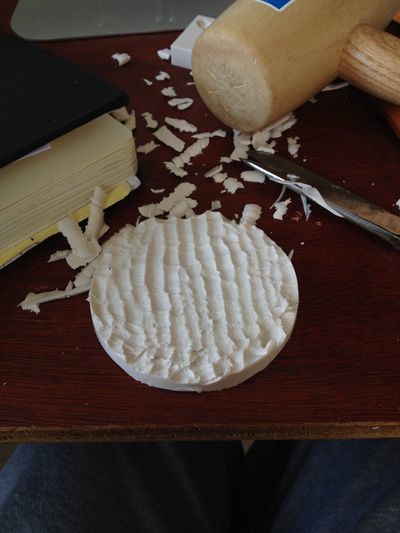
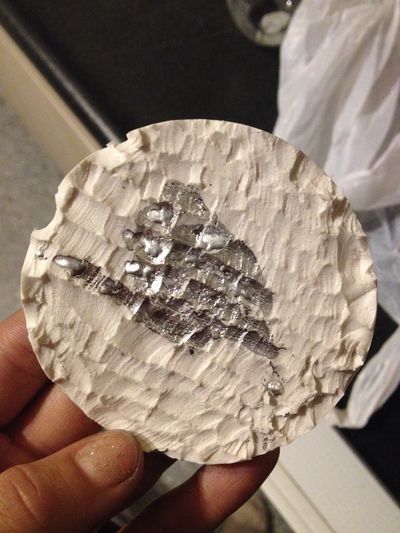
There was some leftover from the casting on which I used the woodcarving technique again, to see if it would give me the same structure.
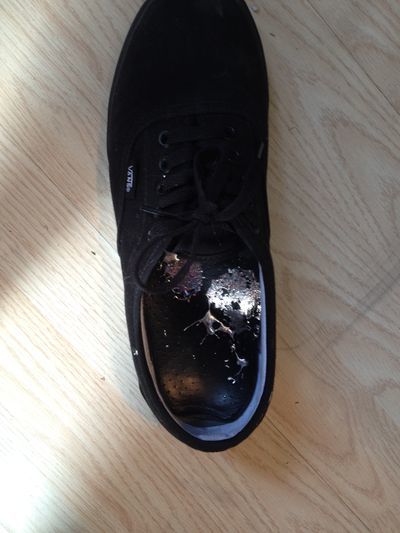
Gallium also leaves traces, that create a mirror or a silver plated look on ordinary objects.
So the next step was to apply this on ordinary objects and materials, to make them even prettier.
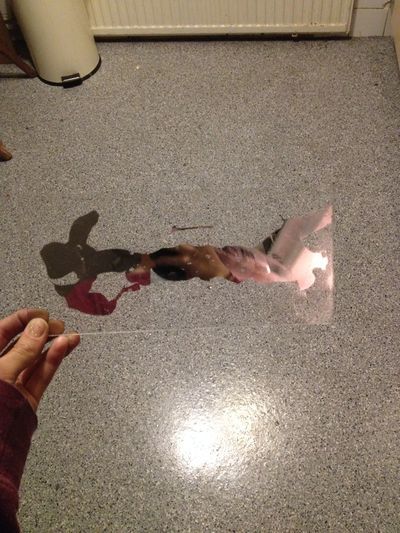
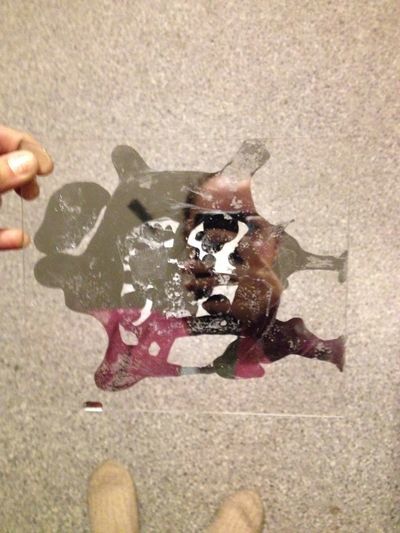
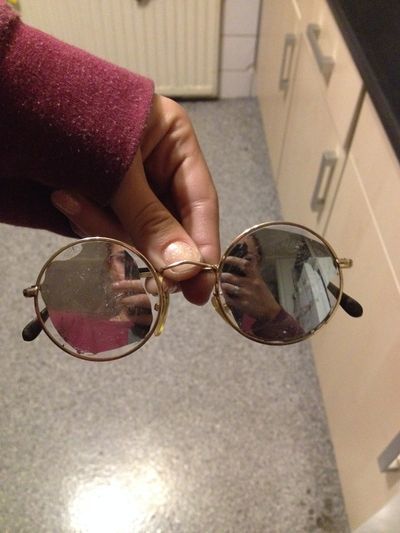
 The last one was an accident..
RAINBOWS
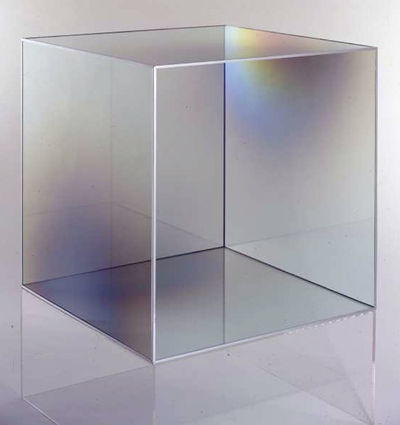
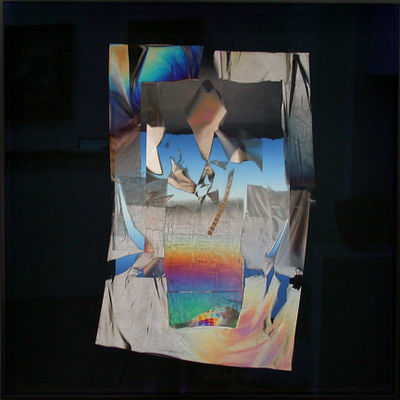
Also inspired by Larry Bell (one of my favorite artist at the time), I started a research about creating rainbows on metals.
Looks like this is also a thing that I'm highly interested in because i can't stop thinking about it, and I need to figure this out.
https://youtu.be/xBPFP2IkIYM
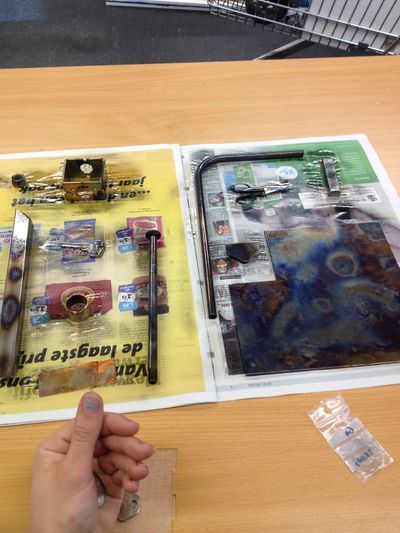
Most metals can be colored with heat oxidation, so I thought hmm that is easy.
To the gas torch we go! I brought a random bunch of metal/steel objects and started heating them up.
Seems this oxidation is not so easy to steer.
Besides that I got some awesome colors, but the problem is that the colors appear when you take the gas torch away from the metal.
When the colors start to appear you can't stop them anymore.
And the bigger problem is that you can swipe the colors of with your finger, so now I have to varnish them.
And the idea was to take this ordinary objects and make them more beautiful and than still be able to use them.
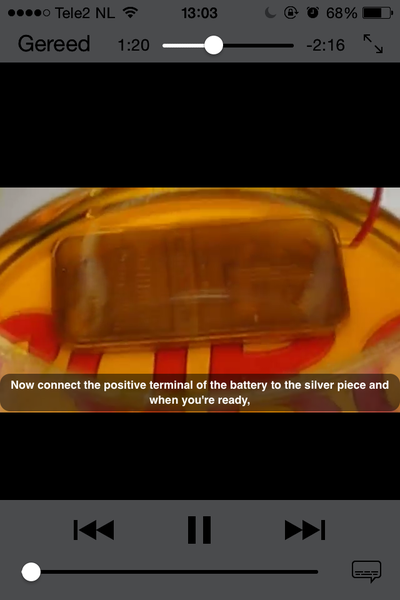
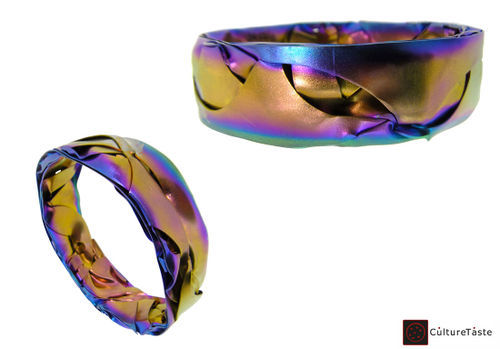
A metal that can't be colored with heat is titanium, this needs an electrolytic anodizing process.
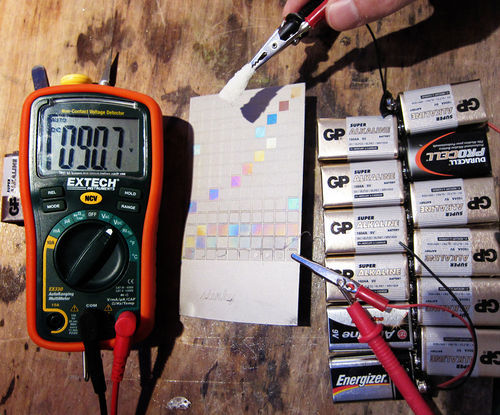
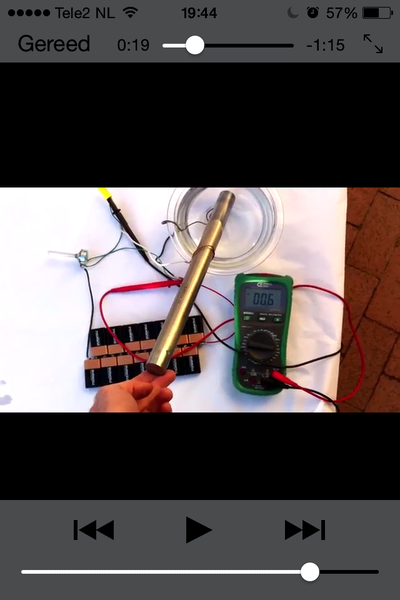
You can color the upper layer of titanium by putting the metal in a mixture of water and a sodium and connecting it with electricity.
The color you get depends on the amount of voltage.
At the moment i am waiting for my 9v battery's and for the shops to open so i can get some scrap-titanium.

titanium: batterijen, water, sodiumhydroxide/soda/zuiversingszout/cola https://youtu.be/3PO0LpdoGvo
zilver: extra nodig zwavel: https://youtu.be/VrA7Jyw1uOs
http://www.hinmeijer.nl/product/118887/zwavel_99_.aspx
http://www.hinmeijer.nl/product/66825/natriumhydroxide_.aspx
http://www.kh-metals.nl/producten/speciale-metalen/titanium
http://www.ijzerhandelvandenberg.com/Bruikbaar-IJzer/
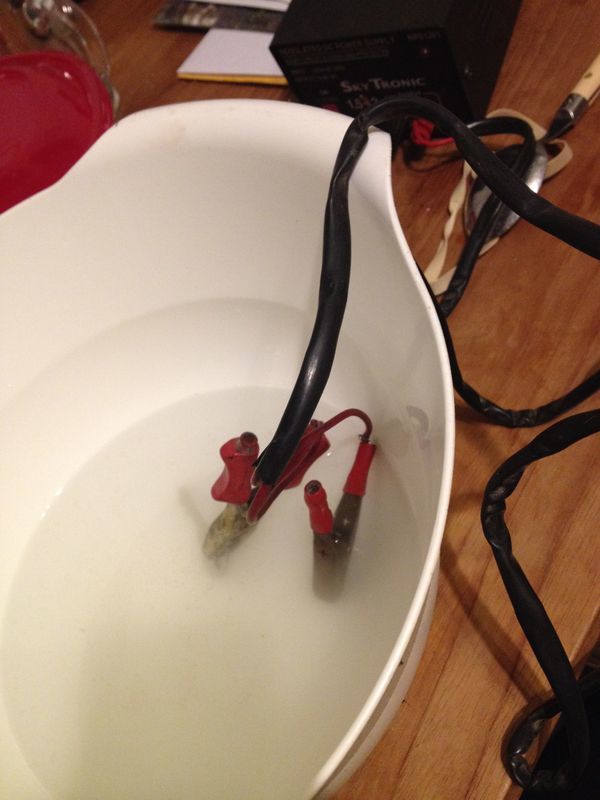
Yesterday I tried to do this with one 9v battery and some old crocodile clams (because i was too impatient) on a doorkey (don't even know if this is titanium for sure), but this failed.
The old clams got a bit cleaner though.
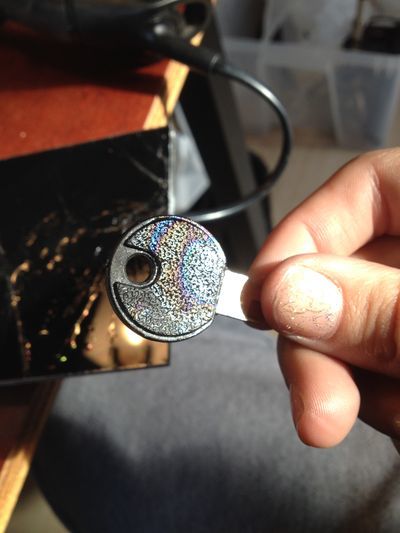
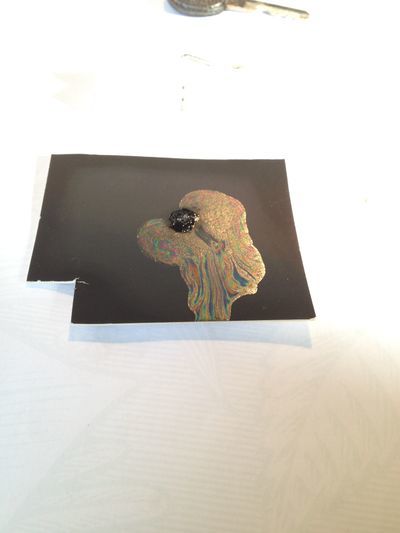
There is also an interesting technique you can use to create rainbow/oil colors on black paper, only using warm water and transparant nail polish.
The moment you drop the nail polish in the water it creates a colorful surface on the water that you can apply to black paper, or anything else that will stick.
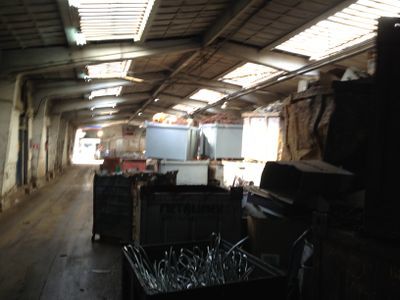
It is very hard to find titanium, but I contacted a few metal trade company's and luckily there was one that had some scrap titanium for me.
An interesting experience, going to a place like that, where all sorts of metal are stored in big piled up containers. The guy had to climb all the way up for me.
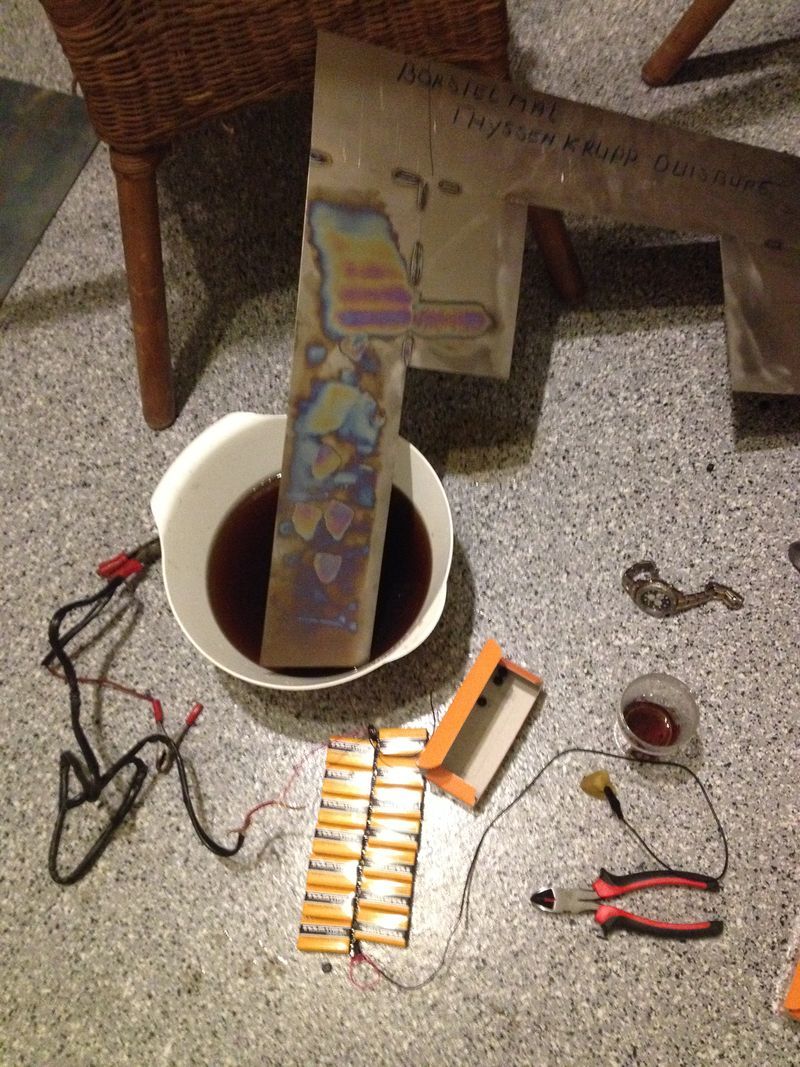
Well my battery's finally came in and I did everything just like the internet says, but it didn't work.
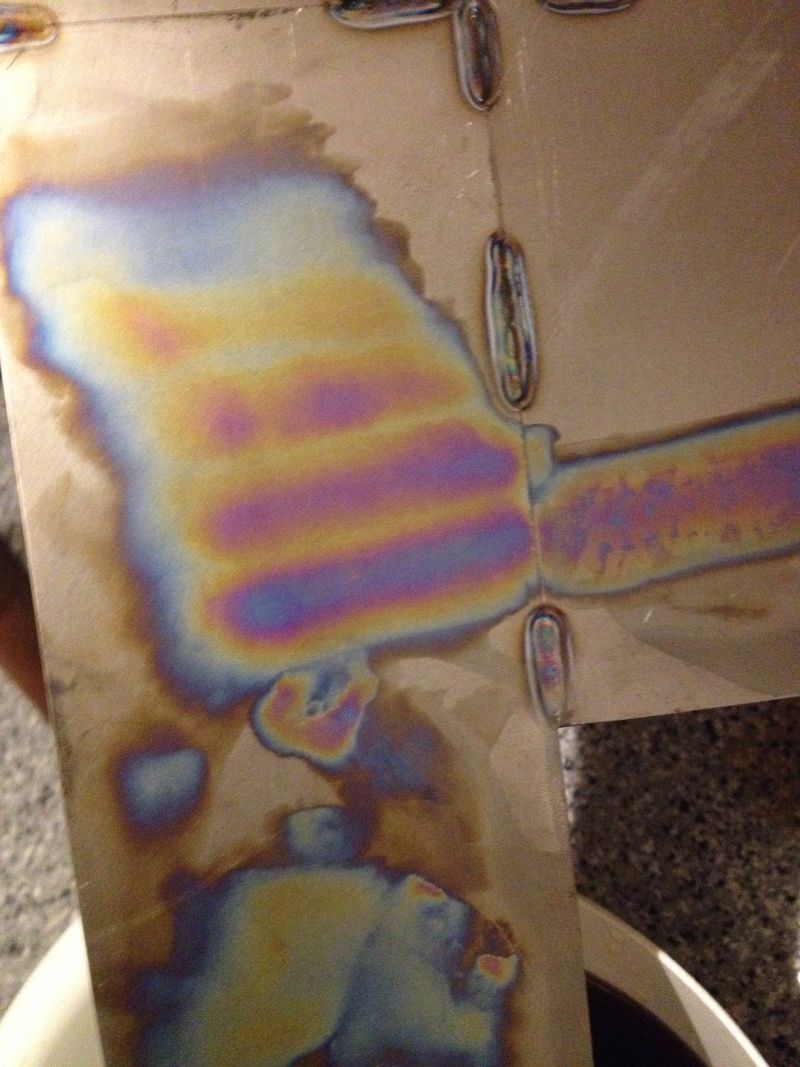
Nothing happend to the parts in the water, then I remembered you could also use a sponge to paint with, and that worked!
I'm so stoked, the colors are amazing, the colors just change in time when you make contact.
It is a pity that it only works on one of my titanium plates, I guess the other ones aren't pure titanium. I also found out that you can use niobium for this proces.
STATEMENT
Content and focus:
What I’ve been working on and what materials and techniques I’ve been using can be read above (the process).
Somewhere in this quarter i decided to stop with most of the conceptual thinking in my practice.
In the quarter before I did a lot of thinking and i am totally fed up with that for the moment.
I just want to create beautiful things for now.
I also took the choice to spend less time on the computer and more time in the stations.
This course fits perfectly with my practice ideals.
In my practice I gain the best work and the most pleasure by experimenting, I like to let myself get surprised by the outcome and then work further on that.
For my competention assessment I composed these sentences about my practice essence: I want to be obstructive in this culture and communicate my believing’s.
I want to make people conscious of our own imagining and how we are being manipulated in that.
These sentences are still actual for my practice but in this course I focused on a more specific theme.
My main motive for this course was to create and experiment with materials, expanding my knowledge in this.
By doing this I found out that what I tend to do and like the most is creating beauty in something ordinary.
To create more than that already exists, to break with the conventions of our expectations.
Within this practice I actually found a technique that I enjoy a lot, turntable woodcarving! Since woodcarving by hand is such a pain in the ass I decided to work with the wood turning table.
This gives me the joy of woodcarving but doesn't wear my body out. These are the feelings i get when in action:
It is addictive.
I AM MAKING THIS WORK.
It is slightly frustrating sometimes.
I am a perfectionist; I can use that in my power to create the fluent lines.
But also can put it aside when a chunk of wood breaks of, or if I carve to much.
It gives ALOT satisfaction, it makes me feel proud of what I've made.
It is a think free zone, I can let myself let lost with the wood and let it lead me to a new form.
I get in a focus-zone.
I am obsessed, woodcarving is everywhere around me and now I notice everything.
There is so much beauty in the wood and the prints in it.
Cultural context:
We live in a world of materialism and consumerism.
By ‘we’ I mean our culture, the Western culture.
We are manipulated into buying things that will make us happy.
I am very fond of the spiritual teacher Eckhart Tolle, whom has made me aware of this.
Through time our brains developed so much that it controls us, it has created the ‘ego’.
The ego lives in the past and in the future, but not in the now.
It worries about what has happened in the past and focuses on the future to make things right. ‘When I get this job I will be happy’.
But by living like this, you are always waiting to be happy and you are never enjoying the present moment.
But the present moment is all there is, the future and the past only exists in our brains, as thoughts.
Acknowledging this can change your perspective in live, and has certainly changed my perspective.
As I am trying to live up to these ideals, I am also connecting this with my own practice.
People don’t look around them anymore and don’t enjoy and notice the beauty in everything, because they are to busy in their heads thinking about where they have to be.
I want to make them see the beauty, and I also want to see the beauty for myself.
The great thing is, that when I’m creating, I forget the world around me, I lose track of time, forget what needs to be done and I ascend in the beauty.
When I start to think about what I’ve made and how I want to present it to the world to communicate my ideals, I get stuck.
I never look forward to making selections, decisions and communicating strategies. I do look forward to creating my ass of.
So why do what I don’t enjoy? When I don’t enjoy something it will have the same quality.
The main reason I stopped high school at the third year of VWO, because doing what I don’t like puts me in a downwards spiral.
You can call me pigheaded, because yeah well, we all have to do things we don’t like sometimes, I know.
But this is my life, and when I get to choose what I want to do with that, I will.
You come alone on earth and you leave alone. So better do what I like instead of pleasing the system.
I know these are big words, but at least I try to live up to them. In this collection I am showing the public the beauty in already existing materials and objects by editing it.
Impact:
As I have already mentioned, beginning this quarter I made a changing decision within my own practice.
I made a pact with myself: doing what I like most and only that.
Experimenting with materials, preferably analogue materials, and continuing on the outcomes of that.
That is what I did, and I have never been more proud of my own work.
That is the greatest feeling ever, that you are getting closer to find out your pure interests and fascinations.
I will certainly continue to work with analogue materials, work with my hands, and enjoy the ‘I MADE DIS’ feeling.
Summary:
In my practice I gain the most pleasure in experimenting, and letting myself get surprised by the outcome.
My main motive is to create and experiment with materials, and expand my knowledge in this.
What I tend to do and like the most to do is creating beauty in the ordinary, to create more than that already exists, to break with the conventions of our expectations.
People don’t look around them anymore and don’t notice the beauty in everything, they are to busy in their heads thinking about where they have to be next.
I want to make them see the beauty, as much as I want to for myself.
The great thing is, that when I’m creating, I forget the world around me, I lose track of time, forget what needs to be done and I ascend in the beauty.
Making for me is addictive, slightly frustrating, satisfying, mind freeing and anger therapy.
1. Give up your need to be always right.
2. Give up your need for control.
3. Give up blame.
4. Give up your self-defating self-talk.
5. Give up complaining.
6. Give up your need to impress others.
7. Give up your fears.
8 Give up on living your life to fit other people’s expectations.
9. Give up your future.
10. Give up your past.
De samenleving wil dat je volgens hun conventies leeft.
Je zal uit het veld geslagen worden wanneer je dit niet doet.
Blijf bij jezelf.
Beïnvloed hun manier van kijken.
Weergeef je eigen observaties.
Wees eigenzinnig.
Verdedig je standpunt en blijf daar bij.
Dit is de kern van je kunstenaarschap.
