Difference between revisions of "User:Jantjewag"
m (→Snif snif 16-6) |
|||
| (36 intermediate revisions by the same user not shown) | |||
| Line 1: | Line 1: | ||
| − | + | ||
| + | |||
== Hi. == | == Hi. == | ||
| − | Hi there. I'm Jan, from Product Design. Currently doing Digital Crafts as a practiceproject to get a little taste oof how it is to work more with technology. Exactly I love it, altough I've got a lot to learn still. Luckely enough we can achieve already a lot through knowledge avaiable in the workshops and on the internet. | + | [[File:pf.jpg|left|100px]]Hi there. I'm Jan, from Product Design. Currently doing Digital Crafts as a practiceproject to get a little taste oof how it is to work more with technology. Exactly I love it, altough I've got a lot to learn still. Luckely enough we can achieve already a lot through knowledge avaiable in the workshops and on the internet. |
| Line 8: | Line 9: | ||
| − | == Project == | + | == Project concept == |
| − | [[File:shanghaismog.jpg|thumb|250px| | + | [[File:shanghaismog.jpg|thumb|250px|right|A group of expatriates distribute face masks to pedestrians to raise awareness of air pollution ]] |
I took my inspiration from the fact that the human nose can't smell a lot of hazardous gasses. Some of these gasses, like nitrogen dioxide, are becoming more and more evident in our (urban) enviroment. The emissions of thousands of cars and companies let to a hazy fog, which covers cities as Shanghai and London. | I took my inspiration from the fact that the human nose can't smell a lot of hazardous gasses. Some of these gasses, like nitrogen dioxide, are becoming more and more evident in our (urban) enviroment. The emissions of thousands of cars and companies let to a hazy fog, which covers cities as Shanghai and London. | ||
| + | |||
| + | This fog is a quite recent development. It was not until the Industrial Revolution (in the 18th century) that the emmissions of industries became a serious problem. Those 200 years might sound like much, but if you look it from the perspective of the entire human history it's not like much. Over time, the human was able to survive to a lot of potential dangers (Getting ate by dinosaurs etc.) but now evolution seems not to be able to keep up the pace. | ||
| + | |||
| + | == Project Development== | ||
| + | |||
| + | === Nostalgic electronics 11-6 === | ||
| + | Today I received my Arduino Pro Micro, exciting! Finally I can put my gasmeter to work and read some data from it. So I dived into the electronica archive (which turned out to contain a lot nostalgia stuff) and looked for the parts I needed. After some time I was able to find a bunch of jumpers and the right resistor I needed. I even found a breadboard that still works after 6 years of dusty silence. So I installed the arduino drivers (which turned out to be harder than I thought) and builded the circuit I need with some help of the Internet. Then it was time for the most exciting moment! Running the code and trying the circuit. It worked, but there was something strange with the values. They seems to fluctuated from almost the lowest to the maximum value, while it was supposed to give a stable output after some minutes. Turned out I used the wrong battery (9V instead of 5V). Noob fail haha. So I'll have to try this later at school. At least the sensing part of my circuit is almost working. | ||
| + | |||
| + | [[File:metingen1.jpg|250 px]] | ||
| + | [[File:metingen2.jpg|250 px]] | ||
| + | |||
| + | |||
| + | === Snif snif 16-6 === | ||
| + | |||
| + | So, my smelling-part is finally ready! It turned out that I not only used the wrong code, but also the wrong powersupply. When I hooked the sensor up to the powersource in the Interaction Station, my arduino was still reading strange numbers. Then I saw on the internet that people used just the arduino as a powersource. After trying that it worked totally fine. This is the code I used: | ||
| + | |||
| + | |||
| + | <pre> | ||
| + | |||
| + | /* | ||
| + | ReadAnalogVoltage | ||
| + | Reads an analog input on pin 0, converts it to voltage, and prints the result to the serial monitor. | ||
| + | Attach the center pin of a potentiometer to pin A0, and the outside pins to +5V and ground. | ||
| + | |||
| + | This example code is in the public domain. | ||
| + | */ | ||
| + | |||
| + | // the setup routine runs once when you press reset: | ||
| + | void setup() { | ||
| + | // initialize serial communication at 9600 bits per second: | ||
| + | Serial.begin(9600); | ||
| + | } | ||
| + | |||
| + | // the loop routine runs over and over again forever: | ||
| + | void loop() { | ||
| + | // read the input on analog pin 0: | ||
| + | int sensorValue = analogRead(A9); | ||
| + | // Convert the analog reading (which goes from 0 - 1023) to a voltage (0 - 5V): | ||
| + | float voltage = sensorValue * (5.0 / 1023.0); | ||
| + | // print out the value you read: | ||
| + | Serial.println(voltage); | ||
| + | delay(1500); // delay in between reads for stability | ||
| + | } | ||
| + | </pre> | ||
| + | |||
| + | So now I can focus on the smell-producing part, which is probably the hardest. I figured out that are several ways to that. Like: | ||
| + | * Using a sprayer, using probably something like a servo motor to trigger it. Super easing, but produces a huge cloud of smell, whereas I need just a small portion. | ||
| + | * Heating a container to vaporize the scents. Kinda easy too, but slow. | ||
| + | * Using a ultrasonic transducer to vaporize a scent liquid | ||
| + | |||
| + | Since this is the part I hadn't really figured out yet I wanted to prototype it a bit more. I bought a fohn, and took it apart to extract the heating element from it. This heating element is made from a Nikkelchrome wire, which is heat resistant untill 1200 degrees Celsius. Amazingly and perfect for my heating element. At first I wanted to heat a metal plate constantly, and drip a drop of scent on that plate, so that it would vaporize (like on the sketch I've made). But the wire consumes about 1 ampere, which is way too much when I run it on batteries. It would drain the battery in an hour, which doesn't make sense if you would wear it all day. So then I thought, it might be better to only heat it when needed. I did a test with a little glass bottle, which is perfect because it isn't electro conductive. It does work, but it takes way to long before it starts to vaporize the scent. This method is more suitable when you want to vaporize somehow equal amounts of scent liquid over a long period of time. So, two methods left on my list, which both could work fine. I think I'll buy an air humidifier, to extract the transducer from it. I heard from a classmate that it contains a quite complicated circuit board, but I expect the principle of the transducer to be quite simple. It's basically a membrane on which you apply a voltage which then start to vibrate. | ||
| + | |||
| + | |||
| + | [[File:circuit smeller.jpg|100px]] [[File:heater element.jpg|100px]] [[File:heating scent container.jpg|100px]] [[File:sketch1.jpg|175px]] | ||
| + | |||
| + | === More stuff 17-6 === | ||
| + | |||
| + | I ordered another sensor, this time a carbon monoxide sensor. This one does measure one gas, which makes it much easier to figure out what is detected. Carbon monoxide is also one of the gasses which is contained in smog. Although not necessarily toxic, it is one of the wolves in sheep's fur (as we say in Dutch). It is one of the gasses that slowly choke you as it takes the place of oxygen in your blood. | ||
| + | |||
| + | I also did some form research, on how my addon accesoire should look like. The first is like an extension of your finger (first picture). I like this since in this case it would really make sense to 'smell' with your fingers, as you want to keep the gass as far from yourselves as you want. You could for example put your finger just outside the door as you feel how bad the polution today is. But as it blocks your tactility, a different would be better. You could also wear it as a ring, as the sensor almost looks like jewelery to me (second picture). I think I still need to think a bit more about how the whole thing would look like (where I hang the electronics etc). The last picture is inspiration, it's mask worn by sporters, when they brook their nose. It somehow looks organic, but gives you still a strange feeling. | ||
| + | |||
| + | [[File:sketchmodel1.jpg|250px]] [[File:sketchmodel2.jpg|100px]] [[File:sketchmodel3.jpg|100px]] [[File:mask.jpg|250px]] | ||
| + | |||
| + | === What will it look like 22-6 === | ||
| + | |||
| + | [[File:6184413.png|120px]] [[File:6184417.png|120px]] [[File:Neusmasker1.png|250px]] | ||
| + | |||
| + | == Final == | ||
| + | |||
| + | For my final piece I decided to make a working prototype from the components I had already. Although I would have liked to have a wearable, it was not possible for this timeframe. Since it's made from simple components you can easily order online I can imagine that this would also be a open design project. People could switch the sensors to smell different gasses or adjust it to their own tangible likes. | ||
| + | |||
| + | List of components: | ||
| + | * Arduino Pro Micro 5V 16mhz ([https://www.sparkfun.com/products/12640]) | ||
| + | * MQ-7 Carbon monoxide gas sensor ([http://www.vanallesenmeer.nl/MQ-7-Gas-Sensor-Module]) | ||
| + | * Freshmatic Air freshener ([http://www.bol.com/nl/p/air-wick-freshmatic-automatische-spray-life-scents-zalige-zomer-250-ml-starter/9200000039910769/]) | ||
| + | * L293D H bridge (You can buy it from several store, for example: [https://www.conrad.nl/nl/stmicroelectronics-l293dd013tr-pmic-soic-20-1185127.html) | ||
| + | * Some electric threads | ||
| + | |||
| + | |||
| + | Assembling requires: | ||
| + | * Soldering iron | ||
| + | * Some soldering tin | ||
| + | * USB micro cable | ||
| + | * Computer with Arduino software installed | ||
| + | |||
| + | Here I used a Arduino as the brain of my 'nose'. It is not that expensive (around 20 euros), and gives a lot of upgrade possibilities. However, if you want it even more cheap you could also use some other components to set a threshold on the sensor. That will bring the price down to a little more then 10 bucks. Adafruit, the maker of this arduino, has extensive documentation on how to use it. One useful link is the hookup guide, on how to install and use this arduino ([https://learn.sparkfun.com/tutorials/pro-micro--fio-v3-hookup-guide]) | ||
| + | U | ||
| + | The gas sensor I used is just one from a whole family. They are low power, cheap and relatively sensitive. The gasses that can be measured range from butane to sulphur dioxide (another smog gas). Luckily enough the sensor can be powered through the arduino, which elimates the use of resistances. The sensor is made from a little piece of metal (tin oxide) which has a low conductivity in clean air. But as soon carbon oxide particles begin to spread through the air and attach to the metal, the resistance goes up. Because of the circuit it will make the voltage to go up. The arduino translates this voltage in a number on a scale from 0 to 1023. I learned from my own tests that this number lays between the 40 and 60 in clear air, and around 120 when you extinguish a candle. | ||
| + | |||
| + | The H bridge is used as an power inverter. This enables the motor to turn back and forward. The version I used is a low power version of the L298. This means that you can't use big dc motors, but the one that comes with the Freshmatic is perfectly fine. | ||
| + | |||
| + | You can just solder all the pins, or use a circuit or breadboard. With the last one you would be able to easier make changes afterwards. Before you can solder the motor to the thread you need to drill a little hole in your freshmatic. Or saw out the back, like I did. This make it easier to connect the motor. Don't saw away too much since that will ruin the construction. | ||
| + | |||
| + | |||
| + | [[File:WP_20150707_005.jpg|150px]] | ||
| + | |||
| + | |||
| + | |||
| + | === Schematic=== | ||
| + | |||
| + | |||
| + | ====How does the electric nose work?==== | ||
| + | |||
| + | The gas sensor measures the amount of carbon monoxide particles in the air. When a high concentration of carbon monoxide is detected the voltage output will go up. This voltage output is connected to the arduino. When the voltage of the sensor raises above a certain level, the arduino starts to control the h-bridge. This H bridge basically is an bigger version of a transistor, able of controlling the motor. We need this because we need the to turn the motor forward and backwards. With only the arduino we would only be able to turn it forward. So when the arduino measures that the threshold is surpassed, it makes the h-bridge to turn the motor forward for 250 ms and then turn backwards for 150 ms. The motor pushes down the button of the scent container, so the scents is released in the air. The Arduino then waits 5 seconds after another spray of scent is released. This is to make sure there is not too much smelly stuff in the air. in The human nose is then able to 'smell' the carbon monoxide. | ||
| + | |||
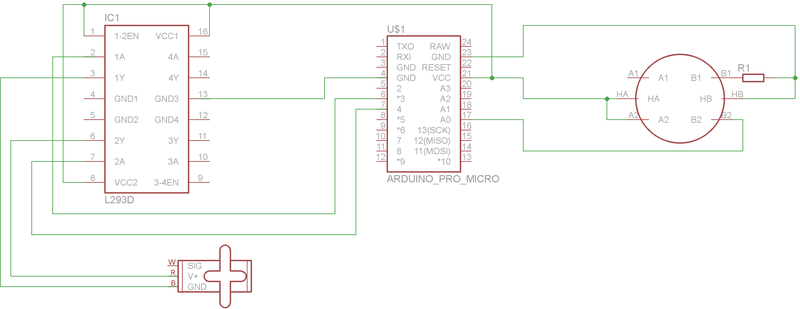
| + | This circuit is not so hard to make. It consists of only four components. These are (from left to right) the L293D H bridge, Arduino, gas sensor and the DC motor. The gas sensor output is connect to the analogue input A0 on the Arduino. This controls the H-bridge from port 3 & 4 on the Arduino to pin 2 & 7 on the H-bridge. When the Arduino send a High on pin 2 and a Low on pin 7 the H-bridge translates this into forward signal to the DC motor. This motor is connect to the H-bridge on pin 3 & 6. It is no problem to connect it directly to H-bridge, since it is able of pulling a high voltage (till 36 volts). Make sure you connect the enabler pin (pin 6) to VCC, otherwise the H-bridge is not enabled. | ||
| + | |||
| + | |||
| + | |||
| + | [[File:SchemaJanWag.png|800px]] | ||
| + | |||
| + | ===Code=== | ||
| + | This is the final code I used. You can used paste it into the Arduino IDE and upload it to your arduino with a USB cable. | ||
| + | |||
| + | <pre> | ||
| + | const int switchPin = 2; // switch input | ||
| + | const int motor1Pin = 3; // H-bridge leg 1 (pin 2, 1A) | ||
| + | const int motor2Pin = 4; // H-bridge leg 2 (pin 7, 2A) | ||
| + | const int enablePin = 9; // H-bridge enable pin | ||
| + | |||
| + | void setup() { | ||
| + | // set the switch as an input: | ||
| + | pinMode(switchPin, INPUT); | ||
| + | |||
| + | // set all the other pins you're using as outputs: | ||
| + | pinMode(motor1Pin, OUTPUT); | ||
| + | pinMode(motor2Pin, OUTPUT); | ||
| + | pinMode(enablePin, OUTPUT); | ||
| + | |||
| + | // set enablePin high so that motor can turn on: | ||
| + | digitalWrite(enablePin, HIGH); | ||
| + | } | ||
| + | |||
| + | void loop() { | ||
| + | // if the switch is high, motor will turn on one direction: | ||
| + | // if (digitalRead(switchPin) == HIGH) { | ||
| + | // digitalWrite(motor1Pin, LOW); // set leg 1 of the H-bridge low | ||
| + | // digitalWrite(motor2Pin, HIGH); // set leg 2 of the H-bridge high | ||
| + | // } | ||
| + | // // if the switch is low, motor will turn in the other direction: | ||
| + | // else { | ||
| + | |||
| + | |||
| + | digitalWrite(motor1Pin, HIGH); // set leg 1 of the H-bridge high | ||
| + | digitalWrite(motor2Pin, LOW); // set leg 2 of the H-bridge low | ||
| + | delay(250); | ||
| + | digitalWrite(motor1Pin, LOW); // set leg 1 of the H-bridge high | ||
| + | digitalWrite(motor2Pin, LOW); // set leg 2 of the H-bridge low | ||
| + | delay(200); | ||
| + | digitalWrite(motor1Pin, LOW); // set leg 1 of the H-bridge high | ||
| + | digitalWrite(motor2Pin, HIGH); // set leg 2 of the H-bridge low | ||
| + | delay(150); | ||
| + | digitalWrite(motor1Pin, LOW); // set leg 1 of the H-bridge high | ||
| + | digitalWrite(motor2Pin, LOW); // set leg 2 of the H-bridge low | ||
| + | delay(5000); | ||
| + | } | ||
| + | </pre> | ||
| + | |||
| + | |||
| + | ===Final product & case=== | ||
| + | |||
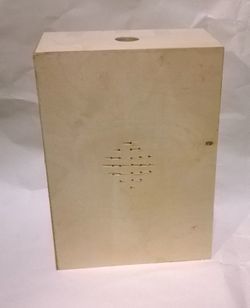
| + | I made a case for my final product which can put into a corner of a house, or worn on your back. On the top is a opening for a gas sensor, and on the front some for the scent releaser. | ||
| + | |||
| + | |||
| + | [[File:WP_20150707_006.jpg|250px]] [[File:WP_20150707_007.jpg|150px]] [[File:WP_20150707_008.jpg|150px]] | ||
Latest revision as of 21:39, 7 July 2015
Contents
Hi.
Hi there. I'm Jan, from Product Design. Currently doing Digital Crafts as a practiceproject to get a little taste oof how it is to work more with technology. Exactly I love it, altough I've got a lot to learn still. Luckely enough we can achieve already a lot through knowledge avaiable in the workshops and on the internet.
Project concept
I took my inspiration from the fact that the human nose can't smell a lot of hazardous gasses. Some of these gasses, like nitrogen dioxide, are becoming more and more evident in our (urban) enviroment. The emissions of thousands of cars and companies let to a hazy fog, which covers cities as Shanghai and London.
This fog is a quite recent development. It was not until the Industrial Revolution (in the 18th century) that the emmissions of industries became a serious problem. Those 200 years might sound like much, but if you look it from the perspective of the entire human history it's not like much. Over time, the human was able to survive to a lot of potential dangers (Getting ate by dinosaurs etc.) but now evolution seems not to be able to keep up the pace.
Project Development
Nostalgic electronics 11-6
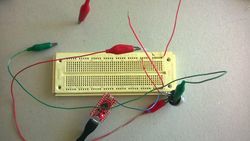
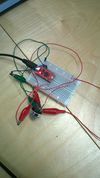
Today I received my Arduino Pro Micro, exciting! Finally I can put my gasmeter to work and read some data from it. So I dived into the electronica archive (which turned out to contain a lot nostalgia stuff) and looked for the parts I needed. After some time I was able to find a bunch of jumpers and the right resistor I needed. I even found a breadboard that still works after 6 years of dusty silence. So I installed the arduino drivers (which turned out to be harder than I thought) and builded the circuit I need with some help of the Internet. Then it was time for the most exciting moment! Running the code and trying the circuit. It worked, but there was something strange with the values. They seems to fluctuated from almost the lowest to the maximum value, while it was supposed to give a stable output after some minutes. Turned out I used the wrong battery (9V instead of 5V). Noob fail haha. So I'll have to try this later at school. At least the sensing part of my circuit is almost working.
Snif snif 16-6
So, my smelling-part is finally ready! It turned out that I not only used the wrong code, but also the wrong powersupply. When I hooked the sensor up to the powersource in the Interaction Station, my arduino was still reading strange numbers. Then I saw on the internet that people used just the arduino as a powersource. After trying that it worked totally fine. This is the code I used:
/*
  ReadAnalogVoltage
  Reads an analog input on pin 0, converts it to voltage, and prints the result to the serial monitor.
  Attach the center pin of a potentiometer to pin A0, and the outside pins to +5V and ground.

 This example code is in the public domain.
 */

// the setup routine runs once when you press reset:
void setup() {
  // initialize serial communication at 9600 bits per second:
  Serial.begin(9600);
}

// the loop routine runs over and over again forever:
void loop() {
  // read the input on analog pin 0:
  int sensorValue = analogRead(A9);
  // Convert the analog reading (which goes from 0 - 1023) to a voltage (0 - 5V):
  float voltage = sensorValue * (5.0 / 1023.0);
  // print out the value you read:
  Serial.println(voltage);
    delay(1500);        // delay in between reads for stability
}
So now I can focus on the smell-producing part, which is probably the hardest. I figured out that are several ways to that. Like:
- Using a sprayer, using probably something like a servo motor to trigger it. Super easing, but produces a huge cloud of smell, whereas I need just a small portion.
- Heating a container to vaporize the scents. Kinda easy too, but slow.
- Using a ultrasonic transducer to vaporize a scent liquid
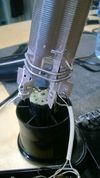
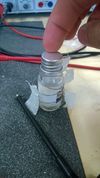
Since this is the part I hadn't really figured out yet I wanted to prototype it a bit more. I bought a fohn, and took it apart to extract the heating element from it. This heating element is made from a Nikkelchrome wire, which is heat resistant untill 1200 degrees Celsius. Amazingly and perfect for my heating element. At first I wanted to heat a metal plate constantly, and drip a drop of scent on that plate, so that it would vaporize (like on the sketch I've made). But the wire consumes about 1 ampere, which is way too much when I run it on batteries. It would drain the battery in an hour, which doesn't make sense if you would wear it all day. So then I thought, it might be better to only heat it when needed. I did a test with a little glass bottle, which is perfect because it isn't electro conductive. It does work, but it takes way to long before it starts to vaporize the scent. This method is more suitable when you want to vaporize somehow equal amounts of scent liquid over a long period of time. So, two methods left on my list, which both could work fine. I think I'll buy an air humidifier, to extract the transducer from it. I heard from a classmate that it contains a quite complicated circuit board, but I expect the principle of the transducer to be quite simple. It's basically a membrane on which you apply a voltage which then start to vibrate.
More stuff 17-6
I ordered another sensor, this time a carbon monoxide sensor. This one does measure one gas, which makes it much easier to figure out what is detected. Carbon monoxide is also one of the gasses which is contained in smog. Although not necessarily toxic, it is one of the wolves in sheep's fur (as we say in Dutch). It is one of the gasses that slowly choke you as it takes the place of oxygen in your blood.
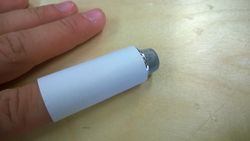
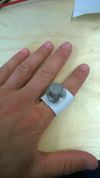
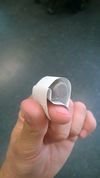
I also did some form research, on how my addon accesoire should look like. The first is like an extension of your finger (first picture). I like this since in this case it would really make sense to 'smell' with your fingers, as you want to keep the gass as far from yourselves as you want. You could for example put your finger just outside the door as you feel how bad the polution today is. But as it blocks your tactility, a different would be better. You could also wear it as a ring, as the sensor almost looks like jewelery to me (second picture). I think I still need to think a bit more about how the whole thing would look like (where I hang the electronics etc). The last picture is inspiration, it's mask worn by sporters, when they brook their nose. It somehow looks organic, but gives you still a strange feeling.
What will it look like 22-6
Final
For my final piece I decided to make a working prototype from the components I had already. Although I would have liked to have a wearable, it was not possible for this timeframe. Since it's made from simple components you can easily order online I can imagine that this would also be a open design project. People could switch the sensors to smell different gasses or adjust it to their own tangible likes.
List of components:
- Arduino Pro Micro 5V 16mhz ([1])
- MQ-7 Carbon monoxide gas sensor ([2])
- Freshmatic Air freshener ([3])
- L293D H bridge (You can buy it from several store, for example: [https://www.conrad.nl/nl/stmicroelectronics-l293dd013tr-pmic-soic-20-1185127.html)
- Some electric threads
Assembling requires:
- Soldering iron
- Some soldering tin
- USB micro cable
- Computer with Arduino software installed
Here I used a Arduino as the brain of my 'nose'. It is not that expensive (around 20 euros), and gives a lot of upgrade possibilities. However, if you want it even more cheap you could also use some other components to set a threshold on the sensor. That will bring the price down to a little more then 10 bucks. Adafruit, the maker of this arduino, has extensive documentation on how to use it. One useful link is the hookup guide, on how to install and use this arduino ([4]) U The gas sensor I used is just one from a whole family. They are low power, cheap and relatively sensitive. The gasses that can be measured range from butane to sulphur dioxide (another smog gas). Luckily enough the sensor can be powered through the arduino, which elimates the use of resistances. The sensor is made from a little piece of metal (tin oxide) which has a low conductivity in clean air. But as soon carbon oxide particles begin to spread through the air and attach to the metal, the resistance goes up. Because of the circuit it will make the voltage to go up. The arduino translates this voltage in a number on a scale from 0 to 1023. I learned from my own tests that this number lays between the 40 and 60 in clear air, and around 120 when you extinguish a candle.
The H bridge is used as an power inverter. This enables the motor to turn back and forward. The version I used is a low power version of the L298. This means that you can't use big dc motors, but the one that comes with the Freshmatic is perfectly fine.
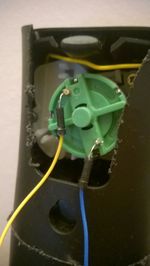
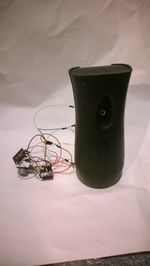
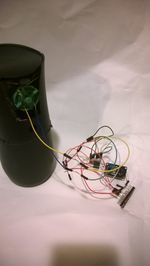
You can just solder all the pins, or use a circuit or breadboard. With the last one you would be able to easier make changes afterwards. Before you can solder the motor to the thread you need to drill a little hole in your freshmatic. Or saw out the back, like I did. This make it easier to connect the motor. Don't saw away too much since that will ruin the construction.
Schematic
How does the electric nose work?
The gas sensor measures the amount of carbon monoxide particles in the air. When a high concentration of carbon monoxide is detected the voltage output will go up. This voltage output is connected to the arduino. When the voltage of the sensor raises above a certain level, the arduino starts to control the h-bridge. This H bridge basically is an bigger version of a transistor, able of controlling the motor. We need this because we need the to turn the motor forward and backwards. With only the arduino we would only be able to turn it forward. So when the arduino measures that the threshold is surpassed, it makes the h-bridge to turn the motor forward for 250 ms and then turn backwards for 150 ms. The motor pushes down the button of the scent container, so the scents is released in the air. The Arduino then waits 5 seconds after another spray of scent is released. This is to make sure there is not too much smelly stuff in the air. in The human nose is then able to 'smell' the carbon monoxide.
This circuit is not so hard to make. It consists of only four components. These are (from left to right) the L293D H bridge, Arduino, gas sensor and the DC motor. The gas sensor output is connect to the analogue input A0 on the Arduino. This controls the H-bridge from port 3 & 4 on the Arduino to pin 2 & 7 on the H-bridge. When the Arduino send a High on pin 2 and a Low on pin 7 the H-bridge translates this into forward signal to the DC motor. This motor is connect to the H-bridge on pin 3 & 6. It is no problem to connect it directly to H-bridge, since it is able of pulling a high voltage (till 36 volts). Make sure you connect the enabler pin (pin 6) to VCC, otherwise the H-bridge is not enabled.
Code
This is the final code I used. You can used paste it into the Arduino IDE and upload it to your arduino with a USB cable.
const int switchPin = 2;    // switch input
const int motor1Pin = 3;    // H-bridge leg 1 (pin 2, 1A)
const int motor2Pin = 4;    // H-bridge leg 2 (pin 7, 2A)
const int enablePin = 9;    // H-bridge enable pin

void setup() {
  // set the switch as an input:
  pinMode(switchPin, INPUT);

  // set all the other pins you're using as outputs:
  pinMode(motor1Pin, OUTPUT);
  pinMode(motor2Pin, OUTPUT);
  pinMode(enablePin, OUTPUT);

  // set enablePin high so that motor can turn on:
  digitalWrite(enablePin, HIGH);
}

void loop() {
  // if the switch is high, motor will turn on one direction:
  // if (digitalRead(switchPin) == HIGH) {
  //   digitalWrite(motor1Pin, LOW);   // set leg 1 of the H-bridge low
  //   digitalWrite(motor2Pin, HIGH);  // set leg 2 of the H-bridge high
  // }
  // // if the switch is low, motor will turn in the other direction:
  // else {


  digitalWrite(motor1Pin, HIGH);  // set leg 1 of the H-bridge high
  digitalWrite(motor2Pin, LOW);   // set leg 2 of the H-bridge low
  delay(250);
  digitalWrite(motor1Pin, LOW);  // set leg 1 of the H-bridge high
  digitalWrite(motor2Pin, LOW);   // set leg 2 of the H-bridge low
  delay(200);
    digitalWrite(motor1Pin, LOW);  // set leg 1 of the H-bridge high
  digitalWrite(motor2Pin, HIGH);   // set leg 2 of the H-bridge low
  delay(150);
  digitalWrite(motor1Pin, LOW);  // set leg 1 of the H-bridge high
  digitalWrite(motor2Pin, LOW);   // set leg 2 of the H-bridge low
  delay(5000);
}
Final product & case
I made a case for my final product which can put into a corner of a house, or worn on your back. On the top is a opening for a gas sensor, and on the front some for the scent releaser.


