Difference between revisions of "User:Lara"
| (12 intermediate revisions by the same user not shown) | |||
| Line 58: | Line 58: | ||
Within our fusing group we had a lot of discussions about what fusing is and what it can be. In the beginning of this project my opinion was: fusing can also be things with textiles because you have to fuse treats together to create a textile. I am very interested in textiles, so I thought what can I make with this. Because textiles are created out of treats I started thinking about embroidery's witch I really like. So I bought an hoop and began trying. Later on I decided that I don't think embroidery is fusing. I will explain this later in this paragraph. | Within our fusing group we had a lot of discussions about what fusing is and what it can be. In the beginning of this project my opinion was: fusing can also be things with textiles because you have to fuse treats together to create a textile. I am very interested in textiles, so I thought what can I make with this. Because textiles are created out of treats I started thinking about embroidery's witch I really like. So I bought an hoop and began trying. Later on I decided that I don't think embroidery is fusing. I will explain this later in this paragraph. | ||
| − | [[file:eye.jpg]] | + | [[file:eye.jpg]] [[file:slang.jpg]] |
After my first 3 tryouts I discovered that i was using the treat wrong. I was using the whole treat, but you have to split the treat. If you do this the embroidery will be less thick. | After my first 3 tryouts I discovered that i was using the treat wrong. I was using the whole treat, but you have to split the treat. If you do this the embroidery will be less thick. | ||
| Line 74: | Line 74: | ||
[[file:machine.jpg]] | [[file:machine.jpg]] | ||
| − | So, I did al of this work that I liked doing very much! I discovered that making embroidery isn't really fusing. I was trying to push the boundaries of fusing but I had it wrong. Embroidery's are not fusing because the material doesn't stick forever. You can take the materials apart if you like. Again I used the same materials like with the collage's. Because I didn't want my work to be for nothing... I made one last experiment to show I do know what fusing is now. | + | So, I did al of this work that I liked doing very much! I discovered that making embroidery isn't really fusing. I was trying to push the boundaries of fusing but I had it wrong. Embroidery's are not fusing because the material doesn't stick forever. You can take the materials apart if you like. Again I used the same materials like with the collage's. Because I didn't want my work to be for nothing... I made one last experiment to show I do know what fusing is now. I decided to take one of my embroidery's to the next step. I threw candle wax over it to see what happend. The result was quite surprising, the candle wax was staying more transparent than I was expecting. Even the colors of the treats fused with the candle wax like you can see on the second picture. I have to say that I liked the back of the embroidery more than I like the front. The back of the embroidery looks like it felt into the water. |
| + | |||
| + | |||
| + | [[file:kaars5.jpg]] [[file:kaars4.jpg]] [[file:kaars3.jpg]] [[file:kaars2.jpg]] [[file:kaars.jpg]] | ||
==4. A material pushed to the limit== | ==4. A material pushed to the limit== | ||
| + | |||
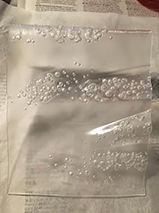
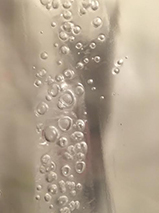
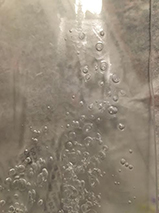
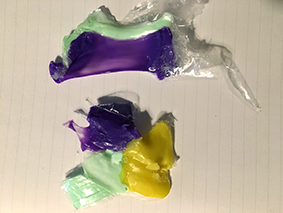
| + | Melting! I was really exited about this experiment. The image that popped up in my head when I thought about pushing a material to the limit was burning or melting. I had bought some plastic at scrap XL and begun my experiment. I wanted to make something aesthetic so I chose pretty colors. First I tried to melt a frame of a bike lamp but that was a bit to tick. I decided to use thinner plastic. I melted things together to fuse the materials, but more important the colors together. I found a piece of perspex in my room and I was curious how it was going to look like if I tried to melt it. Something unexpected happend!! I was expecting that the material was just getting soft and I could bend it into another shape. But what happend! There came bubbles into the plastic. I think the air that was still in the plastic came out of the plastic wile I was heating it. I liked the result, It looked a bit like water! I tried to make of waves into the material. | ||
| + | |||
| + | |||
| + | [[file:melt2.jpg]] [[file:melt3.jpg]] [[file:melt4.jpg]] [[file:melt6.jpg]] [[file:plastic.jpg]] | ||
==5. A shared example== | ==5. A shared example== | ||
| Line 84: | Line 92: | ||
This is how the tiles looked in the molts. We are going to polish them and put them together when they are dry. | This is how the tiles looked in the molts. We are going to polish them and put them together when they are dry. | ||
| + | |||
| + | |||
| + | |||
[[file:groep.jpg]] | [[file:groep.jpg]] | ||
| Line 90: | Line 101: | ||
[[file:polish.jpg]] [[file:tegels.jpg]] | [[file:polish.jpg]] [[file:tegels.jpg]] | ||
| + | |||
| + | |||
| + | ==WHY I MAKE== | ||
| + | |||
| + | Ik maak vanuit mijn verwondering en nieuwsgierigheid over de wereld. Ik observeer en vergaar hiermee de hele dag informatie over het landschap waarin ik mij bevind. Mijn handen en hoofd zijn sterk met elkaar verbonden. De beelden die in mijn hoofd zitten, worden door mijn handen in elkaar gezet. Mijn fantasie en gedachtes maak ik visueel en tastbaar door het maakproces. Maken zorgt voor rust in mijn hoofd en voldoening. Het zorgt voor ontdekkingen binnen mijn proces. | ||
| + | |||
| + | Tijdens het maken verbind ik graag analoog en digitaal met elkaar omdat ik ervan overtuigd ben dat ze bij elkaar horen. | ||
| + | |||
| + | Ik maak om verrast te worden door het onbekende. Het niet weten hoe iets er precies uit gaat zien. Ik maak omdat ik opzoek ben naar de perfecte imperfectie. Alles om ons heen wordt steeds meer hetzelfde en daarom zoek ik naar het onverwachtse. Met mijn nieuwsgierigheid als leidinggevende in mijn hoofd, ga ik opzoek naar vervreemding en vervorming van de werkelijkheid. | ||
| + | |||
| + | Het leren om technologieën correct te gebruiken kan via een tutorial. Het leren om technologieën naar je eigen hand te zetten en voor jezelf het uiterste eruit te halen kun je alleen zelf doen. Hetzelfde geld voor materialen. Door te maken leer ik mezelf te ontplooien en technieken toe te eigenen die mijn werk of gedachten tot hun recht laten komen. Ik vind het belangrijk dat experiment terug te zien is in eindproducten. Doormiddel van experiment zie je aandacht, speelsheid en plezier terug in het werk. | ||
| + | |||
| + | |||
| + | ==End Work== | ||
| + | |||
| + | For my end work I made a video. I made a lot of lose experiments and I wanted to fuse this experiments together. Also in my "Why I make' statement I talked about how I think digital and analog can't be apart from each other, they compliment each other in my movie. I really liked experimenting with the after effects program. In the beginning of this quarter I was a bit lost by doing all this random experiments, later on I found the joy of making in this quarter. I really liked the freedom of this quarter, it let me think deep about things and materials. | ||
| + | |||
| + | |||
| + | Check the video I made with my statement in it! --> I emaild you the link because I can't add it to my wiki page! | ||
| + | |||
| + | ==Picture== | ||
| + | |||
| + | I combined examples that I found in the room with a lot of colors. I wanted to make a picture that is esthetically and also intresting to look at. When i look at this picture my imagination strarts! I like how the mateerials are all different but when you put them together in a picture they have all overlap. It was nice to see all of the works last week and discuss it. A lot of exmaples surprised me and made me exited about making. I chose to look for materials and colors that were the most exited to me, that is how they are related the most. | ||
| + | |||
| + | |||
| + | [[file:COLOR.jpg]] | ||
Latest revision as of 09:51, 2 April 2017
LARA BRUGGEMAN
0907064@hr.nl - lblarabruggeman@gmail.com
Graphic Design
Contents
Fusing
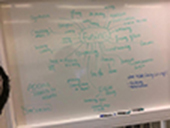
We had a group meeting to discuss our given subject: Fusing. We got very deep into the subject, to the point of where the entire universe is fusing if you think about it long enough. We focused on fusing within craft. To do this we had to define craft itself. We talked about craft for 4 hours and decided that we all had other thoughts about craft. The thing we did agree on is that craft is in the proces and also in skill and handeling a material. We all had different opinions about what fusing can be for us. It was interesting to have discussions about our different meanings and look at fusing from another perspective. We made a big wordweb to clarify fusing and to help us present our opinions and thoughts about fusing in class.
In my opinion you can define fusing as: adding things to things.
1. Historical example
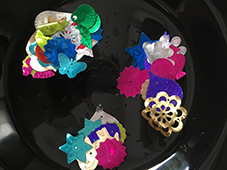
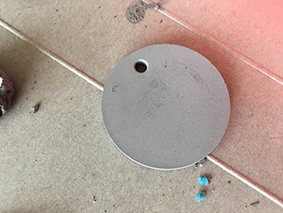
First i wanted to do something with melting because melting materials is an very historical proces. I looked in my room for something that i could melt togheter and i found the colourfull things you can see on the picture. I tried to melt them in a pan with boiled water. I discovered that the material wasn't plastic but aluminum, so it didn't melt down on the temperature of the boiled water. In the end it stuck together but I wasn't happy with the end result. I decided to take another starting point and use chalk for my historical example.
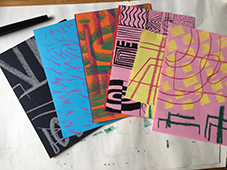
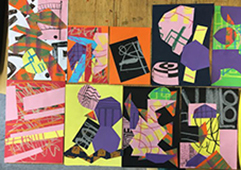
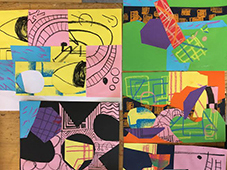
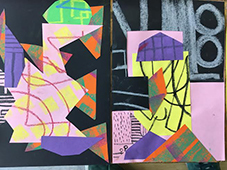
I asked the people around me what they think about when they think about craft. A lot of them told me that they thought about gluing, cutting and painting. I thought it could be interesting to take this misunderstood bias as an new starting point for my experiments. I chalked on a lot of colorful papers and cut them all in different pieces. When I was done cutting I clued them together again in many different shapes and compositions. I'm quite happy with the end result because it turned out to be a research about colors and shapes. I would like to use the colors, shapes and patterns I discovered with painting with chalk, cutting and gluing as an starting point and inspiration for the rest of the assignments in quarter 7.
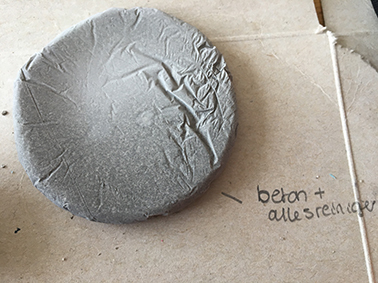
I came to the conclusion that making a collage isn't really fusing. It isn't fusing because I used the same material on top of each other. I like the outcome of the experiment but decided to make also another historical example. I made some objects out of concrete. The first time I used to much water. The concrete was to porous to came out of the molt. The first thing I learned was to use a small amount of water.
On the second picture I made concrete in a plastic bag. I really like the texture on the result! I also mixed this one with cleaning soap instead of water. The concrete still smells like the soap, days after I made it. In the last picture you see the beginning of a necklace. The concrete was strong enough to came out of the mold.
2. Comparative example
When I started this example I was inspired by the group example. We made one example with concrete and candle wax and I found this really interesting and also aesthetic. I decided to use those two materials for the comparative example.
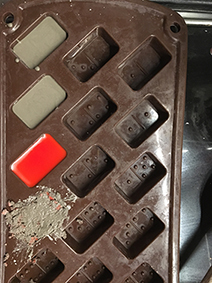
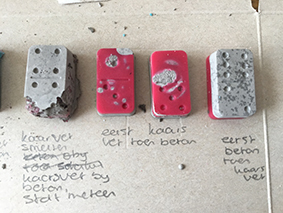
I found a mold in my kitchen and decided to use it for my experiments. I wrote down the combinations of each experiment so I would remember what I did afterwards. I used red candle wax for the first tree examples. I made the concrete and I melted the candle wax. I tried to make layers in the molt. I was surprised how nice the layers became. I thought the materials were going to mix with each other in the molt. The second thing i tried was to mis the candle wax with the concrete before putting it into the molt. The candle wax congealed very fast and it became a weird substance. After I was done with te red candle wax I used blue ones. I still wanted to mix the materials zo now I melted the candle wax and added the concrete into the pan. It made a really weird sound en started bubbling. The concrete became darker of colour. Later on I realized that the layers from the first experiment were so pretty because the wax is oily and the concrete is made with water. Oil and water don't mix very well. I could use some soap next time and see what happens.
The building in front in my house is getting demolished. When I look at this process I'm hypnotized by how the deconstructing of the building works. In the beginning the building was made out of bricks what gave the building a value which is that it forms a whole. This is because the bricks are actually fused together to form the building itself. At the moment building is deconstructed so the bricks witch are crushed into stones lost their value of being a building together. The place looks very lost with the lose stones, so i decided to give the stones a new purpose to fuse them in a new way. I stole some stones from the building place and try experimenting with them.
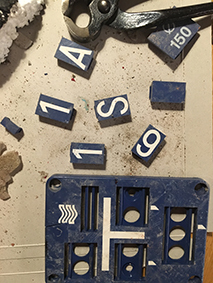
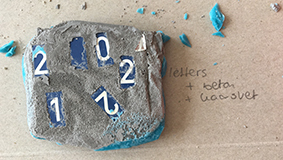
The letters I used for this example came out of a sign I found on the building place across my home. I wanted to find out if I could give them a new purpose. I deconstructed the sign and used the plastic letters in my experiment. First I put the letters in the mold I made out of foil and after that the concrete. I was afraid that the concrete would run under the letters.
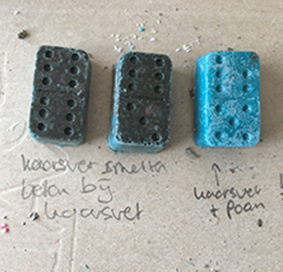
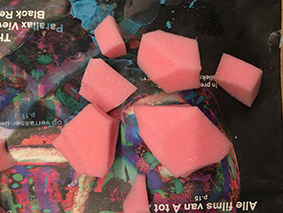
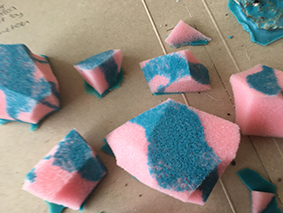
In the shared example we used a really weird pink foam material. I was curious what would happen if I fused the foam with candle wax. I was curious if it would run trough the foam or not. I found out it didn't run trough the foam as I expected. I do like the aesthetic from the colours and shapes together.
3. A new skill
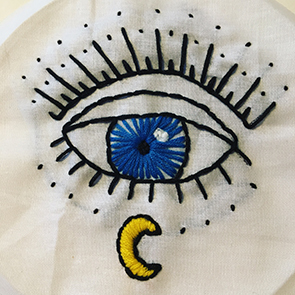
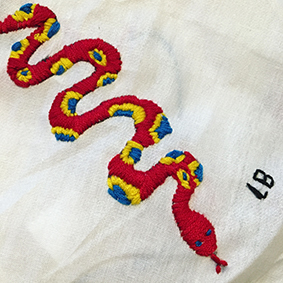
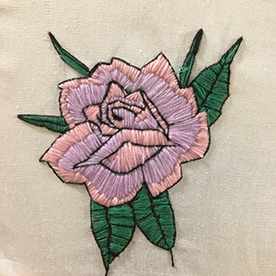
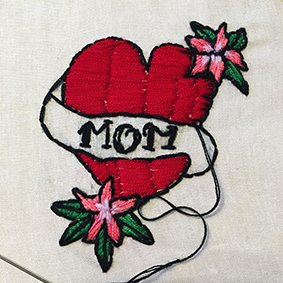
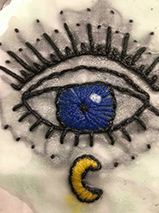
Within our fusing group we had a lot of discussions about what fusing is and what it can be. In the beginning of this project my opinion was: fusing can also be things with textiles because you have to fuse treats together to create a textile. I am very interested in textiles, so I thought what can I make with this. Because textiles are created out of treats I started thinking about embroidery's witch I really like. So I bought an hoop and began trying. Later on I decided that I don't think embroidery is fusing. I will explain this later in this paragraph.
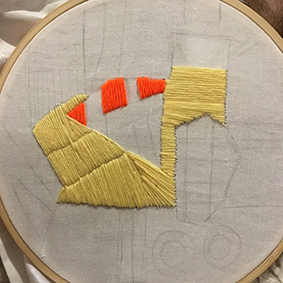
After my first 3 tryouts I discovered that i was using the treat wrong. I was using the whole treat, but you have to split the treat. If you do this the embroidery will be less thick. I splited the treat for the next two examples I made. I discovered that I could make the image more precisely with the thinner treat. I even managed to make shadow's and different colour shades inside the image.
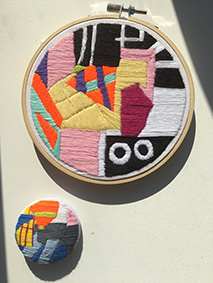
Because I really liked what I was doing and the techniek I was using I decided to take another step. Instead of making an clear image I wanted to make an more abstract image. I used the collage's from the historical example as an inspiration. I zoomed in on one of the collages and picked out an interesting piece. After I finished this piece I also made a pin inspired by the collage's.
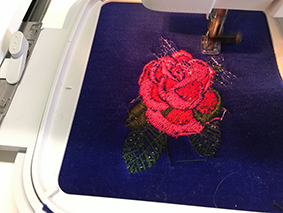
Because I liked making embroidery's this much I decided that I also wanted to know how to use the embroidery machine. I found it very meditating to do it by hand, but if I would like to use it in the future the machine might be more handy. I made an appointment to learn how to use the machine and how to switch the treats. The women form the fabric station learned me how to convert a file into an embroidery and what the steps are to use this machine. I'm happy that I know how to make emboidery's by hand and by machine. In my opinion the hand made embroidery are more related to craft because you can almost see the many ours it takes to make such a thing. But I also think the machine is a great technologie to reproduce thinks I make faster.
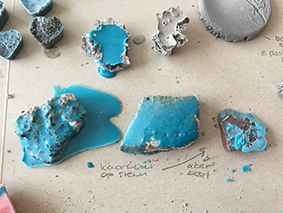
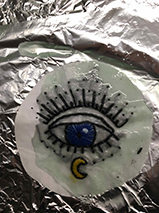
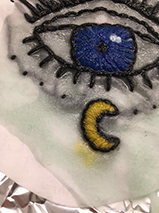
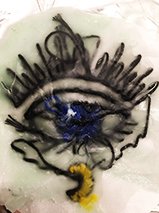
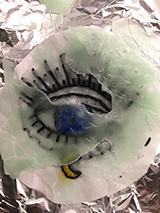
So, I did al of this work that I liked doing very much! I discovered that making embroidery isn't really fusing. I was trying to push the boundaries of fusing but I had it wrong. Embroidery's are not fusing because the material doesn't stick forever. You can take the materials apart if you like. Again I used the same materials like with the collage's. Because I didn't want my work to be for nothing... I made one last experiment to show I do know what fusing is now. I decided to take one of my embroidery's to the next step. I threw candle wax over it to see what happend. The result was quite surprising, the candle wax was staying more transparent than I was expecting. Even the colors of the treats fused with the candle wax like you can see on the second picture. I have to say that I liked the back of the embroidery more than I like the front. The back of the embroidery looks like it felt into the water.
4. A material pushed to the limit
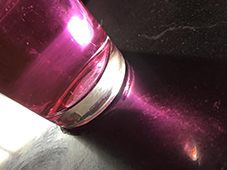
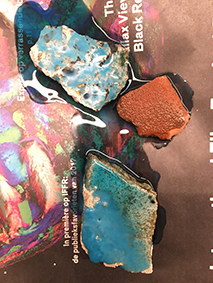
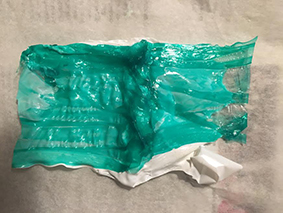
Melting! I was really exited about this experiment. The image that popped up in my head when I thought about pushing a material to the limit was burning or melting. I had bought some plastic at scrap XL and begun my experiment. I wanted to make something aesthetic so I chose pretty colors. First I tried to melt a frame of a bike lamp but that was a bit to tick. I decided to use thinner plastic. I melted things together to fuse the materials, but more important the colors together. I found a piece of perspex in my room and I was curious how it was going to look like if I tried to melt it. Something unexpected happend!! I was expecting that the material was just getting soft and I could bend it into another shape. But what happend! There came bubbles into the plastic. I think the air that was still in the plastic came out of the plastic wile I was heating it. I liked the result, It looked a bit like water! I tried to make of waves into the material.
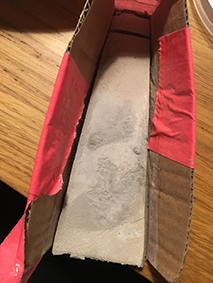
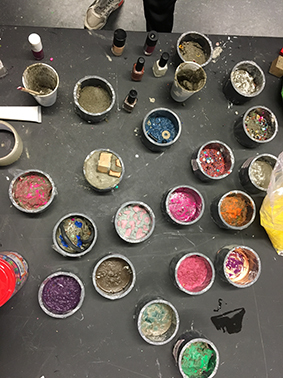
For the shared example we are trying to mike tiles. Our group consists of people who study graphic design or illustration. Because we are very used to word 2D and don't know a lot about materials we wanted to make something 3D and experiment with different kind of materials. First we were thinking about all making a part of a cube with our opinion about fusing and then fuse it together. After that we decided to make tiles from all kinds of different materials. We went to the store Scrap XL were you can buy a lot of materials. We bought a lot of things like, wood, plastic, coloured glass, foam etc. We made molts out of a plastic tube with some tape on the back. First we wanted to make molts out of wood, but we came till the conclusion that was a lot of work and the tube molts has the same effect. We did a lot of experiments in the tube's and wrote all of the combinations on the tubes so we can remember what we did.
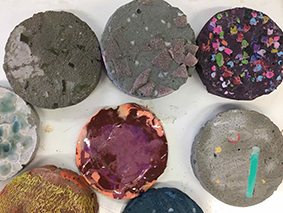
This is how the tiles looked in the molts. We are going to polish them and put them together when they are dry.
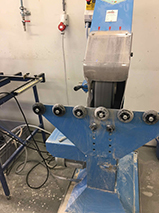
After the tiles came out of the molds we polished them with the polish machine in the ceramic station. We had to polish them careful because they were very fragile. One of the tiles broke while we were polishing it. Lucky nobody got hurt and we could take the broken tile out of the machine. We think the tile broke because we made the concrete for that one with to much water. We were quite happy with the end results. Some of them were very lame or ugly, but we had also a few nice ones. We learned a lot about materials and fusing materials together. My favorite was the one were we putted concrete and pink foam together. It is interesting how the materials compliment each other because of their differences.
WHY I MAKE
Ik maak vanuit mijn verwondering en nieuwsgierigheid over de wereld. Ik observeer en vergaar hiermee de hele dag informatie over het landschap waarin ik mij bevind. Mijn handen en hoofd zijn sterk met elkaar verbonden. De beelden die in mijn hoofd zitten, worden door mijn handen in elkaar gezet. Mijn fantasie en gedachtes maak ik visueel en tastbaar door het maakproces. Maken zorgt voor rust in mijn hoofd en voldoening. Het zorgt voor ontdekkingen binnen mijn proces.
Tijdens het maken verbind ik graag analoog en digitaal met elkaar omdat ik ervan overtuigd ben dat ze bij elkaar horen.
Ik maak om verrast te worden door het onbekende. Het niet weten hoe iets er precies uit gaat zien. Ik maak omdat ik opzoek ben naar de perfecte imperfectie. Alles om ons heen wordt steeds meer hetzelfde en daarom zoek ik naar het onverwachtse. Met mijn nieuwsgierigheid als leidinggevende in mijn hoofd, ga ik opzoek naar vervreemding en vervorming van de werkelijkheid.
Het leren om technologieën correct te gebruiken kan via een tutorial. Het leren om technologieën naar je eigen hand te zetten en voor jezelf het uiterste eruit te halen kun je alleen zelf doen. Hetzelfde geld voor materialen. Door te maken leer ik mezelf te ontplooien en technieken toe te eigenen die mijn werk of gedachten tot hun recht laten komen. Ik vind het belangrijk dat experiment terug te zien is in eindproducten. Doormiddel van experiment zie je aandacht, speelsheid en plezier terug in het werk.
End Work
For my end work I made a video. I made a lot of lose experiments and I wanted to fuse this experiments together. Also in my "Why I make' statement I talked about how I think digital and analog can't be apart from each other, they compliment each other in my movie. I really liked experimenting with the after effects program. In the beginning of this quarter I was a bit lost by doing all this random experiments, later on I found the joy of making in this quarter. I really liked the freedom of this quarter, it let me think deep about things and materials.
Check the video I made with my statement in it! --> I emaild you the link because I can't add it to my wiki page!
Picture
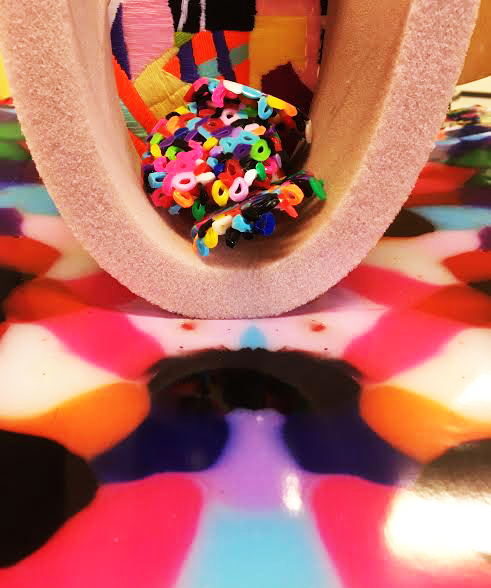
I combined examples that I found in the room with a lot of colors. I wanted to make a picture that is esthetically and also intresting to look at. When i look at this picture my imagination strarts! I like how the mateerials are all different but when you put them together in a picture they have all overlap. It was nice to see all of the works last week and discuss it. A lot of exmaples surprised me and made me exited about making. I chose to look for materials and colors that were the most exited to me, that is how they are related the most.

