Difference between revisions of "User:Kayl"
| (11 intermediate revisions by the same user not shown) | |||
| Line 236: | Line 236: | ||
[[File:Mxmvs4.JPG|200px|thumb|right|getting the test Dye out of the paint after 1 min]] | [[File:Mxmvs4.JPG|200px|thumb|right|getting the test Dye out of the paint after 1 min]] | ||
[[File:Mxmvs5.JPG|200px|thumb|left|Test Dye of the checkered fabric ]] | [[File:Mxmvs5.JPG|200px|thumb|left|Test Dye of the checkered fabric ]] | ||
| − | [[File: IMG-20170621-WA0031.jpg| | + | [[File: IMG-20170621-WA0031.jpg|500px|thumb|left|Washing the fabric(120-100CM) after 45 minutes of dye ]] |
| − | [[File: Image-2017-06-21_(1).jpg| | + | [[File: Image-2017-06-21_(1).jpg|400px|thumb|right|tablecloth in the centrifuge machine after painting]] |
| − | [[File:Mxmvs8.JPG| | + | [[File:Mxmvs8.JPG|300px|thumb|left|sketch 1]] |
| − | [[File:Mxmvs10.JPG| | + | [[File:Mxmvs10.JPG|300px|thumb|right|sketch 2]] |
| − | [[File:Mxmvs11.JPG| | + | [[File:Mxmvs11.JPG|500px|thumb|left|sketch 3]] |
| − | [[File:Mxmvs12.JPG| | + | [[File:Mxmvs12.JPG|300px|thumb|right|testing acrylic markers on the fabric with drawing Symbols as Decoration]] |
| − | [[File:Mxmvs13.JPG| | + | [[File:Mxmvs13.JPG|400px|thumb|left|Test : small version of the tablecloth how it could look with Symbols as Decoration]] |
| − | [[File:Mxmvs14.JPG| | + | [[File:Mxmvs14.JPG|500px|thumb|left|Lettertype drawn with one layer (small marker)Symbols as Decoration: No Phone, No Light]] |
| − | [[File:Mxmvs15.JPG| | + | [[File:Mxmvs15.JPG|500px|thumb|right|lettertype drawn with second layer(thick marker)Symbols as Decoration: No Phone, No Light]] |
| − | [[File: Image-2017-06-21_(2).jpg| | + | [[File: Image-2017-06-21_(2).jpg|400px|thumb|right|Battery with resistor]] |
| − | [[File: Image-c2017-06-21_(3).jpg| | + | [[File: Image-c2017-06-21_(3).jpg|600px|thumb|left|The whole Led Strip before hacking ]] |
| − | [[File: Image-2c017-06-21_(5).jpg| | + | [[File: Image-2c017-06-21_(5).jpg|500px|thumb|right|a piece of the led strip is cut off, the piece that isn’t connected is not working anymore]] |
| − | [[File: Imvhnage-2017-06-21 (6).jpg| | + | [[File: Imvhnage-2017-06-21 (6).jpg|400px|thumb|left|pieces of the led strip soldered together again]] |
| − | [[File:Mxmvs21.JPG| | + | [[File:Mxmvs21.JPG|400px|thumb|right|Photo shows that the reattached led strips work again]] |
| − | [[File:Mxmvs26.JPG| | + | [[File:Mxmvs26.JPG|600px|thumb|left|Led strip cut into pieces to form the letters]] |
| − | [[File: Image-20kjhvg17-06-21_(9).jpg| | + | [[File: Image-20kjhvg17-06-21_(9).jpg|600px|thumb|left|All the lights work after putting all pieces of 2 light strips together]] |
| − | [[File: Image-2017-0mn6-21 (10).jpg| | + | [[File: Image-2017-0mn6-21 (10).jpg|500px|thumb|right|Softbuttons in the making]] |
| − | [[File:Mxmvs20.JPG| | + | [[File:Mxmvs20.JPG|400px|thumb|right|making the softbuttons together with maxime]] |
| − | [[File:Mxmvs16.JPG| | + | [[File:Mxmvs16.JPG|500px|thumb|right|Cutting the positive wire to attach the softbuttons in the circuit]] |
| − | [[File:Mxmvs18.JPG| | + | [[File:Mxmvs18.JPG|700px|thumb|left|Phones closing the circuit so the Led lights are working]] |
| − | [[File:Mxmvs19.JPG| | + | [[File:Mxmvs19.JPG|600px|thumb|right|Final Tablecloth without Phones so the cicuit it not working]] |
| Line 278: | Line 278: | ||
I am glad that Maxime and I worked together as she did a wonderfull job on the Lettertype and the design of the tableclote decorations. I knew more about electronics and soldering, that is why i did the soldering and attaching the Leds but by explaining how it works she helped a lot with attaching the softbuttons | I am glad that Maxime and I worked together as she did a wonderfull job on the Lettertype and the design of the tableclote decorations. I knew more about electronics and soldering, that is why i did the soldering and attaching the Leds but by explaining how it works she helped a lot with attaching the softbuttons | ||
Together we managed to help eachother with our knowledge and made the tablecloth work! | Together we managed to help eachother with our knowledge and made the tablecloth work! | ||
| + | |||
| + | |||
| + | –––––––––––––––––––––––––––––––––––––––––––––––––––––––––––––––––––––––––––––––––––––––––––––––––––––––––––––––––––––––––––––––––––––––––––––––––––––––––––––––––––––––– | ||
| + | |||
| + | == '''Presentation''' 22-06-2017 == | ||
| + | |||
| + | –––––––––––––––––––––––––––––––––––––––––––––––––––––––––––––––––––––––––––––––––––––––––––––––––––––––––––––––––––––––––––––––––––––––––––––––––––––––––––––––––––––––– | ||
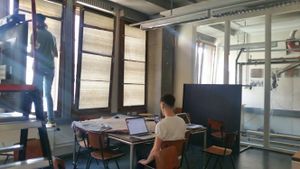
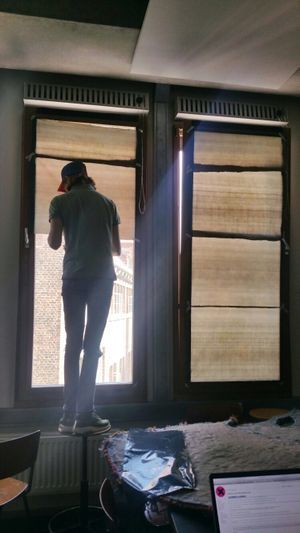
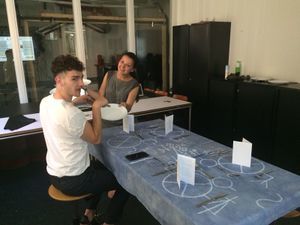
| + | We decided to make a team for the presentation with Axel Verwee and Mickey Nerrings. As our table cloth can be used in multiple situations to bring people together and their project is also about bringing people together. There device is about connecting people in a different way, the device is sending a message when the peolpe who wear it touch. The message is with information about the other person so that you can keep in contact. We thought this was a nice project because we could combine the 2 projects in 1 presentation because people who get to know each other at a dinner or a picknic/festival can exchange information without picking up their phones and disconnecting with your dinner partners. | ||
| + | |||
| + | [[File:Samenwerk2.JPG|300px|]] [[File:Samenwerk1.JPG|300px|]][[File:20170622-WA0005jgh.jpg|300px]][[File:20170622-WA0006hghf.jpg|300px]] | ||
| + | [[File:foto-3.jpg|300px]] | ||
Latest revision as of 10:10, 22 June 2017
Expanded Toolbox 2017
17-04-2017
Kaylee Nieuwenhuizen
Welcome on my page. My name is Kaylee and my email is 0912721@hr.nl.
I will post about my proces of the digital craft minor 2017 Q8 - WDKA
––––––––––––––––––––––––––––––––––––––––––––––––––––––––––––––––––––––––––––––––––––––––––––––––––––––––––––––––––––––––––––––––––––––––––––––––––––––––––––––––––––––––
Contents
- 1 First Class: Group exercise 20-04-2017
- 2 No Class: Holidays 27-04-2017
- 3 No Class: Hacking 04-05-2017
- 4 Second Class: Measuring 11-05-2017
- 5 Third Class: Keyboard 18-05-2017
- 6 No Class: Holiday ‘Hemelvaart’ 25-05-2017
- 7 Fourth Class: Own Assignment 01-06-2017
- 8 Our own Project 08-06-2017-22-06-2017
- 9 Presentation 22-06-2017
First Class: Group exercise 20-04-2017
––––––––––––––––––––––––––––––––––––––––––––––––––––––––––––––––––––––––––––––––––––––––––––––––––––––––––––––––––––––––––––––––––––––––––––––––––––––––––––––––––––––––
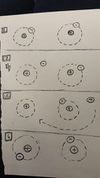
We are the Electrons. We learned that '+ and -' came together, in a dance we showed this with shaking our body but when '- and -' came together they would clash. How the Electrons react is explained further in the drawing that we made, on the left.
––––––––––––––––––––––––––––––––––––––––––––––––––––––––––––––––––––––––––––––––––––––––––––––––––––––––––––––––––––––––––––––––––––––––––––––––––––––––––––––––––––––––
No Class: Holidays 27-04-2017
––––––––––––––––––––––––––––––––––––––––––––––––––––––––––––––––––––––––––––––––––––––––––––––––––––––––––––––––––––––––––––––––––––––––––––––––––––––––––––––––––––––––
No Class: Hacking 04-05-2017
––––––––––––––––––––––––––––––––––––––––––––––––––––––––––––––––––––––––––––––––––––––––––––––––––––––––––––––––––––––––––––––––––––––––––––––––––––––––––––––––––––––––
Second Class: Measuring 11-05-2017
–––––––––––––––––––––––––––––––––––––––––––––––––––––––––––––––––––––––––––––––––––––––––––––––––––––––––––––––––––––––––––––––––––––––––––––––––––––––––––––––––––––––– In this class we started with a summary of the first class. In a battery the elektrons go from the + side to the - side. A Led light has a long and a short, the long side is the + side and is called Anode, the short side is the - side and is called Cathode. A resistor is to limit the presure of the battery for a Led light for example. A resistor = Ohm. You can calculate how much the resistor resists with a dutch"donkey bridge": Zij bracht rozen op gerrits graf bij vies grauw weer
1-2-X-------
Zij = Zwart = 0-0-1
Bracht = Bruin = 1-1-10
Rozen = Rood = 2-2-100
Op = Oranje = 3-3-1000
Gerrits = Geel = 4-4-10K
Graf = Groen = 5-5-100K
Bij = Blauw = 6-6-1M
Vies = Violet = 7-7-10M
Grauw = Grijs = 8-8-100M
Weer = Wit = 9-9-1000M
Further in this class we did some small experiments in a group. We made a circuit on a plugboard with a 9 volt battery, a resistor and a LED. the rest of the experiments were about measuring with a volt meter.
What you need (ask at the Interaction Station):
* Multimeter
* 9 Volt battery (5V in the tutorial)
* 9 Volt battery clip for in a breadboard
* 470 Ohm resistor (1K Ohm in the tutorial)
* LED
* breadboard
Outcome: Voltage 7
Resistance 465
Ampere 19.3
Measuring resistance
What you need (ask at the Interaction Station):
* Multimeter
* 3 random resistors
* 3 resistors of the same value
* breadboard
Series Resistance Outcome: Volt 1th restitor 2.38
Volt 2nd/3th 2.39
Volt 1th + 2nd together 4.77
Volt 2nd + 3th together 4.78
Volt 1th +2nd +3th together 7.16
I = V/R
9,11: 2,38 = 3,83
9,11 : 7,16 = 1,27
Parallell Resistance Outcome
Voltage van de drie restitors 8.41
Measuring Current
What you need (ask at the Interaction Station):
* Multimeter
* 9 Volt battery (5V in the tutorial)
* 9 Volt battery clip for in a breadboard
* 470 Ohm resistor (1K Ohm in the tutorial)
* LED
* breadboard
Outcome Voltage 7
Resistance 465
Ampere 19.3
Measuring voltage and current in a series circuit
What you need (ask at the Interaction Station):
* Multimeter
* 9 Volt battery (5V in the tutorial)
* 9 Volt battery clip for in a breadboard
* 3 resistors random resistors
* breadboard
Outcome Volt 9.11
Ampere 3.82
I = V/R
9,11: 2,38 = 3,83
9,11 : 7,16 = 1,27
Measuring voltage and current in a parallel circuit
What you need (ask at the Interaction Station):
* Multimeter
* 9 Volt battery (5V in the tutorial)
* 9 Volt battery clip for in a breadboard
* 3 resistors random resistors
* breadboard
Outcome:
Battery voltage: 8.58
Voltage van de drie restitors : 8.41
I=V/R
8.58/8.41 = 1.02
––––––––––––––––––––––––––––––––––––––––––––––––––––––––––––––––––––––––––––––––––––––––––––––––––––––––––––––––––––––––––––––––––––––––––––––––––––––––––––––––––––––––
Third Class: Keyboard 18-05-2017
––––––––––––––––––––––––––––––––––––––––––––––––––––––––––––––––––––––––––––––––––––––––––––––––––––––––––––––––––––––––––––––––––––––––––––––––––––––––––––––––––––––––
In the third class we had to make a Keyboard. in this assignment we could show what we have learned about circuits with resistors and LEDs, and about measuring voltage. we also learned new things about how to adjust a copper plate, and how to solder a microchip. First we picked a schematic. Axel Verwee and I had schematic 1 so we teamed up for this assignment. We had to draw the circuit on a copper plate. Ad first we tried to iron a printed image on the copper. if the ink would have sticked on the copper we could have put the copper in a gemecal bath but this only worked for half of the image. Then we grinded our version of the schematic on the copper plate. The soldering of the chip was the hardest part, this went wrong the first time as the paws of the chip broke when we tried to attach the treads to other componends and on the copper plate. The second time we first connected all the paws of the chip to other threads. then we soldered all the other componends on the copper plate, and at last we connected te threads from the chip to other parts on the plate untill everything was connected. We designed our keyboard in such a way that the chip was floating in the air. It was very nice to look at and it worked! you only had to hold the speaker up because we placed it upside down; the metal part under the speaker made contact to the copper plate which we could solve with a small piece of tape underneed the speaker. We Finished First!!
Want to see how the Keyboard worked? click here on the video it is on youtube >>>[1]
––––––––––––––––––––––––––––––––––––––––––––––––––––––––––––––––––––––––––––––––––––––––––––––––––––––––––––––––––––––––––––––––––––––––––––––––––––––––––––––––––––––––
No Class: Holiday ‘Hemelvaart’ 25-05-2017
––––––––––––––––––––––––––––––––––––––––––––––––––––––––––––––––––––––––––––––––––––––––––––––––––––––––––––––––––––––––––––––––––––––––––––––––––––––––––––––––––––––––
Fourth Class: Own Assignment 01-06-2017
––––––––––––––––––––––––––––––––––––––––––––––––––––––––––––––––––––––––––––––––––––––––––––––––––––––––––––––––––––––––––––––––––––––––––––––––––––––––––––––––––––––––
This class was about brainstorming for our independent presentation and using drawings to come up with fast ideas. We had to choose some experiment we've done in the lessons before which we liked, to work on further as your own project. At first i tought about the keyboard experiment but what i found more interesting is that energy flows through our bodies. I liked the way we measured energy by holding eachothers hand. In this class we had to make 5 drawings, based on 5 steps, how to realise this project from what we've learned in class till what it can be as in exhibition for the presentations. The 5 steps:
1. Make an illustration of your most memorable insight of what you have learned/discovered; I made an illustration of people holding hands with a measuring device inbetween.
2. Make a drawing of how this insight can be made into a physical artefact; I made a drawing of an installation with on both sides a softbutton. Without a
conductive intermediate piece between the buttons the installation would not work. Spectators would have to hold hands around the big object for it to connect and start working.
3. Make a drawing of an independent idea you would like to build/construct; I made a drawing of a Landscape With the same softbuttons on both ends with the same idea behind it as in drawing two. spectators would have to hold hands and come together.
4. Make a drawing of this idea in its most minimal/essential form;The most minimalistic form of this idea was that two people have to work together to make a LED light work.
5. Make a drawing of this idea in its most expansive/immersive form. The most immersive form of this idea was a huge painting which will light up and start moving when people hold hands and work together.
The idea behind these options/ideas is that we use technologie to bring people together. in most causes people watch and observe art on there own in a museum and then they come home. I thought that if people have to work together to make the art work and for that purpose have to hold hands it will become easier to make contact with strangers and have a conversation with them, get to know new people and step out of you comfort zone. The Teachers gave me the advice to think about how i could let the people who watch and interact with the installation/art object and each other, know that they are part of the art object. They need to understand that the act they are doing is as important as the art object but that working together and starting a conversation is even more important.
Maxime wanted to make something where contact between people creates something. Because our ideas were so semilair at the brainstorming session, we decided to work together So that we could strengthen each other's ideas. As Maxime is doing Graphic design, and i'm doing fashion design, we started brainstorming about a project where we both could bring imput from our majors and learn from each others skills.
––––––––––––––––––––––––––––––––––––––––––––––––––––––––––––––––––––––––––––––––––––––––––––––––––––––––––––––––––––––––––––––––––––––––––––––––––––––––––––––––––––––––
Our own Project 08-06-2017-22-06-2017
––––––––––––––––––––––––––––––––––––––––––––––––––––––––––––––––––––––––––––––––––––––––––––––––––––––––––––––––––––––––––––––––––––––––––––––––––––––––––––––––––––––––
t strips together ]]
So, our first idea was to make a chain of people between the light and the Teslabol so you could lighten-up things in a distance. We thought a lot about what we could light up with the tesla bol and what should be the art object that would make people come together but because the tesla bol gives already light the element of surprise was given away. We looked at other elements and experiments from class what we found interesting and fun to work with. We looked at plugboards because the colours and the flow of the threads are aesthetically beautiful. It also made us think about the art of Karel Appel. We had an idea of mixing the craftmanship used in these kinds of paintings with the idea of a plugboard and make an painting with threads which would be able to light up. Mainly because elektronics are often about functionality and art about decoration. We did do some experiments with this idea but we didn't work it out because we really wanted to do more with the connection between people.
"What else is about connecting people? What about phones?! Your phone nowadays is the most important connector. It connects you to family, friends, work, people you know, people you dont know, people you want to know and so forth. What is another way of connection between people? A dinner with friends, family, or maybe a date? A problem nowadays is that if you having a nice dinner with others, there are ALWAYS phones on the table. It's kind of accepted but it's still super annoying if you are together and one picks up his phone, the whole physical connection and afmosphere is gone. Probably something is more important while having a nice dinner...
How can we combine these two? To bring it back to what we've learned in class, we came to the idea of using the phone, our personal connector, as a connector in a cirquit. We made a tablecloth with LED's in the middle, which only turn on if all the phones are in the cirquit, on the table. If you pick up your phone to use it, the light will turn off. And you dont want to wait in the dark till the other is done with his phone right?" Written by maxime.
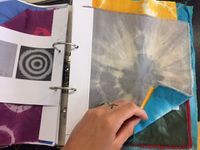
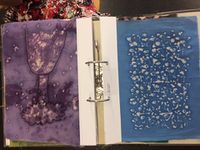
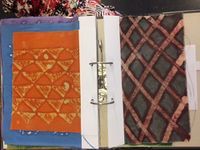
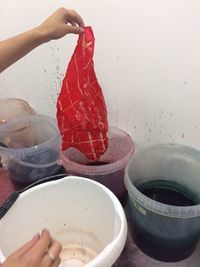
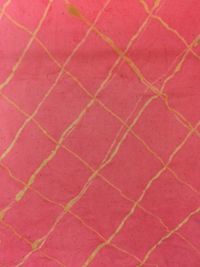
We could combine our skills and learn from each other with this idea. For the tablecloth itself we went to the fashion station, my department, for dying cotton. We wanted to dye the fabric ourselfs to bring our carftmanship in this project of digitalcraft. We looked at some books in the fabric station to deside on a print to dye. A checkered test of fabric gave us the idea of a picnic tablecloth so we tried this out. But we wanted more of a flow in the fabric, a more unexpected dyeing technique. So we washed the cotton, made it weth, cropped it all together in a too small bucket. We weeled the fabric around every 10 min, and took it out after 3 quaters of an hour. We washed the cotton again but not in the washing machine because then the paint would become more equally spread, without washing the tablecloth the paint left a structure on the cotton, a flowing unexpected dye. We did this twice as it seemed handy to have a backup if something would go wrong.
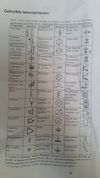
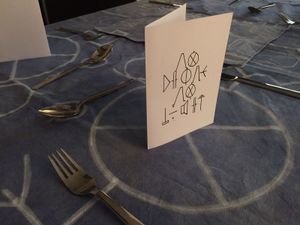
Maxime used her graphic design skills to make a lettertype using the technical symbols we learned in class. The symbols are used in a decorative way in the tablecloth but they are placed as crockery, for example a circle with a cross is used as a plate. The lettertype is used in the middle in a communicative way, it's telling the users: NO PHONE NO LIGHT. Maxime made a few sketches of how the symbols could be placed. we discussed this toghether and decided on the final design. She drew the symbols with 2 white acrylic markers by hand, one small and one big to make the symbols pop a little bit more. She drew by hand to make it look more crafted and flowy to match the dye of the tablecloth. We made the text in the middle on another piece of fabric so that we could attach it on the tablecloth later with all the wires and electronics inbetween the layers. After se was done drawing I made a hem on the end on the sewing machines, using a dark blue colour thread matching the darkest spots of dye.
As the interaction station was closed and we could not work on school on the soldering I aranged a soldering machine myself so i could do the soldering at home. I hacked 2 LED strips. we wanted to form the letters with the lights but when i cut of some lights of the strip they stopt working but the part that was still attached to the battery still worked. This is how i knew the Leds were connected in parallel. I soldered copper threads between the cuts in the strip to form a new circuit. because the lights had to stay in place behind the letters i taped them on to the fabric. When all the lights were attached and in place(this didn't work out all the time as the Led strip was very fragile and most of the time the soldering would fall off if i tried to to attach it on the fabric)we had to make the spots were the phones would have a part in the circuit.
Maxime and i started working on the softbuttons. I knew how they worked as i had used them before in a project i explained to her how we needed to make them. We used a spons which we cut in small pieces. on top and under the spons we made squares of cardboard. on these squares we taped alluminium tape on which we made a copper thread. So the top and the bottom square had both a copper thread on a conductive material, the alluminium/conductive layers would touch each other when a phone would be placed on the top cardboard. We cut the positive thread from the battery connected the thread to the first softbutton. The thread of the first softbutton was soldered by me to the next softbutton and so on until the last thread was soldered on the other end on the cut thread which would lead to the Led light and the rest of the circuit. Again we taped the threads to the fabric and turned it over to see if the phones would activate the circuit of Leds by closing the softbuttons. When this worked we attached the fabric with the letters and all the Leds and threads on the tablecloth with Velcro. using velcro seems handy as you can get the fabric piece of the tablecloth to replace empty batteries but you can also wash the tablecloth without the electronic parts.
I am glad that Maxime and I worked together as she did a wonderfull job on the Lettertype and the design of the tableclote decorations. I knew more about electronics and soldering, that is why i did the soldering and attaching the Leds but by explaining how it works she helped a lot with attaching the softbuttons Together we managed to help eachother with our knowledge and made the tablecloth work!
––––––––––––––––––––––––––––––––––––––––––––––––––––––––––––––––––––––––––––––––––––––––––––––––––––––––––––––––––––––––––––––––––––––––––––––––––––––––––––––––––––––––
Presentation 22-06-2017
–––––––––––––––––––––––––––––––––––––––––––––––––––––––––––––––––––––––––––––––––––––––––––––––––––––––––––––––––––––––––––––––––––––––––––––––––––––––––––––––––––––––– We decided to make a team for the presentation with Axel Verwee and Mickey Nerrings. As our table cloth can be used in multiple situations to bring people together and their project is also about bringing people together. There device is about connecting people in a different way, the device is sending a message when the peolpe who wear it touch. The message is with information about the other person so that you can keep in contact. We thought this was a nice project because we could combine the 2 projects in 1 presentation because people who get to know each other at a dinner or a picknic/festival can exchange information without picking up their phones and disconnecting with your dinner partners.
