Difference between revisions of "User:Kenah/Sensative trackpad"
| (One intermediate revision by the same user not shown) | |||
| Line 2: | Line 2: | ||
<span style='width:40em;font-size:30px;display:block;color:white;background:linear-gradient(purple,white);'> | <span style='width:40em;font-size:30px;display:block;color:white;background:linear-gradient(purple,white);'> | ||
<br/><br/><br/> | <br/><br/><br/> | ||
| − | ''' | + | '''Sensors and sensitivity |
''' | ''' | ||
<br/><br/><br/><br/> | <br/><br/><br/><br/> | ||
| Line 24: | Line 24: | ||
<br/> | <br/> | ||
== PROCESS == | == PROCESS == | ||
| − | + | <br/><br/> | |
| + | ====BODYVOLTAGE METER==== | ||
<span style='width:40em;display:block;'> | <span style='width:40em;display:block;'> | ||
| − | At first, we were assigned to do some digging and bring a sensor to the class. I did some research and found some interesting sensors, like the Bend sensor, pressure Sensor, thermal sensor, proximity sensor and the optical sensor. but the one that got my attention was the body voltage meter. what I think is so interesting about the body voltage meter is that you use your body as a sensor to sense static electricity. <br | + | At first, we were assigned to do some digging and bring a sensor to the class. I did some research and found some interesting sensors, like the Bend sensor, pressure Sensor, thermal sensor, proximity sensor and the optical sensor. but the one that got my attention was the body voltage meter. what I think is so interesting about the body voltage meter is that you use your body as a sensor to sense static electricity. <br> |
[[https://www.youtube.com/watch?v=nVFdMZlHPuM| Body Voltage Meter]] | [[https://www.youtube.com/watch?v=nVFdMZlHPuM| Body Voltage Meter]] | ||
| − | <br><br> | + | <br/><br/> |
In the class meeting where we presented the sensors, I teamed up with Philip. here we decided to do some more research on the body voltage meter plus capacitive sensor. but eventually, Philips research had more information that we could work with. I couldn't find any information oh how or why a body voltage meter did what it did. All I could find is a community that lived with the fear of having static electricity collected in their body because of the daily use of electronics. after exchanging the findings we decided to work with the capacitive sensor. <br> | In the class meeting where we presented the sensors, I teamed up with Philip. here we decided to do some more research on the body voltage meter plus capacitive sensor. but eventually, Philips research had more information that we could work with. I couldn't find any information oh how or why a body voltage meter did what it did. All I could find is a community that lived with the fear of having static electricity collected in their body because of the daily use of electronics. after exchanging the findings we decided to work with the capacitive sensor. <br> | ||
[[https://www.youtube.com/watch?v=lUw1u1PYmBE| People that use it]] | [[https://www.youtube.com/watch?v=lUw1u1PYmBE| People that use it]] | ||
| − | <br><br> | + | </span> |
| + | |||
| + | <br/><br/> | ||
| + | ====CAPACITIVE SENSOR==== | ||
| + | <span style='width:40em;display:block;'> | ||
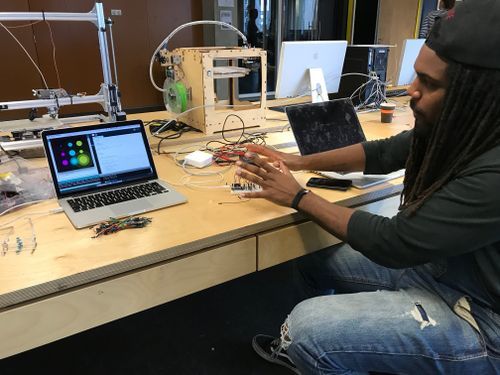
A capacitive sensing is not the same but allows you to measure proximity and/or touch. This happens by moving your hand through a magnetic field generated by the sensor. Your body is then the other side of a capacitor, changing the capacitance which you can measure. This number can be converted to distance. This requires lots of calibration and filtering the measured values. | A capacitive sensing is not the same but allows you to measure proximity and/or touch. This happens by moving your hand through a magnetic field generated by the sensor. Your body is then the other side of a capacitor, changing the capacitance which you can measure. This number can be converted to distance. This requires lots of calibration and filtering the measured values. | ||
| + | <br/><br/> | ||
| + | [[File:Capacitivetest1 philip.jpg|thumb||center|500px|testing the capacitive sensor]] | ||
| + | </span> | ||
| + | <br/><br/> | ||
| + | |||
| + | ====THERAMIN==== | ||
| + | <span style='width:40em;display:block;'> | ||
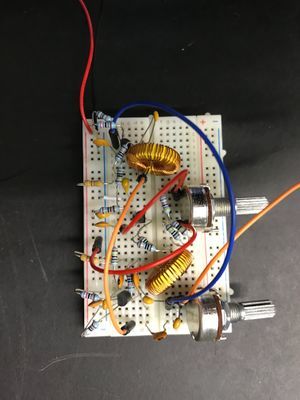
| + | Part of Philips research also involved sound so he wanted to find a way to incorporate it. He did a lot of experiment with sound and what kind of visuals it would make (link to [[http://digitalcraft.wdka.nl/wiki/User:Philip#Week_3_.26_4_-_Sensors_and_sensitivity Philip's research]]). After getting the capacitive sensor te work we decided to also try something else, because the capacitive sensor could be really unstable at times. So we tried something else that worked the same but also worked with sound. we started looking at the theremin and eventually build one. the only problem was that we couldn't figure out how to make it work. after consulting with some teachers and a classmate that also worked on one, we decided that it would be best if we would continue with the capacitive sensor. This because the schematics for the theremin were incomplete or wrong. | ||
| + | <br/><br/> | ||
| + | [[File:Theremin philip.jpg|thumb|300px|center|circuit for the theramin]] | ||
</span> | </span> | ||
| + | <br/><br/> | ||
| + | ====THE MAKING==== | ||
| + | <span style='width:40em;display:block;'> | ||
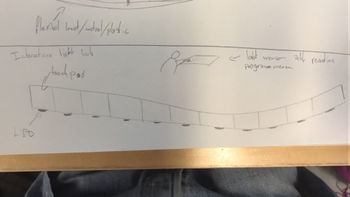
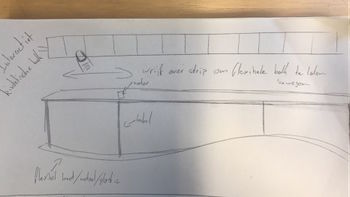
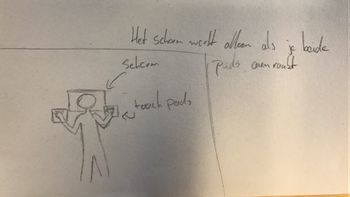
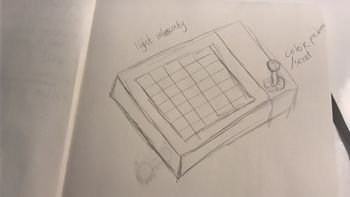
| + | after doing al the techincal experimenting we still had to find a purpose for it to be used. we started steching out ideas how people could interact with it and how it might be meaningful. | ||
| + | </span> | ||
| + | |||
| + | <br/><br/> | ||
| + | <gallery widths=350px heights=350px> | ||
| + | File:Capacitivesketch3 philip.jpg|A long beam with LED's that react to (almost) touching a specific part of the beam. | ||
| + | File:Capacitivesketch2 philip.jpg|An interactive kinetic installation that has a long flexible beam that you can move by sliding your hand over a slider. | ||
| + | File:Sketchcapacitive philip.jpg|Two touchpads with a screen in between that forces you to watch the content. | ||
| + | File:Sketch sensor alkenah.JPG|sketches of a controller box to conduct some kind of interaction with an interface | ||
| + | </gallery> | ||
| + | |||
| + | <br/><br/> | ||
| + | <span style='width:40em;display:block;'> | ||
| + | because we were intresseded and inspired by more abstract light and michanical instalations we decided as a start incorparate lights in it. So we build a box that held the sensor en the lights in it and to have the people touch the top of the acrylic so let the light react. but after the first presentation it was make clear to us that there had to be something more to it to take it to the next level. Because what we basiclly made was a DIY trackpad. After realizing that we brainstormed again and we discovered that there are a veriety of buttons swithes and tools being made that are more haptic and give the user more control and feedback in use. so we decided to explore that realm and see what we could do to gave a trackpad the same feeling. we decided to change the acrylic top for a frame with circle in the middele that we covered up with a textile that was really nice to the touch en really stretchy. this gave it an extra dimension because you could press into the top that would them mean that the senor would give greater numbers, because you get closer to the sensor. | ||
| + | </span> | ||
| + | |||
| + | <br/><br/> | ||
| + | <gallery widths=550px heights=550px> | ||
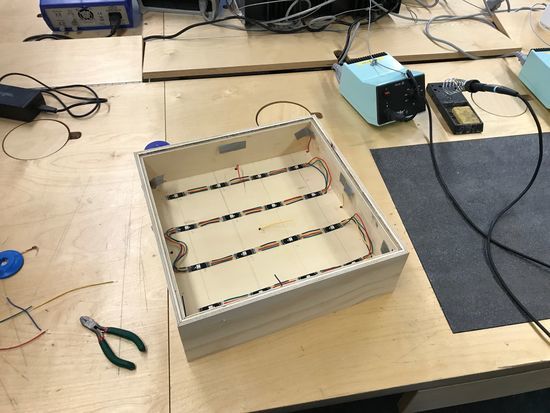
| + | File:capacibox1_philip.jpg|These are WS2814 LED's which have special drivers inside which make it super easy to address each individual LED. Only 1 data line is needed. The LED's are grouped to match the sensors. Sensor 1 activates LED 1. Sensor 2 activates LED 2 & 3. And so on. The middle sensor activates LED 6, 7, 10 and 11. | ||
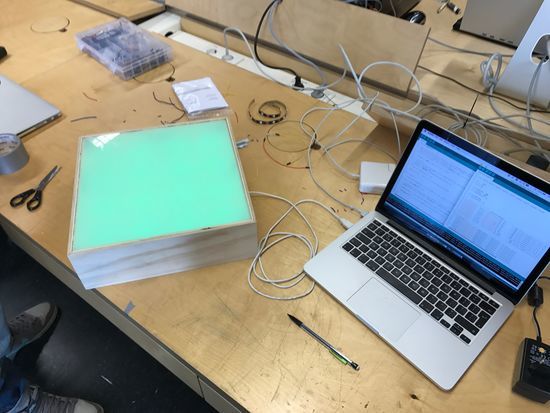
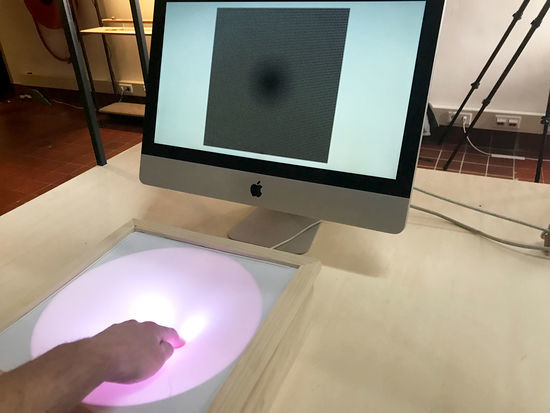
| + | File:capacibox2.jpg|The finished box that responds to (almost) touch. | ||
| + | File:Sensor top alkenah.JPG | ||
| + | </gallery> | ||
| + | |||
| + | <br/><br/> | ||
| + | ====EXPO==== | ||
| + | <gallery widths=550px heights=550px> | ||
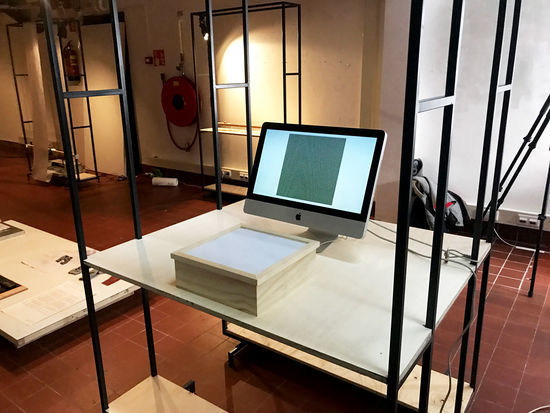
| + | File:sensorsensitivityeindexpo-philip.jpg|Setup at final exhibition. | ||
| + | File:sensorsensitivitytrackpadfinal-philip.jpg | ||
| + | </gallery> | ||
</center> | </center> | ||
Latest revision as of 18:37, 1 November 2017
Sensors and sensitivity
Contents
PEOPLE
ALKENAH WANSING
Major // graphic design
PAGE ALKENAH
PHILIP GHERING
Major // CMD
PAGE PHILIP
SENSOR
BODY VOLTAGE METER
PROCESS
BODYVOLTAGE METER
At first, we were assigned to do some digging and bring a sensor to the class. I did some research and found some interesting sensors, like the Bend sensor, pressure Sensor, thermal sensor, proximity sensor and the optical sensor. but the one that got my attention was the body voltage meter. what I think is so interesting about the body voltage meter is that you use your body as a sensor to sense static electricity.
[Body Voltage Meter]
In the class meeting where we presented the sensors, I teamed up with Philip. here we decided to do some more research on the body voltage meter plus capacitive sensor. but eventually, Philips research had more information that we could work with. I couldn't find any information oh how or why a body voltage meter did what it did. All I could find is a community that lived with the fear of having static electricity collected in their body because of the daily use of electronics. after exchanging the findings we decided to work with the capacitive sensor.
[People that use it]
CAPACITIVE SENSOR
A capacitive sensing is not the same but allows you to measure proximity and/or touch. This happens by moving your hand through a magnetic field generated by the sensor. Your body is then the other side of a capacitor, changing the capacitance which you can measure. This number can be converted to distance. This requires lots of calibration and filtering the measured values.
THERAMIN
Part of Philips research also involved sound so he wanted to find a way to incorporate it. He did a lot of experiment with sound and what kind of visuals it would make (link to [Philip's research]). After getting the capacitive sensor te work we decided to also try something else, because the capacitive sensor could be really unstable at times. So we tried something else that worked the same but also worked with sound. we started looking at the theremin and eventually build one. the only problem was that we couldn't figure out how to make it work. after consulting with some teachers and a classmate that also worked on one, we decided that it would be best if we would continue with the capacitive sensor. This because the schematics for the theremin were incomplete or wrong.
THE MAKING
after doing al the techincal experimenting we still had to find a purpose for it to be used. we started steching out ideas how people could interact with it and how it might be meaningful.
because we were intresseded and inspired by more abstract light and michanical instalations we decided as a start incorparate lights in it. So we build a box that held the sensor en the lights in it and to have the people touch the top of the acrylic so let the light react. but after the first presentation it was make clear to us that there had to be something more to it to take it to the next level. Because what we basiclly made was a DIY trackpad. After realizing that we brainstormed again and we discovered that there are a veriety of buttons swithes and tools being made that are more haptic and give the user more control and feedback in use. so we decided to explore that realm and see what we could do to gave a trackpad the same feeling. we decided to change the acrylic top for a frame with circle in the middele that we covered up with a textile that was really nice to the touch en really stretchy. this gave it an extra dimension because you could press into the top that would them mean that the senor would give greater numbers, because you get closer to the sensor.
These are WS2814 LED's which have special drivers inside which make it super easy to address each individual LED. Only 1 data line is needed. The LED's are grouped to match the sensors. Sensor 1 activates LED 1. Sensor 2 activates LED 2 & 3. And so on. The middle sensor activates LED 6, 7, 10 and 11.
