Difference between revisions of "User:Ellemies"
| (52 intermediate revisions by the same user not shown) | |||
| Line 1: | Line 1: | ||
| − | + | [[File:Animated GIF-downsized.gif|100px|thumb|right|Hoi!]] | |
| − | [[File:Animated GIF-downsized.gif]] | ||
| + | Welcome to my documentation of Digital Craft 2018 | ||
| + | Michelle Kootkar, 0931029. | ||
| + | Docent Beeldende Kunst en Vormgeving, derde leerjaar. | ||
== Flying Glider 2.0 == | == Flying Glider 2.0 == | ||
| Line 16: | Line 18: | ||
When you finally finished putting the plane together and want to make it fly, the plane would fall apart. | When you finally finished putting the plane together and want to make it fly, the plane would fall apart. | ||
| − | |||
| − | |||
| − | < | + | <div><ul> |
| − | File: | + | <li style="display: inline-block;"> [[File:Diykit.JPG|thumb|none|220px|Caption 1]] </li> |
| − | File: | + | <li style="display: inline-block;"> [[File:Painfull-stresfull.JPG|thumb|none|220px|Caption 1]] </li> |
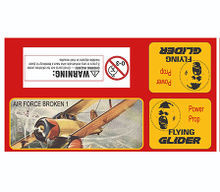
| − | + | <li style="display: inline-block;"> [[File:Originalflyingglider.jpg|thumb|none|220px|Original flying glider, toy for children, made out of foam]] </li> | |
| − | File:Originalflyingglider.jpg | + | <li style="display: inline-block;"> [[File:verpakking.jpg|thumb|none|220px|Our packaging designed after original flying glider]] </li> |
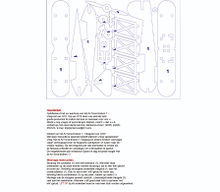
| − | + | <li style="display: inline-block;"> [[File:Handleiding.jpg|thumb|none|220px|Caption 1]] </li> | |
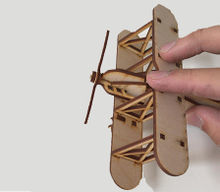
| − | File: | + | <li style="display: inline-block;"> [[File:plain.jpg|thumb|none|220px|Endresult]] </li> |
| − | File: | + | </ul></div> |
| − | [[File:plain.jpg|thumb|none|220px| | ||
| − | </ | ||
| + | == Schimmelderij == | ||
| + | Project 2: Cybernetic Prosthetics | ||
| + | In small groups, you will present a cluster of self-directed works as a prototype of a new relationships between a biological organism- and a machine, relating to our explorations on reimagining technology in the posthuman age. The prototypes should be materialized in 3D form, and simulate interactive feedback loops that generate emergent forms. For 3 year students, this first project can be speculative and rudimentary. The technology doesn't have to fully work yet, but the idea should be communicated through the prototype and appropriate documentation. (max 5 people per group). | ||
| + | This project was created by: Jamie, Simone and Michelle | ||
| + | We started our project by researching the artist we discussed in the class of Ivan. The artist that struck us the most was Eduardo Kac. Ivan mentioned the DNA flower and we did more research about him. We came on a project of his, where he is creating an artist gene. This gene was created by translating a sentence from the bible, Genesis, into Morse Code, and converting the Morse Code into DNA base pairs according to a conversion principle specially developed for this work. | ||
| + | So this project made us think about Google translate fails. When you translate a sentence to another language and then translate it to its original language something different comes out of it. Sometimes it can be quite funny or poetic. That made us think about esthetical art that we as human don’t have complete control over. | ||
| + | We wanted to create something that decides and or can speaks for itself. So first we talked about an idea of a plant that could sing songs when it is happy or sad. But soon it felt a bit cheesy already. | ||
| + | Then we decided that we want to focus more on an organism that makes its own decision with an esthetical outcome. | ||
| + | We came across the topic of mold. Mold has this quality of making its own image/structure/colour. It is alive, and we as humans do not have to interfere with that. We watch an episode from Het Klokhuis about mold. It gave us the instruction how to make mold, and what factors modify it. | ||
| + | |||
| + | Putting mold in a plastic container is not that attractive or visually sexy as one would say. This ‘’thing’’ we wanted to create had to be something appealing to the eye. We thought of a painting that would change day by day. A mold painting/schimmelderij (in Dutch it is really funny).In our design we created a feedback loop. The painting would randomly adjust heat and cold so the painting would react to it. After sketching how this thing would look we made a prototype out of wood. | ||
| + | After all, I decided that I will never work with mold again. It is disgusting and it stinks. The group doesn’t completely agree. They thought the mold had quite some beautiful patterns and colours. Again, I disagree. | ||
| + | |||
| + | Click here for the our visual presentation... | ||
| + | ↧ ↧ ↧ | ||
| + | |||
| + | |||
| + | [[File:Powerpointschimmel.pdf]] | ||
| + | |||
| + | == Josephine de Kopieermachine (R.I.P.) == | ||
| + | |||
| + | Project 3: From Devices to systems | ||
| + | Sensors and sensitivity training. You will open the 'black box' of a technical device in an anatomical machine learning lesson, and you will also dissect and analyse a concrete instance of a complex system at work. How do devices and networked systems interact? Document and research all of the parts, how they work, where they come from. Redesign and add new circuits. Put it back together with a new function and added sensor feedback loops. The basic electronics should be fully functional. | ||
| + | Last year in winter, I fell in love. With a copier (I named her Josephine de Kopieermachine). | ||
| + | In September I started a project named Geen titel (dit project is een serie werken maar ook een serie gedachtes vertaalt naar papier met stift en verf, ik wil het niet benoemen als mooi maar er zitten wel degelijk mooie dingen tussen, ik laat het wel weten als het af is, daarom kan ik nog niet te veel conclusies trekken). This project involved around 100 works that I wanted to archive digitally. I started scanning them and by accident I moved one of my prints on the glass. I bought my own printer (Josephine) and we made with this method +- 60 works together. | ||
| + | Instead of moving my prints on the scanner I wanted to test what happened if you moved the scanner. But first, together with Jamie we tested what you need for a good print. We went to the dark room and tested how light influenced a print. After that we tested how to catch movement on a print. Ideally, I wanted to make 3D scanner out of Josephine. | ||
| + | After our test, we decided to open her up. We wanted to see what happened inside of her while she was scanning. And at one point, we succeeded. Until I, murdered Josephine with impatience an brutal strength. Jamie and I tried to remove the scan part of the printer from the print part of the printer. | ||
| + | |||
| + | May Josephine rest in cyberspace. | ||
| + | |||
| + | Click here for the our visual presentation... | ||
| + | ↧ ↧ ↧ | ||
| + | |||
| + | |||
| + | [[File:Powerpointprinter.pdf]] | ||
| + | |||
| + | == Carthographic printer == | ||
| + | Image | ||
| + | |||
| + | https://drive.google.com/file/d/1Cgz-N8m5h_Ez9mT7UmjFvJumWF_siU3p/view?usp=sharing | ||
| + | |||
| + | == Research == | ||
| + | Here you will find all the recources I used, or most of all discoverd! | ||
| + | // I went to the exhibition Robot Love (Dutch Design Week) in Eindhoven | ||
| + | // I went to the Cinekid Medialab. A real digital playground, for childeren. But to be honest, I had a lot of fun there as well | ||
| + | // You'll find my notes of the digtal craft classes, with a ton of new artists | ||
| + | // I read the 2 manifestos from Garnett Hertz | ||
| + | // After the class of Javier, I expirimentet with the arduino. An finally after some hours I was able to use a LCD and Servo motor at the same time. | ||
| + | |||
| + | |||
| + | ---- | ||
| + | |||
| + | '''Robot Love''' | ||
| + | |||
| + | Visual report about Robot Love, relating to Digital Craft.* | ||
| + | * https://robotlove.nl/ | ||
| + | |||
| + | [[File:Robotlove_MK.gif]] | ||
| + | |||
| + | Click here for documentation... | ||
| + | ↧ ↧ ↧ | ||
| + | |||
| + | https://drive.google.com/drive/folders/1xNnZhBZS7szeilUixKzC8w495MliE44G?usp=sharing | ||
| + | |||
| + | ---- | ||
| + | |||
| + | '''Cinekid Medialab''' | ||
| + | |||
| + | |||
| + | Visual report about Cinekid Medialab, relating to Digital Craft.* | ||
| + | * https://www.cinekid.nl/nl/medialab-2018 | ||
| + | |||
| + | [[File:MedialabMK.gif]] | ||
| + | |||
| + | Click here for documentation... | ||
| + | ↧ ↧ ↧ | ||
| + | |||
| + | https://drive.google.com/drive/folders/1bKgkrPTeAdwR6YbaAvMhv7wXgQYE-sTG?usp=sharing | ||
| + | |||
| + | |||
| + | ---- | ||
| + | '''Notes of the digital craft classes''' | ||
| + | |||
| + | [[File:digitalcraftNOTESMK.pdf]] | ||
| + | |||
| + | |||
| + | |||
| + | ---- | ||
| + | '''Hertz, Garnett''' | ||
| + | |||
| + | http://www.conceptlab.com/criticalmaking/ | ||
| + | |||
| + | http://www.disobedientelectronics.com/ | ||
| + | |||
| + | |||
| + | ---- | ||
| + | '''Testing with Arduino''' | ||
| + | |||
| + | https://drive.google.com/drive/folders/1YD7OP-z5cHwu8LzxSO_D3S9wPC8ywfO3?usp=sharing | ||
| + | |||
| + | ---- | ||
| + | |||
| + | == Position paper == | ||
| + | |||
| + | Click here for the position paper... ↧ ↧ ↧ | ||
| + | |||
| + | [[File:Positionpaper2.pdf]] | ||
| + | |||
| + | == Final == | ||
| + | [[File:IMG-20181214-WA0011.jpg|200px|thumb|left|Final presentation]] | ||
| + | For my final presentation I decided to make a overview of all the things I've read, made and visited in the last half year. A part of that presentation was a lino cut of a 3d-printer. My statement (as you can read in my position paper): | ||
| + | ''I often visit primary, secondary schools. And once you enter the school you stumble across 3d printers and | ||
| + | pens, laser cutters and terms as makerspace and 21fst century skills. With all these terms (and questions relating to that) in my mind I define my craft. I make material that | ||
| + | explains, make it accessible, confuse and question this subject. '' | ||
| + | |||
| + | |||
| + | '''Feedback''' | ||
| + | The project you presented was interesting, but showed the final result instead of the process. We can see you developed a tremendous contextual awareness and engaged in a lot of research for this project. Also the collaborative projects and inquisitive attitude you displayed was noticeable in class. What we missed however is a structured reflection in your documentation and a clear research trajectory for your final project. We can see your creative ability and contextual awareness, but the next step is to translate this into something that can communicate with other people. | ||
| + | Resit: Communicate your process and how you will share it with others, translating your research into a workshop or set of instructions (for example) instead of only showing the final results by you as a maker. In the documentation you also need to include the final project, conclusion and reflection. | ||
| + | I think the presentation showed where I was in that time. In a reviewing position of my own work en thougts. On the 31fst of January I will have my resit | ||
| − | == | + | == Final Final == |
| + | |||
| + | Every school vacation The New Institute organizes a FamilieFest. A day full of activities for the whole familie. Last edition I made a workshop for it: | ||
| + | '''''Koppie Kopie''''' | ||
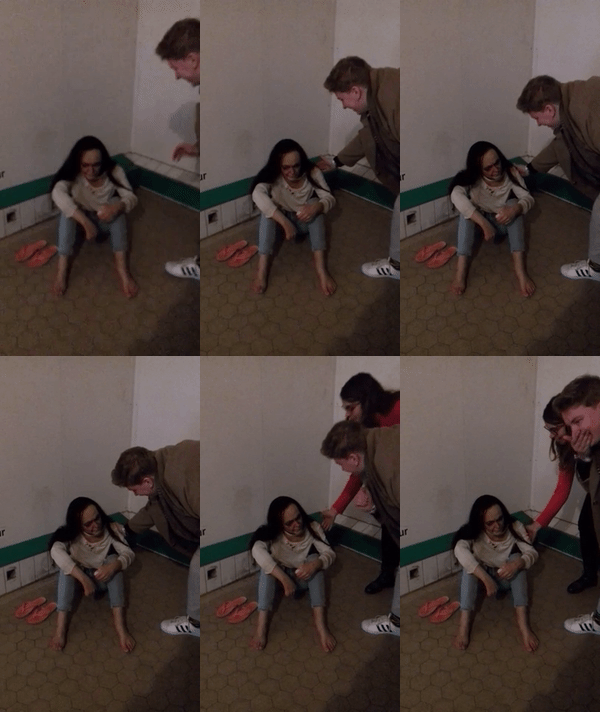
| + | On the second of January the theme of the FamilieFest was Team Toekomst. This day gets a big group of diverse visitors. Toddlers, children, almost teenagers, parents and grandparents. My workshop had two elements. First the participants make a copy of themselves. Next, the participants go to the second part of the workshop. There they will complete there copy of themselves with a wish for the future. At last they put in in a big envelop, seal it and open it in the future (2070?) | ||
| − | + | [[File:IMG-20190102-WA0077.jpg]] | |
| − | + | [[File:IMG-20190102-WA0101.jpg]] | |
| − | |||
| − | |||
| − | |||
| − | |||
Latest revision as of 17:45, 31 January 2019
Welcome to my documentation of Digital Craft 2018 Michelle Kootkar, 0931029. Docent Beeldende Kunst en Vormgeving, derde leerjaar.
Contents
Flying Glider 2.0
Project 1: Critical Making exercise Reimagine an existing technology or platform using the provided sets of cards. This project was created by: Jamie, Simone, Guido, Jelle and Michelle.
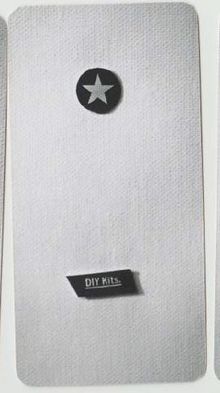
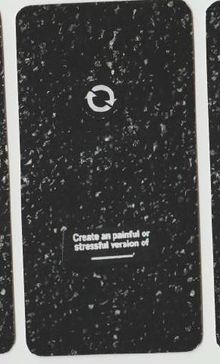
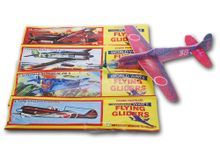
Our goal for this project was to reimagine an existing technology or platform. In order to do that we picked two cards. The cards had different categories: technology/platform, ‘’an obligation’’ and an technique. Our cards: DIY kit, A painful or stressful version of.. and our own technique wood + laser cutter. We decided to create a painful an stressful version of a flying glider (kids toy). The original flying glider is made out of foam and had an iconic packaging. We created one that is made out of wood. The laser cut plan was designed to be cut on an 4 mm piece of wood, but we used a 3 mm one. When somebody would put the plane together the pieces would not completely fit. Next to that we also made a useless manual (‘click piece one to one and after that connect piece one to one’) When you finally finished putting the plane together and want to make it fly, the plane would fall apart.
Schimmelderij
Project 2: Cybernetic Prosthetics In small groups, you will present a cluster of self-directed works as a prototype of a new relationships between a biological organism- and a machine, relating to our explorations on reimagining technology in the posthuman age. The prototypes should be materialized in 3D form, and simulate interactive feedback loops that generate emergent forms. For 3 year students, this first project can be speculative and rudimentary. The technology doesn't have to fully work yet, but the idea should be communicated through the prototype and appropriate documentation. (max 5 people per group). This project was created by: Jamie, Simone and Michelle We started our project by researching the artist we discussed in the class of Ivan. The artist that struck us the most was Eduardo Kac. Ivan mentioned the DNA flower and we did more research about him. We came on a project of his, where he is creating an artist gene. This gene was created by translating a sentence from the bible, Genesis, into Morse Code, and converting the Morse Code into DNA base pairs according to a conversion principle specially developed for this work. So this project made us think about Google translate fails. When you translate a sentence to another language and then translate it to its original language something different comes out of it. Sometimes it can be quite funny or poetic. That made us think about esthetical art that we as human don’t have complete control over. We wanted to create something that decides and or can speaks for itself. So first we talked about an idea of a plant that could sing songs when it is happy or sad. But soon it felt a bit cheesy already. Then we decided that we want to focus more on an organism that makes its own decision with an esthetical outcome. We came across the topic of mold. Mold has this quality of making its own image/structure/colour. It is alive, and we as humans do not have to interfere with that. We watch an episode from Het Klokhuis about mold. It gave us the instruction how to make mold, and what factors modify it.
Putting mold in a plastic container is not that attractive or visually sexy as one would say. This ‘’thing’’ we wanted to create had to be something appealing to the eye. We thought of a painting that would change day by day. A mold painting/schimmelderij (in Dutch it is really funny).In our design we created a feedback loop. The painting would randomly adjust heat and cold so the painting would react to it. After sketching how this thing would look we made a prototype out of wood. After all, I decided that I will never work with mold again. It is disgusting and it stinks. The group doesn’t completely agree. They thought the mold had quite some beautiful patterns and colours. Again, I disagree.
Click here for the our visual presentation... ↧ ↧ ↧
Josephine de Kopieermachine (R.I.P.)
Project 3: From Devices to systems Sensors and sensitivity training. You will open the 'black box' of a technical device in an anatomical machine learning lesson, and you will also dissect and analyse a concrete instance of a complex system at work. How do devices and networked systems interact? Document and research all of the parts, how they work, where they come from. Redesign and add new circuits. Put it back together with a new function and added sensor feedback loops. The basic electronics should be fully functional. Last year in winter, I fell in love. With a copier (I named her Josephine de Kopieermachine). In September I started a project named Geen titel (dit project is een serie werken maar ook een serie gedachtes vertaalt naar papier met stift en verf, ik wil het niet benoemen als mooi maar er zitten wel degelijk mooie dingen tussen, ik laat het wel weten als het af is, daarom kan ik nog niet te veel conclusies trekken). This project involved around 100 works that I wanted to archive digitally. I started scanning them and by accident I moved one of my prints on the glass. I bought my own printer (Josephine) and we made with this method +- 60 works together. Instead of moving my prints on the scanner I wanted to test what happened if you moved the scanner. But first, together with Jamie we tested what you need for a good print. We went to the dark room and tested how light influenced a print. After that we tested how to catch movement on a print. Ideally, I wanted to make 3D scanner out of Josephine. After our test, we decided to open her up. We wanted to see what happened inside of her while she was scanning. And at one point, we succeeded. Until I, murdered Josephine with impatience an brutal strength. Jamie and I tried to remove the scan part of the printer from the print part of the printer.
May Josephine rest in cyberspace.
Click here for the our visual presentation... ↧ ↧ ↧
Carthographic printer
Image
https://drive.google.com/file/d/1Cgz-N8m5h_Ez9mT7UmjFvJumWF_siU3p/view?usp=sharing
Research
Here you will find all the recources I used, or most of all discoverd! // I went to the exhibition Robot Love (Dutch Design Week) in Eindhoven // I went to the Cinekid Medialab. A real digital playground, for childeren. But to be honest, I had a lot of fun there as well // You'll find my notes of the digtal craft classes, with a ton of new artists // I read the 2 manifestos from Garnett Hertz // After the class of Javier, I expirimentet with the arduino. An finally after some hours I was able to use a LCD and Servo motor at the same time.
Robot Love
Visual report about Robot Love, relating to Digital Craft.*
Click here for documentation... ↧ ↧ ↧
https://drive.google.com/drive/folders/1xNnZhBZS7szeilUixKzC8w495MliE44G?usp=sharing
Cinekid Medialab
Visual report about Cinekid Medialab, relating to Digital Craft.*
Click here for documentation... ↧ ↧ ↧
https://drive.google.com/drive/folders/1bKgkrPTeAdwR6YbaAvMhv7wXgQYE-sTG?usp=sharing
Notes of the digital craft classes
Hertz, Garnett
http://www.conceptlab.com/criticalmaking/
http://www.disobedientelectronics.com/
Testing with Arduino
https://drive.google.com/drive/folders/1YD7OP-z5cHwu8LzxSO_D3S9wPC8ywfO3?usp=sharing
Position paper
Click here for the position paper... ↧ ↧ ↧
Final
For my final presentation I decided to make a overview of all the things I've read, made and visited in the last half year. A part of that presentation was a lino cut of a 3d-printer. My statement (as you can read in my position paper):
I often visit primary, secondary schools. And once you enter the school you stumble across 3d printers and
pens, laser cutters and terms as makerspace and 21fst century skills. With all these terms (and questions relating to that) in my mind I define my craft. I make material that
explains, make it accessible, confuse and question this subject.
Feedback
The project you presented was interesting, but showed the final result instead of the process. We can see you developed a tremendous contextual awareness and engaged in a lot of research for this project. Also the collaborative projects and inquisitive attitude you displayed was noticeable in class. What we missed however is a structured reflection in your documentation and a clear research trajectory for your final project. We can see your creative ability and contextual awareness, but the next step is to translate this into something that can communicate with other people.
Resit: Communicate your process and how you will share it with others, translating your research into a workshop or set of instructions (for example) instead of only showing the final results by you as a maker. In the documentation you also need to include the final project, conclusion and reflection.
I think the presentation showed where I was in that time. In a reviewing position of my own work en thougts. On the 31fst of January I will have my resit
Final Final
Every school vacation The New Institute organizes a FamilieFest. A day full of activities for the whole familie. Last edition I made a workshop for it: Koppie Kopie
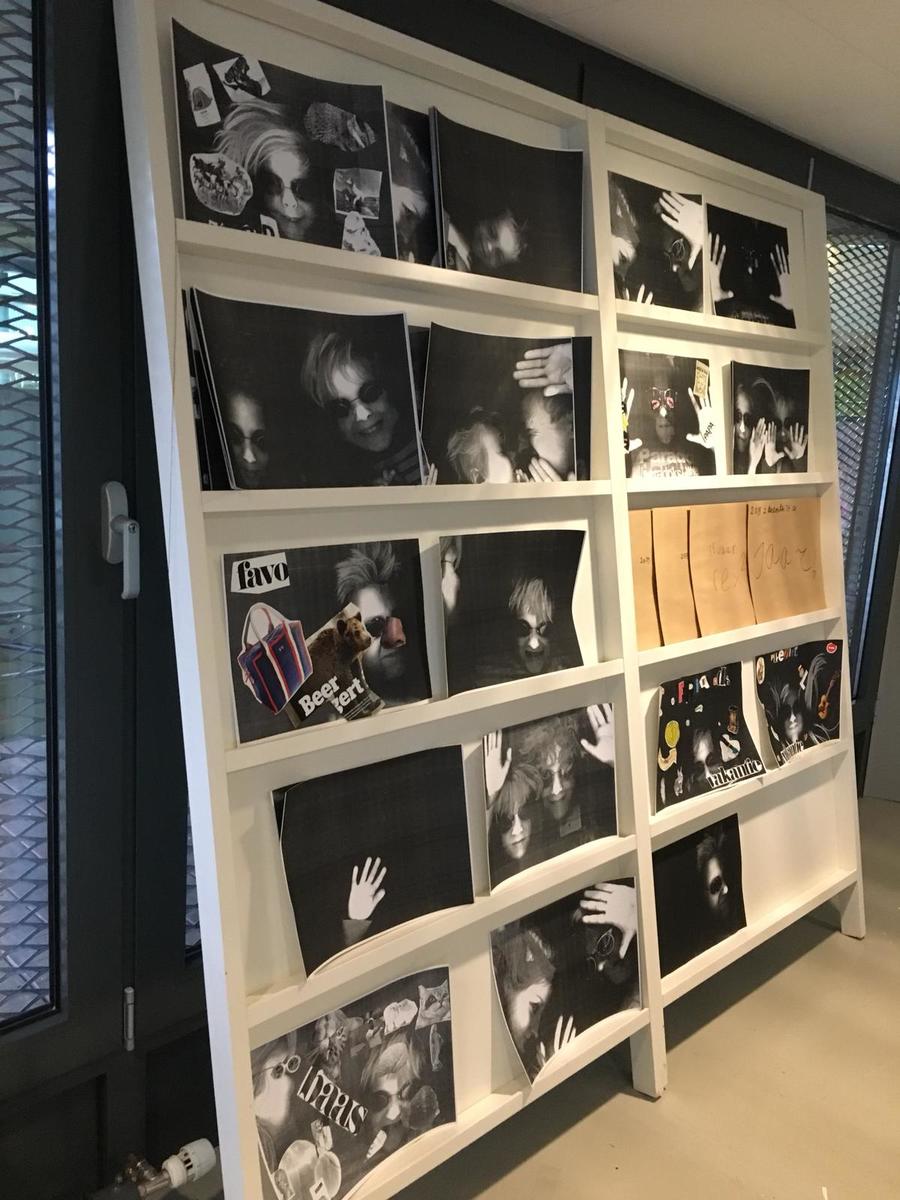
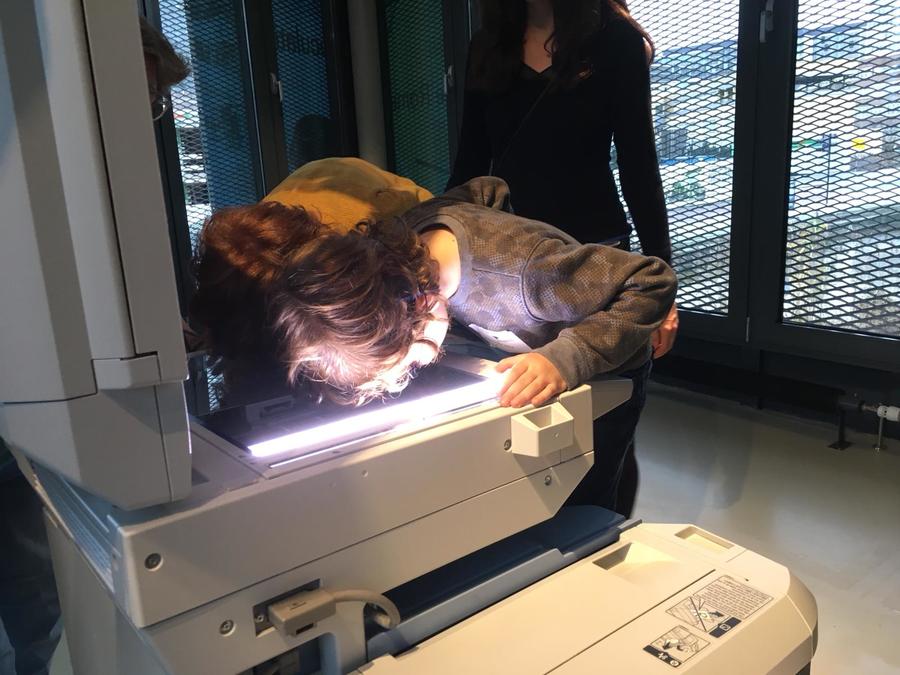
On the second of January the theme of the FamilieFest was Team Toekomst. This day gets a big group of diverse visitors. Toddlers, children, almost teenagers, parents and grandparents. My workshop had two elements. First the participants make a copy of themselves. Next, the participants go to the second part of the workshop. There they will complete there copy of themselves with a wish for the future. At last they put in in a big envelop, seal it and open it in the future (2070?)
