Difference between revisions of "User:Floor/week5"
| Line 5: | Line 5: | ||
The process starts with a special type of stone, one that has pores. To get the surface of the rock ready (aka: perfectly smooth) you wet the surface, swipe away excess water, put some bluish powder on there (which is apparently the second hardest material on earth). Then sandwich a smaller stone plate on top of it, and start moving it in an 8-figure. Do this until it gets sticky and heavy to move, refresh the powder, and go again. There are three stages, each time you step down to a finer version of the powder/sand. You can image how tiring but also meditative this process can be. It sure is a work-out. | The process starts with a special type of stone, one that has pores. To get the surface of the rock ready (aka: perfectly smooth) you wet the surface, swipe away excess water, put some bluish powder on there (which is apparently the second hardest material on earth). Then sandwich a smaller stone plate on top of it, and start moving it in an 8-figure. Do this until it gets sticky and heavy to move, refresh the powder, and go again. There are three stages, each time you step down to a finer version of the powder/sand. You can image how tiring but also meditative this process can be. It sure is a work-out. | ||
| + | [[File:Litho_steen_slijpen.jpg | 800px]] | ||
| + | |||
| + | |||
| + | Interesting and beautiful patterns form when you take off the top stone plate: | ||
| + | |||
| + | [[file:woooo.jpg | 400px]] | ||
| − | [[ | + | When the surface was perfectly clean, smooth and dry, we got on to drawing. What's quite special about this printing technique is that the drawing is very direct, as if drawing on paper. There's a range of different materials you can choose from, mainly different types of chalk but also a liquid that you can use as paint (the brownish rings in my drawing). In my design I tried to use as many different materials as I could. This of course made the image a little messy and chaotic but I wanted be able to compare them in the end. |
| + | |||
| + | [[file:drawing-on-litho.jpg | 400px]] | ||
Revision as of 14:48, 18 April 2016
Lithography part 1
Lithography is a printing technique I've been wanting to try for some time now. And this week I finally got around to doing it!
The process starts with a special type of stone, one that has pores. To get the surface of the rock ready (aka: perfectly smooth) you wet the surface, swipe away excess water, put some bluish powder on there (which is apparently the second hardest material on earth). Then sandwich a smaller stone plate on top of it, and start moving it in an 8-figure. Do this until it gets sticky and heavy to move, refresh the powder, and go again. There are three stages, each time you step down to a finer version of the powder/sand. You can image how tiring but also meditative this process can be. It sure is a work-out.
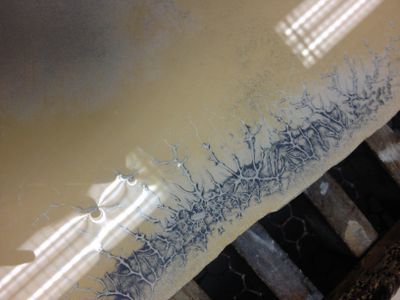
Interesting and beautiful patterns form when you take off the top stone plate:
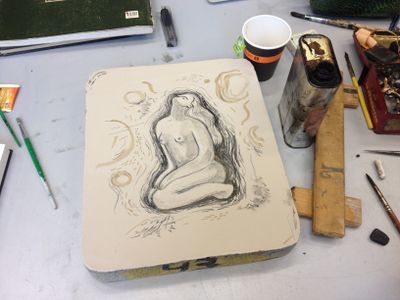
When the surface was perfectly clean, smooth and dry, we got on to drawing. What's quite special about this printing technique is that the drawing is very direct, as if drawing on paper. There's a range of different materials you can choose from, mainly different types of chalk but also a liquid that you can use as paint (the brownish rings in my drawing). In my design I tried to use as many different materials as I could. This of course made the image a little messy and chaotic but I wanted be able to compare them in the end.
Flatbed printer
As opposed to all the analog printing techniques I have been trying out: a totally digitalized one.
Analog photo printing
And another evening spent in the darkroom.


