Difference between revisions of "Group2"
| Line 1: | Line 1: | ||
= Tools & Tech Group 2 = | = Tools & Tech Group 2 = | ||
| − | Hi! We are group 2, | + | Hi! We are group 2, our group consist of 4 people: Lieve, Robin, Fatma and Adinda. We are making a creating robot that will cause chaos and destruction. Or at least chaos. |
| + | |||
At the beginning of the project we did not set explicit <b> group roles </b>. We all want to learn everything (or at least something) and everyone has to take a part in this. Therefore each of us helps to bring in materials, get some parts together or destroyed and figure out the Arduino. | At the beginning of the project we did not set explicit <b> group roles </b>. We all want to learn everything (or at least something) and everyone has to take a part in this. Therefore each of us helps to bring in materials, get some parts together or destroyed and figure out the Arduino. | ||
| − | + | ||
== '''First Ideas and Sketches''' == | == '''First Ideas and Sketches''' == | ||
| − | We started our project by making a few sketches and coming up with some ideas for making a creating robot. | + | We started our project by making a few sketches and coming up with some ideas for making a creating robot. Soon we found out we all had some different ideas of what we wanted. After a look on the sketches that Adinda brought we went to search for some inspirational images to broaden our view on a creating robot. |
[[File:Robotschts1.jpg| 350px ]] | [[File:Robotschts1.jpg| 350px ]] | ||
| Line 31: | Line 32: | ||
== '''Confetti Robot''' == | == '''Confetti Robot''' == | ||
| − | After we talked about this, we decided to make a confetti robot. Lieve and Robin went out for balloons, Fatma made the confetti and Adinda got the car. Our idea was to use the car to make our robot moving. While moving we want the robot to pick in balloons so that they explode and a huge bom of confetti will go of. | + | During class Lieve came with the idea to make a big mess and confetti could do this. We talked about canons, bomb drops and more of that. Fatma remarked that she wanted that our confetti had a meaning or a message, which we all agreed on. After we talked about this, we decided to make a confetti robot. Lieve and Robin went out for balloons, Fatma made the confetti and Adinda got the car. Our idea was to use the car to make our robot moving. While moving we want the robot to pick in balloons so that they explode and a huge bom of confetti will go of. Because we didn't exactly knew how this would work yet we googled a bit to support our idea. |
| Line 53: | Line 54: | ||
=== '''Robot comes to live''' === | === '''Robot comes to live''' === | ||
| − | Before we can start building we needed some parts and some extra ideas about how to shape our robot and spread the confetti. | + | Before we can start building we needed some parts and some extra ideas about how to shape our robot and spread the confetti. At decided we need a servo for this that would make a 180 degree turn to make the balloon explode. In class we already had a little play with the servo so it was not completely unknown to us of what we could do with it. We took the sample code of the arduino website and found out that it was a little bit complexer than we thought. Luckily we had Simons knowledge to help us with this. |
Parts & Ideas | Parts & Ideas | ||
| Line 64: | Line 65: | ||
</gallery> | </gallery> | ||
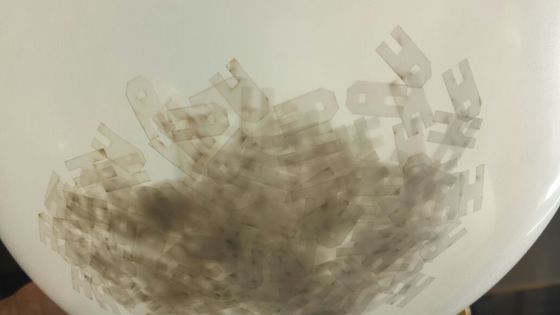
| − | Here our first balloon filled with confetti. The experiment turned out to be really successful, the poppin sound and the burst of confetti definitely made quite the impression. | + | In the beginning we decided that we wanted to make confetti that had a meaning so Fatma went to make a first lasercut trial of the confetti. We decided to make it a statement to our enemy HAHAHAHA our evil team laugh, supported by our mean little looking robot. |
| + | |||
| + | |||
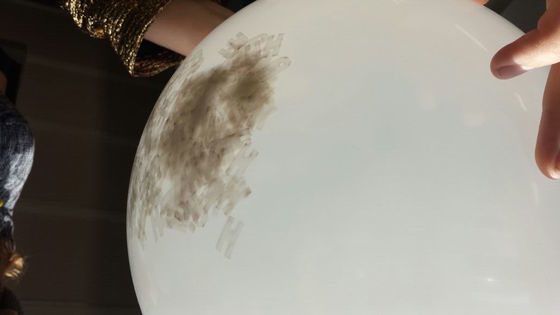
| + | Here is our first balloon filled with confetti. The experiment turned out to be really successful, the poppin sound and the burst of confetti definitely made quite the impression. | ||
[[File:IMG_6535.JPG|560px]] [[File:IMG_6536.JPG|560px]] | [[File:IMG_6535.JPG|560px]] [[File:IMG_6536.JPG|560px]] | ||
| Line 70: | Line 74: | ||
=== '''The Making Of''' === | === '''The Making Of''' === | ||
| − | The time finally came to put our robot together. It was a challenge to get all the parts working like we wanted to. During class Fatma went to the store to get a solution for a sensor that altered our robot to take action. She came back with a Halloween skull that reacts to movement and sound. At the end of the class we had our Arduino code and the robot finally working together correctly. | + | ==== '''Session 1''' ==== |
| + | |||
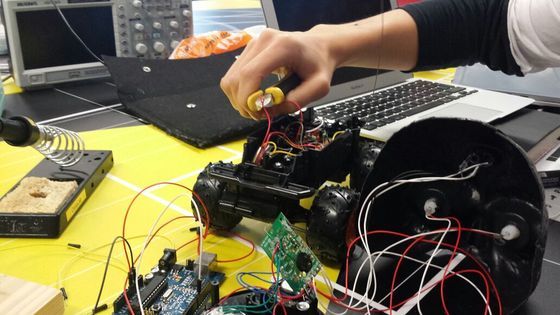
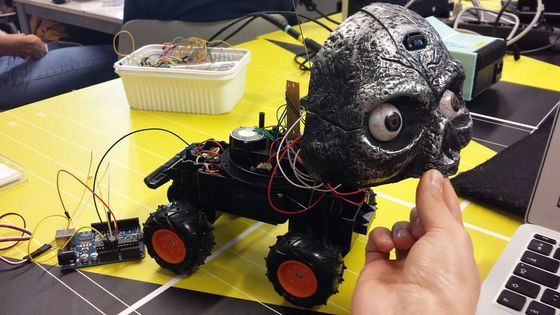
| + | The time finally came to put our robot together. It was a challenge to get all the parts working like we wanted to. We started with the car that we already had demolished and could we used as our transportation. Last class we decided that we wanted our robot to react on the balloon so it would 'see' it and the pick in it. In theory we needed a sensor for this. But we soon came to the conclusion that regular objects, also had sensors that react on movements. The fact that halloween was nearby was of course a welcome thing. During class Fatma went to the store to get a solution for a sensor that altered our robot to take action. She came back with a Halloween skull that reacts to movement and sound. | ||
| + | |||
| + | So we stepped of our original idea of making a sweet bird/chicken that picked in a balloon. And the head of the Halloween Skull got heavily demolished and its evil laughs kept spreading in the interaction station. We connected the wires of the sensor to the Arduino and the Servo which without a code didn't trigger the reaction of course but that part will be covered in our arduino chapter. | ||
| + | |||
| + | Because we let the batteries in the head we didn't had to connect the sensor to the batteries of the car. But the servo doesnt move on itself so this we had to connect to the power source of the car. luckily this was not hugely complicated. | ||
| + | |||
| + | At the end of the class we had our Arduino code and the robot finally working together correctly. | ||
<gallery> | <gallery> | ||
| Line 86: | Line 98: | ||
[[File:IMG_6523.JPG|1125px]] | [[File:IMG_6523.JPG|1125px]] | ||
| + | ==== '''Arduino''' ==== | ||
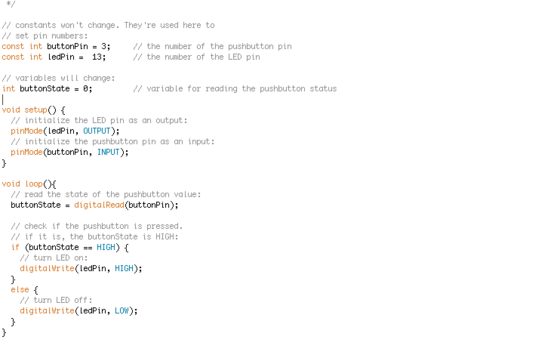
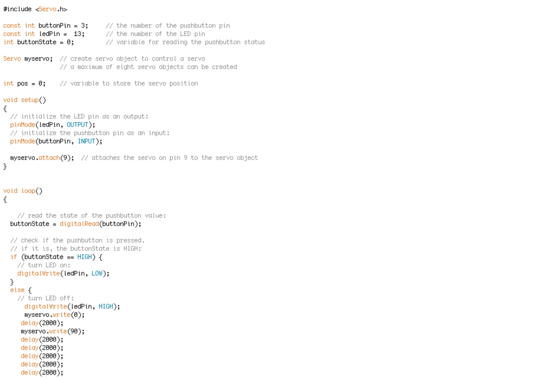
| + | At first we had only the servo in the arduino code, this made our servo turn in an angle with a pause of several seconds. But because we wanted something extra and we added the head with a sensor in it. Our arduino code had to be adjusted to this. Because we had no clue how to do this we first went to google for several codes that would go with the sensor. Soon we wound up in a big pile of information and we had no idea how to connect the servo to the sensor. Again we called Simon for the rescue, he explained that tee could use the button code as input. This because a button can be seen the same as the sensor. They both react on something as a result to trigger something. | ||
| + | |||
| + | [[File:Screen Shot 2014-10-24 at 13.41.49.png|560px]] [[File:Screen_Shot_2014-10-24_at_13.42.27.png| 560px ]] | ||
| + | |||
| + | ==== '''Session 2''' ==== | ||
| + | After our week off we went to finish the last parts on monday. This is the day we put our robot together as a whole being. Unfortunately this didn't went without any troubles. When we first turn on our robot, the sound and servo worked fine but when we taped the arduino to our 'car' the servo did not respond anymore. We got in a little panic when Adinda made the remark that maybe the batteries where empty. After Robin and Lieve went out to get new batteries and we replaced them, the car still did not work quit good when we put everything together again. We checked every wire and connection to figure out what the problem might be. Lieve saw a loose wire but we didn't knew if it was a extension of another wire or something that got loose (and where it came from). | ||
| + | |||
| + | So again it was Simon for the rescue, it was indeed the loose wire that caused all the problem. And when he helped with putting it back on our robot, our robot worked like an evil (talking) sunshine. This was the moment that we could put every part back together and hot glue it to our robot! yes.. hot glue, the perfect solution to everything that must stick. | ||
| + | |||
| + | ==== '''Confetti''' ==== | ||
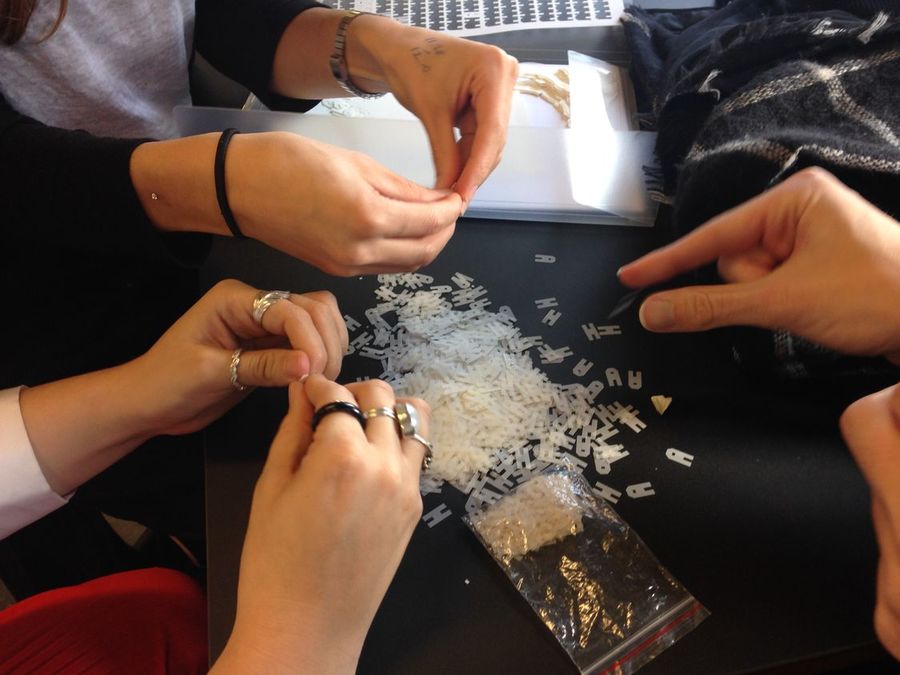
| + | We also made our confetti this day in the lasercutter. Because we needed more, Fatma placed more pages in the lasercutter. With the unseen result that we had to take all the HAHAHA apart. | ||
| + | |||
| + | <gallery> | ||
| + | File: IMG_6689.JPG | ||
| + | File: IMG_6708.JPG | ||
| + | File: IMG_6709.JPG | ||
| + | File: IMG_6710.JPG | ||
| + | File: IMG_6713.JPG | ||
| + | File: IMG_6714.JPG | ||
| + | </gallery> | ||
| + | |||
| + | [[File:IMG 6690.JPG|1125px]] | ||
| + | |||
| + | ==== '''Arduino''' ==== | ||
| + | |||
| + | Because the code was already finished in session 1, we didn't have to adjust it anymore. | ||
| + | |||
| + | == '''Presentation''' == | ||
Blog updated by: Adinda | Blog updated by: Adinda | ||
| + | Photos: Adinda & Fatma | ||
Revision as of 08:55, 28 October 2014
Contents
Tools & Tech Group 2
Hi! We are group 2, our group consist of 4 people: Lieve, Robin, Fatma and Adinda. We are making a creating robot that will cause chaos and destruction. Or at least chaos.
At the beginning of the project we did not set explicit group roles . We all want to learn everything (or at least something) and everyone has to take a part in this. Therefore each of us helps to bring in materials, get some parts together or destroyed and figure out the Arduino.
First Ideas and Sketches
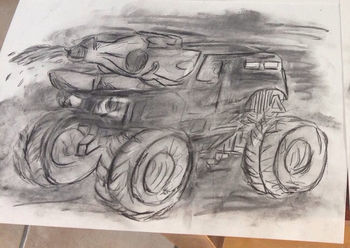
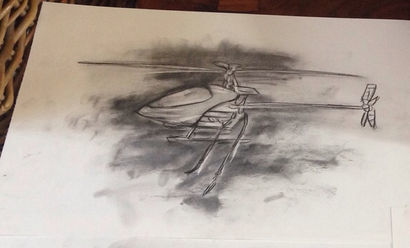
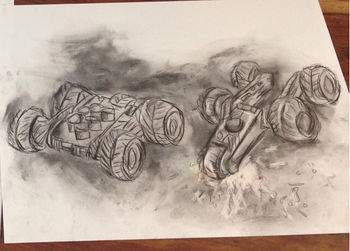
We started our project by making a few sketches and coming up with some ideas for making a creating robot. Soon we found out we all had some different ideas of what we wanted. After a look on the sketches that Adinda brought we went to search for some inspirational images to broaden our view on a creating robot.
Allround inspiration
Confetti Robot
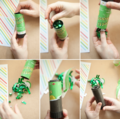
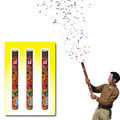
During class Lieve came with the idea to make a big mess and confetti could do this. We talked about canons, bomb drops and more of that. Fatma remarked that she wanted that our confetti had a meaning or a message, which we all agreed on. After we talked about this, we decided to make a confetti robot. Lieve and Robin went out for balloons, Fatma made the confetti and Adinda got the car. Our idea was to use the car to make our robot moving. While moving we want the robot to pick in balloons so that they explode and a huge bom of confetti will go of. Because we didn't exactly knew how this would work yet we googled a bit to support our idea.
Inspiration Images
Robot comes to live
Before we can start building we needed some parts and some extra ideas about how to shape our robot and spread the confetti. At decided we need a servo for this that would make a 180 degree turn to make the balloon explode. In class we already had a little play with the servo so it was not completely unknown to us of what we could do with it. We took the sample code of the arduino website and found out that it was a little bit complexer than we thought. Luckily we had Simons knowledge to help us with this.
Parts & Ideas
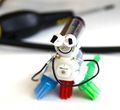
In the beginning we decided that we wanted to make confetti that had a meaning so Fatma went to make a first lasercut trial of the confetti. We decided to make it a statement to our enemy HAHAHAHA our evil team laugh, supported by our mean little looking robot.
Here is our first balloon filled with confetti. The experiment turned out to be really successful, the poppin sound and the burst of confetti definitely made quite the impression.
The Making Of
Session 1
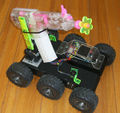
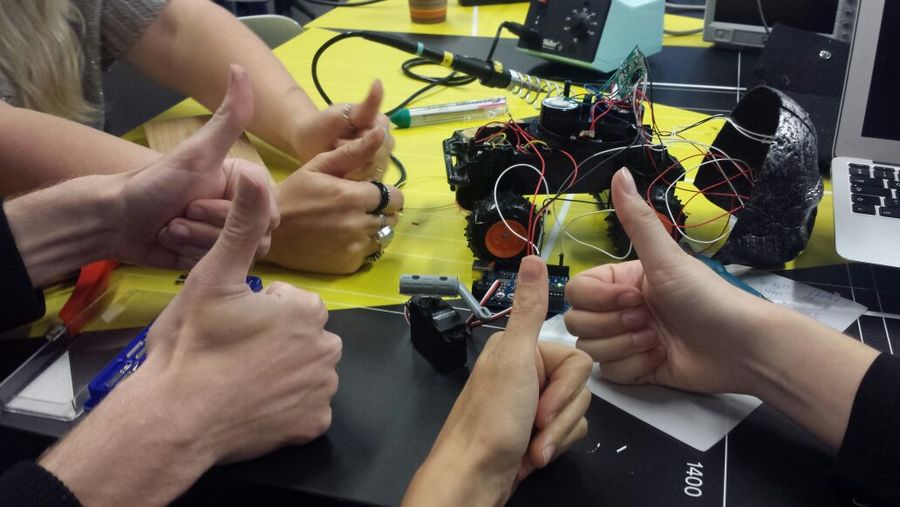
The time finally came to put our robot together. It was a challenge to get all the parts working like we wanted to. We started with the car that we already had demolished and could we used as our transportation. Last class we decided that we wanted our robot to react on the balloon so it would 'see' it and the pick in it. In theory we needed a sensor for this. But we soon came to the conclusion that regular objects, also had sensors that react on movements. The fact that halloween was nearby was of course a welcome thing. During class Fatma went to the store to get a solution for a sensor that altered our robot to take action. She came back with a Halloween skull that reacts to movement and sound.
So we stepped of our original idea of making a sweet bird/chicken that picked in a balloon. And the head of the Halloween Skull got heavily demolished and its evil laughs kept spreading in the interaction station. We connected the wires of the sensor to the Arduino and the Servo which without a code didn't trigger the reaction of course but that part will be covered in our arduino chapter.
Because we let the batteries in the head we didn't had to connect the sensor to the batteries of the car. But the servo doesnt move on itself so this we had to connect to the power source of the car. luckily this was not hugely complicated.
At the end of the class we had our Arduino code and the robot finally working together correctly.
Arduino
At first we had only the servo in the arduino code, this made our servo turn in an angle with a pause of several seconds. But because we wanted something extra and we added the head with a sensor in it. Our arduino code had to be adjusted to this. Because we had no clue how to do this we first went to google for several codes that would go with the sensor. Soon we wound up in a big pile of information and we had no idea how to connect the servo to the sensor. Again we called Simon for the rescue, he explained that tee could use the button code as input. This because a button can be seen the same as the sensor. They both react on something as a result to trigger something.
Session 2
After our week off we went to finish the last parts on monday. This is the day we put our robot together as a whole being. Unfortunately this didn't went without any troubles. When we first turn on our robot, the sound and servo worked fine but when we taped the arduino to our 'car' the servo did not respond anymore. We got in a little panic when Adinda made the remark that maybe the batteries where empty. After Robin and Lieve went out to get new batteries and we replaced them, the car still did not work quit good when we put everything together again. We checked every wire and connection to figure out what the problem might be. Lieve saw a loose wire but we didn't knew if it was a extension of another wire or something that got loose (and where it came from).
So again it was Simon for the rescue, it was indeed the loose wire that caused all the problem. And when he helped with putting it back on our robot, our robot worked like an evil (talking) sunshine. This was the moment that we could put every part back together and hot glue it to our robot! yes.. hot glue, the perfect solution to everything that must stick.
Confetti
We also made our confetti this day in the lasercutter. Because we needed more, Fatma placed more pages in the lasercutter. With the unseen result that we had to take all the HAHAHA apart.
Arduino
Because the code was already finished in session 1, we didn't have to adjust it anymore.
Presentation
Blog updated by: Adinda Photos: Adinda & Fatma
