Difference between revisions of "PracticalMMM"
| Line 24: | Line 24: | ||
! Activity | ! Activity | ||
|- | |- | ||
| − | | | + | | May 19th --10:30 - 12:10 |
| − | | | + | | Publication Station BL.00.4 |
| − | |||
| − | |||
| − | |||
| − | |||
| I DRAW, YOU DRAW, IT DRAWS | | I DRAW, YOU DRAW, IT DRAWS | ||
|- | |- | ||
| − | |10 | + | | May 26th-10:30 - 12:10 |
| − | | Digital | + | | Digital Lab/Material Station WH.01.105.1 & WH.01.105.2 |
| THE EXTRUDED, MILLED, & SLICED ALPHABET | | THE EXTRUDED, MILLED, & SLICED ALPHABET | ||
|- | |- | ||
| − | | | + | |June 02-10:30 - 12:10 |
| − | | | + | | Digital Lab/Material Station WH.01.105.1 & WH.01.105.2 |
| − | | | + | | THE EXTRUDED, MILLED, & SLICED ALPHABET |
|- | |- | ||
| − | | | + | |June 09-10:30 - 12:10 |
| − | + | | Interaction Station | |
| − | |||
| − | |||
| − | |||
| − | | Interaction | ||
| − | |||
| − | |||
| − | |||
| − | |||
| − | |||
| − | |||
| − | |||
| − | |||
| − | |||
| − | |||
| − | |||
| − | |||
| − | |||
| − | |||
| − | |||
| − | |||
| HUMAN POWERED MACHINE MAKING | | HUMAN POWERED MACHINE MAKING | ||
|- | |- | ||
| − | | | + | |June 16-10:30 - 12:10 |
| Interaction Station | | Interaction Station | ||
| − | | | + | | HUMAN POWERED MACHINE PRESENTATION |
|- | |- | ||
|} | |} | ||
Revision as of 13:42, 11 May 2016
Contents
MIMMIKING MACHINES MODULE
OVERVIEW
Have you ever wondered what it is like to be an CNC machine, 3d printer or plotter? Perhaps not, but experiencing a day in the life of your desktop or workshop machines might give you better insight how they work and give you new ideas to work with them in creative ways. In this module you will be asked to think, act and react like a machine. You will build your own apparatuses to carve, print and extrude designs powered by you and your fellow (human) classmates.
Newer fabrication technologies are making it easier to work almost any material with absolute precession and control. Engineers and Technologists have been developing tools such as CNC routers, laser engravers and 3d printers in ways that make them easier to access, afford, and operate. More and more research and development is being dedicated to creating one touch solutions which defer complex decisions to the machine's processor rather than to its operator. While these technologies undoubtably save time, labour, and offer many possibilities to create, how much control do you really have over our work if you do not understand the basic principles behind your tools of production?
The purpose of this course is threefold: 1. to introduce the basic principles of newer fabrication technologies; 2. expose the advantages, but also the limitations of these tools; and 3. create and experiment with new tools for creative production.
FORMAT
This module will includes classical, practise-based, and individual study.
The module is based on 3 biweekly Workshops. Each lesson will begin with a quick introducing on a specific fabrication technology, as well as the principles driving them. The renaming 3 hours will be dedicated to the hands-on practise of copying, building, and testing self made machines, and when possible, compared to the automated machine driven result.
Due to the condensed number of classes it is absolutely necessary that you are present and prepared for each and every class. Each week a list of materials will be given for the following class.
SCHEDULE
| Date / Time | Location | Activity |
|---|---|---|
| May 19th --10:30 - 12:10 | Publication Station BL.00.4 | I DRAW, YOU DRAW, IT DRAWS |
| May 26th-10:30 - 12:10 | Digital Lab/Material Station WH.01.105.1 & WH.01.105.2 | THE EXTRUDED, MILLED, & SLICED ALPHABET |
| June 02-10:30 - 12:10 | Digital Lab/Material Station WH.01.105.1 & WH.01.105.2 | THE EXTRUDED, MILLED, & SLICED ALPHABET |
| June 09-10:30 - 12:10 | Interaction Station | HUMAN POWERED MACHINE MAKING |
| June 16-10:30 - 12:10 | Interaction Station | HUMAN POWERED MACHINE PRESENTATION |
ASSIGNMENTS
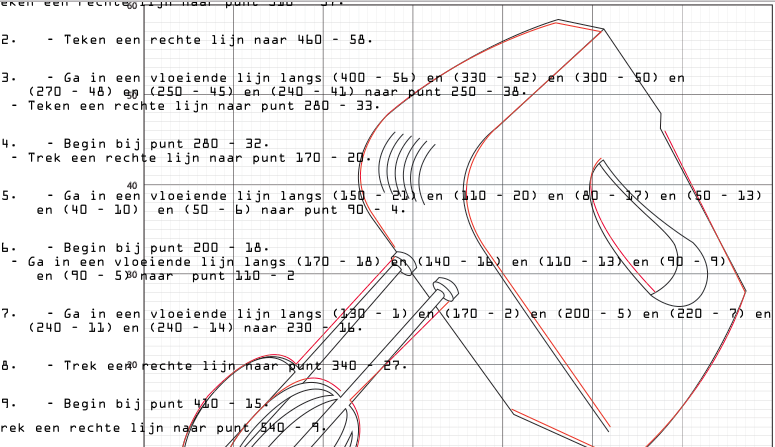
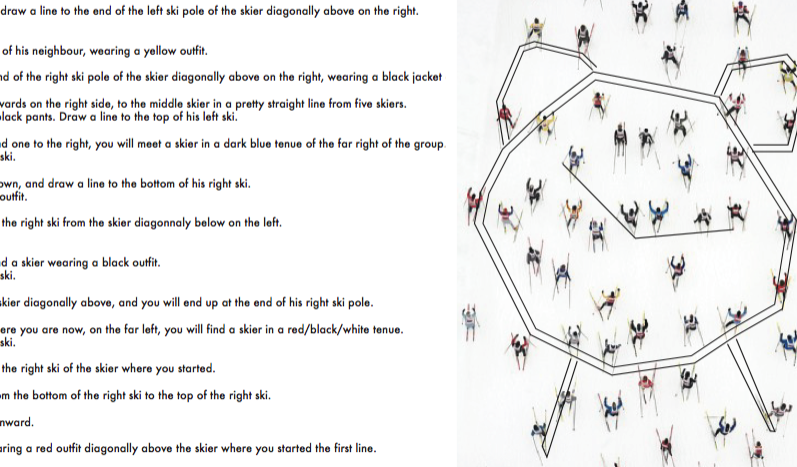
Assignment 1: I Draw. You Draw. It Draws
The first assignment requires each student to take or make a drawing of their favourite machine and redraw it in illustrator or any other vector based program. The drawing must fit on an a1 sheet and must consist of a minimum of 24 separate paths. You will prepare detailed instructions of how one might reproduce the drawing without seeing the original.. You give the command lines and your classmate will interpret them. A new drawing will be made. Will you make instructions following guides X,Y axis? Will you use common measurements and cardinal points, or will you opt for a more unorthodox system of calibration? This decision is up to you. But the more precise the instruction is the better your your human drawing machinewill be.
What you need to prepare before the lesson/workshop:
-Pick your FAVOURITE MACHINE Make a VECTOR drawing of it A1 size with more then 24 paths ! -Design a reference system and draw/print it on a A1 eg. stars map, cartesian -Prepare detailed instructions for someone else to draw step by step -Bring to class your instructions, your reverence system, a fine liner and an extra white A1 SHEET for your classmate to draw on! -Do not show your drawing to your classmates!!!
References:
Assignment 2: The Extruded Milled and Sliced Alphabet
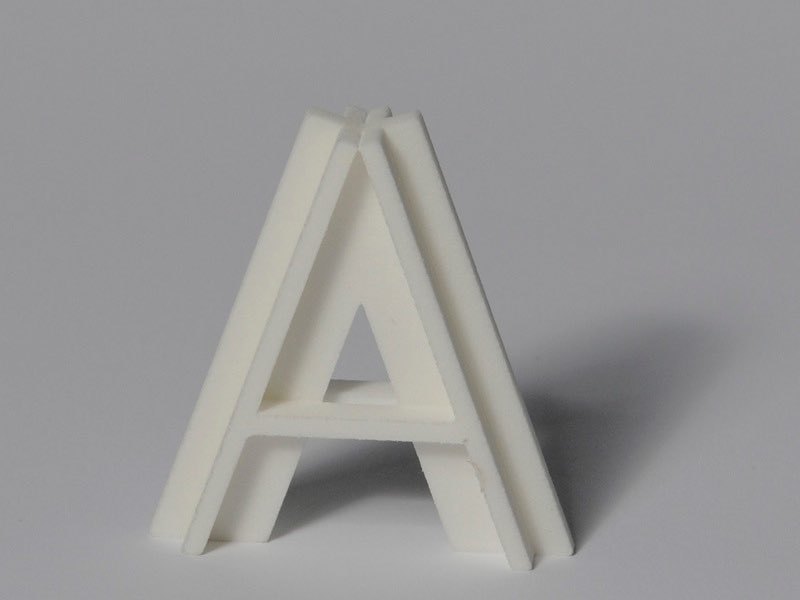
For the second assignment every student will design a letter of the alphabet in a 3d software program. In class in groups of three you will produce your letter in the digital lab. 1 student 3d prints his letter, 1 uses the cnc mill and one makes his letter with the laser-cutter. In this way every student gets familiar with the three techniques. After class you will make your letter in the other 2 techniques yourself. Make your own appointments for this in the digital lab. You will also have to make your letter using the hot-glue method in which you mimick a 3d printer by hand.
After all letters are fabricated, you will arrange and photograph the letters in to a an A1 digital poster. Upload your poster and 3d letter files to the Digital Craft wiki along with documentation of each fabrication technology used. For the mimicking machines presentation you will also form the word "Digital Craft" with the letters you made as a group to be a physical part on the exhibition.
What you need to prepare before the lesson/workshop: -Design a each of the letters in a 3d software program (going beyond simple extrusion) -Export your 3d letters as STL files
Final Assignment: Human Powered Machine
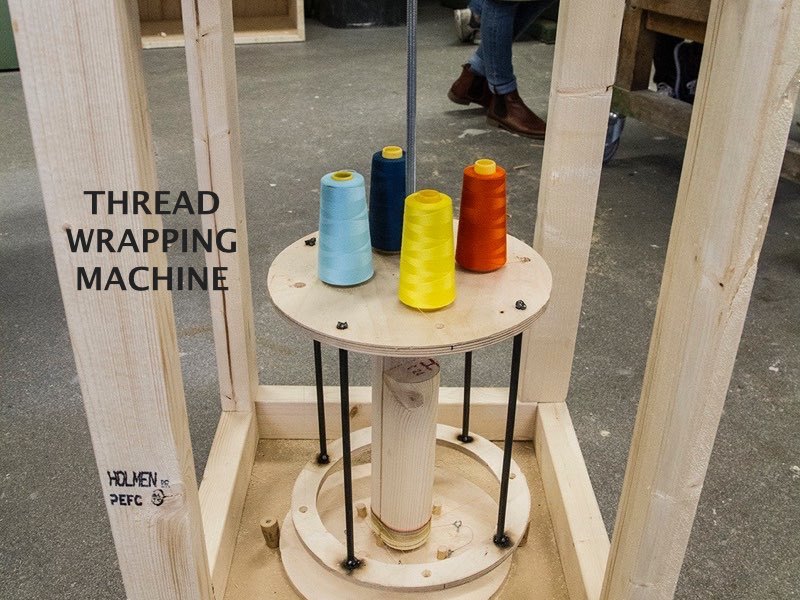
In the Open Source factory, group a 3-4 students will bring their own self-invented human-powered production machine to school. This presentation of the machine include an introduction of how each machine works and the remainder of the class will be a 'work party' where everyone will have the opportunity to experiment with each new invention. In this assignment their are no constraints, except for those you and your group members design. Your challenge is not only to design the production tools, but communicate how they work, and what needs to be done in order to use them as with a desired result. The designing of the situation / experience is just as important as the final output. Remember--you do have to rely on humans, therefore provoking curiosity will be more successful then providing long repetitive tasks or complex algorithms. Before the Open Source Factory open you are required to take well-framed/lit images of your machine, create open documentation of how to build and use your machine as well as some nice photographs of the realised results.
References:
DELIVERABLES & ASSESMENT
Deliverables:
1. Human Drawn Machine, Instructions, and Human/Machine Plotted Result
The original Illustrator drawing + your written set of instructions + drawing drawn by someone else based on instructions.
2. 3d Printed, Milled, Sliced, and Machine Mimicked Letter (e.g hotglue) + Wiki entry on fabrication technologies used + Uploaded pictures of your letters, each letter in 3 angles.
so there should be one letter produced in at least 3 ways: self-made/machine mimicked (e.g hot glue) + 3d-printed + 3d milled or lasercut. Each photographed in 3 angles. (printed on a4)
3. Human powered machine + documented process book, result, and reflection
The groups or individual's presentation of the machine include an introduction of how each machine works and the remainder of the class will be a 'work party' where everyone will have the opportunity to experiment with each new invention. In this assignment their are no constraints, except for those you and your group members design. Your challenge is not only to design the production tools, but communicate how they work, and what needs to be done in order to use them as with a desired result. The designing of the situation / experience is just as important as the final output. Remember--you do have to rely on humans, therefore provoking curiosity will be more successful then providing long repetitive tasks or complex algorithms. Before the Open Source Factory open you are required to take well-framed/lit images of your machine, create open documentation of how to build and use your machine as well as some nice photographs of the realized results.
Assessment will be based on the following criteria:
Assignment 1 – 2: 40%
- Attendance and preparation - Comprehension of taught material - Creativity and level of detail of the assignment - Completion of the assignment within given time
Assignment 3: 60%
- Quality of concept of the invented machine - Quality of design (material, form, and construction) of the invented machine - Quality of wiki entry documenting process, result, and reflection
