Difference between revisions of "User:Solchadwick"
Solchadwick (talk | contribs) |
Solchadwick (talk | contribs) |
||
| Line 60: | Line 60: | ||
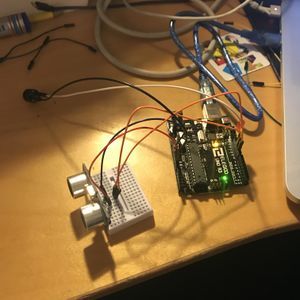
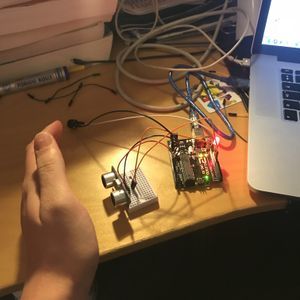
Moving onto the final outcome after running multiple different pieces of code and having to change the piezo speaker frequency to get an auditable sound out of it the final circuit was complete. The ultrasonic sensor detects objects up to 80cm away directly in its path, meaning if it was placed by a window or doorway the range would easily detect an intruder. An LED also taken from the smoke alarm provides visual notification of the detection as well, primarily to aid with setting up the circuit. The frequency can be set to a number of different tones via an Arduino plugin called ToneAC. However, there are still some issues with volume that are yet to be resolved but I think this may be due to there not being a volt amplifier as part of the circuit as the piezo speaker may require a higher voltage to reach full alarm level as controlled by the ambiguous long rectangle within the smoke detector. Here are a few pictures at various levels of assembly. | Moving onto the final outcome after running multiple different pieces of code and having to change the piezo speaker frequency to get an auditable sound out of it the final circuit was complete. The ultrasonic sensor detects objects up to 80cm away directly in its path, meaning if it was placed by a window or doorway the range would easily detect an intruder. An LED also taken from the smoke alarm provides visual notification of the detection as well, primarily to aid with setting up the circuit. The frequency can be set to a number of different tones via an Arduino plugin called ToneAC. However, there are still some issues with volume that are yet to be resolved but I think this may be due to there not being a volt amplifier as part of the circuit as the piezo speaker may require a higher voltage to reach full alarm level as controlled by the ambiguous long rectangle within the smoke detector. Here are a few pictures at various levels of assembly. | ||
| − | [[File:burglaralarm.jpg|300px|left]] [[File: | + | [[File:burglaralarm.jpg|300px|left]] [[File:burgularalarm2.jpg|300px|middle]][[File:burgularalarm3.jpg|300px|right]] |
Revision as of 22:19, 5 December 2018
Project 4: Cartography of Complex Systems & the Anthropocene: How is technology linked to economic, political and ecological wicked problems and human-made catastrophes? Where is a line out? How to break the feedback loops? How is the supply chain linked to the device you are working with? Pick a problem or issue to analyze and engage with a complex ecological system. This is a visual mapping assignment, which should be accompanied by a text of max 1000 words. DEADLINE: 2 November
Final project you will present your research question, your planning, and a conceptual and technical experiment for a final project that will be included in a self-organized stand-alone presentation in December 2018. You will intensely explore and develop over the last 6 weeks to present in the end term exhibition.
Project 3
From Devices to systems
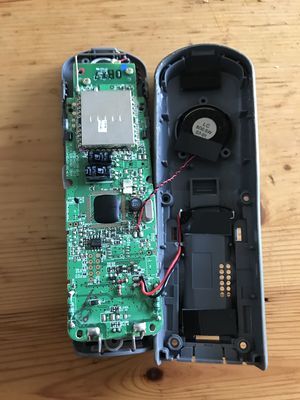
The project started orientated around the wireless home phone with a plan to use the receivers and broadcasting apparatus within handsets on a more local scale as a means for electronics within a household to communicate. However after a bit of research into the practicalities and the prospect of having the dissect more than one electronic device interest cooled. There was also this feeling of waste as the phone had been purchased from a local second-hand store and likely more materials and household goods would have to be obtained to fulfil the project. With this in mind, a more economical and resourcefully sourced item was found around my room.
Looking around my room the natural progression was the mountain of old smoke detectors on the side.
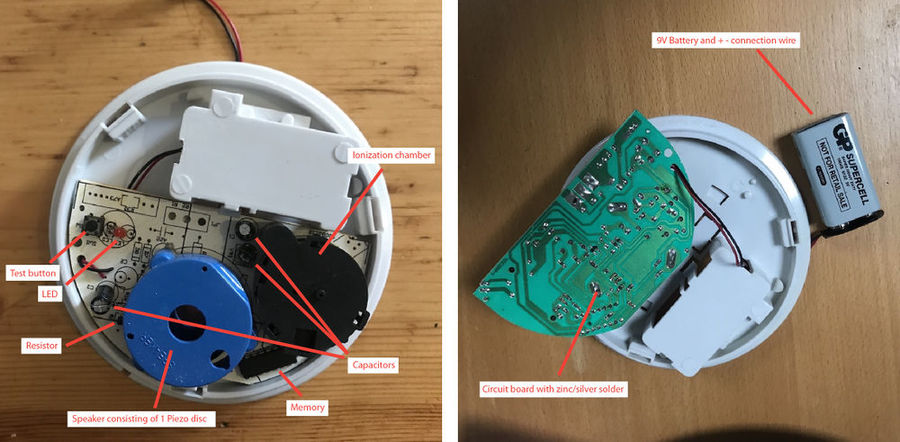
To begin I need to understand more about the internal elements of the detector especially the ionisation chamber as I hadn't heard of it before:
Ionisation chamber An ionization smoke detector uses a radioisotope, typically americium-241, to ionize air; a difference due to smoke is detected and an alarm is generated. Ionization detectors are more sensitive to the flaming stage of fires than optical detectors, while optical detectors are more sensitive to fires in the early smouldering stage. The smoke detector has two ionization chambers, one open to the air, and a reference chamber which does not allow the entry of particles. The radioactive source emits alpha particles into both chambers, which ionizes some air molecules. There is a potential difference (voltage) between pairs of electrodes in the chambers; the electrical charge on the ions allows an electric current to flow. The currents in both chambers should be the same as they are equally affected by air pressure, temperature, and the ageing of the source. If any smoke particles enter the open chamber, some of the ions will attach to the particles and not be available to carry the current in that chamber. An electronic circuit detects that a current difference has developed between the open and sealed chambers, and sounds the alarm. (wiki)
Speaker The speaker component consists of a simple piezoelectric disk inside a plastic chamber, using the piezoelectric effect to generate sound. The initial mechanical motion is created by applying a voltage to a piezoelectric material, and this motion is typically converted into audible sound using diaphragms and resonators. Typically they operate well in the range of 1-5kHz and up to 100kHz in ultrasound applications.
Resistor The resistor is likely to be an End-of-Line (EOL) Resistor. The resistor limits the current to a bare minimum so the panel doesn't think it's detecting a fire, but at the same time, it allows the panel to confirm that current is flowing through all the wires. To make sure all the wires are supervised for continuity, the end-of-line resistor has to be installed at the end of the line, so the electrical current will go through all the wires.
Capacitors The capacitor is a passive two-terminal electrical component used to store energy electrostatically in an electric field. The forms of practical capacitors vary widely, but all contain at least two electrical conductors separated by a dielectric. They will hold an electrical charge even after the battery is removed and allow the detector to function resourcefully from the battery over a long period of time.
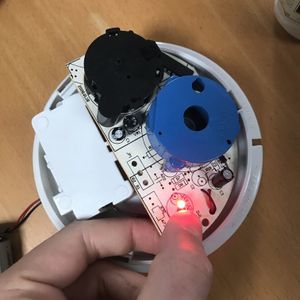
Test LED and button Fairly self-explanatory, the test button completes the circuit to let the user know the alarm is working and the LED intermittently flashes always and faster when the alarm is going off.
Memory/voltage controller After research, I decided it more likely that the long rectangular element was a voltage controller similar to an L293D. This allows the voltage to be stepped up and regulated when necessary e.g. when alarm is sounded.
9V battery Connected via a two-point + and - connector, the battery still had some life in it after what must have been years in service, showing the effectiveness of the Capacitors.
The small circular black bit next to one of the resistors remained a mystery, however.
Ideas
My first idea was for a post-nuclear apocalyptic safety device in the form of a radiation detector but after some quick research, it was clear that this would be impossible due to the ionisation chamber only detecting beta radiation as opposed to nuclear fallout which would be gamma and alpha ions.
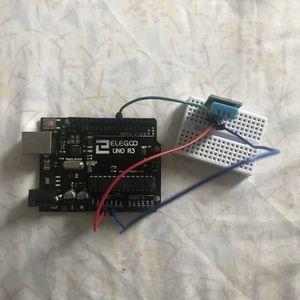
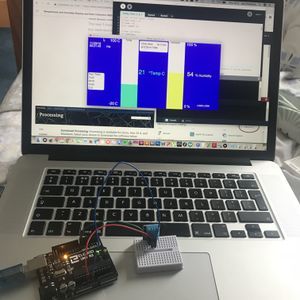
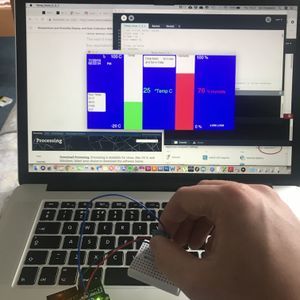
The next idea was around utilising a DHT11 temperature and humidity module to create a more "useful" everyday smoke alarm. The idea was that the system could detect when the user is just burning their toast in the kitchen and calmly tell them as opposed to sounding a full-blown alarm buzzer. I tested the fundamentals of the circuit and made a working system with an Arduino, the plan being to use the alarm component from a smoke detector at an altered frequency. However, upon testing it proved hard to detect low-level smoke with the DHT11 sensor.
As can be seen, humidity and temp increased when the sensor is in hand. Code from [Media:https://www.instructables.com/id/Temperature-and-Humidity-Display-and-Data-Collecti/]
Final production
Using the Arduino experience gained from the ideas phase I decided to work out a similar system but instead with an ultrasonic distance proximity. The reason behind this was partly as a solution to the widespread burglary problem within my student community in Leeds, Hyde Park UK. 9,500 burglaries were reported in Leeds in 2009/10 and the student community of Hyde Park is a prime target with lots of laptops and lax security systems. Most student houses have a lot of old fire alarms hanging about so I thought maybe a solution to this problem would be guidance on how to create a homemade alarm using an Arduino, ultrasonic sensor and old fire alarm parts. [1]
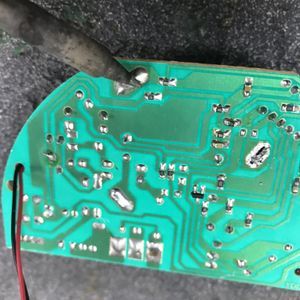
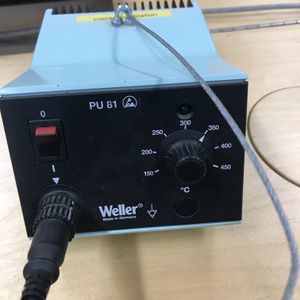
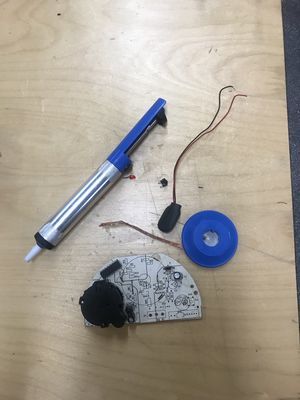
I set about desoldering some crucial parts from the smoke alarm for use in the new circuit.
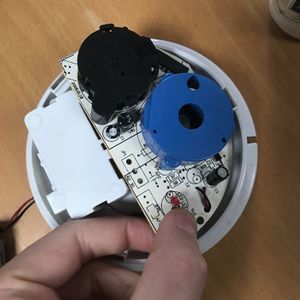
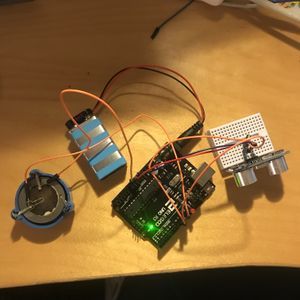
Moving onto the final outcome after running multiple different pieces of code and having to change the piezo speaker frequency to get an auditable sound out of it the final circuit was complete. The ultrasonic sensor detects objects up to 80cm away directly in its path, meaning if it was placed by a window or doorway the range would easily detect an intruder. An LED also taken from the smoke alarm provides visual notification of the detection as well, primarily to aid with setting up the circuit. The frequency can be set to a number of different tones via an Arduino plugin called ToneAC. However, there are still some issues with volume that are yet to be resolved but I think this may be due to there not being a volt amplifier as part of the circuit as the piezo speaker may require a higher voltage to reach full alarm level as controlled by the ambiguous long rectangle within the smoke detector. Here are a few pictures at various levels of assembly.
== Project 2 ==
===CalmCat===
by Monika Sumauskaite, Vilius Vaura, Sol Chadwick


A jacket created to calm down a stressed-out cat. When the cat, wearing this jacket, meows anxiously or an increase of a heartbeat is detected, straps tightness and applies gentle pressure on the belly of the cat, stimulating specific acupressure points, that are proven to have calming effects.
Acupressure points

It is known that acupressure techniques can help to relax and overcome stress in humans and animals, like cats. There are multiple bumps on the inside of the jacket to stimulate those points when the cat is stressed. [2][3]
Sound/Heartbeat activation
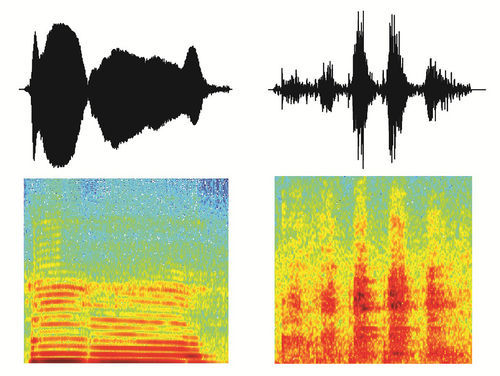

The tightening of the jacket could be activated in a few different ways. The technology could use sound/voice recognition, that would be able to distinguish a stressful meow.
Or a heartbeat sensor could be used. Normal cats pulse varies from 140 to 220 beats per minute. An integrated heartbeat sensor would detect its rise and activate the straps.
Self lacing/tightening technology

The Calm Cat jacked would include a self-tightening, “cat activated” straps. The technology could work on similar principles as Nikes or Back to the Futures self-lacing shoes.

