User:Axel
Axel Verwee
Email: 0915310@hr.nl
Welkom to my page.
I am a fashion student. Mickey and I are working together for this quarter. Here you can find everything what I am up to.
––––––––––––––––––––––––––––––––––––––––––––––––––––––––––––––––––––––––––––––––––––––––––––––––––––––––––––––––––––––––––––––––––––––––––––––––––––––––––––––––––––––––
Contents
Own Assignment
––––––––––––––––––––––––––––––––––––––––––––––––––––––––––––––––––––––––––––––––––––––––––––––––––––––––––––––––––––––––––––––––––––––––––––––––––––––––––––––––––––––––
'Feel My hotspot Hackathon'
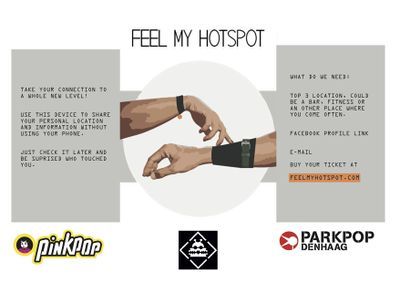
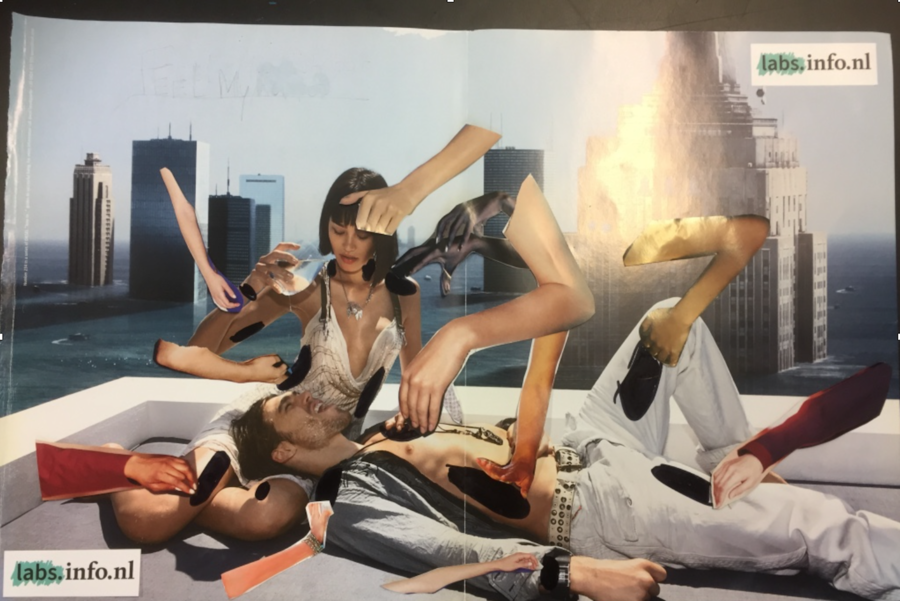
Well, we are creating a concept, its about how people can interact with each other if they met in a bar or somewhere else. The interaction is about touching. When you touch someone you could get some information about the person. For example, I meet someone nice in the bar, then I just touch his shoulder, and then a small censor will give a detail of information of that person. We will just start with a small detail like: Where does he go out sometimes? That location will be open for me to see. Only if the other person is interested to. On that point we can go further because if there is a connection. When we will meet up again we can touch each other on the arms for example and then i'll know what kind of work he does. And he also can accept it that i can see the location of his work.
 ––––––––––––––––––––––––––––––––––––––––––––––––––––––––––––––––––––––––––––––––––––––––––––––––––––––––––––––––––––––––––––––––––––––––––––––––––––––––––––––––––––––––
'Feel My hotspot Digital Craftt'
––––––––––––––––––––––––––––––––––––––––––––––––––––––––––––––––––––––––––––––––––––––––––––––––––––––––––––––––––––––––––––––––––––––––––––––––––––––––––––––––––––––––
Mickey and I spoke to each other and decided to make our project a bit easier. Because otherwise it wouldn't be finished on time.
So our new concept is that people on festivals will wear a bracelet with a chip and one with a sensor (check in system). When people are buying tickets for the festival they have to give their top three location and Facebook profile. This will be connected with a chip they will get at the festival. When you are interested in someone, you just check in on their bracelet. Well of course if they accept you. When they accept you, the chip wil send your information to the email address from the other person. So then you don't need phone on he festival. Also it's a nice idea to find each other back in real life after the festival.
–––––––––––––––––––––––––––––––––––––––––––––––––––––––––––––––––––––––––––––––––––––––––––––––––––––––––––––––––––––––––––––––––––––––––––––––––––––––––––––––––––––––– So in our collaboration we worked together on the concept and worked that out together. Further we talked about how we wanted try and make it and we discussed this als with the help of the Interaction station. Mickey was going to focus more on the electronics. Off course sometimes we worked together on it but the most is done by mickey. So I started focussing on the design and thinking about what that could look like. * Mickey Nerrings
–––––––––––––––––––––––––––––––––––––––––––––––––––––––––––––––––––––––––––––––––––––––––––––––––––––––––––––––––––––––––––––––––––––––––––––––––––––––––––––––––––––––– So we thought because we were more drinking about a sort of festival idea for this product. so in the design we wanted to try to make something that you could wear something like a little bag and a bracelet. So for the bag we came up with this idea for a Fanny pack, because you still see those a lot, and would be very handy on a festival. so we were trying to come up with an idea for what kind of fanny pack we would like to make. We bought a fanny pack on the market to look at the patterns. From that we made a new fanny pack. we chose for a fabric that is more water resisted, we thought that would be handy with the electronics. for the bracelet we combined it with the chip
––––––––––––––––––––––––––––––––––––––––––––––––––––––––––––––––––––––––––––––––––––––––––––––––––––––––––––––––––––––––––––––––––––––––––––––––––––––––––––––––––––––––
Teamwork
–––––––––––––––––––––––––––––––––––––––––––––––––––––––––––––––––––––––––––––––––––––––––––––––––––––––––––––––––––––––––––––––––––––––––––––––––––––––––––––––––––––––– We decided to make a team for the presentation with Axel Verwee and Mickey Nerrings. As our table cloth can be used in multiple situations to bring people together and their project is also about bringing people together. There device is about connecting people in a different way, the device is sending a message when the peolpe who wear it touch. The message is with information about the other person so that you can keep in contact. We thought this was a nice project because we could combine the 2 projects in 1 presentation because people who get to know each other at a dinner or a picknic/festival can exchange information without picking up their phones and disconnecting with your dinner partners. We decided to make a team with Kaylee and Maxime. They made a table carpet, with light connection and mobile telephones. Really interesting and we thought we could make a good exposition together.
––––––––––––––––––––––––––––––––––––––––––––––––––––––––––––––––––––––––––––––––––––––––––––––––––––––––––––––––––––––––––––––––––––––––––––––––––––––––––––––––––––––––
First Class: Group exercise
––––––––––––––––––––––––––––––––––––––––––––––––––––––––––––––––––––––––––––––––––––––––––––––––––––––––––––––––––––––––––––––––––––––––––––––––––––––––––––––––––––––––
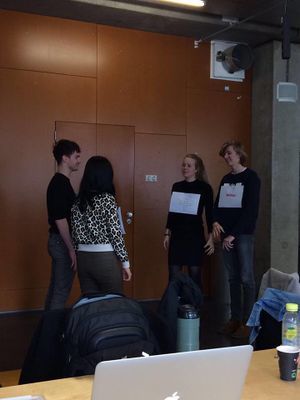
So for this small group assignment we did a little theater, what we were trying to show is how + and - are reacting on each other.
When '+ and -' came together and started it would start to shake, because we were excited for being together. But when '- and -' came together they would clash.
––––––––––––––––––––––––––––––––––––––––––––––––––––––––––––––––––––––––––––––––––––––––––––––––––––––––––––––––––––––––––––––––––––––––––––––––––––––––––––––––––––––––
Second Class: Measuring
––––––––––––––––––––––––––––––––––––––––––––––––––––––––––––––––––––––––––––––––––––––––––––––––––––––––––––––––––––––––––––––––––––––––––––––––––––––––––––––––––––––––
In the class we had to measure different things.
Outcome:
Voltage 7
Resistance 465
Ampere 19.3
Measuring resistance
Series Resistance Outcome: Volt 1th restitor 2.38
Volt 2nd/3th 2.39
Volt 1th + 2nd together 4.77
Volt 2nd + 3th together 4.78
Volt 1th +2nd +3th together 7.16
I = V/R
9,11: 2,38 = 3,83
9,11 : 7,16 = 1,27
Parallell Resistance Outcome
Voltage van de drie restitors 8.41
Measuring Current
Outcome Voltage 7
Resistance 465
Ampere 19.3
Measuring voltage and current in a series circuit
Outcome Volt 9.11
Ampere 3.82
I = V/R
9,11: 2,38 = 3,83
9,11 : 7,16 = 1,27
Measuring voltage and current in a parallel circuit
Outcome:
Battery voltage: 8.58
Voltage van de drie restitors : 8.41
I=V/R
8.58/8.41 = 1.02
You can calculate how much the resistor resists
1-2-X-------
Zwart = 0-0-1
Bruin = 1-1-10
Rood = 2-2-100
Oranje = 3-3-1000
Geel = 4-4-10K
Groen = 5-5-100K
Blauw = 6-6-1M
Violet = 7-7-10M
Grijs = 8-8-100M
Wit = 9-9-1000M
––––––––––––––––––––––––––––––––––––––––––––––––––––––––––––––––––––––––––––––––––––––––––––––––––––––––––––––––––––––––––––––––––––––––––––––––––––––––––––––––––––––––
Third Class: Keyboard
––––––––––––––––––––––––––––––––––––––––––––––––––––––––––––––––––––––––––––––––––––––––––––––––––––––––––––––––––––––––––––––––––––––––––––––––––––––––––––––––––––––––
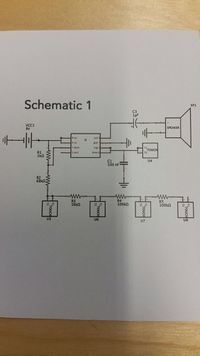
In the third class we had to make a Keyboard. In this assignment we had to make use of the things that we learnt in the other lessons. The goal was to make the same keyboard Dennis made. Kaylee and I worked together for this assignment. We first tried to to get an image on the plate, this we tried by making a image wet and iron it on the plate (this did not work). Then we tried grinding a schematic on the copper (this worked beter). when we finished the grinding on the kopper plate we started Attaching the first components. Then we started working with the Deadbugg, which was a quit the disaster (we broke like 4 of them). When attaching the threads to the Deadbugg we made use of a magnifying glass because the paws were so small. Finally after a lot of crying we were able to (as first) make it work. The video is on youtube [1]

