Difference between revisions of "P2-CulturalDiversity"
| (31 intermediate revisions by the same user not shown) | |||
| Line 2: | Line 2: | ||
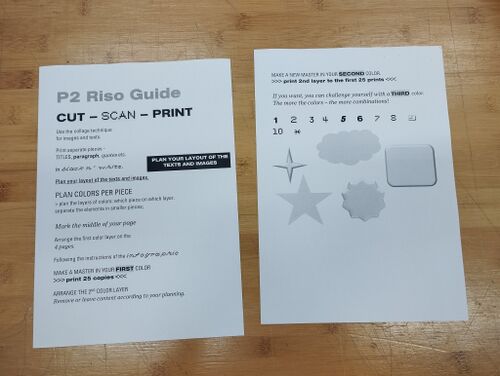
1. Print your text as separate pieces (titles, paragraph, quotes etc. '''in black n’ white''') | 1. Print your text as separate pieces (titles, paragraph, quotes etc. '''in black n’ white''') | ||
* make sure you choose different styles for the paragraphs, titles, quotes. <br> | * make sure you choose different styles for the paragraphs, titles, quotes. <br> | ||
[[File:P2_1_print.jpg|500px]]<br> | |||
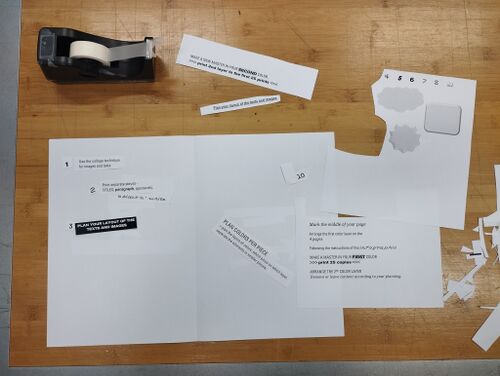
2. Use the collage technique for placing the images and texts.<br> | 2. Use the collage technique for placing the images and texts.<br> | ||
[[File:P2_2_collage.jpg|500px]]<br> | |||
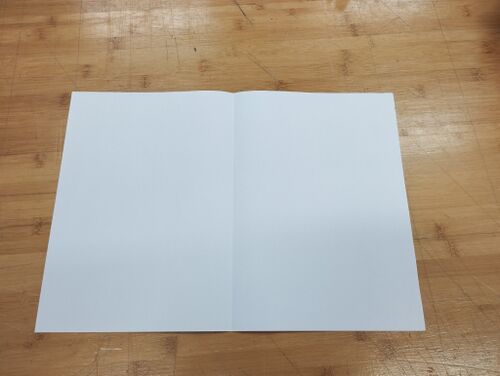
3. Mark the middle of your page<br> | 3. Mark the middle of your page<br> | ||
* by folding it or drawing a light pencil line | * by folding it or drawing a light pencil line | ||
[[File:P2_3_middle.jpg|500px]]<br> | |||
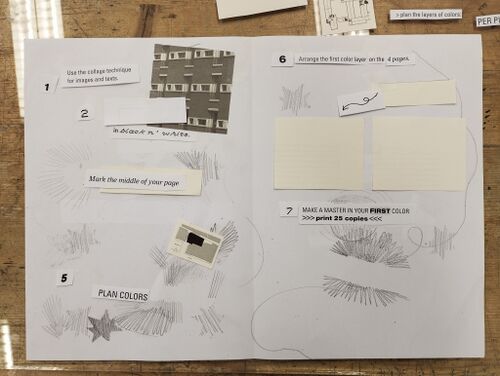
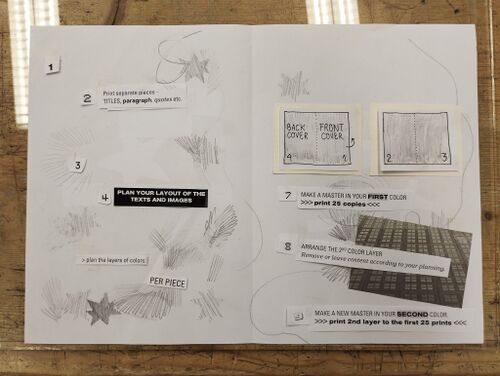
4. Plan the layout of the texts and images.<br><br> | |||
[[File:P2_4_plan-layout.jpg|500px]]<br><br> | |||
[[File:P2_13_cover1.jpg|500px]]<br> | |||
== Prepare the design for RISO printing == | == Prepare the design for RISO printing == | ||
5. Plan colors per piece > plan the layers of colors (which piece on which layer). | 5. Plan colors per collage piece> plan the layers of colors (which piece on which layer). | ||
* | * large paragraphs you can cut to print with different colours as well; <br> | ||
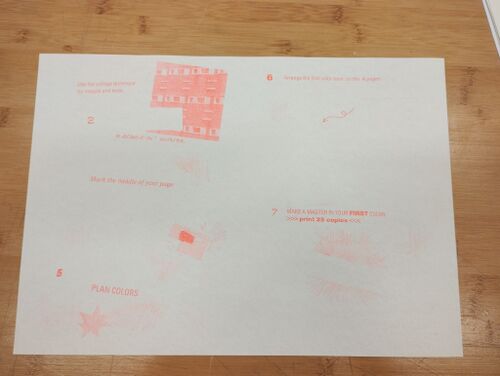
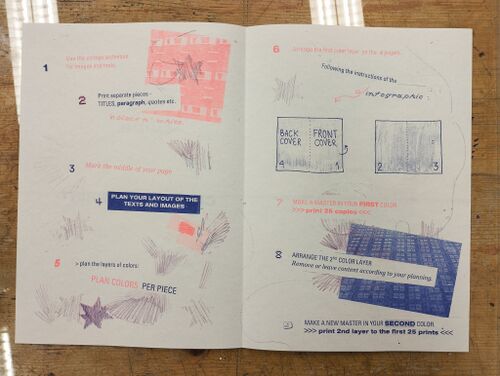
6. Arrange the 1st color layer on all 4 pages. | |||
* remove the content that you want to only appear with the second color | * remove the content that you want to only appear with the second color | ||
* '''tip''': Tape down the first color layer with clear tape before removing the second layer (that way you make sure that everything will be well aligned throughout the printing process) | * '''tip''': Tape down the first color layer with clear tape before removing the second layer (that way you make sure that everything will be well aligned throughout the printing process) | ||
[[File:P2_5_plan-layer1.jpg|500px]]<br> | |||
== RISO printing == | == RISO printing == | ||
'''<big>1st layer</big>'''<br> | '''<big>1st layer</big>'''<br> | ||
7. Make the first master <br><br> | |||
'''<big>Making the master with the Copy function of the RISO:</big>'''<br><br> | '''<big>Making the master with the Copy function of the RISO:</big>'''<br><br> | ||
7.1 Open the front door and place a color of your choice<br> | |||
7.2 Put 2 test papers on the paper tray <br><br> | |||
[[File:P2_6_change-color.jpg|500px]]<br> | |||
7.3 Open the lid and place your paper, aligning it with the A3 measurement guides <br><br> | |||
[[File:P2_7_layer1master.jpg|500px]]<br><br> | |||
[[File:P2_8_layer1master-placement.jpg|500px]]<br> | |||
7.4 Make sure the printer is in "Master Making" mode <br> | |||
7.5 Select 1 as print quantity <br> | |||
7.6 Press the blue button to start the process <br><br> | |||
[[File:P2_9_MasterMode.jpg|500px]]<br> | |||
7.7 Print 25 copies <br><br> | |||
[[File:P2_10_layer1-printed.jpg|500px]]<br> | |||
'''<big>2nd layer</big>'''<br> | '''<big>2nd layer</big>'''<br> | ||
8. Arrange the 2nd color layer - remove /leave content according to your planning. | |||
* make sure you are placing the paper the same direction as you did on your first layer | * make sure you are placing the paper on the scanner the same direction as you did on your first layer | ||
* to avoid ruining your prints always make sure to test print the master | * to avoid ruining your prints always make sure to test print the master<br> | ||
* '''tip:'''the riso inks are transparent, which means that by overlapping 2 colours, you can get a new third colour! You can take advantage of that | |||
[[File:P2_11_plan-layer2.jpg|500px]]<br> | |||
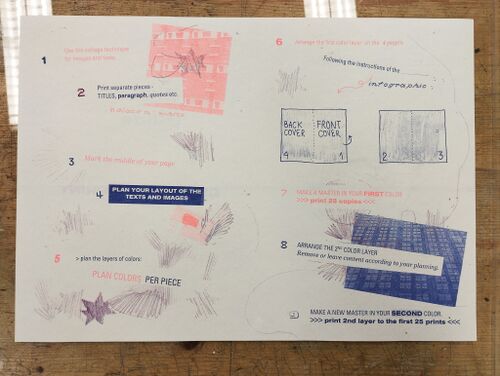
9. Make master in a new color > print the 2nd layer to the first 25 prints.<br> | |||
[[File:P2_12_layer2-printed.jpg|500px]]<br> | |||
'''<big>The other side</big>'''<br><br> | |||
10. Repeat the (2 layered) process for the other side of the paper.<br> | |||
- pay attention to which way you are turning your paper<br> | |||
[[File:P2_13_cover1.jpg|500px]]<br><br> | |||
[[File:P2_14_cover2.jpg|500px]]<br> | |||
[[File:P2_15_cover-printed.jpg|500px]]<br> | |||
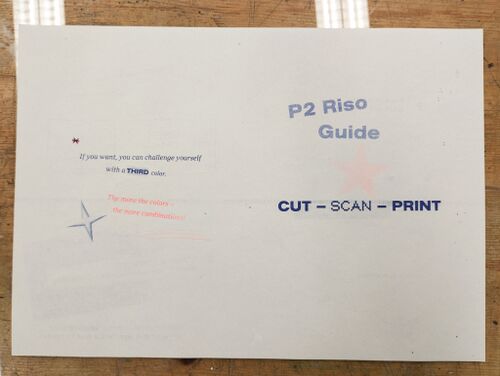
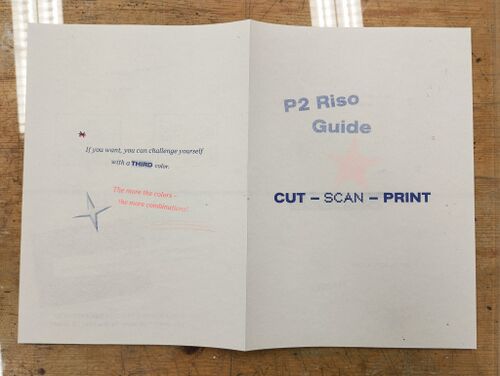
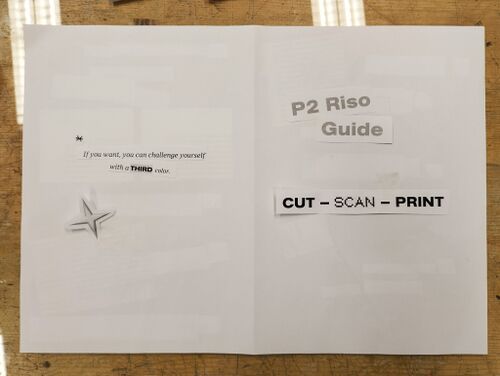
* If you want, you can challenge yourself with a third color. '''The more colors - the more combinations!''' | * If you want, you can challenge yourself with a third color. '''The more colors - the more combinations!''' | ||
<br> | |||
11. Fold the paper and you have your finished RISO zine.<br> | |||
[[File:P2_17_folded-cover.jpg|500px]]<br><br> | |||
[[File:P2_18_folded.jpg|500px]]<br> | |||
Latest revision as of 06:52, 14 May 2024
Composing the image
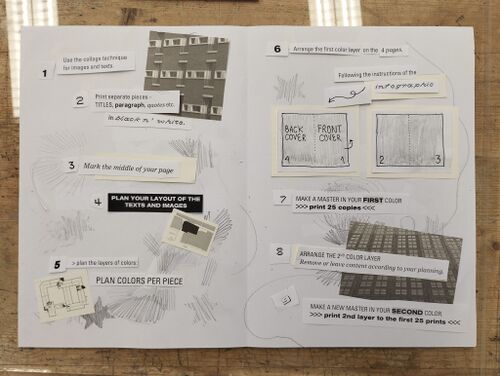
1. Print your text as separate pieces (titles, paragraph, quotes etc. in black n’ white)
- make sure you choose different styles for the paragraphs, titles, quotes.
2. Use the collage technique for placing the images and texts.
3. Mark the middle of your page
- by folding it or drawing a light pencil line
4. Plan the layout of the texts and images.
Prepare the design for RISO printing
5. Plan colors per collage piece> plan the layers of colors (which piece on which layer).
- large paragraphs you can cut to print with different colours as well;
6. Arrange the 1st color layer on all 4 pages.
- remove the content that you want to only appear with the second color
- tip: Tape down the first color layer with clear tape before removing the second layer (that way you make sure that everything will be well aligned throughout the printing process)
RISO printing
1st layer
7. Make the first master
Making the master with the Copy function of the RISO:
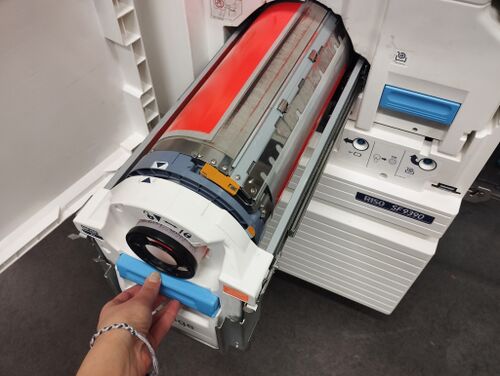
7.1 Open the front door and place a color of your choice
7.2 Put 2 test papers on the paper tray
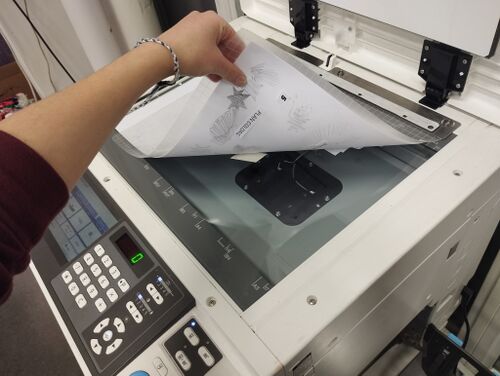
7.3 Open the lid and place your paper, aligning it with the A3 measurement guides
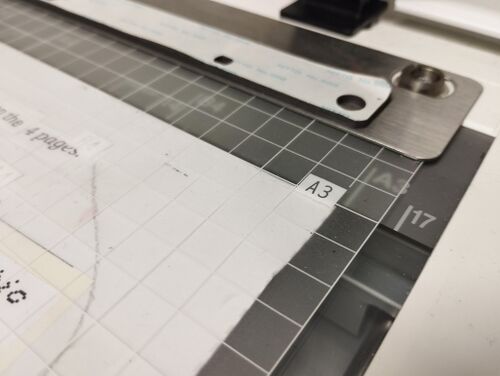
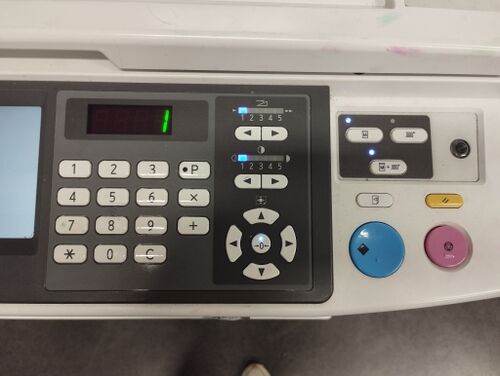
7.4 Make sure the printer is in "Master Making" mode
7.5 Select 1 as print quantity
7.6 Press the blue button to start the process
2nd layer
8. Arrange the 2nd color layer - remove /leave content according to your planning.
- make sure you are placing the paper on the scanner the same direction as you did on your first layer
- to avoid ruining your prints always make sure to test print the master
- tip:the riso inks are transparent, which means that by overlapping 2 colours, you can get a new third colour! You can take advantage of that
9. Make master in a new color > print the 2nd layer to the first 25 prints.
The other side
10. Repeat the (2 layered) process for the other side of the paper.
- pay attention to which way you are turning your paper

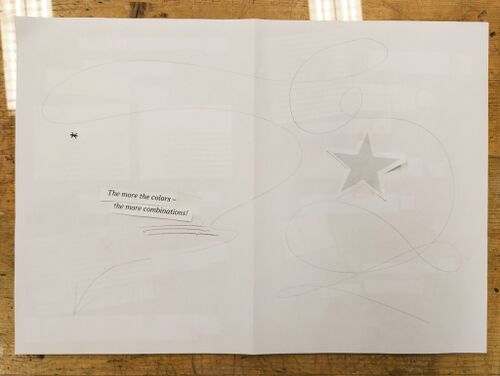
- If you want, you can challenge yourself with a third color. The more colors - the more combinations!
