Difference between revisions of "Quickstartguide:C600i"
| Line 1: | Line 1: | ||
[[File:Canon printer.jpg|thumb|jpg]] | [[File:Canon printer.jpg|thumb|jpg | left | 400 px]] | ||
'''<big>Printen met de Canon C600i / English below | '''<big>Printen met de Canon C600i / English below | ||
</big> | </big> | ||
| Line 18: | Line 18: | ||
Then go to the Layout Tab and choose Scaling and Doubleside print options. | Then go to the Layout Tab and choose Scaling and Doubleside print options. | ||
Revision as of 13:04, 21 April 2021
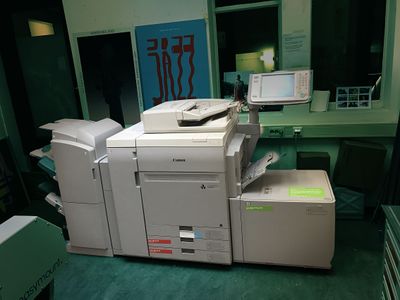
Printen met de Canon C600i / English below
Upload your PDF by Airdrop - see yellow sticker - to the Mac.
Your file can be found in the folder "downloads".
From here you drag it to the Tab "Held" in the app Command Workstation by Fiery.
Doubleclick on the file, go to Media.
Now select Paper Source, Output Paper Size and Media Type.
Then go to the Layout Tab and choose Scaling and Doubleside print options.
If you have checked these 5 items, press PRINT.
More details below:
QuickStart guide: printing on the Big Canon high speed laserprinter c600i
For a fair price, from € 0,15 for a single side A4, you can upgrade the quality of your prints by printing on the c600i.
There is a variety of papers in stock. Matte, glossy, green label, sulphate. From 90 up to 300 grammes.
All these papers are especially designed for laser printing.
You can also use your own paper, but beware that not everything is printable.
Do not bend or roll up the paper that still needs to be printed!
How to prepare your files?
The software program that we use for printing is called Fiery Command Workstation.
There is a tab called HELD. That is where you drop your files in.
Files can only be PDF, and preferably PDF/x a:2001.
This is the kind of PDF that integrates all your used fonts and puts the file in CMYK.
From InDesign you export your files as a PDF file.
From Illustrator you save your files as PDF files.
In the next screen after saving, fill in the type of PDF (PDF/x a:2001) where it says "none".
After you dropped your PDF in the HELD tab, double click on it.
In the next screen in the upper right side, you can click and look for presets.
If you find a preset that is (close to) what you want, choose it.
You can still adjust all options.
There are minimal five options you need to check. This is what the printer wants to know:
tab MEDIA
• What is the size of the paper you are going to print on?
• What kind of paper is that?
• In which drawer is the paper?
In the next tab LAYOUT fill in:
• Do you want to scale your file, or is it 100%?
• Is it double sided and if so, does it turn of the short or the long edge?
Booklet
For booklet printing, always use a PDF with separate pages, never spreads.
If you have a self cover magazine (everything has the same paper quality), your cover is page 1 in your PDF.
For folded and staples magazines, your total amount of pages should be devidable by four.
So you can have 8, 12, 16, 20 and 24 pages in your PDF.
For more that 24 pages it is recommended to glue bind, or to print your book in signatures.
For signatures, use the Nested Saddle option. Fill in how many sheets you need in one signature.
The default setting for Booklet is Saddle Stitch. This means that your first and last pages will be on the same sheet.
For self covers it means that your frontcover is on the right side of the sheet, and the backcover on the left. This will be sheet 1.
In the Booklet modus, you do not print pages, but sheets. And each sheet has four pages.
