Difference between revisions of "Quickstartguide:HR-PRINTERS"
| Line 2: | Line 2: | ||
== Print Settings for the Canon Multi Functional Printers == | == Print Settings for the Canon Multi Functional Printers == | ||
===Print on HR printers=== | |||
*Open the print window in your program (Indesign/Acrobat/Photoshop) | |||
Don't print directly from the desktop, you have less control over the settings | |||
<br> | |||
[[File:Mainwindow.png]] | |||
*Choose the HR_FollowME printer | |||
<br> | |||
[[File:choosehr.png]] | |||
<br> | |||
===Page Setup=== | |||
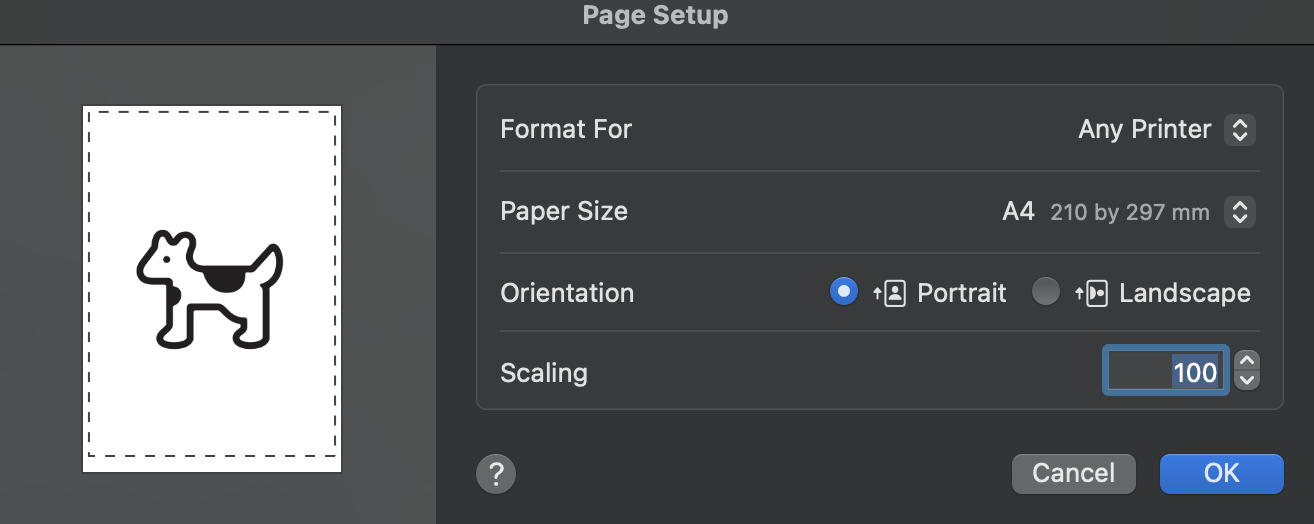
*Go to Page Setup and choose your paper size | |||
<br> | |||
[[File:pagesetup.png]] | |||
===Printer Settings=== | |||
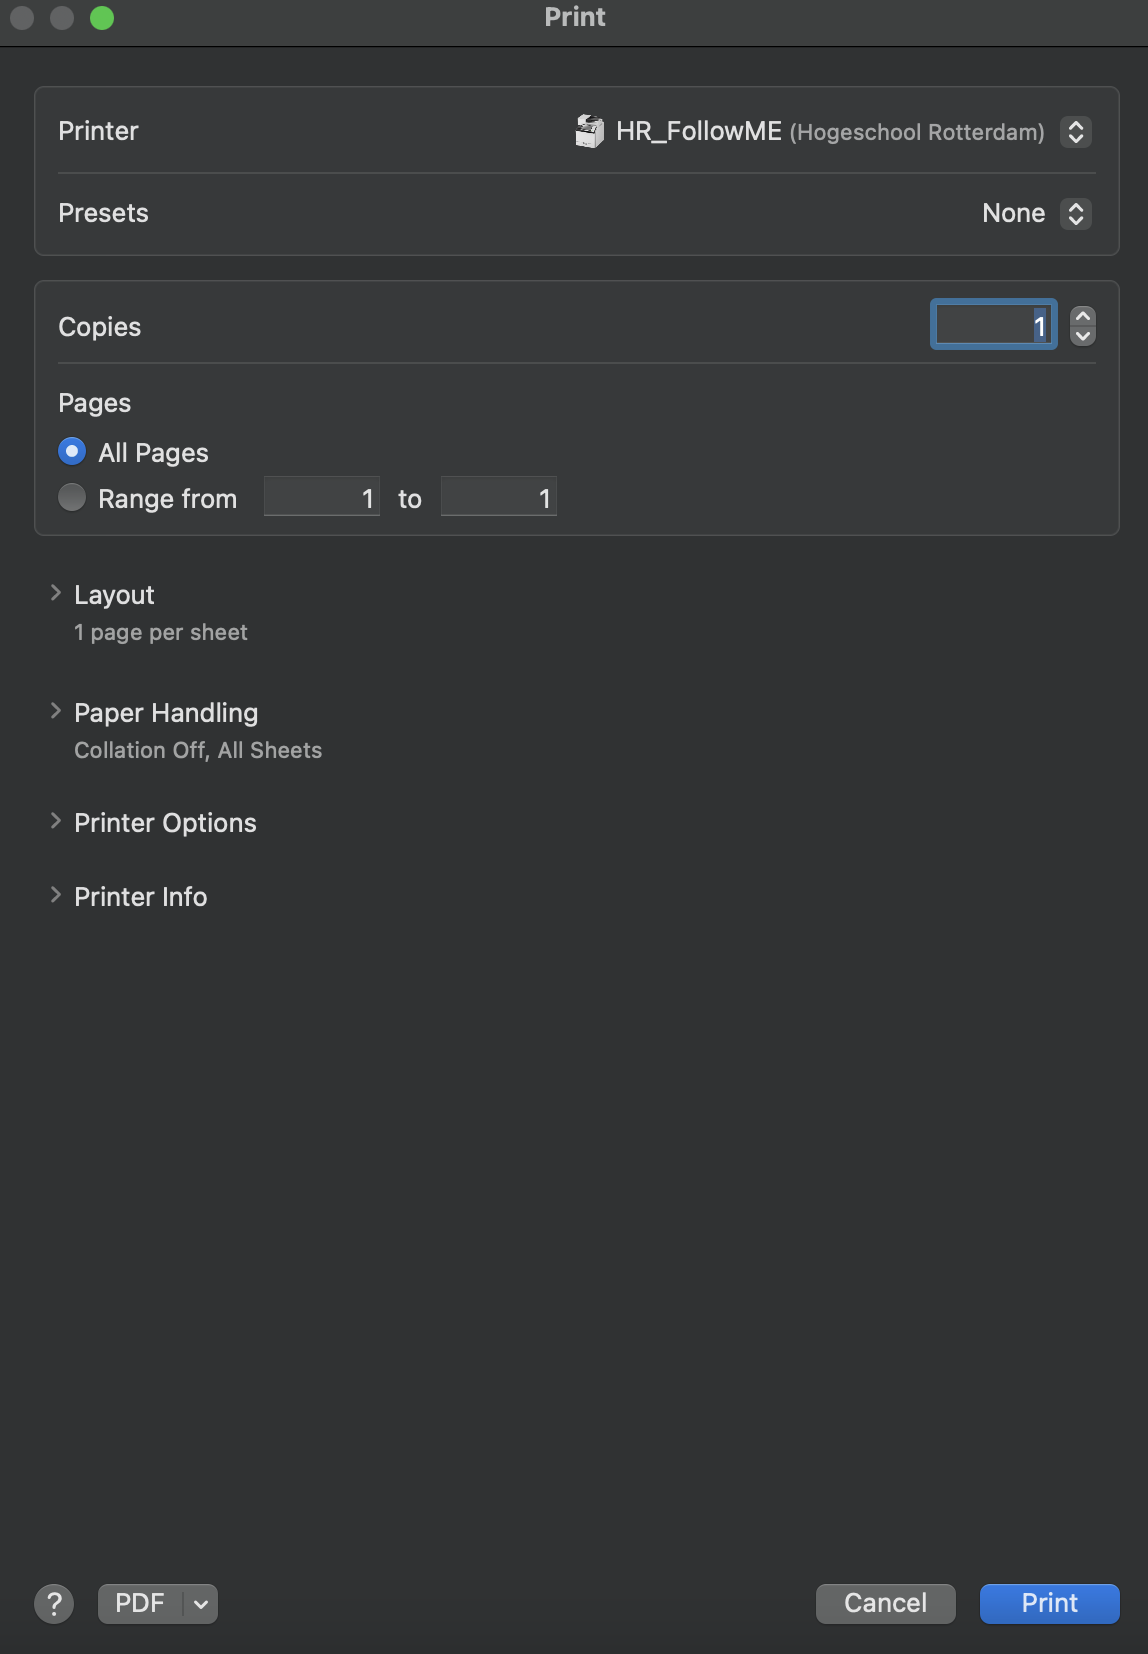
*Go to Printer | |||
<br> | |||
[[File:printer.png]] | |||
===Layout=== | |||
*Go to Layout | |||
If you want to print multiple smaller pages on one page change the "Pages per Sheet" | |||
<br> | |||
[[File:layout.png]] | |||
* | |||
<br> | |||
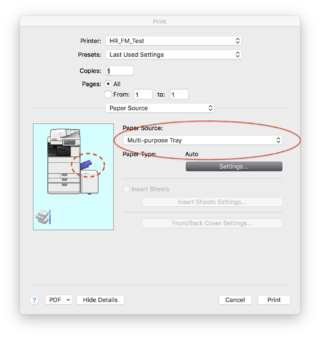
=== Paper Source === | |||
[[File:Mfp_3.png | 320px]][[File:mfp_4.png | 500px]] | |||
Set the Paper Source | |||
Auto for standard paper | |||
Multi-purpose Tray for your own paper | |||
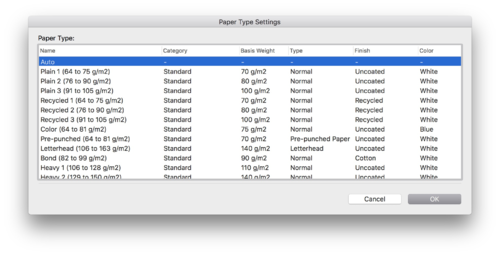
Set the paper type by Settings | |||
Choice the type that come the closed to your paper. | |||
=== Finishing === | |||
[[File:Mfp_5.png | 320px]][[File:Mfp_6.png | 320px]] | |||
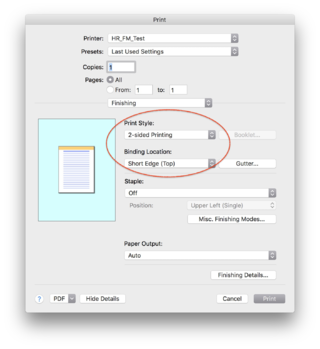
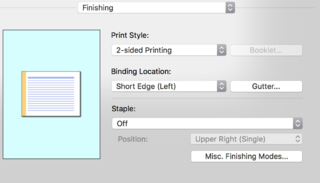
Set the Print Style | |||
1 or 2 sided Print | |||
When you print on landscape set it on the Short Edge (Left). | |||
=== Quality === | |||
[[File:Mfp_7.png | 320px]][[File:Mfp_8.png | 320px]] | |||
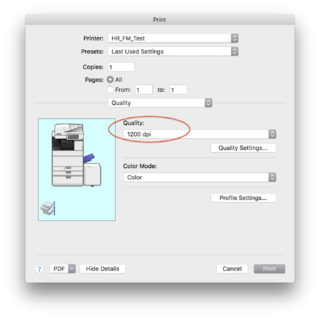
Set Quality to 1200dpi | |||
Always Show Details | |||
<br> | |||
[[File:mfp_1.png | 320px]][[File:Mfp_2.png | 320px]] | |||
<br> | |||
Choose the setting to adjust | |||
<br> | |||
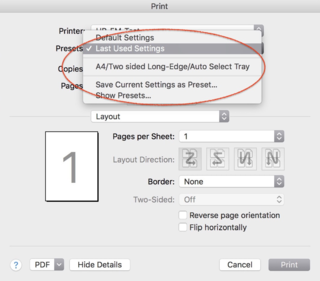
Make a preset from your settings | |||
===Send to the printer and print=== | |||
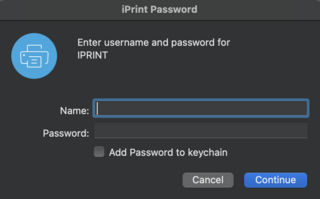
*Log in with your student number and password | |||
<br> | |||
[[File:login.png|320px]] | |||
<br> | |||
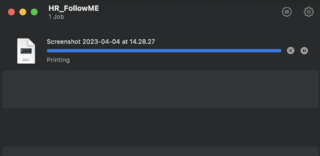
*Wait until the file is sent to the printer | |||
<br> | |||
[[File:waitsend.png|320px]] | |||
<br> | |||
== Install iPrint == | == Install iPrint == | ||
Install iPrint and _HR.Followme printer | Install iPrint and _HR.Followme printer | ||
Revision as of 09:47, 11 April 2023
Print Settings for the Canon Multi Functional Printers
Print on HR printers
- Open the print window in your program (Indesign/Acrobat/Photoshop)
Don't print directly from the desktop, you have less control over the settings
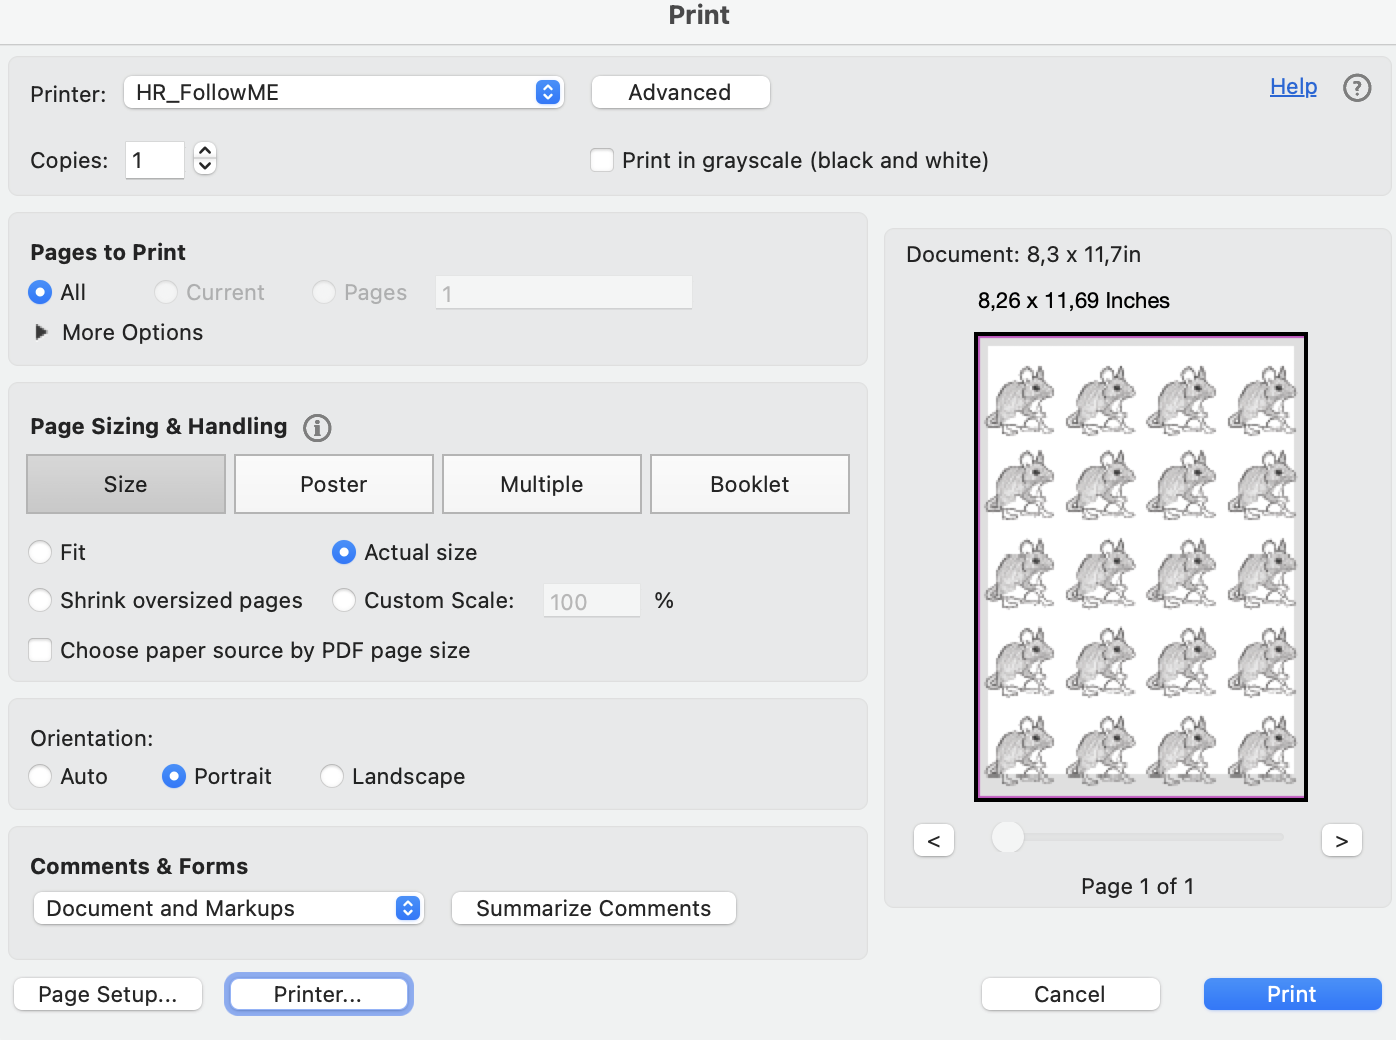
- Choose the HR_FollowME printer
Page Setup
- Go to Page Setup and choose your paper size
Printer Settings
- Go to Printer
Layout
- Go to Layout
If you want to print multiple smaller pages on one page change the "Pages per Sheet"

Paper Source
Set the Paper Source
Auto for standard paper
Multi-purpose Tray for your own paper
Set the paper type by Settings
Choice the type that come the closed to your paper.
Finishing
Set the Print Style
1 or 2 sided Print
When you print on landscape set it on the Short Edge (Left).
Quality
Set Quality to 1200dpi
Always Show Details
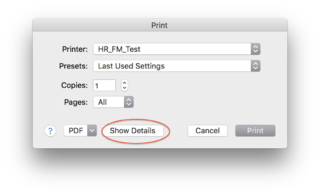
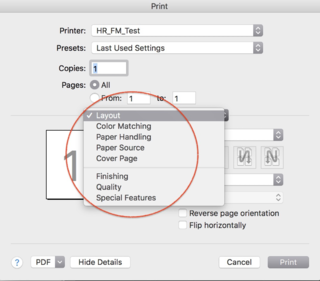
Choose the setting to adjust
Make a preset from your settings
Send to the printer and print
- Log in with your student number and password
- Wait until the file is sent to the printer
Install iPrint
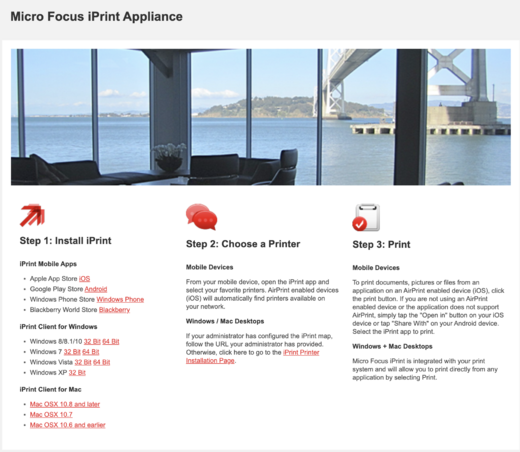
Install iPrint and _HR.Followme printer Follow the steps on: http://print.hr.nl (works only within the buildings of the Rotterdam University of Applied Sciences)
- Choose your operational system and install iPrint
Print on HR printers
- Open the print window in your program (Indesign/Acrobat/Photoshop)
Don't print directly from the desktop, you have less control over the settings

- Choose the HR_FollowME printer
Page Setup
- Go to Page Setup and choose your paper size
Printer Settings
- Go to Printer
Layout
- Go to Layout
If you want to print multiple smaller pages on one page change the "Pages per Sheet"

Paper Source
Set the Paper Source
Auto for standard paper
Multi-purpose Tray for your own paper
Set the paper type by Settings
Choice the type that come the closed to your paper.
Finishing
Set the Print Style
1 or 2 sided Print
When you print on landscape set it on the Short Edge (Left).
Quality
Set Quality to 1200dpi
Always Show Details


Choose the setting to adjust
Make a preset from your settings
Send to the printer and print
- Log in with your student number and password
- Wait until the file is sent to the printer

