Mimaki How To: Difference between revisions
mNo edit summary |
→Step 1: Test round: added a solution Tag: visualeditor |
||
| Line 30: | Line 30: | ||
[[File:StormLadyDeath Final print01.jpg | 600px]] | [[File:StormLadyDeath Final print01.jpg | 600px]] | ||
As you can see the white is extremely glitched and blotched. This is because there was shades of black happening in my original layer. It's extremely important to make sure the white is smooth without and shades, as even a 1% difference will show up as a white square on the Mimaki white layer. If you really want to stay safe I advice a vector base as there is no chance for missed pixels. | As you can see the white is extremely glitched and blotched. This is because there was shades of black happening in my original layer. It's extremely important to make sure the white is smooth without and shades, as even a 1% difference will show up as a white square on the Mimaki white layer. If you really want to stay safe I advice a vector base as there is no chance for missed pixels. If I changed my file to greyscale > bitmap in photoshop it would also have been smooth. | ||
Latest revision as of 08:21, 7 September 2023
In this wiki I will try and share my experience on printing with a Mimaki. I will be working with both a white layer, colour layers printed on brown paper and a gloss layer. Hopefully with this explenation you will be better prepared before starting to print with a Mimaki. This is an experience article to help people get a better understanding of the Mimaki. I will be sharing my complete experience including the mistakes I made. So do not follow this wiki as a 'step-by-step' guide as you will be making the same mistakes I did.
Step 1: Test round
[edit]So first you need to choose a file. I started with this design, wanting to print it the cover of a brown book cover.
You might notice that the image has a lot of nuances in color with little heavy contrast. This posed quite a challange for the Mimaki, so keep in mind that if you're not printing on a white basis an image like this is very challanging.
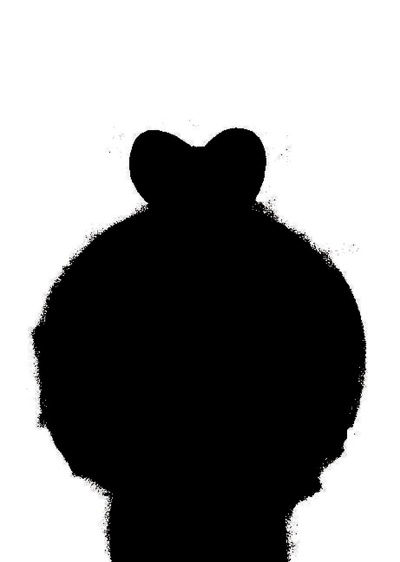
The Mimaki does not recognise pure white as a printable color. So for starters you need to cut up your design in one, two or three layers depending on your needs. For my image I intended the brown parts to allow the natural color of the paper, so in my design I made those parts white.
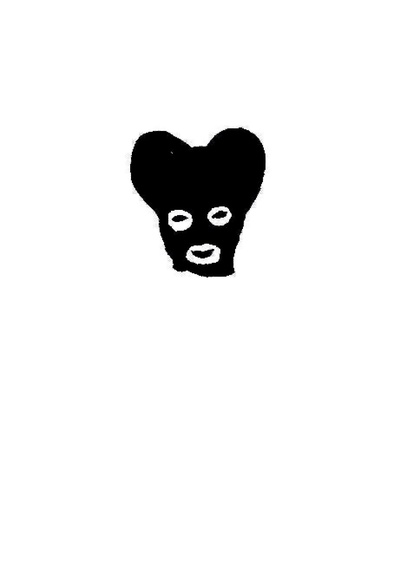
Now the light parts of the skin will also become dark as white is always printed on a seperate layer. Since the Mimake does not recognise white as a color you need to invert your basis so the Mimaki recognises the outline. For my image this would end up looking like this:
To find the out how to set the white layer please refer to the MIMAKI page.
Then for the gloss page follow the same logic as the white layer. White will be transparent, Black will be printed.
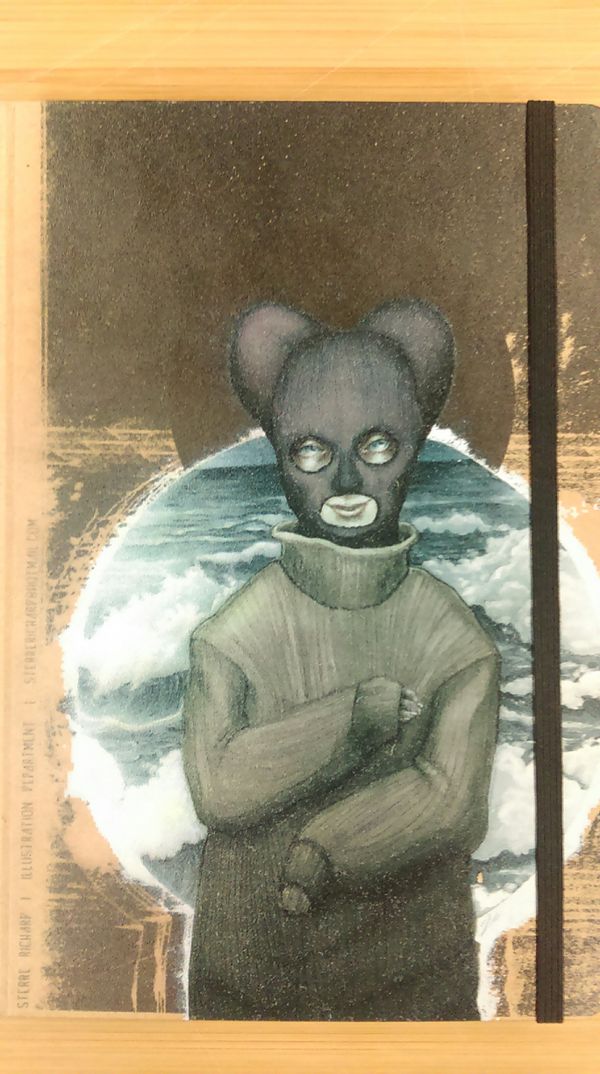
Everything combined and printed on the Mimaki resulted in this booklet:
As you can see the white is extremely glitched and blotched. This is because there was shades of black happening in my original layer. It's extremely important to make sure the white is smooth without and shades, as even a 1% difference will show up as a white square on the Mimaki white layer. If you really want to stay safe I advice a vector base as there is no chance for missed pixels. If I changed my file to greyscale > bitmap in photoshop it would also have been smooth.


