Quickstartguide:Mimaki: Difference between revisions
Created page with "<big>'''Printing with the Mimaki Flatbed Printer'''</big>''' Import your PDF / JPG / TIFF file from Raster Link's Open File. Click on your document and choose one of the fun..." |
No edit summary |
||
| (4 intermediate revisions by 3 users not shown) | |||
| Line 1: | Line 1: | ||
<big>'''Printing | <big>''' MIMAKI Printing Instructions '''</big>''' | ||
=== Anatomy of the Printer === | |||
The printer has two main parts, the flatbed and the head. The flatbed is where you will place whatever | |||
you will print. It is 594x420 mm (A2) The head is where the nozzles that give out the ink are. | |||
<br> | |||
[[File:Mimaki.jpg]] | |||
<br> | |||
[[File:Flatbed.jpg]] | |||
<br> | |||
[[File:Head.jpg]] | |||
<br> | |||
=== Material and dimensions === | |||
What material are you printing on? What are the dimensions of the object? | |||
—> Do not print on mirror-like materials, they will damage the printing head. Materials that absorb | |||
liquids are not ideal <— | |||
=== Prepare and bring your files === | |||
Bring your file on a usb stick. You need to know what the dimensions of your image are at 300 dpi. Download it on the computer. Open the software. | |||
=== The software === | |||
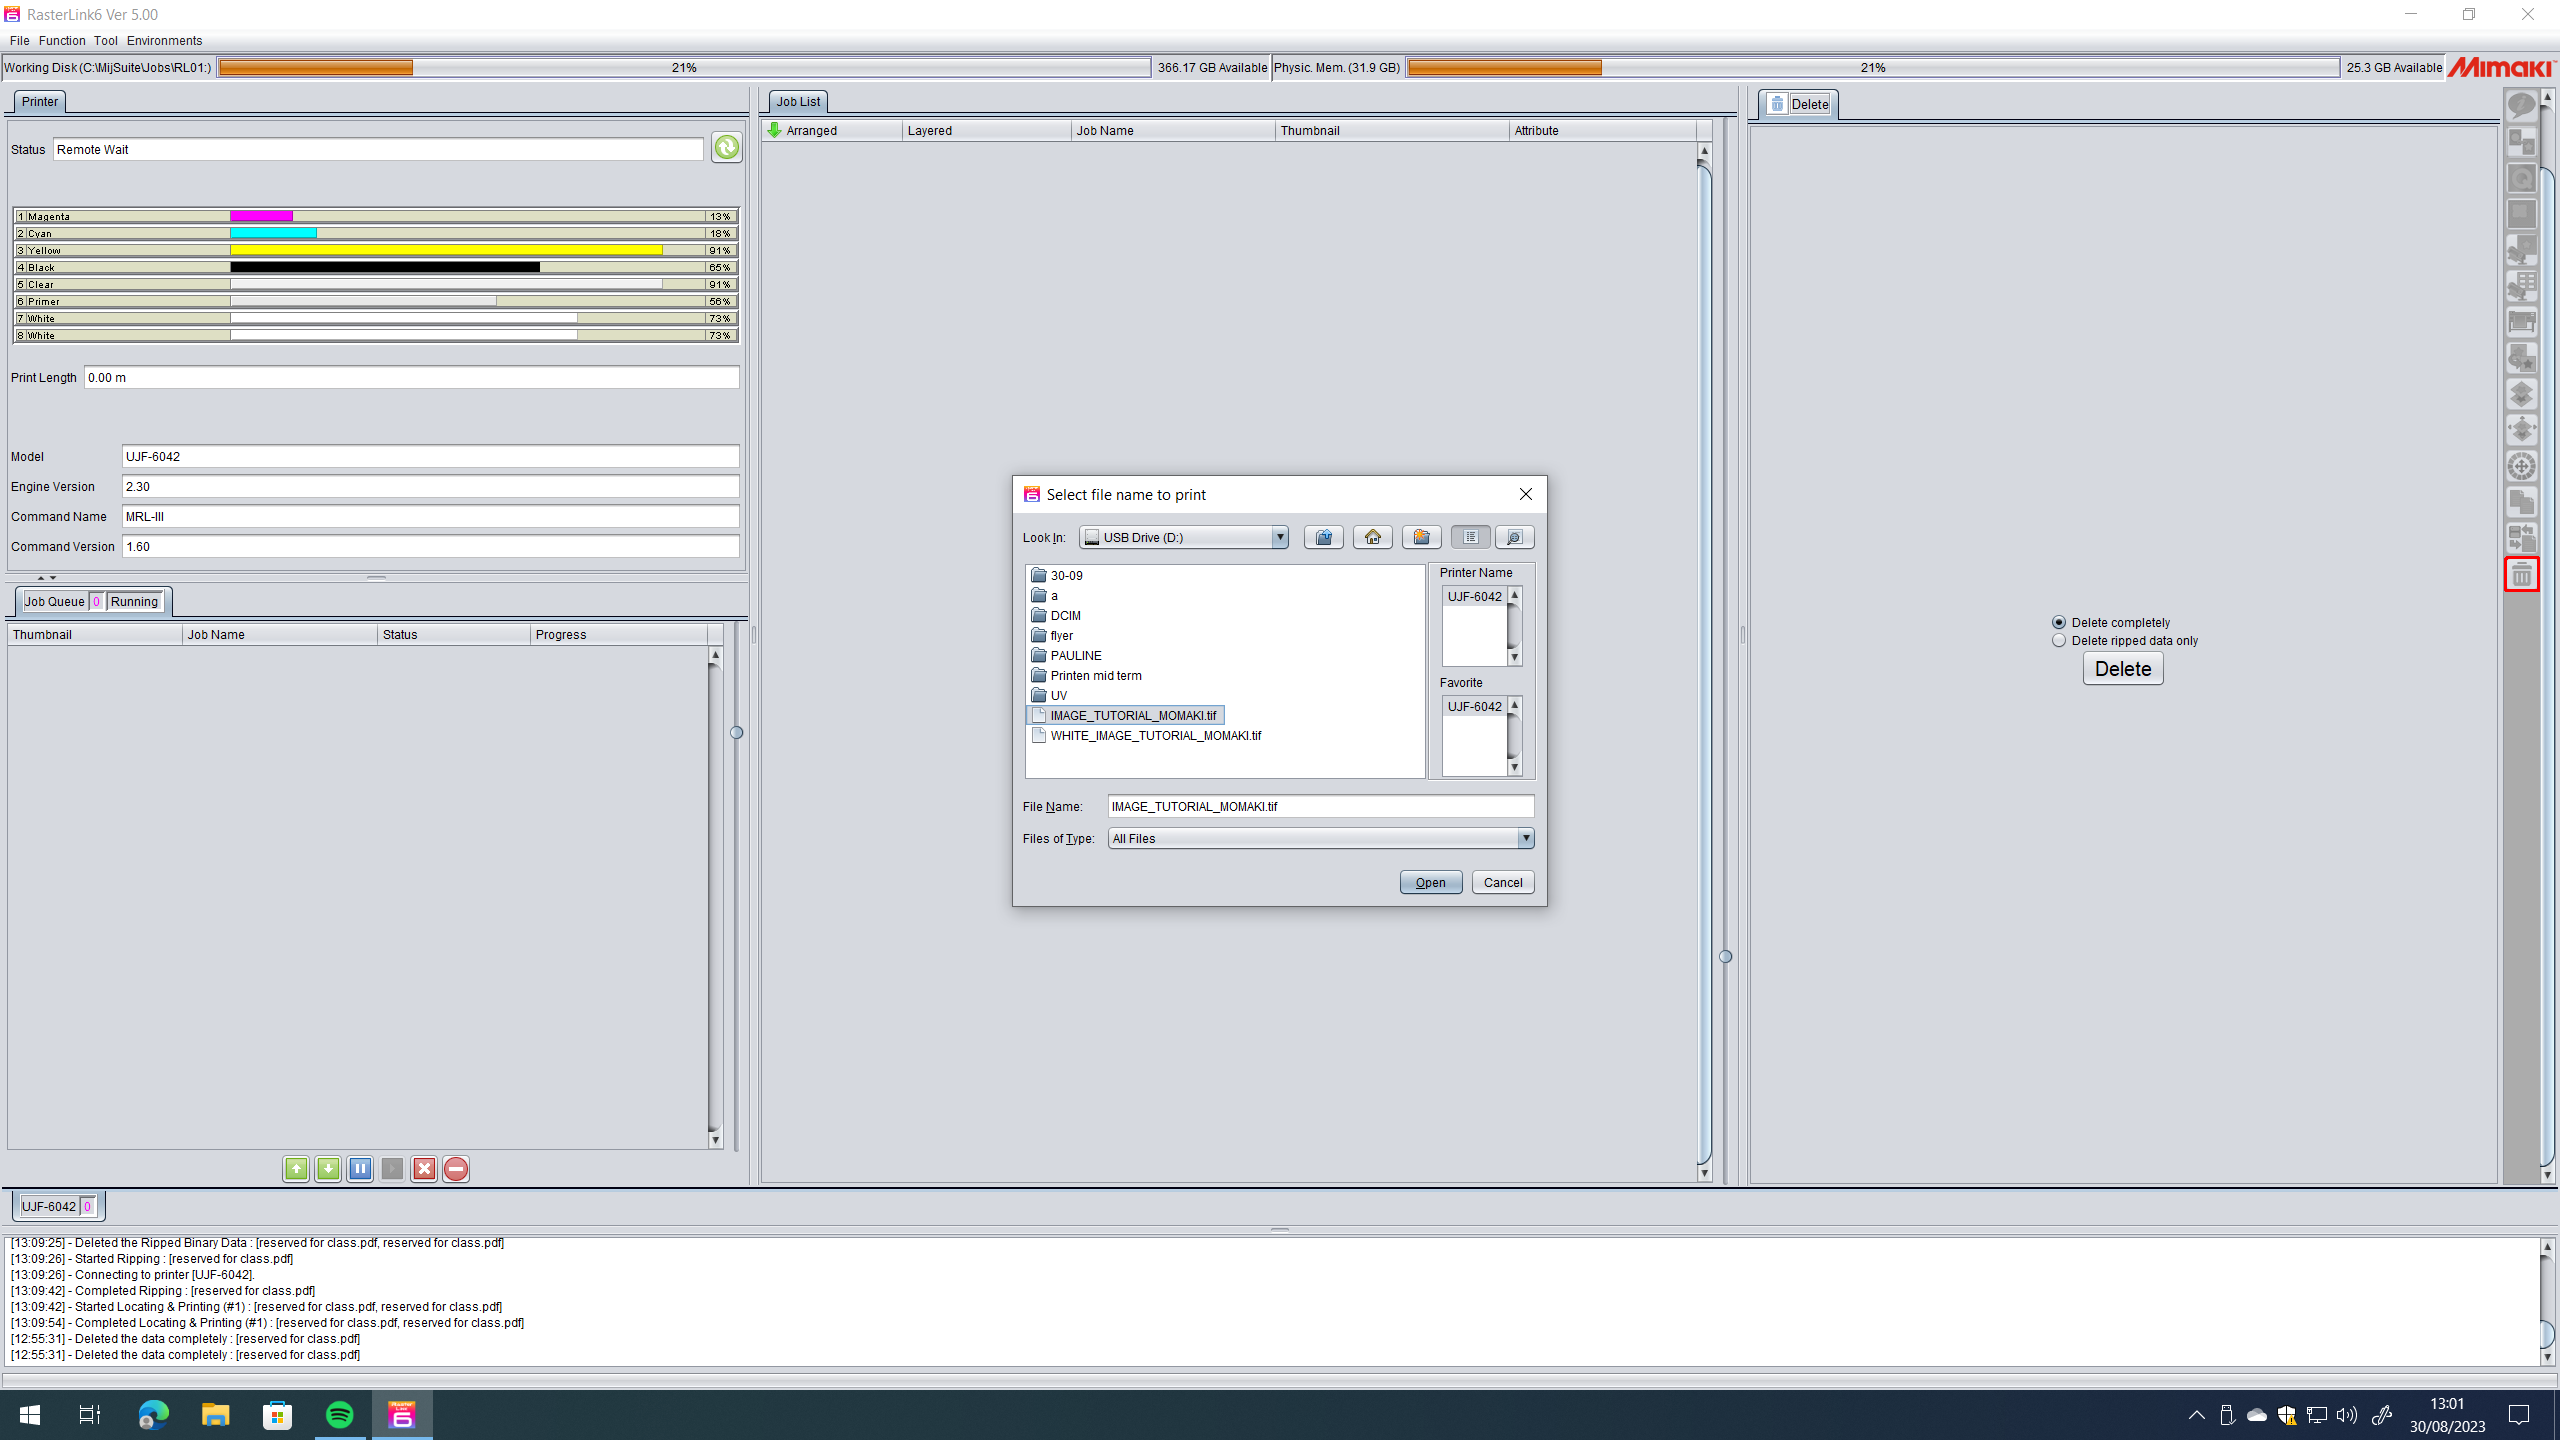
Once the program is open, click File – Open – Your File (dragging it to the software does not work) | |||
<br> | |||
[[File:Software 1.png]] | |||
<br> | |||
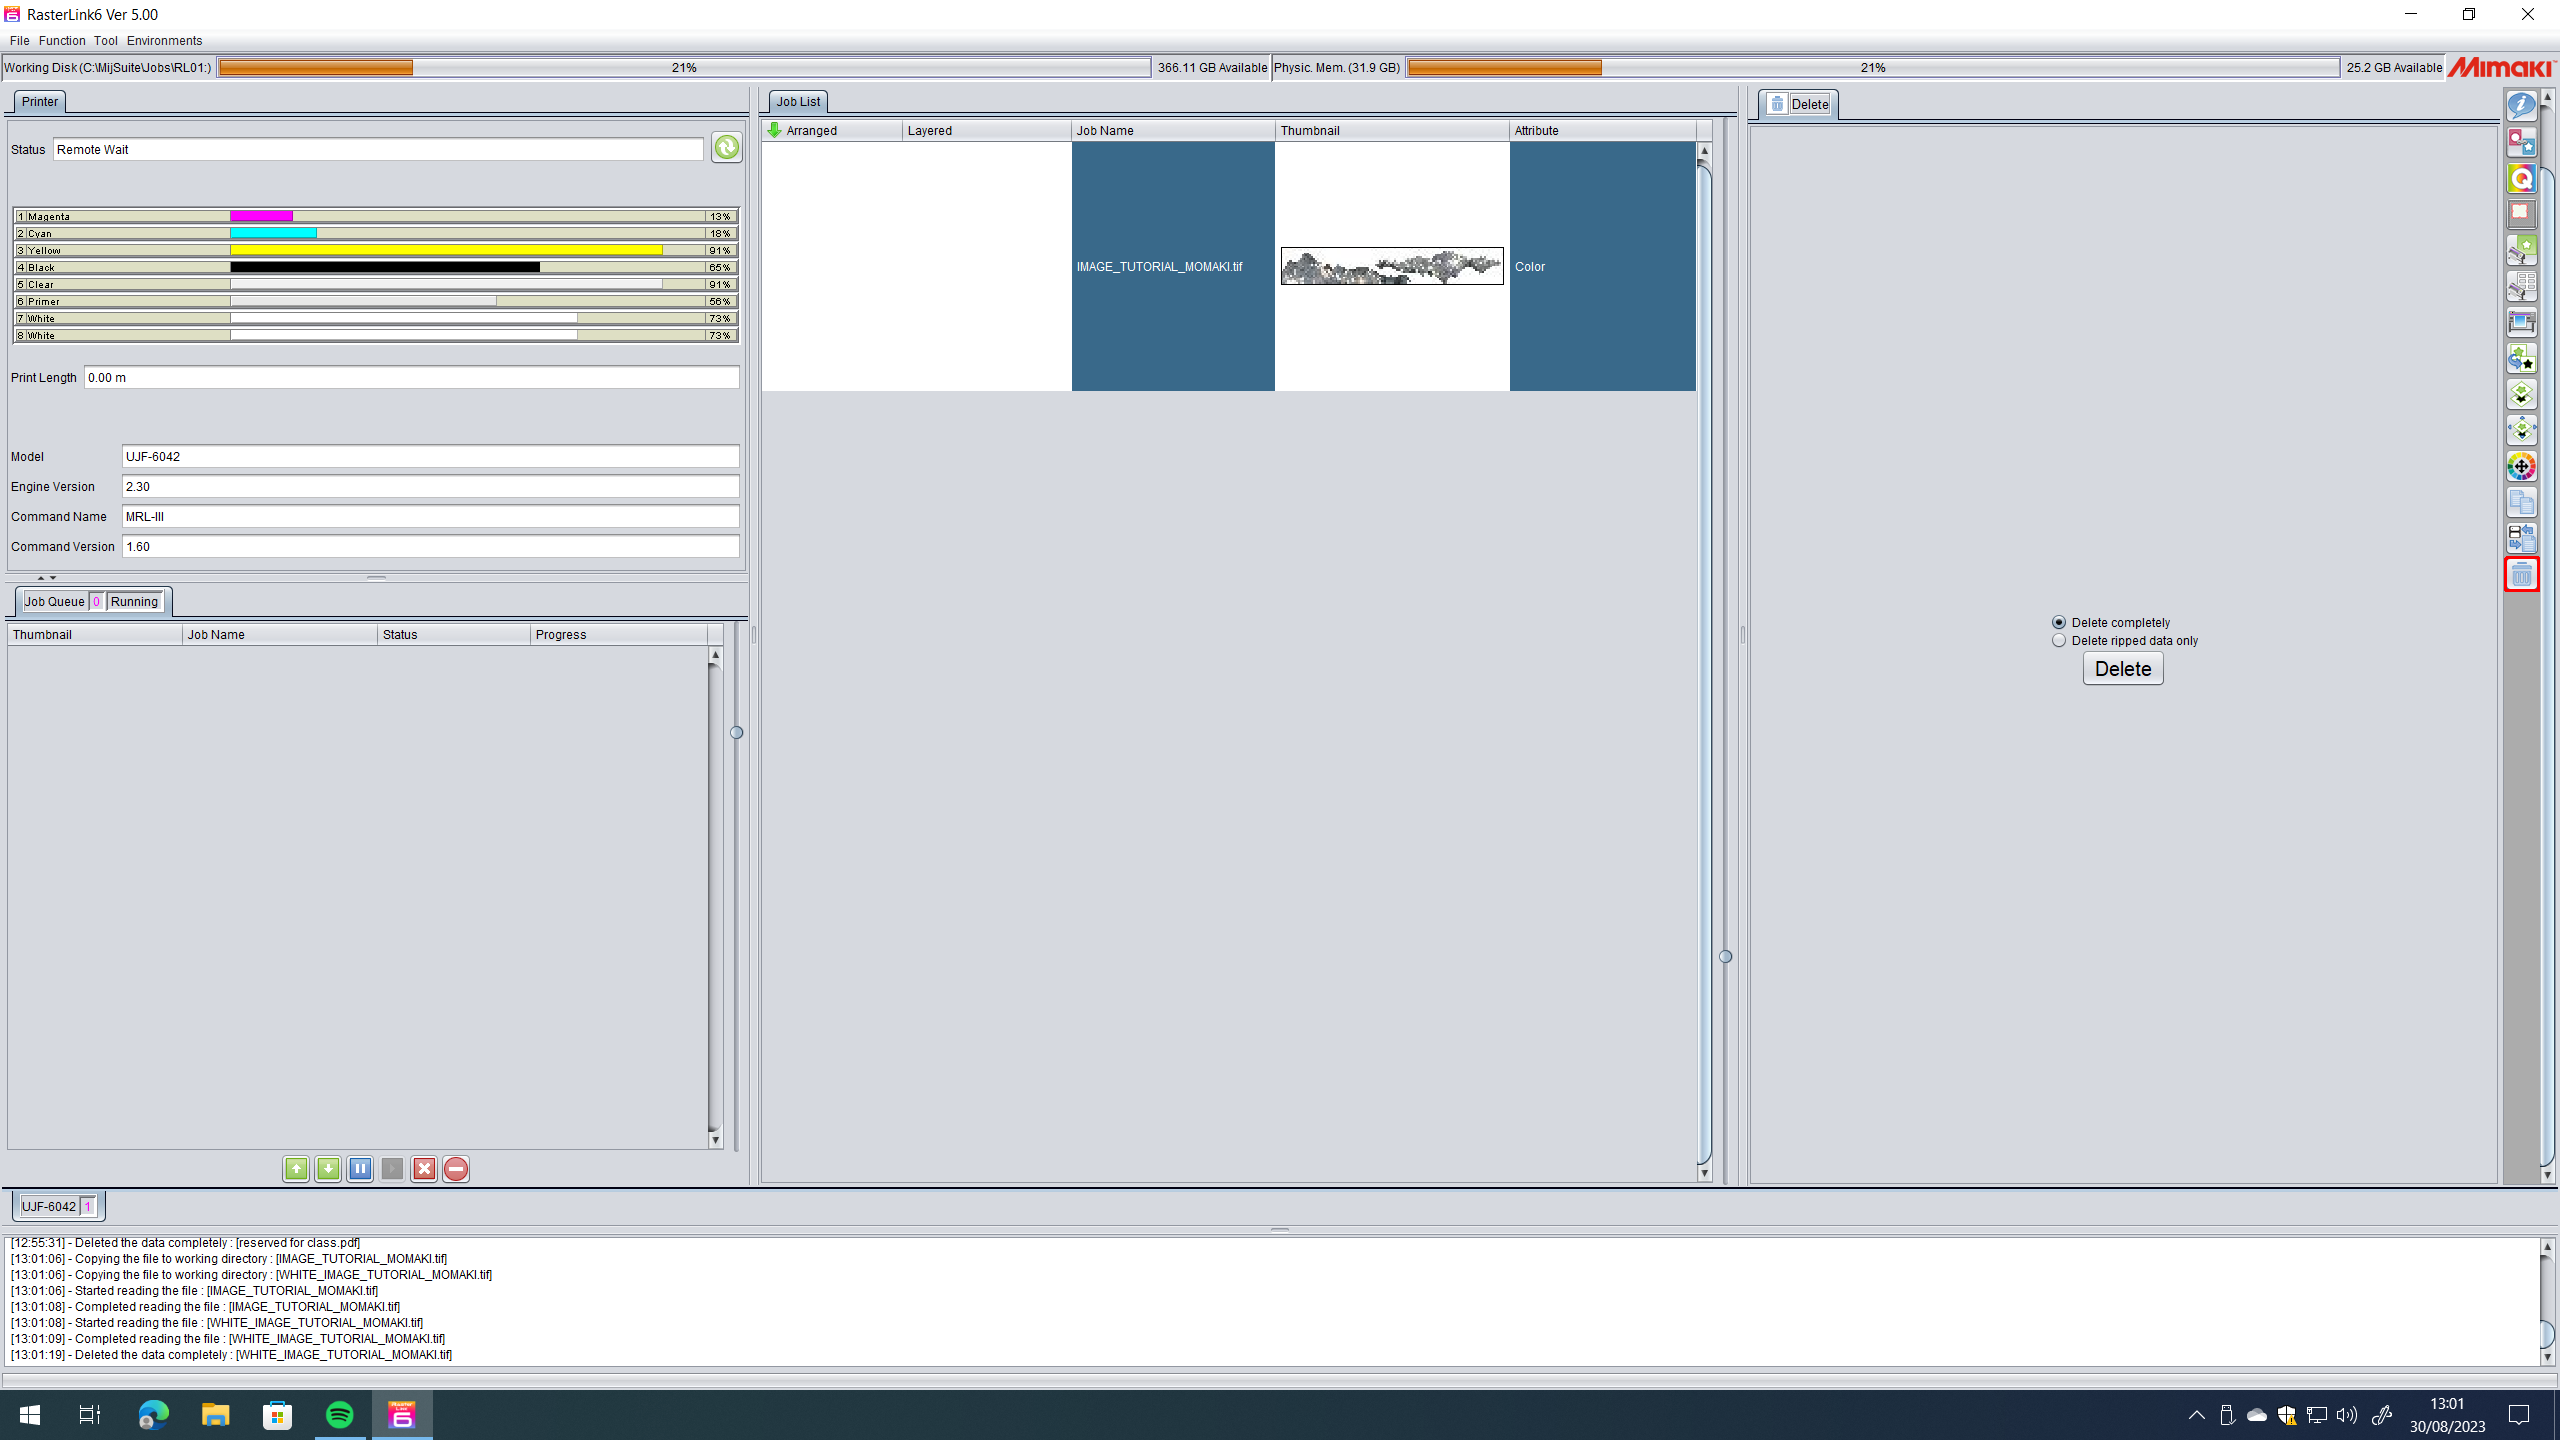
=== Select the file. === | |||
<br> | |||
[[File:Software 2.png]] | |||
<br> | |||
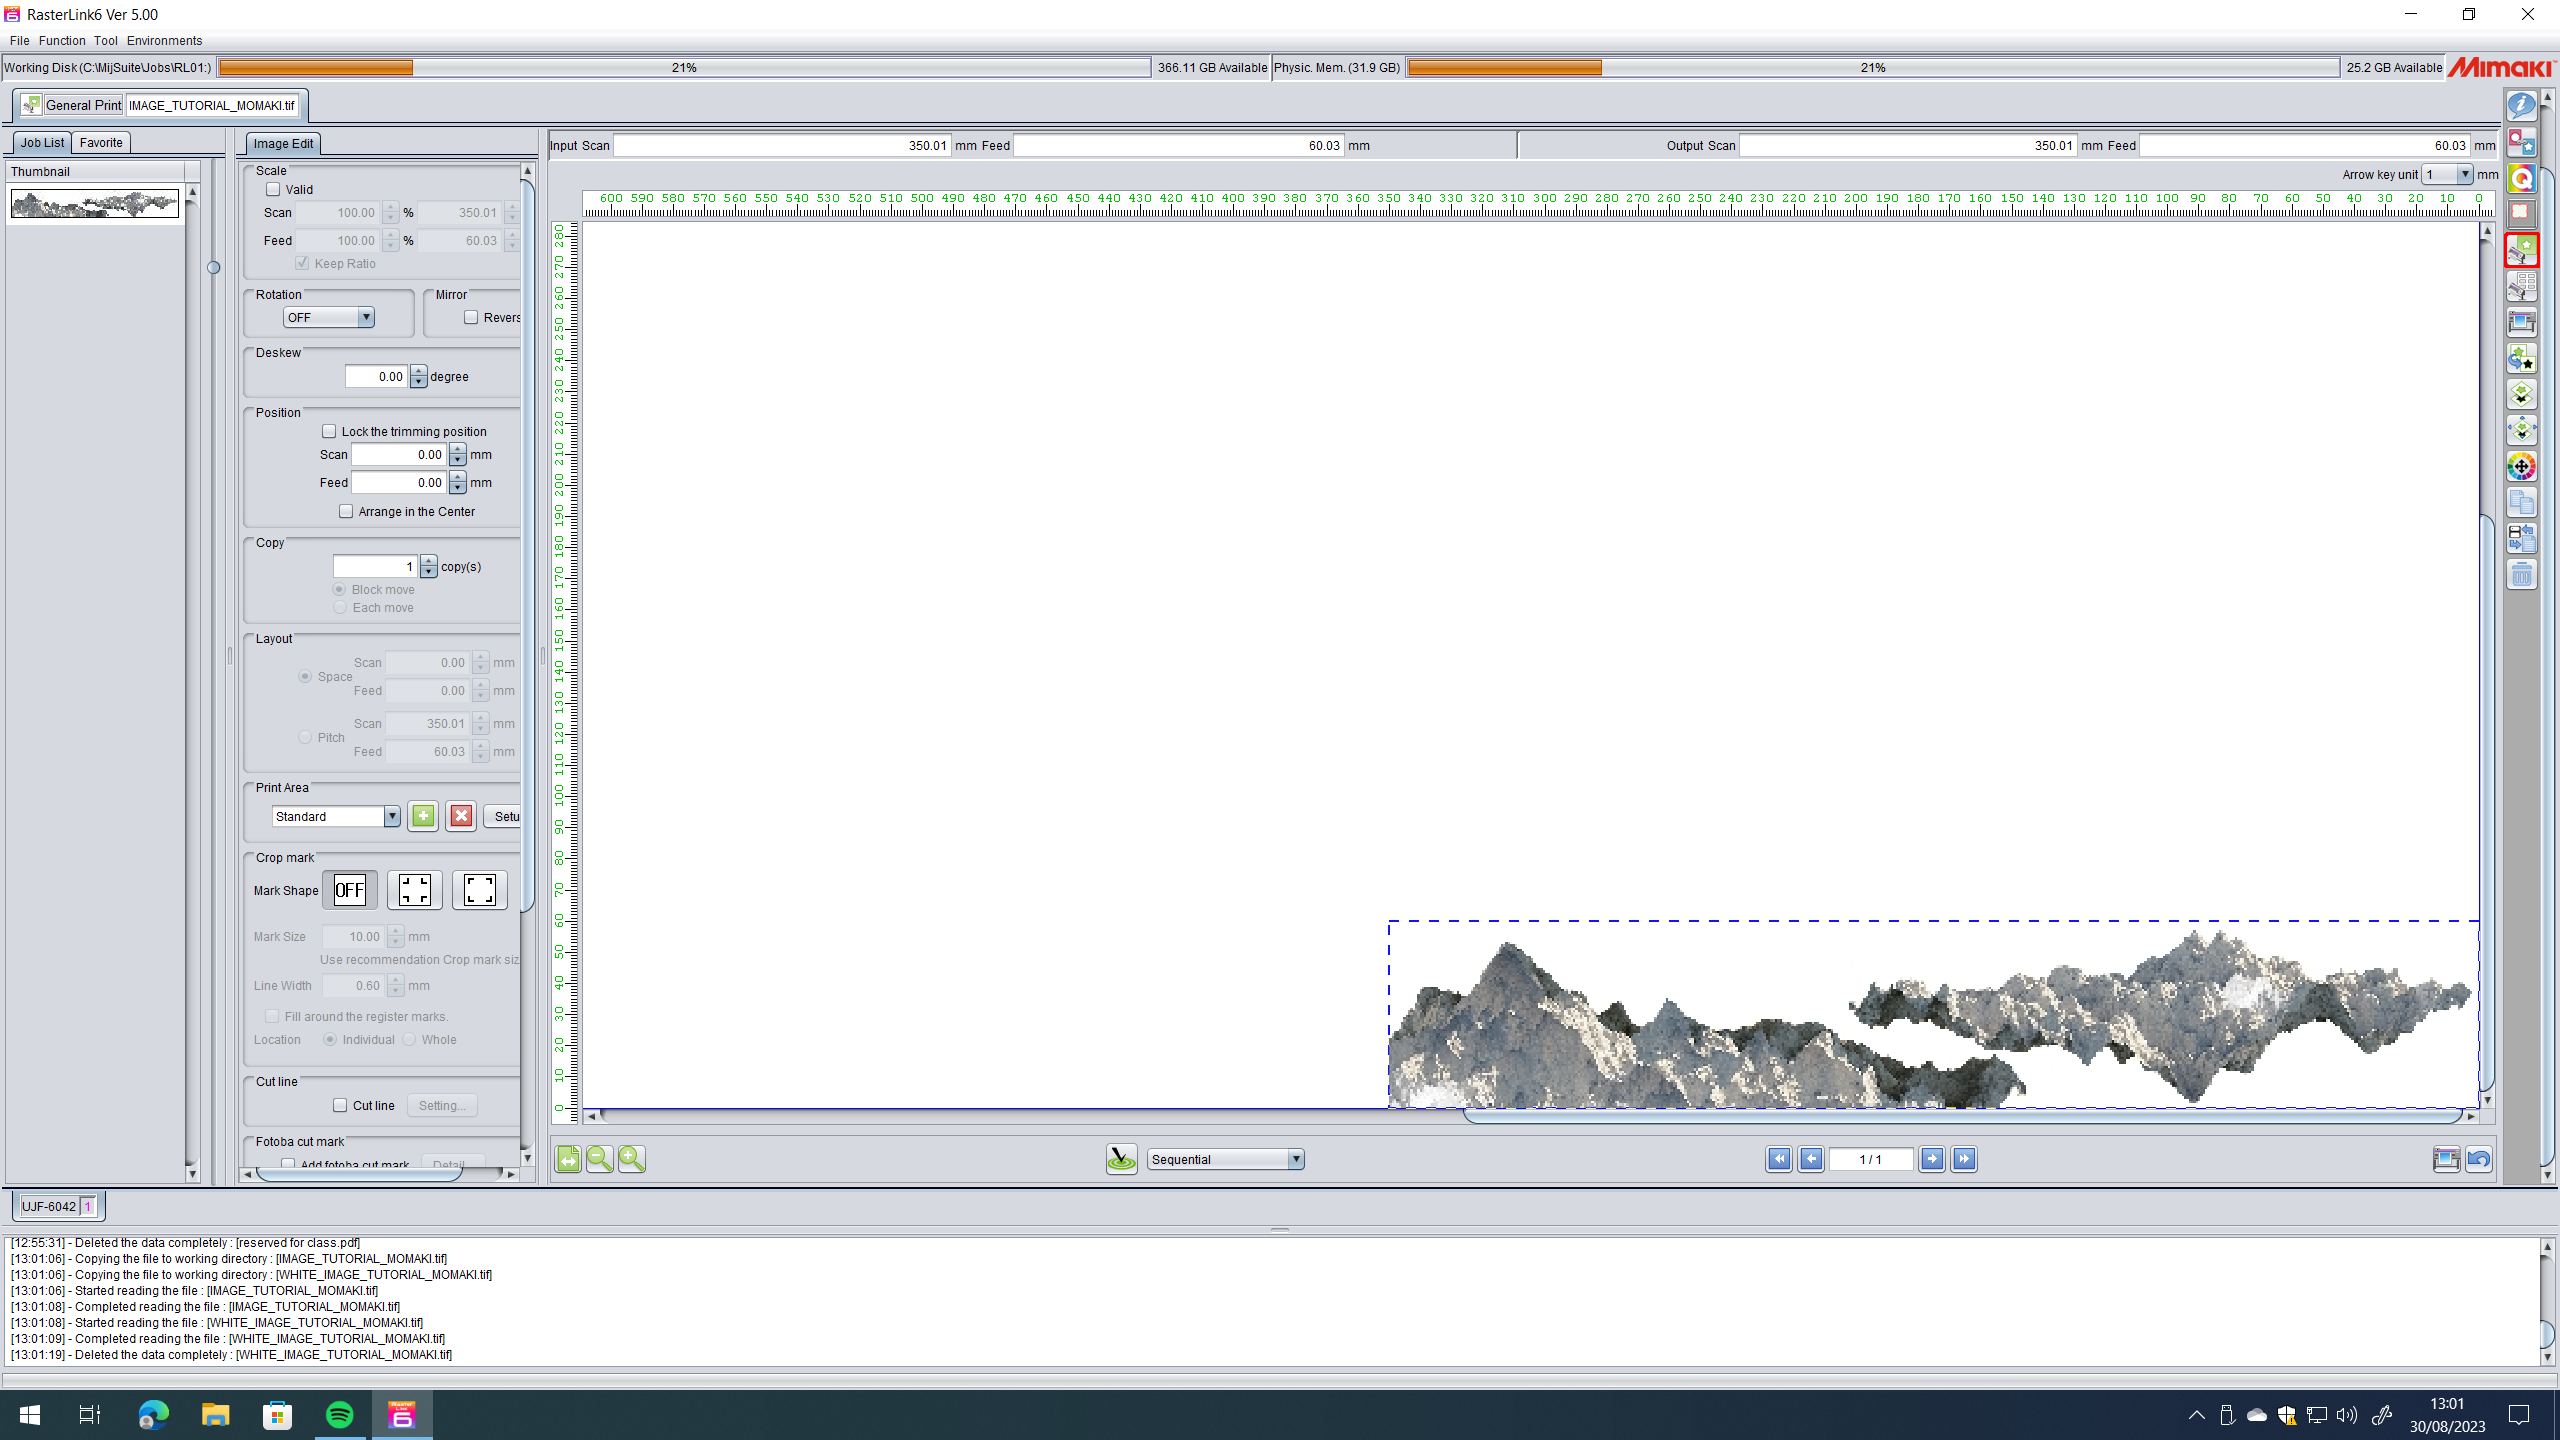
Click on the General print button (alt+g) here a representation of the flatbed will appear. You can place | |||
the image in the same spot you will place the material on the flatbed. Making sure the dimensions and | |||
position of the image in relation with the material on the flatbed is crucial. | |||
<br> | |||
[[File:Software 3.png]] | |||
<br> | |||
[[File:Software 4.png]] | |||
<br> | |||
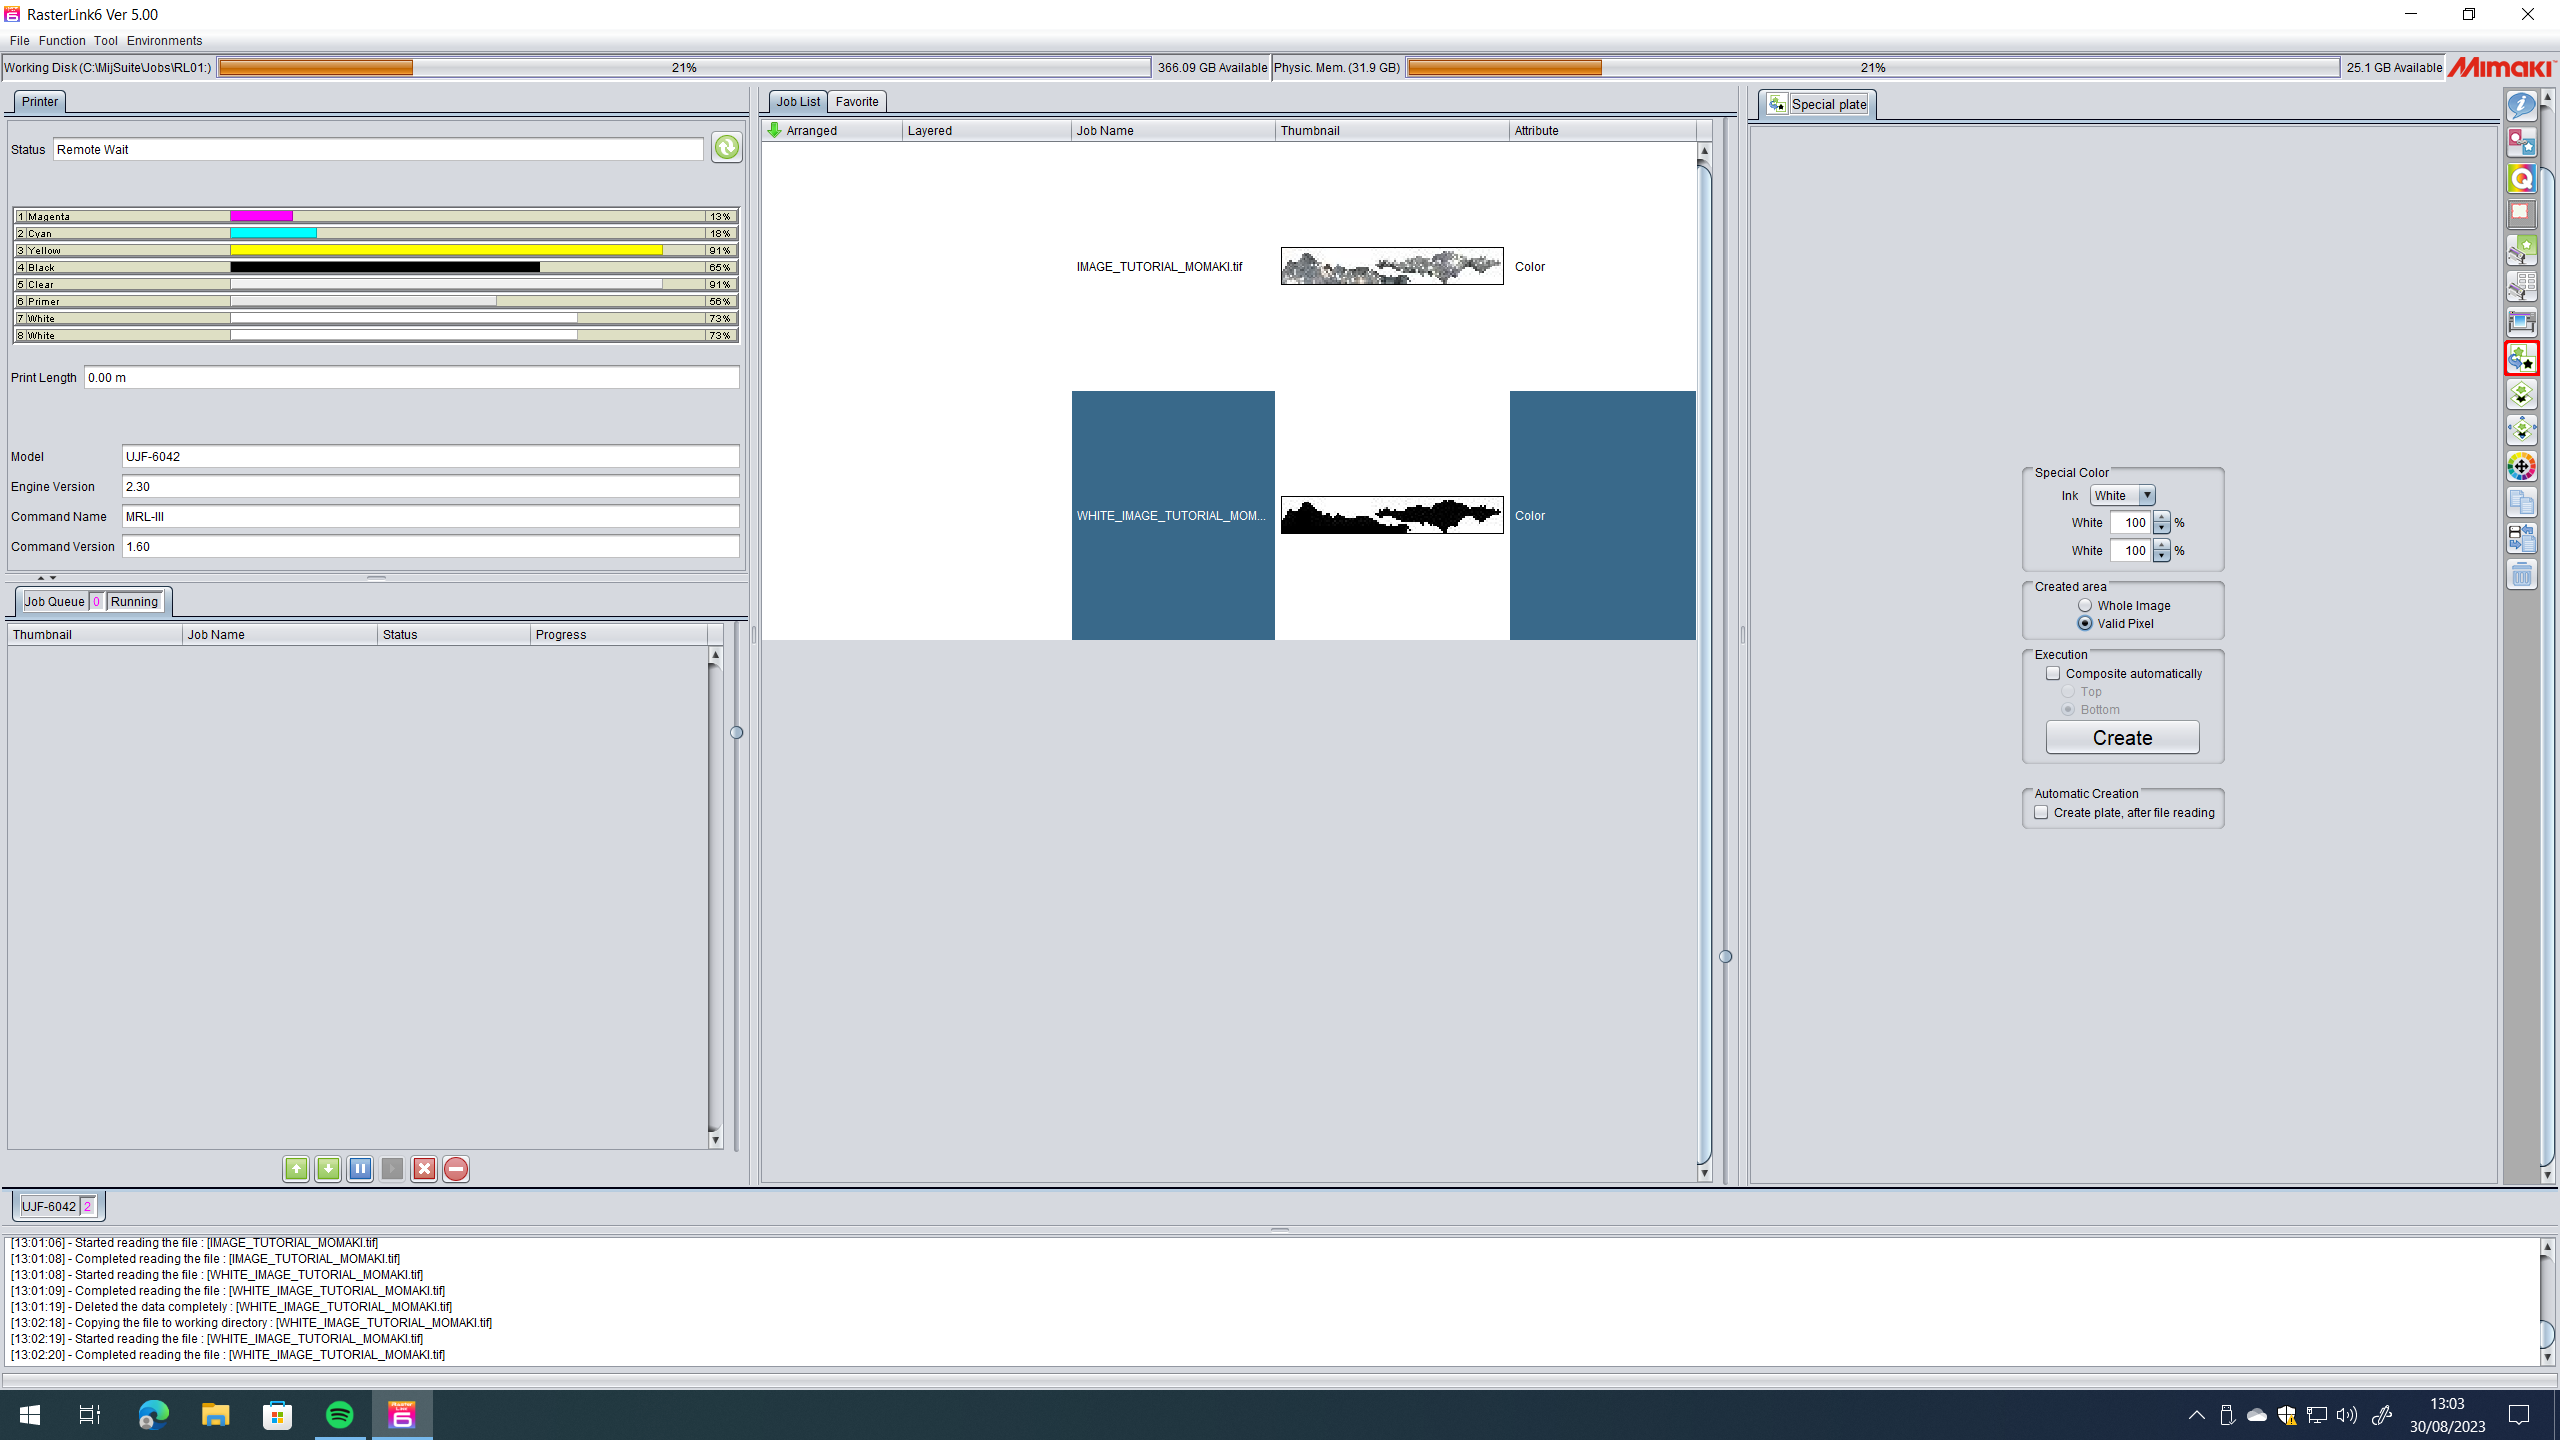
You can add special layers by pressing the Special Plate button (alt+p) here you can create layers of | |||
primer, white color, gloss finish, on the whole image or in the parts with valid pixels. This is only done | |||
when such finishes are required. | |||
If you did create a special plate, there will be other files created next to your original one, to work | |||
with them together, select them and click the Composition button (alt+m) organize them and | |||
click on merge. Usually primer layers or white should be on the bottom, Gloss finish on top. | |||
<br> | |||
[[File:Software 5.png]] | |||
<br> | |||
[[File:Software 6.png]] | |||
<br> | |||
Click on the Execution button (alt+x) Make sure RIP and Print is selected and then click start. | |||
<br> | |||
[[File:Software 7.png]] | |||
<br> | |||
=== Placing your material on the flatbed === | |||
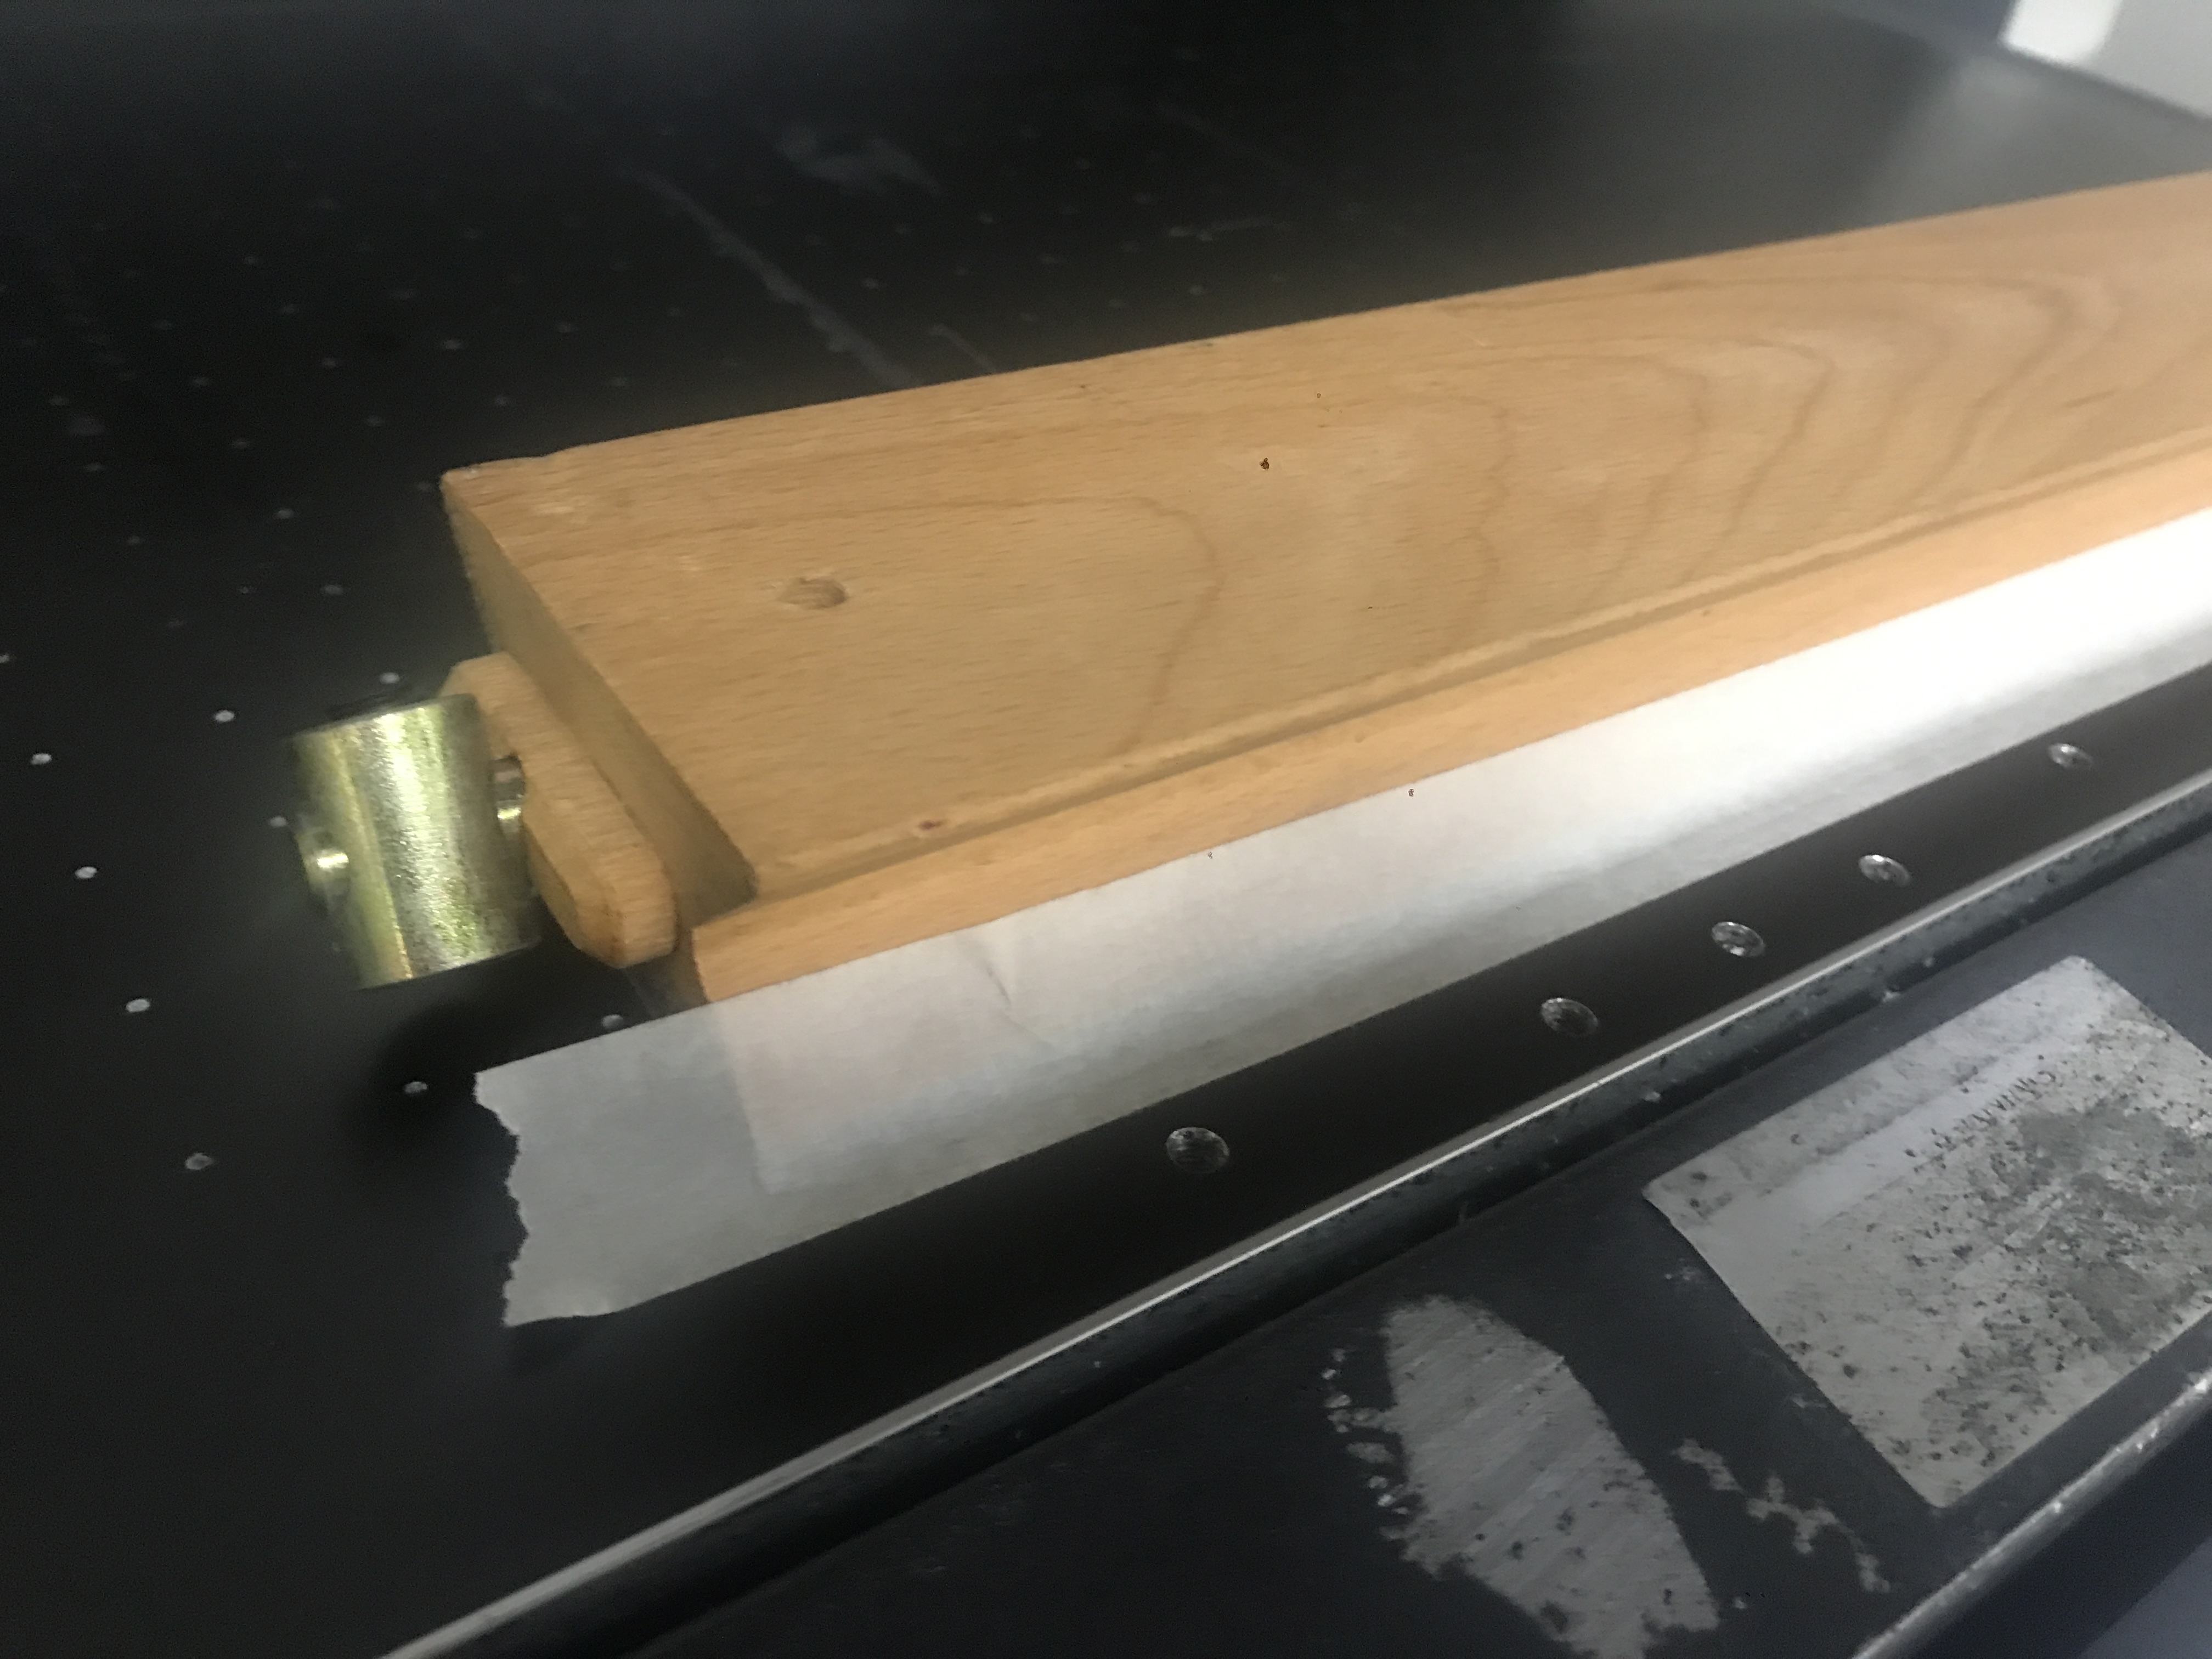
On the flatbed the material needs to be placed and secured properly, so it doesn’t move while printing. | |||
<br> | |||
[[File:Material on flatbed .jpg]] | |||
<br> | |||
[[File:Material on flatbed 2.jpg]] | |||
<br> | |||
[[File:Material on flatbed 3.jpg]] | |||
<br> | |||
=== Print === | |||
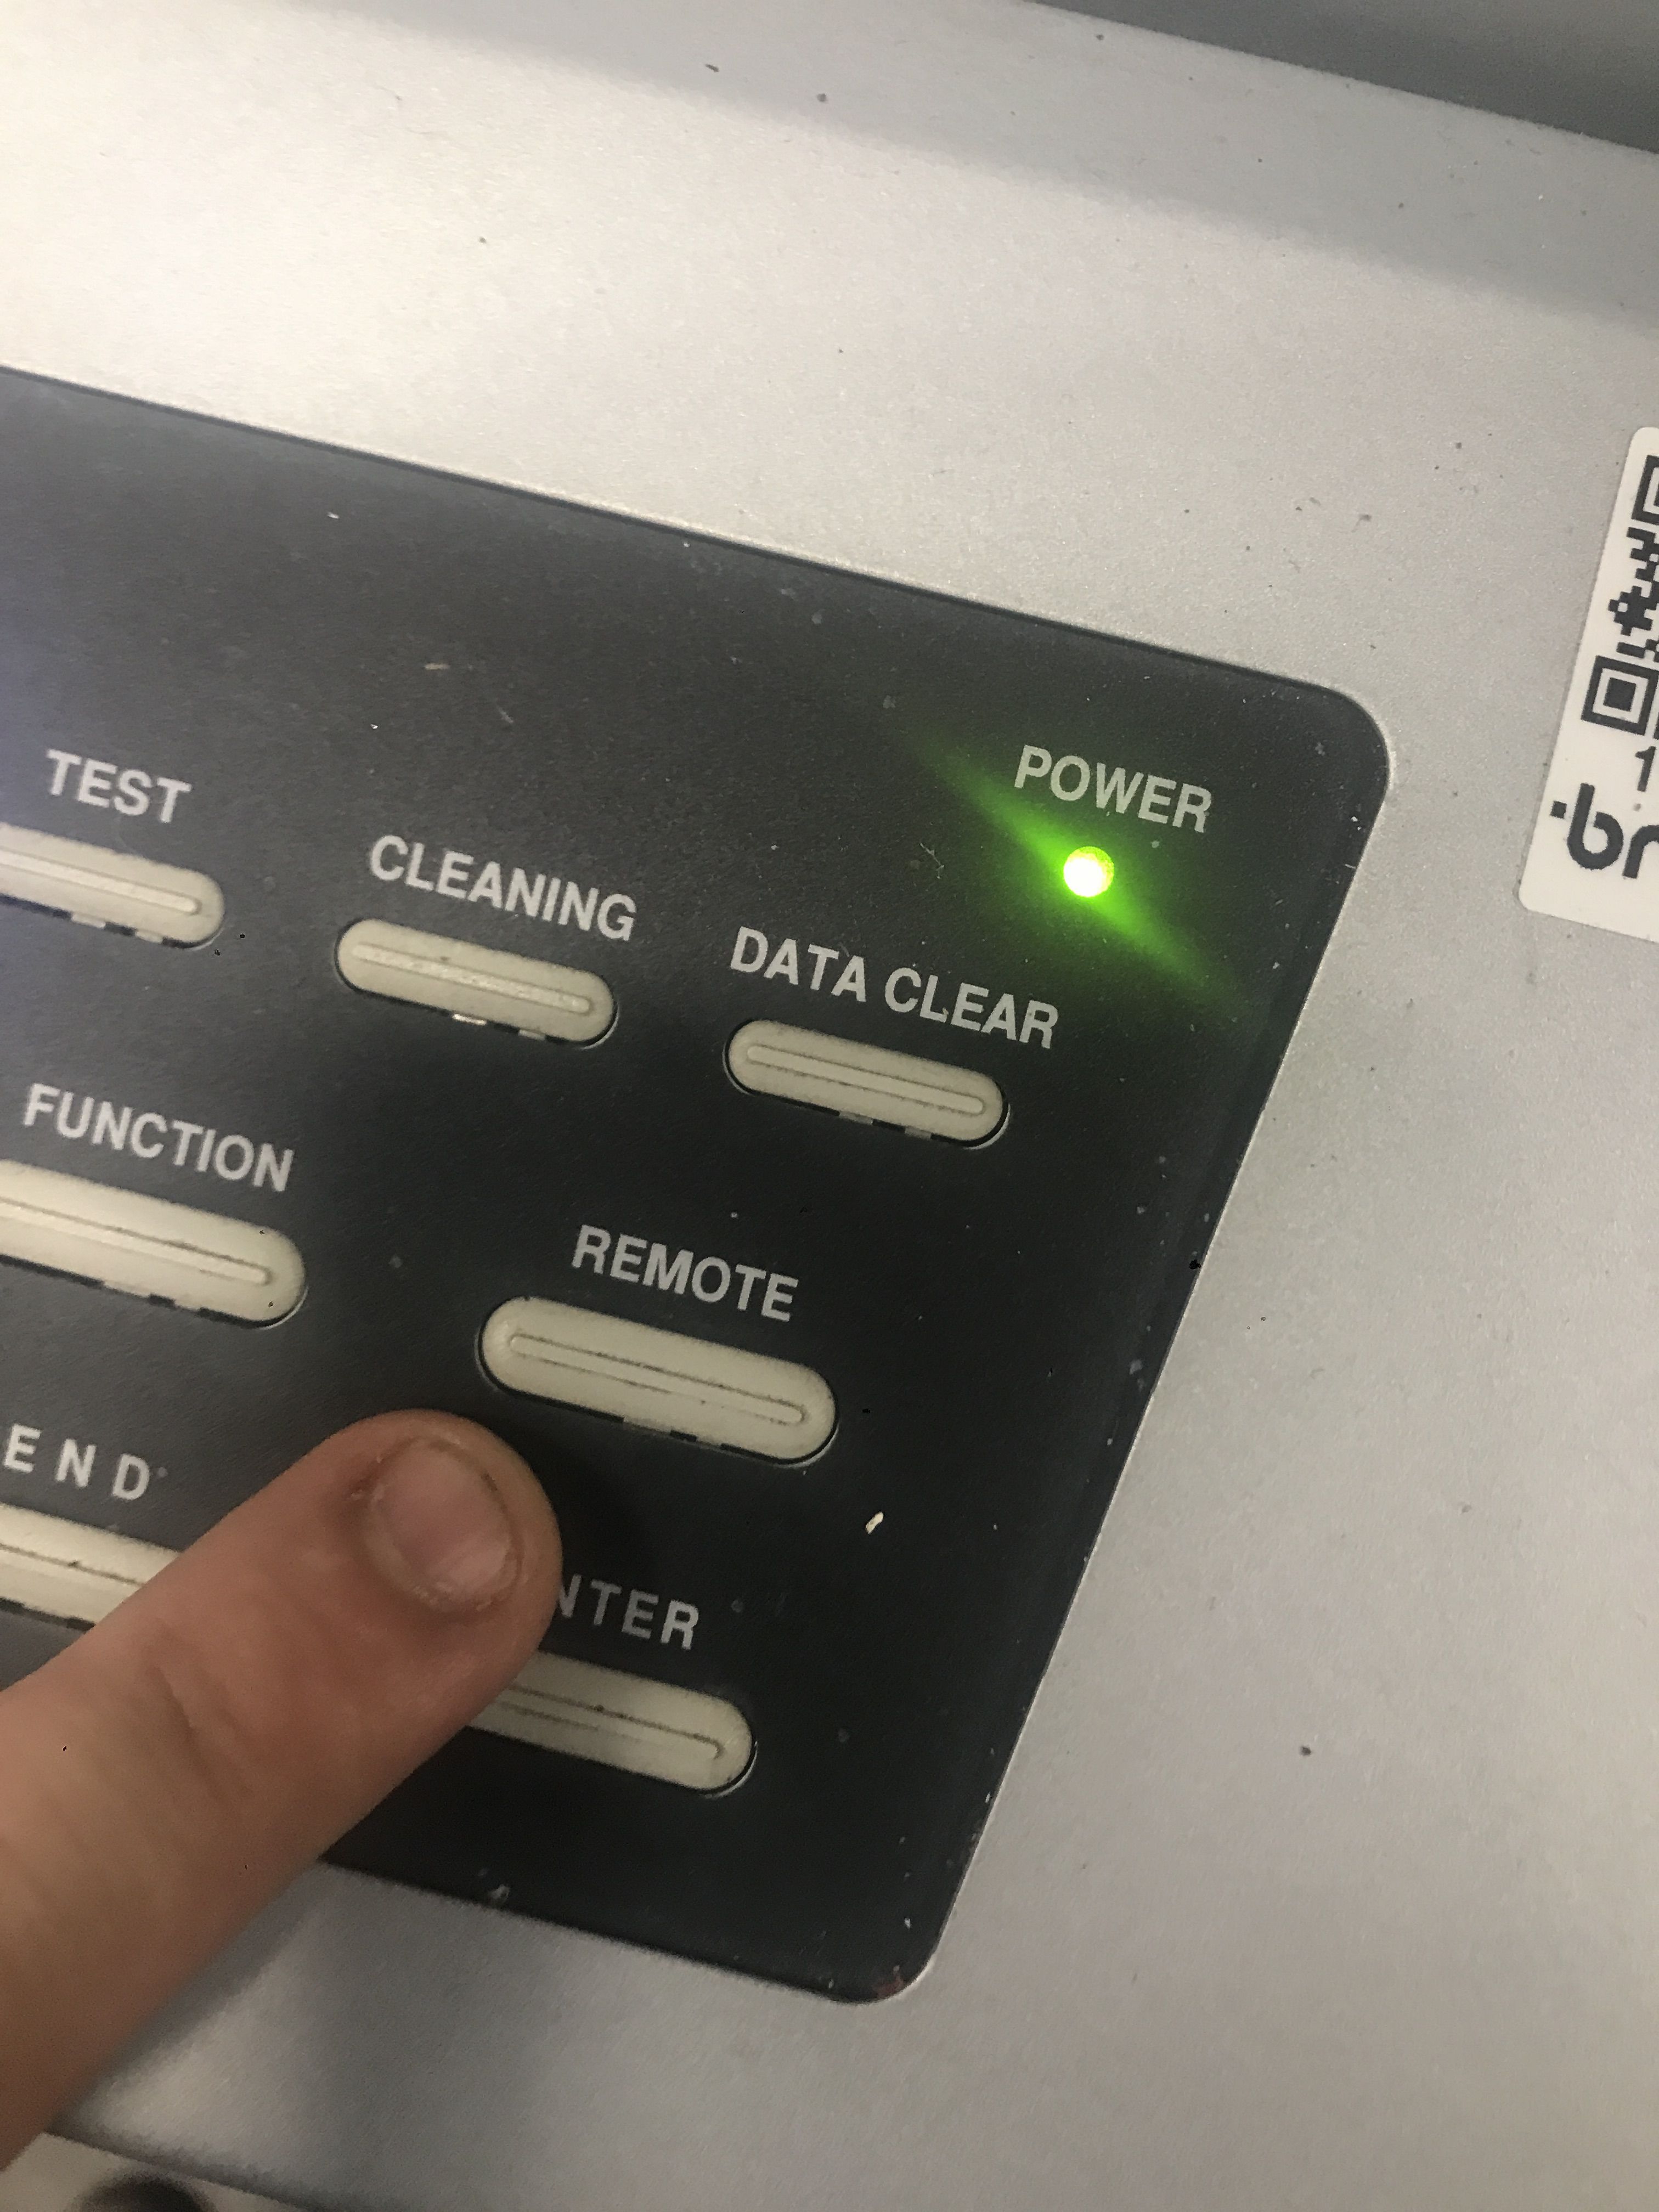
Click the REMOTE button and the printing should start. | |||
<br> | |||
[[File:Start.jpg]] | |||
<br> | |||
Latest revision as of 11:10, 8 September 2023
MIMAKI Printing Instructions
Anatomy of the Printer
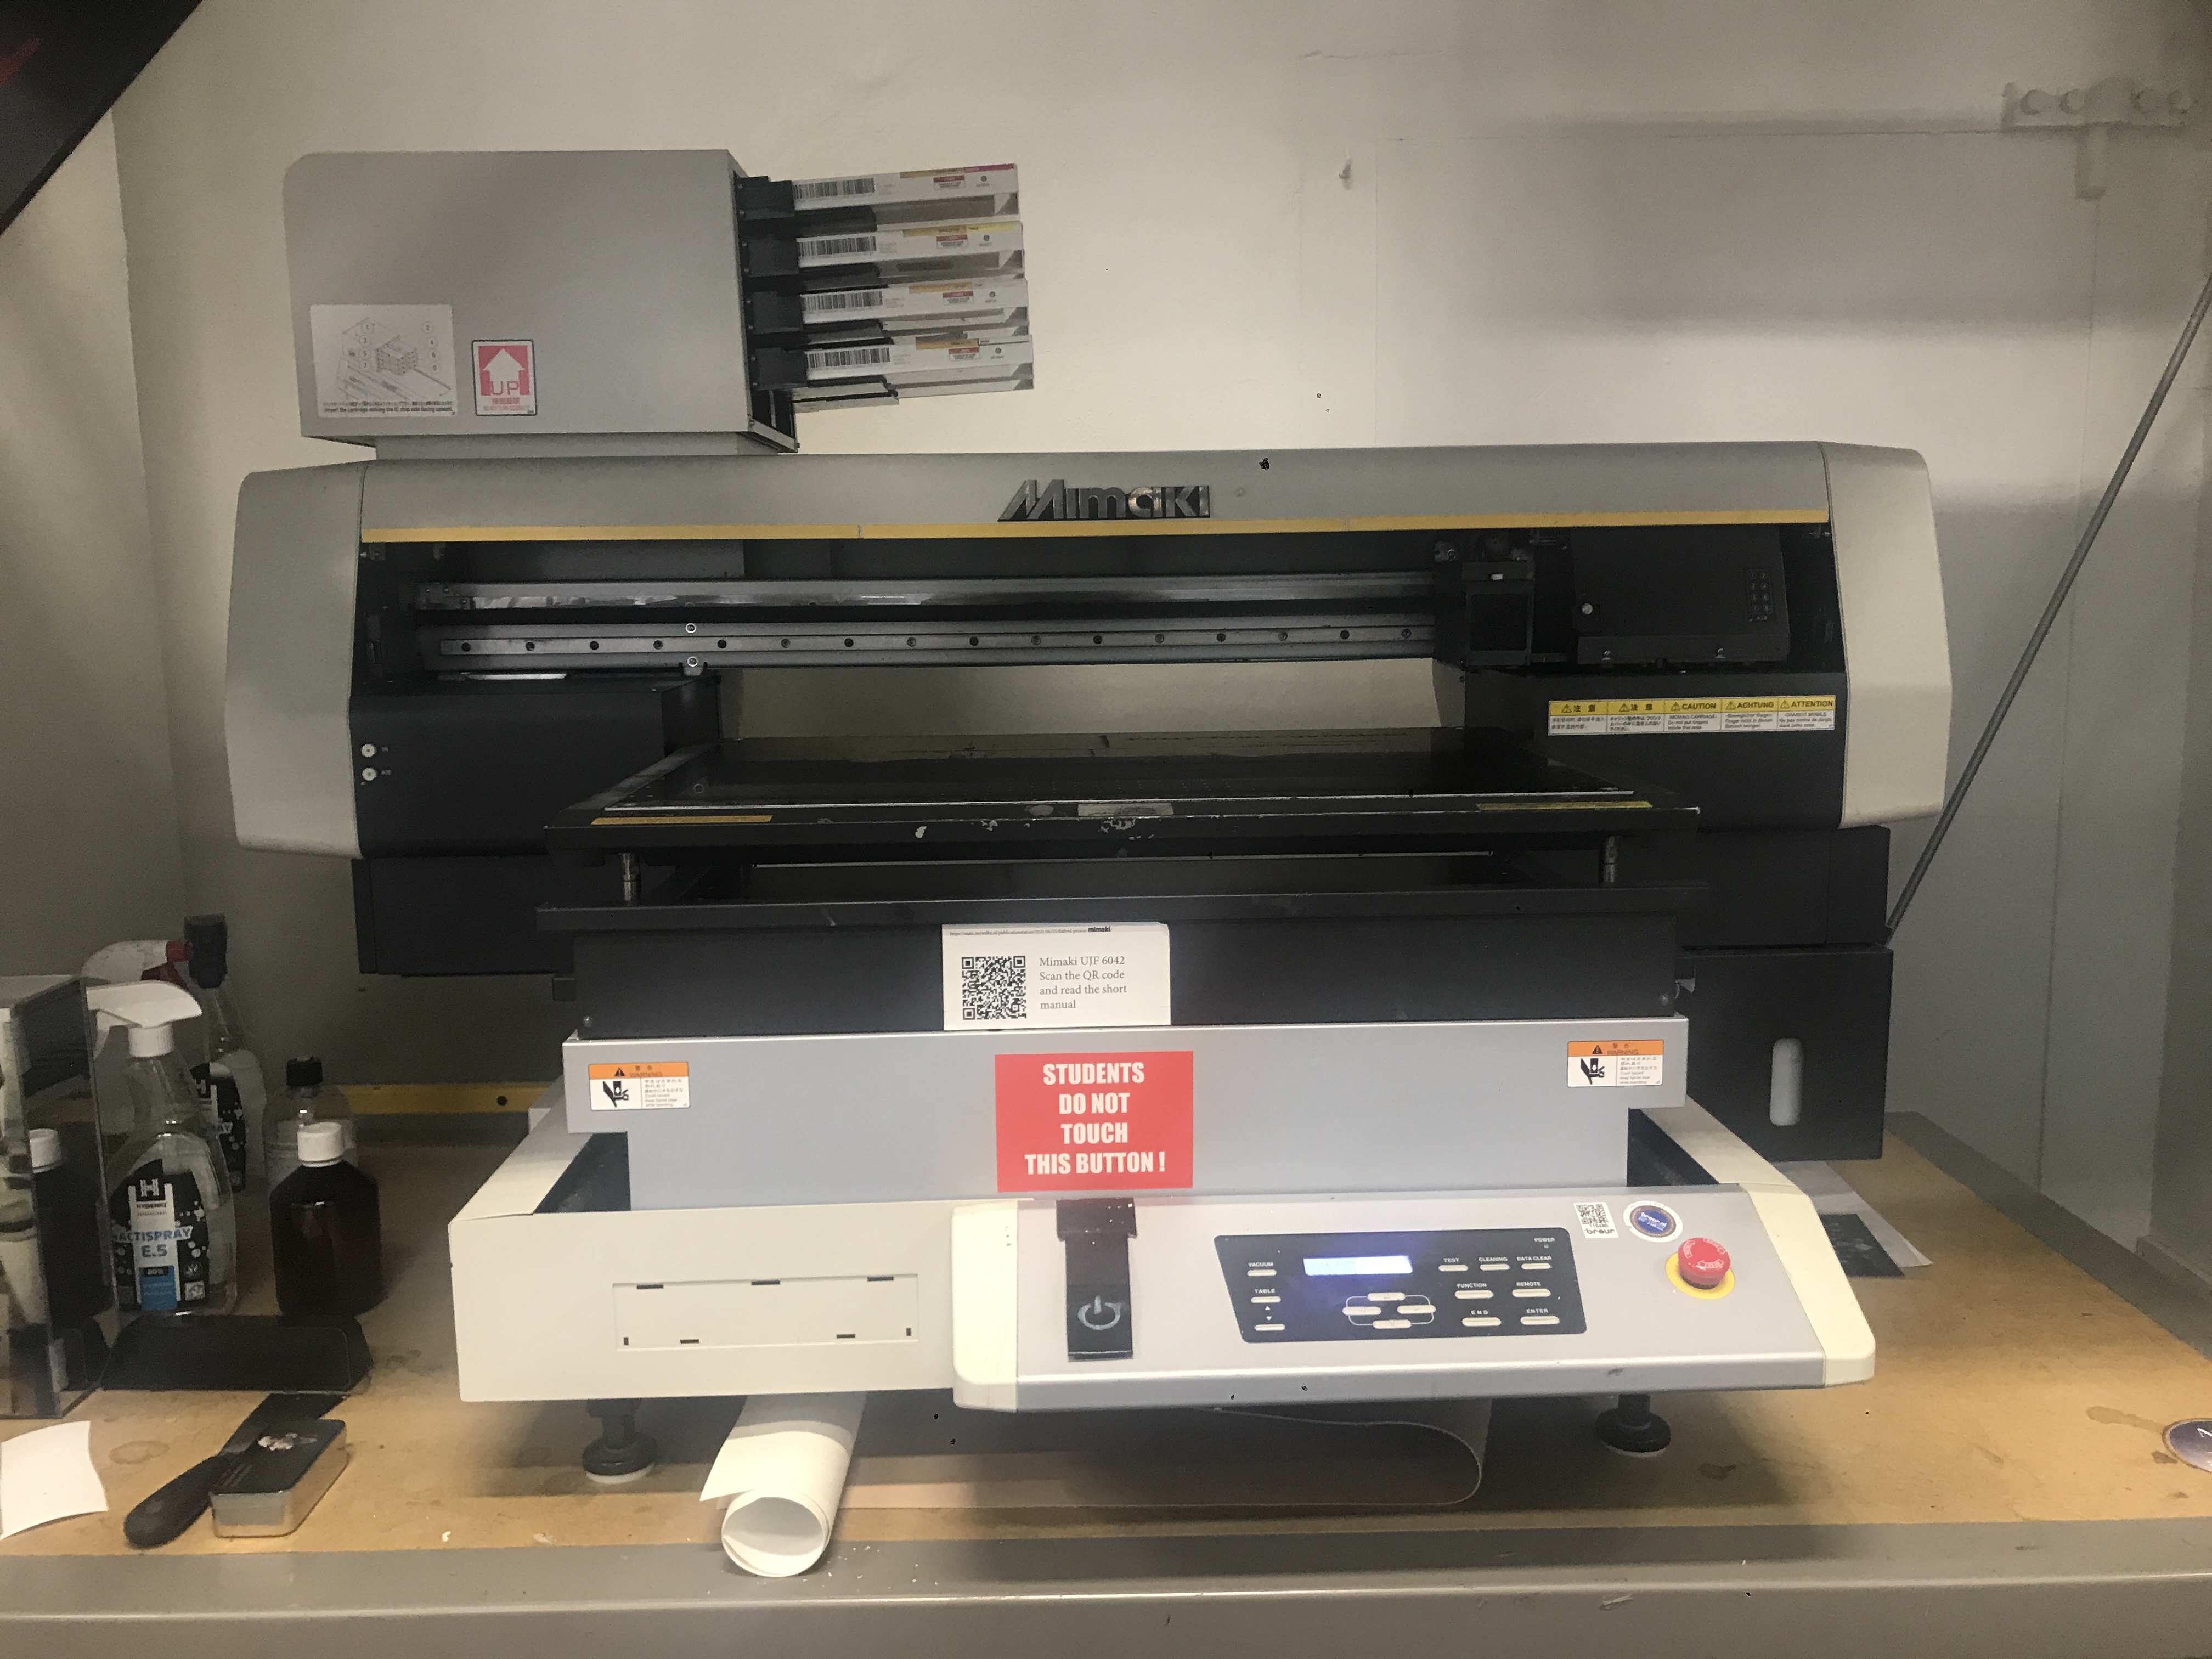
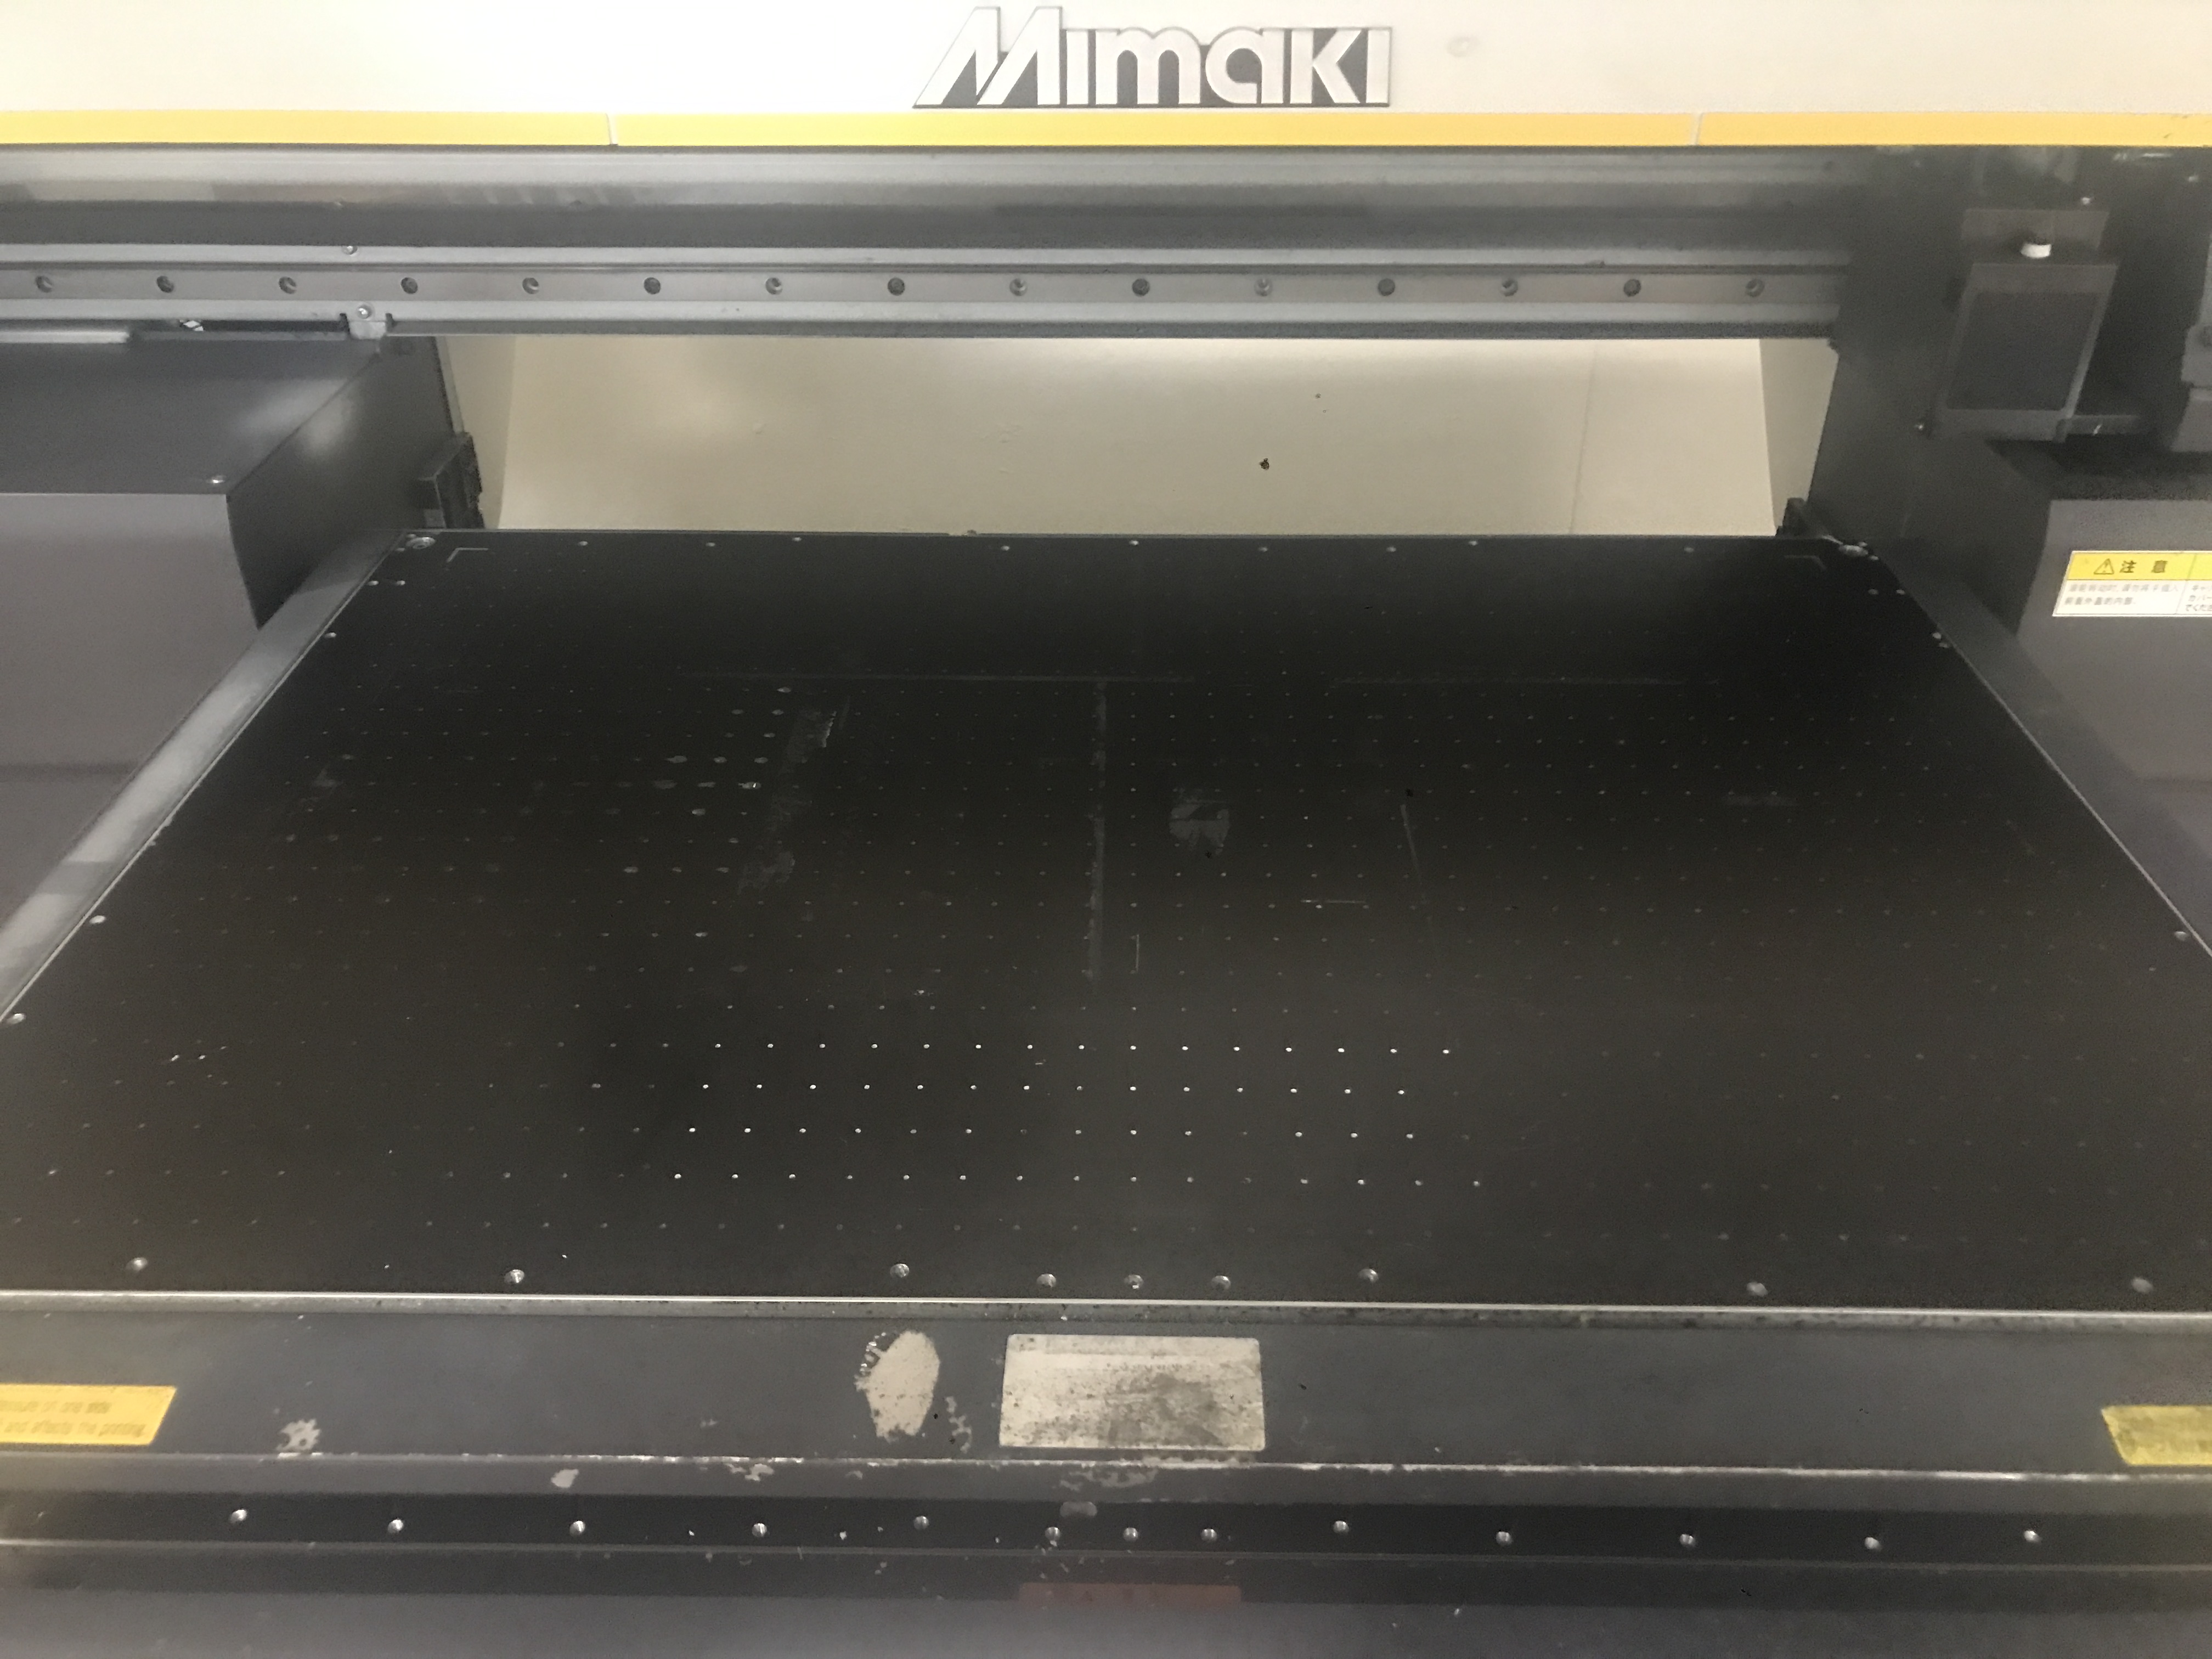
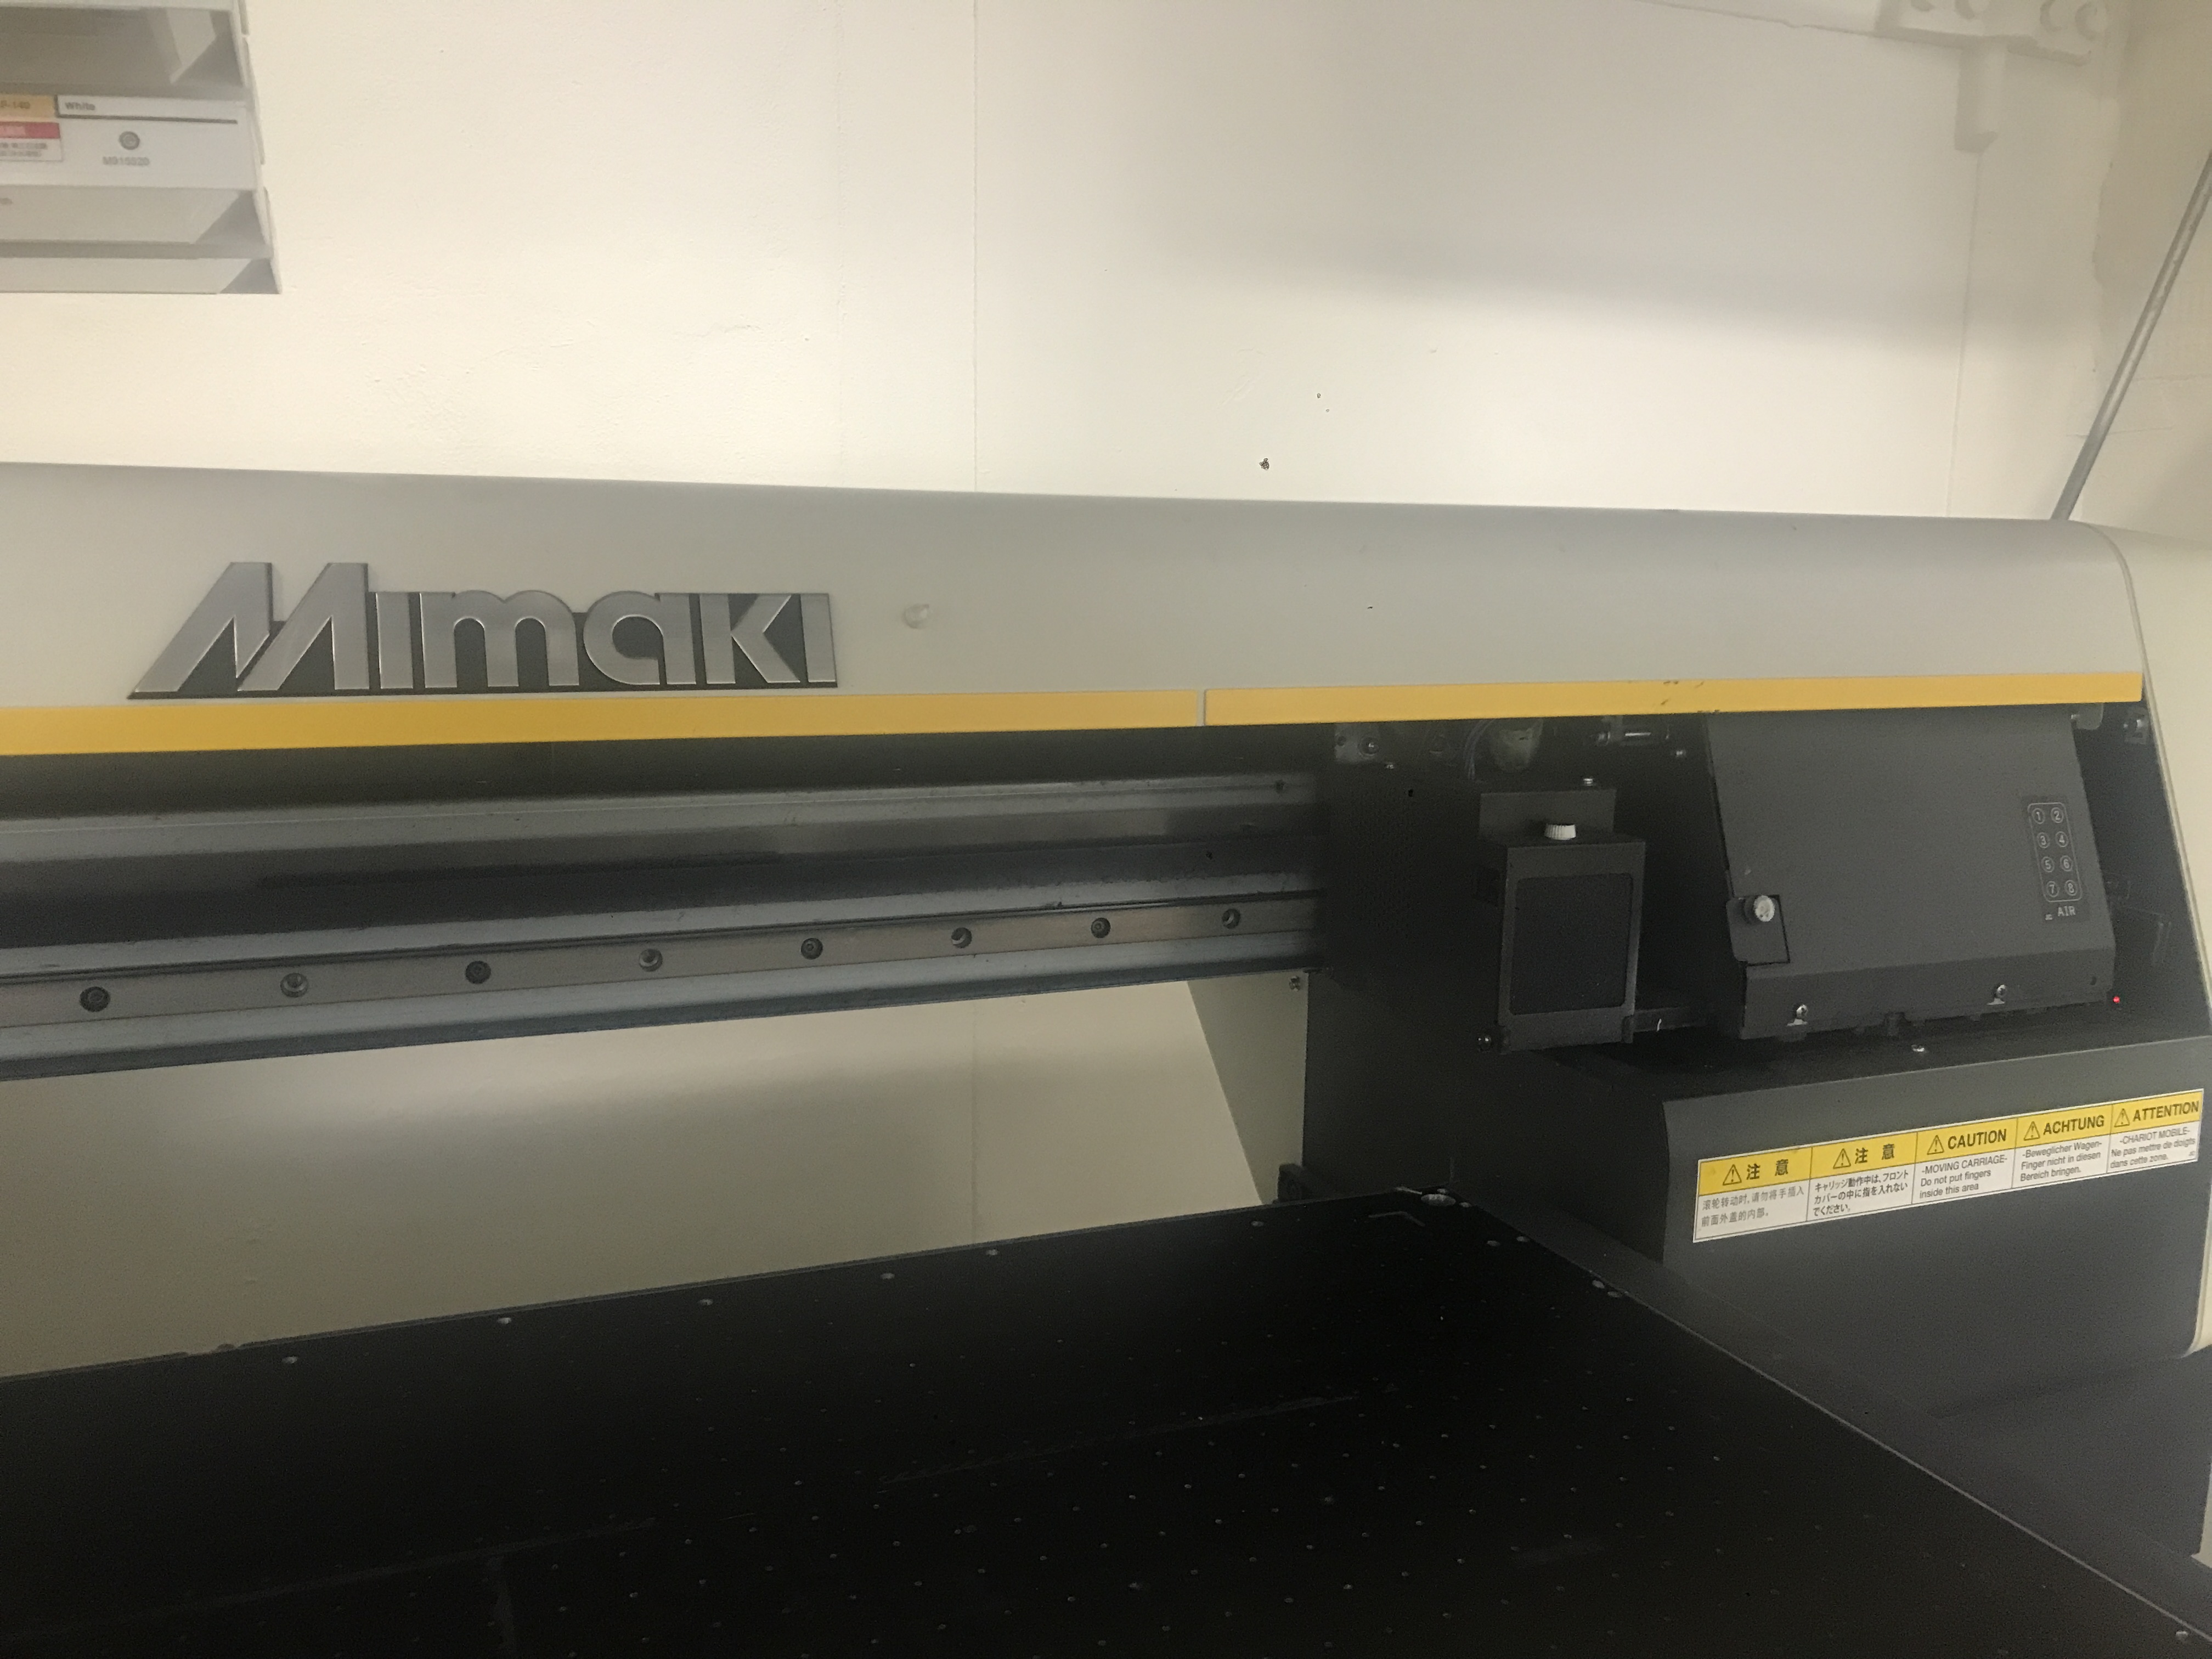
The printer has two main parts, the flatbed and the head. The flatbed is where you will place whatever you will print. It is 594x420 mm (A2) The head is where the nozzles that give out the ink are.
Material and dimensions
What material are you printing on? What are the dimensions of the object? —> Do not print on mirror-like materials, they will damage the printing head. Materials that absorb liquids are not ideal <—
Prepare and bring your files
Bring your file on a usb stick. You need to know what the dimensions of your image are at 300 dpi. Download it on the computer. Open the software.
The software
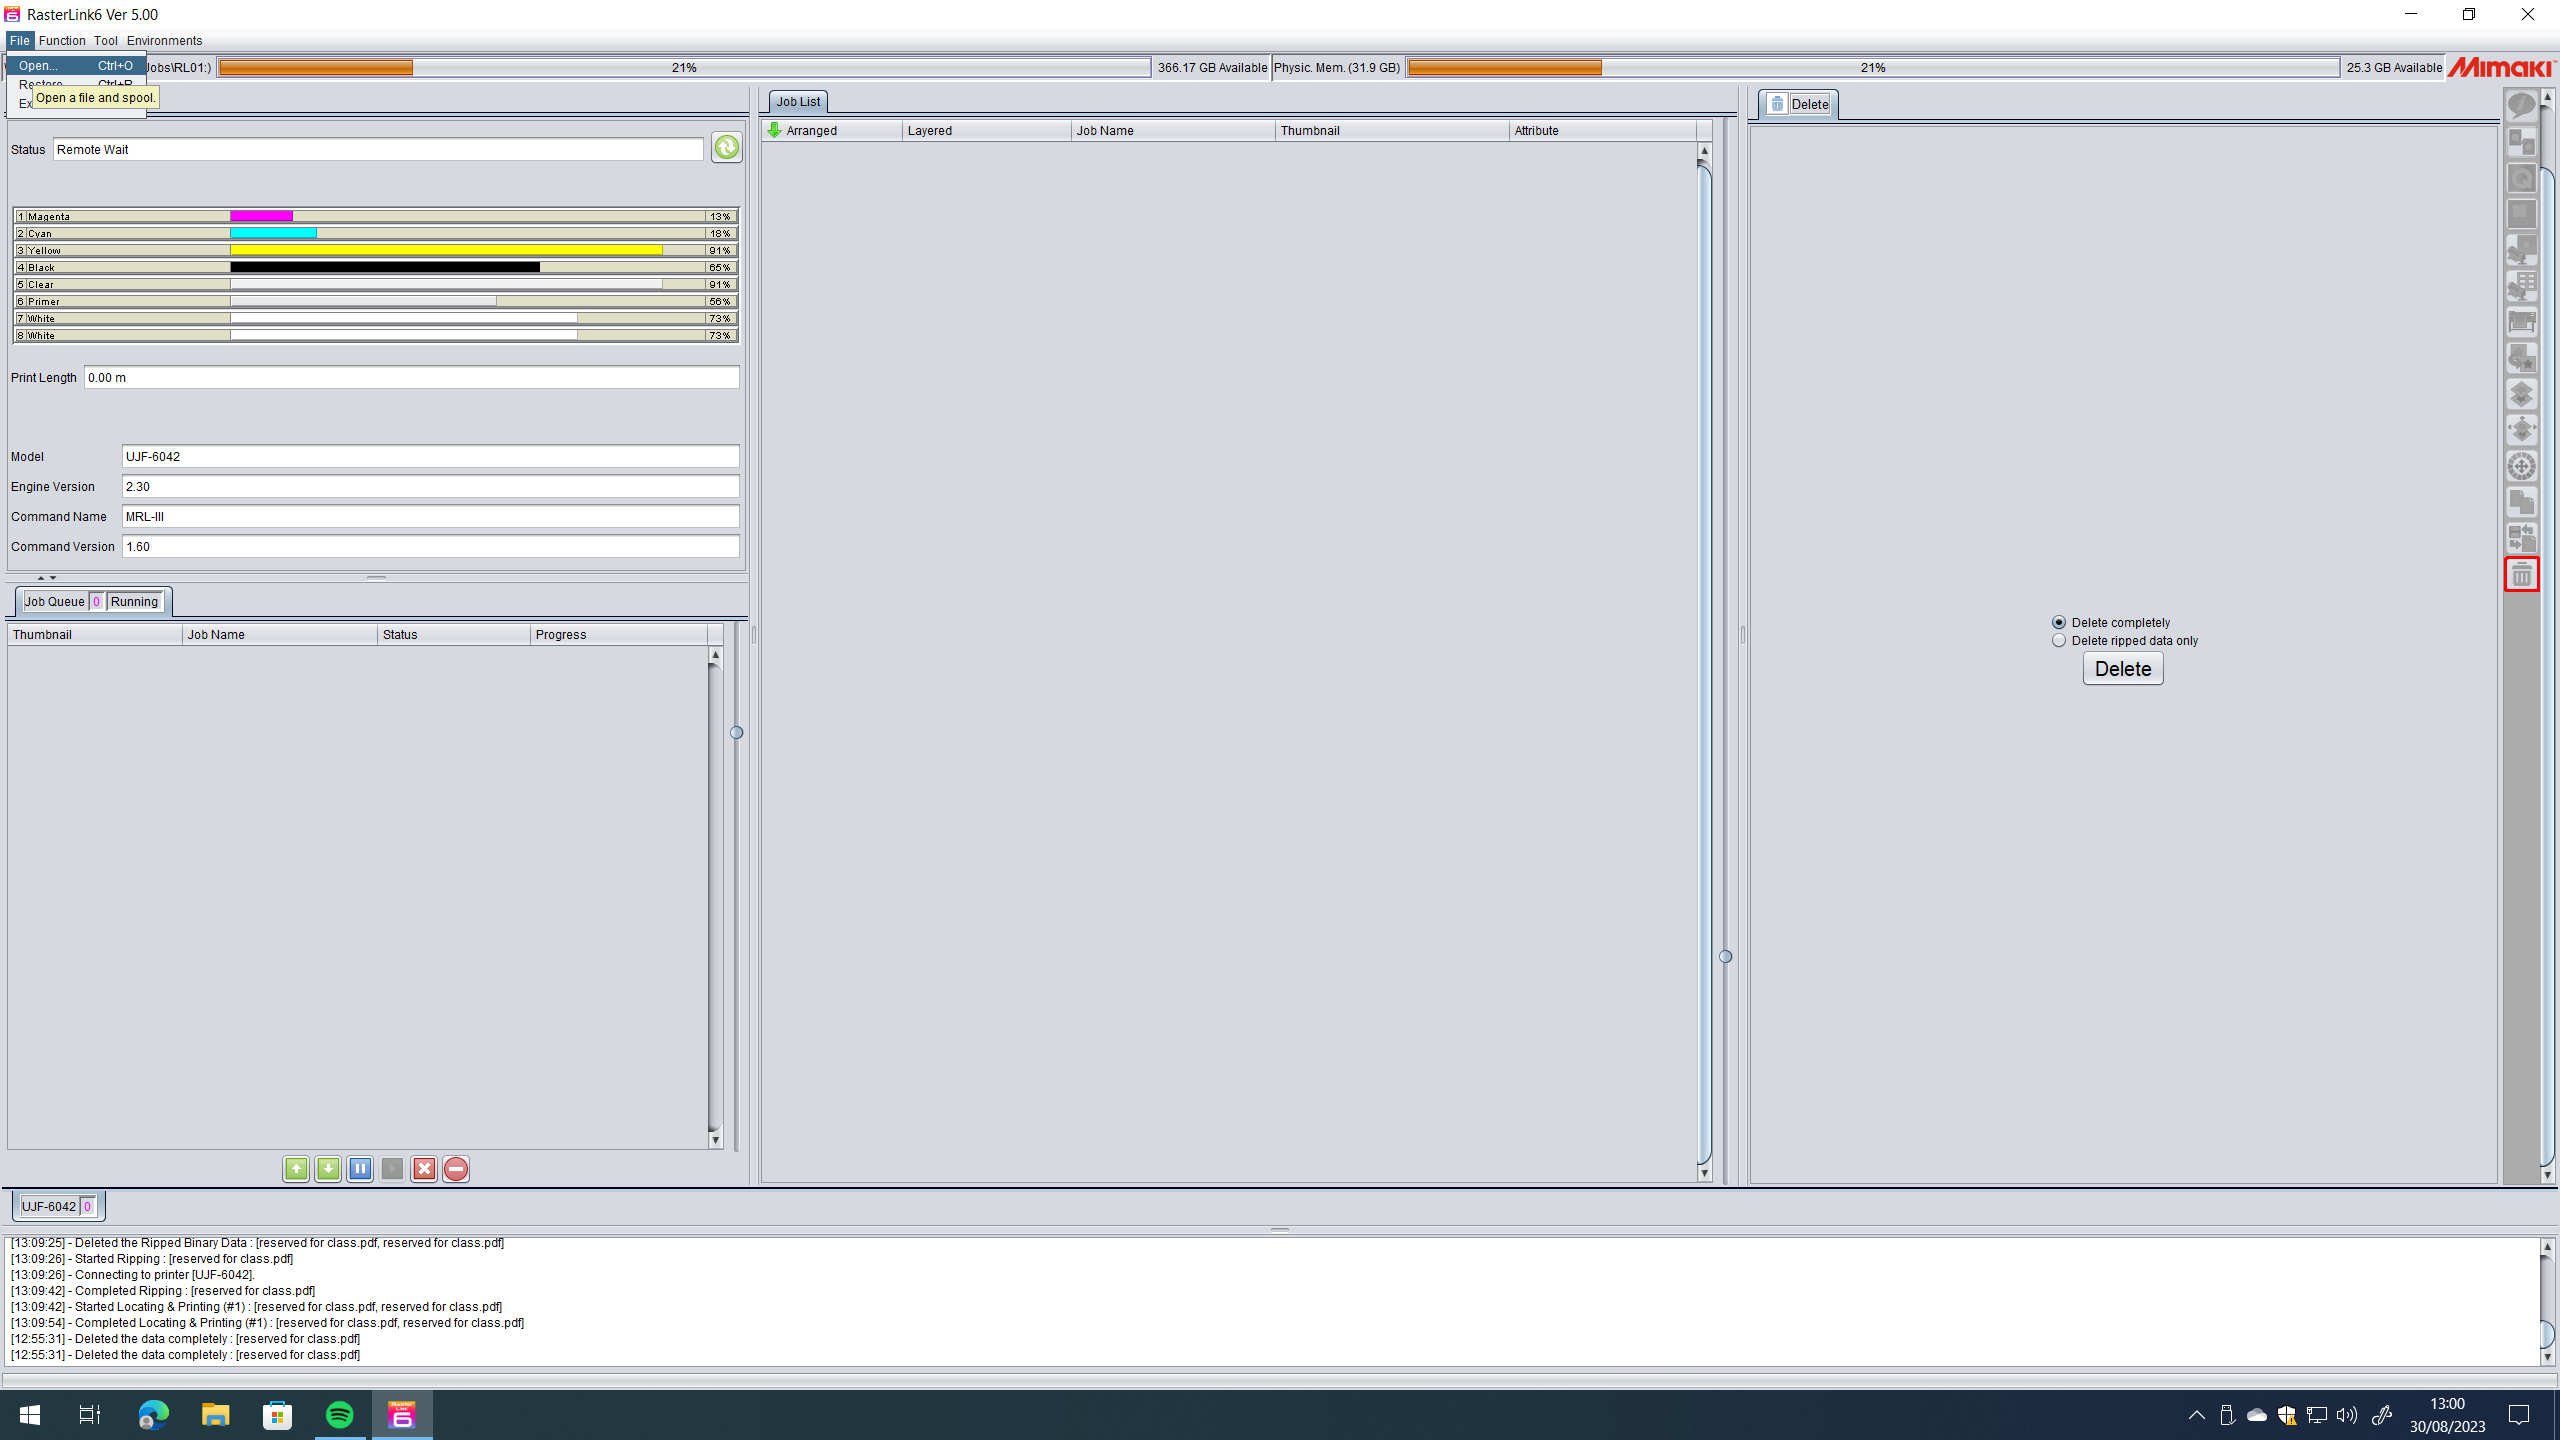
Once the program is open, click File – Open – Your File (dragging it to the software does not work)
Select the file.
Click on the General print button (alt+g) here a representation of the flatbed will appear. You can place the image in the same spot you will place the material on the flatbed. Making sure the dimensions and position of the image in relation with the material on the flatbed is crucial.
You can add special layers by pressing the Special Plate button (alt+p) here you can create layers of primer, white color, gloss finish, on the whole image or in the parts with valid pixels. This is only done when such finishes are required.
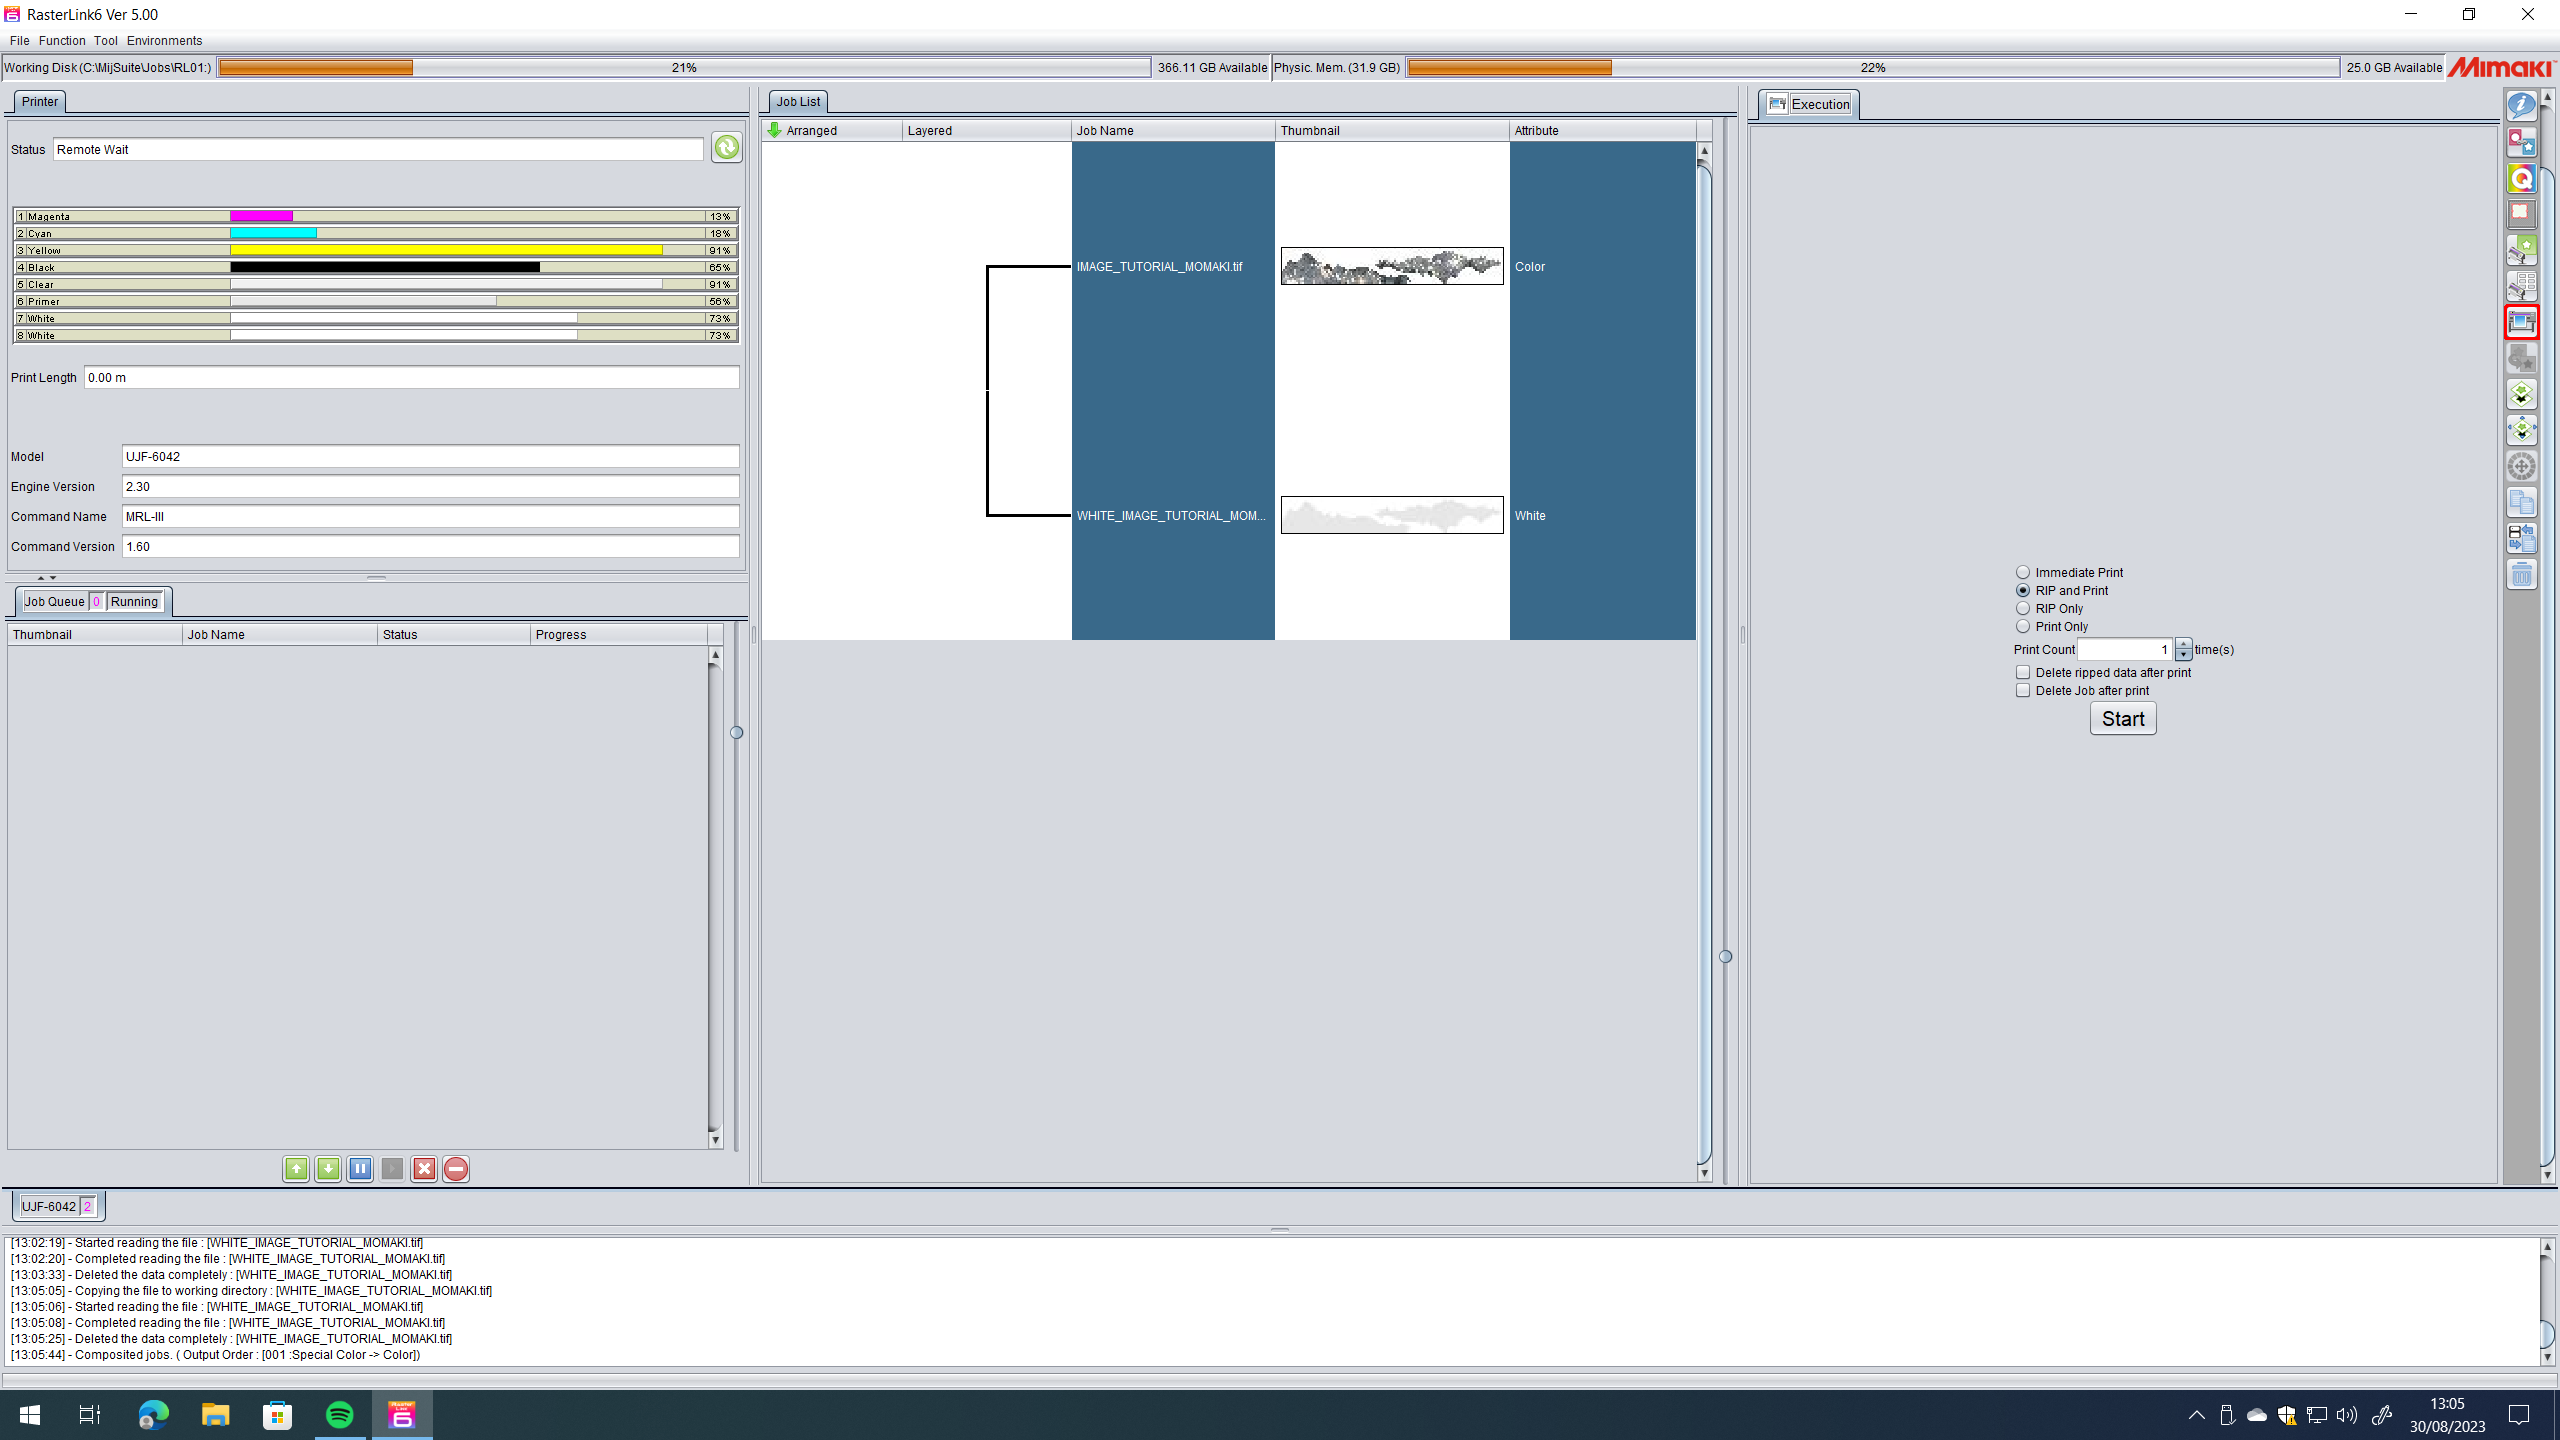
If you did create a special plate, there will be other files created next to your original one, to work with them together, select them and click the Composition button (alt+m) organize them and click on merge. Usually primer layers or white should be on the bottom, Gloss finish on top.
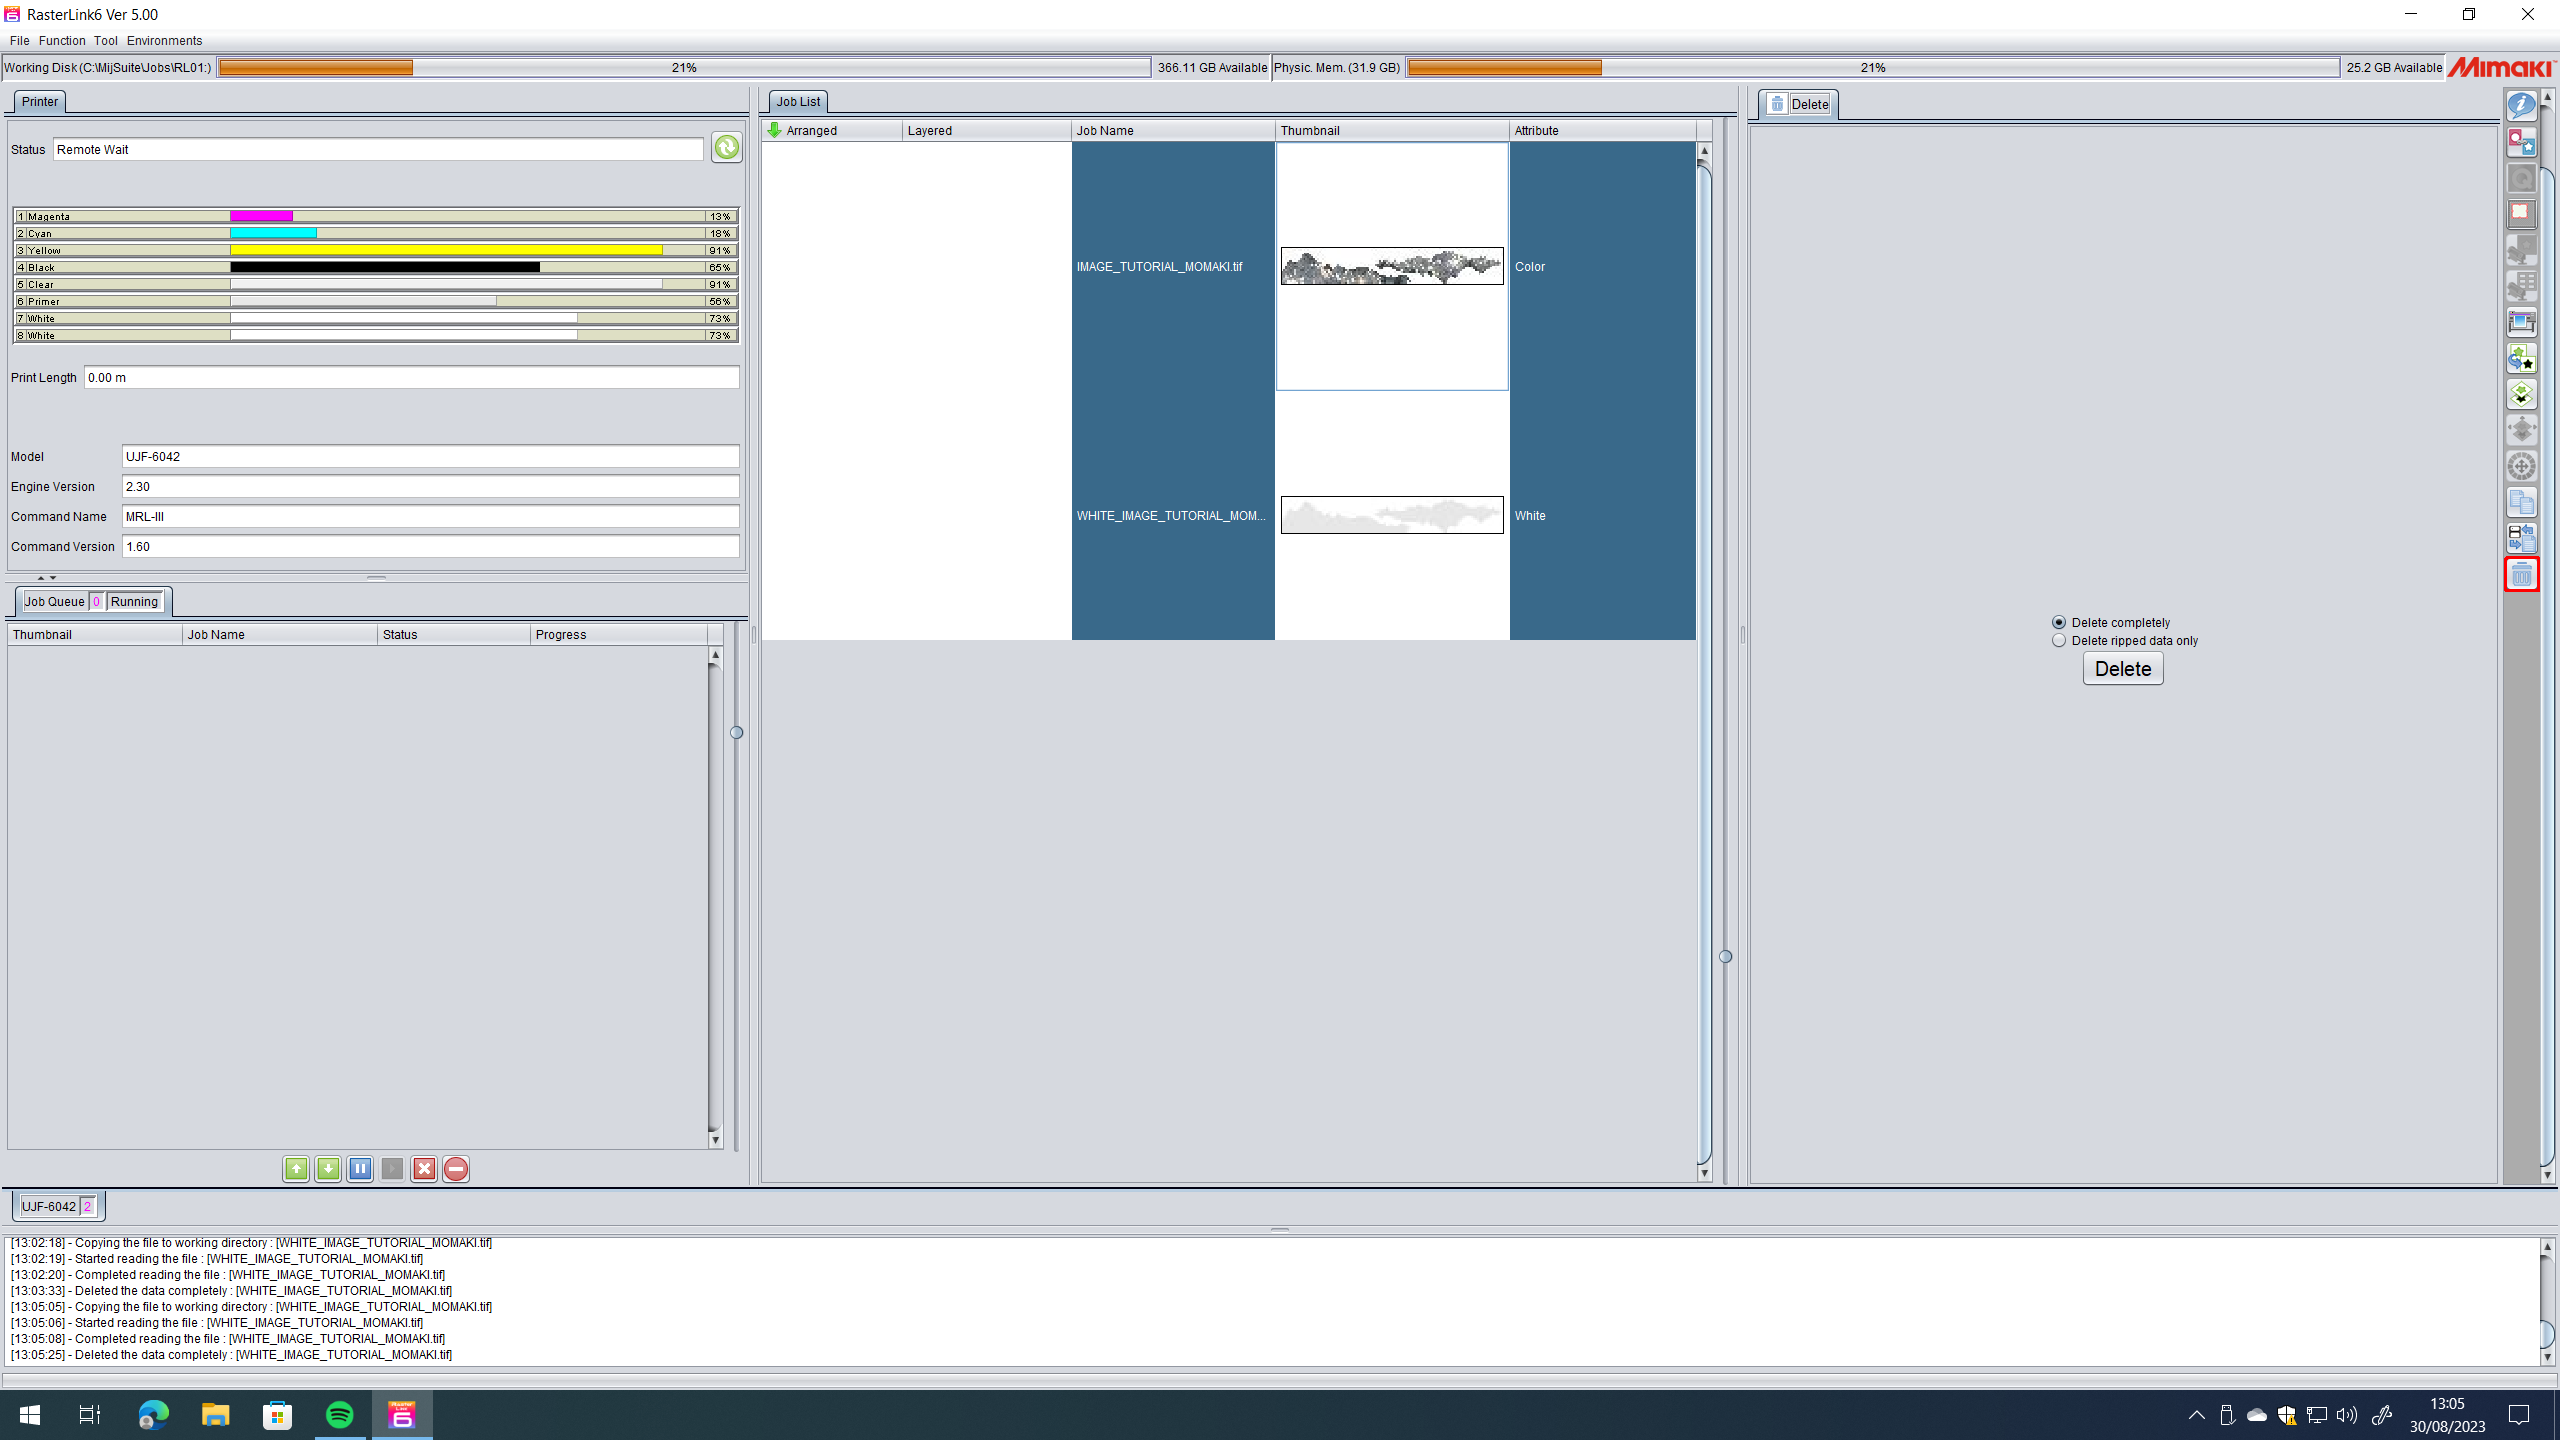
Click on the Execution button (alt+x) Make sure RIP and Print is selected and then click start.
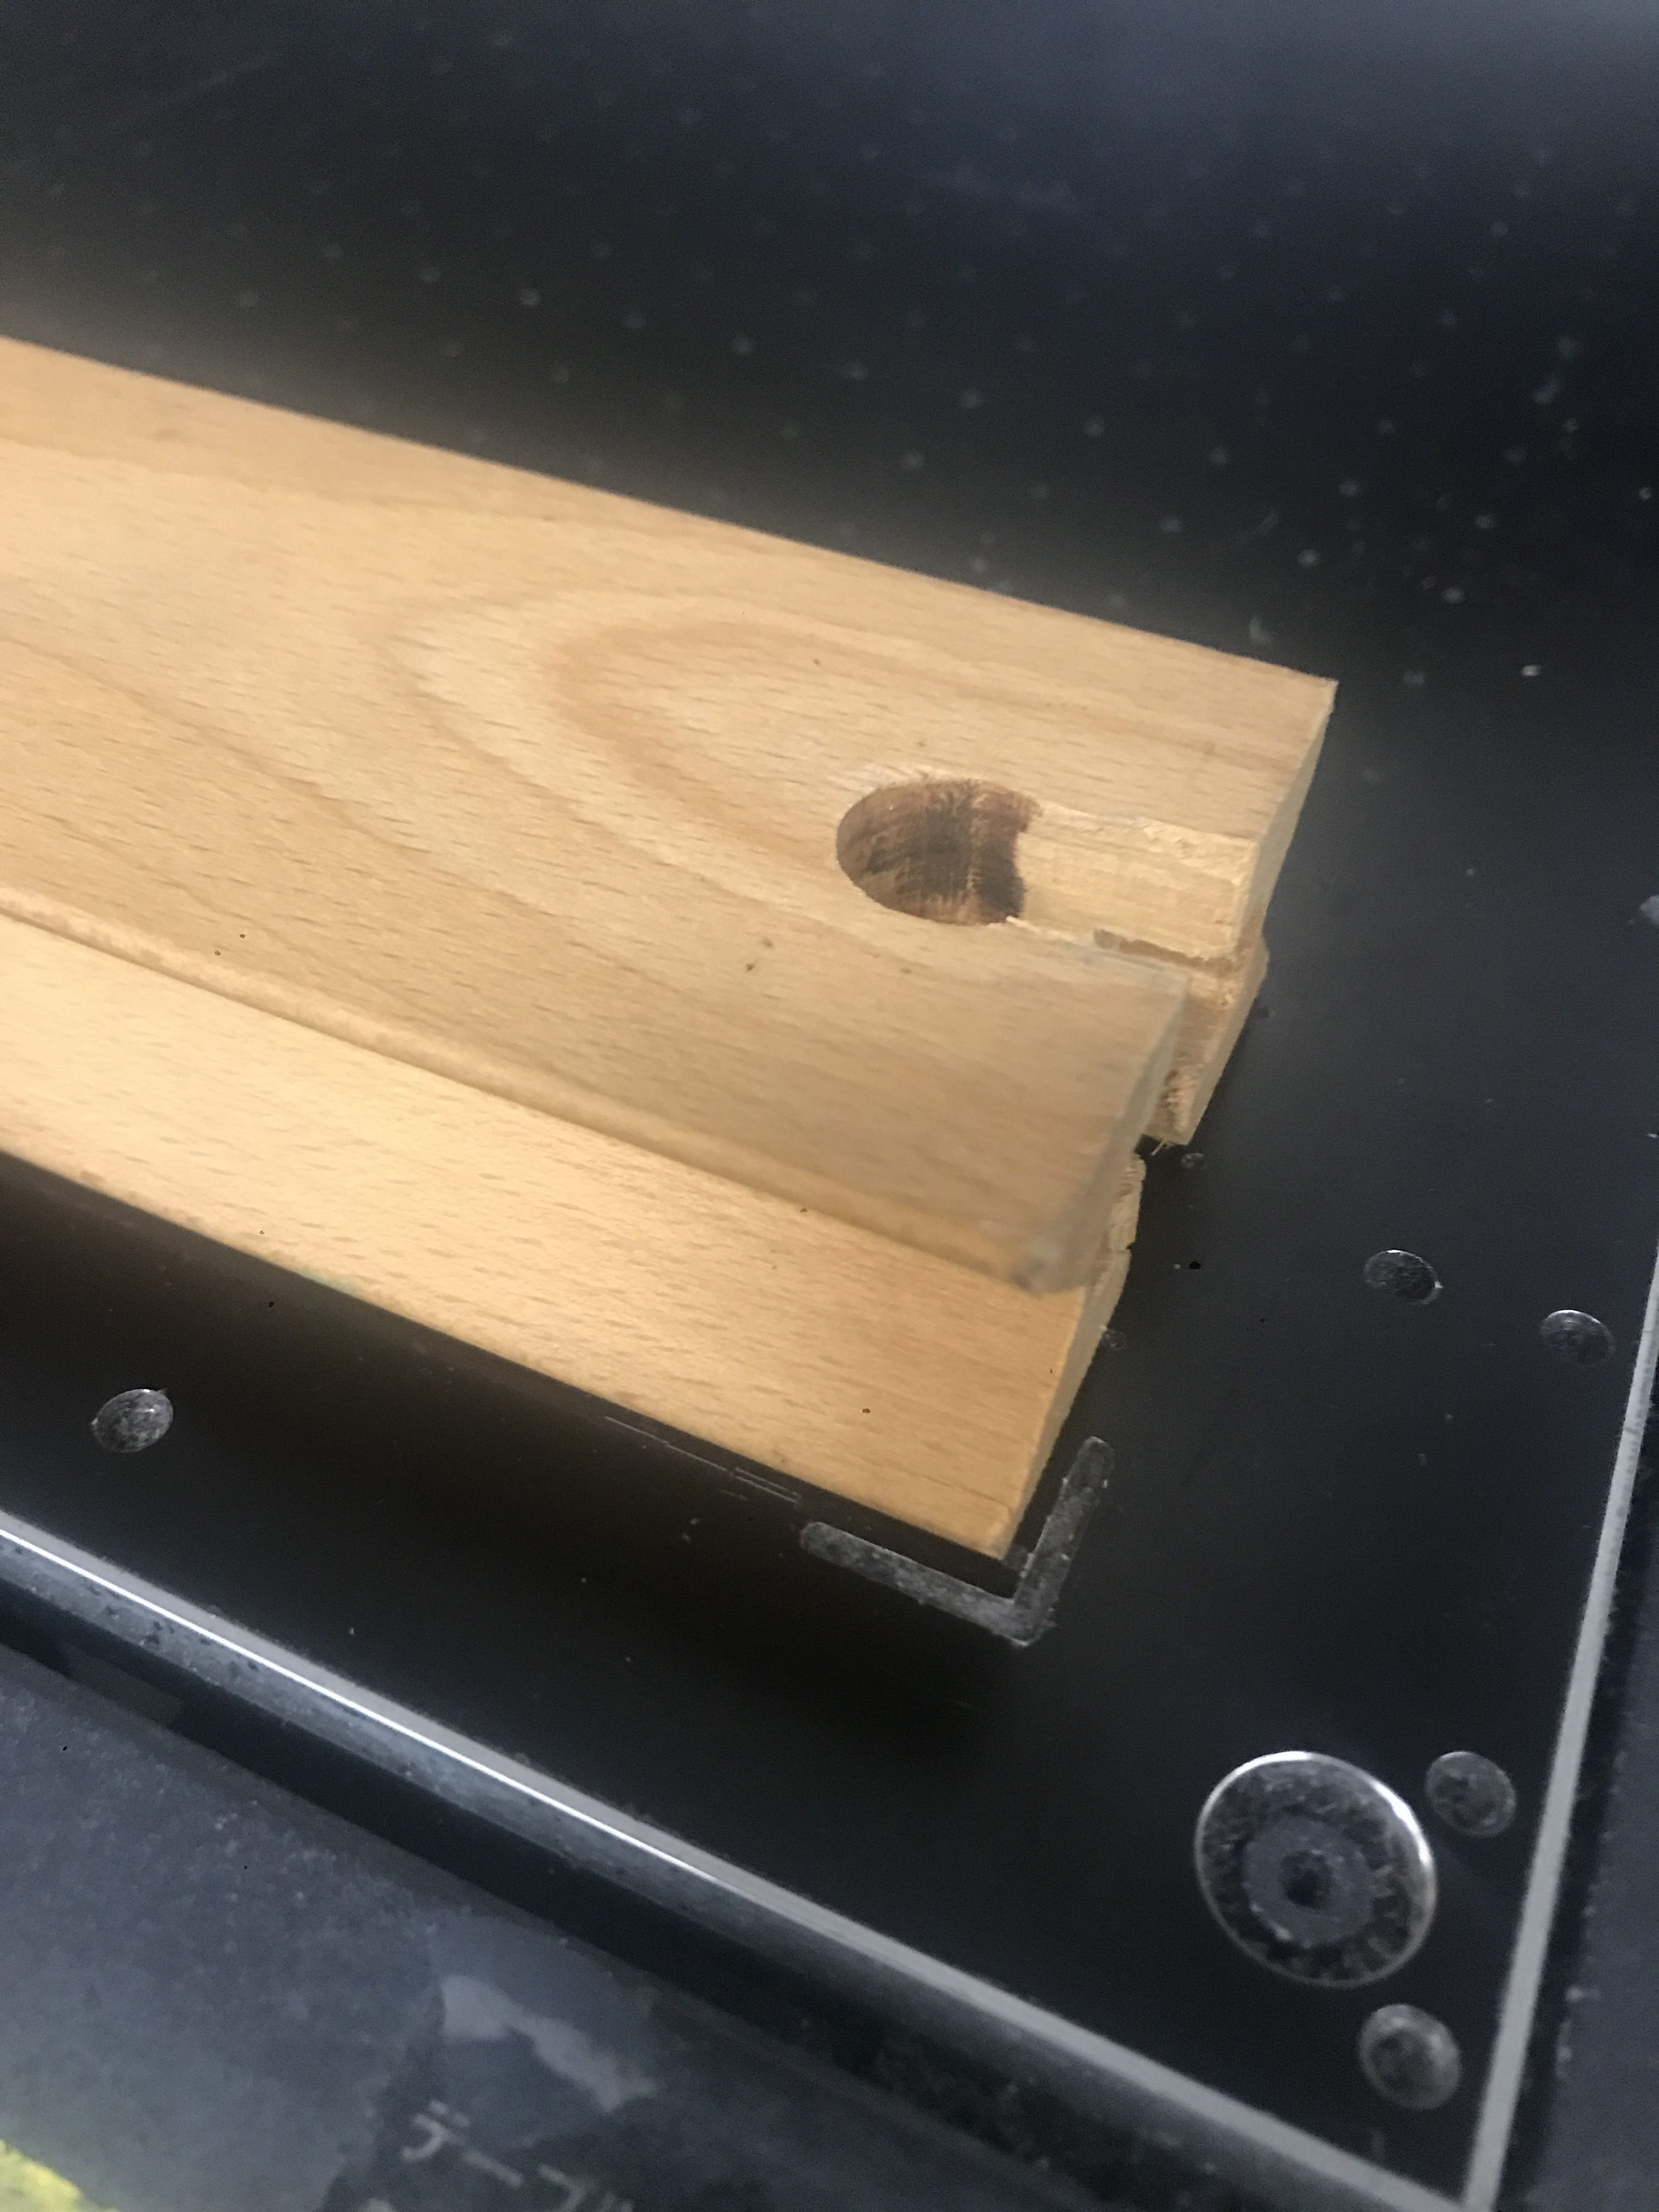
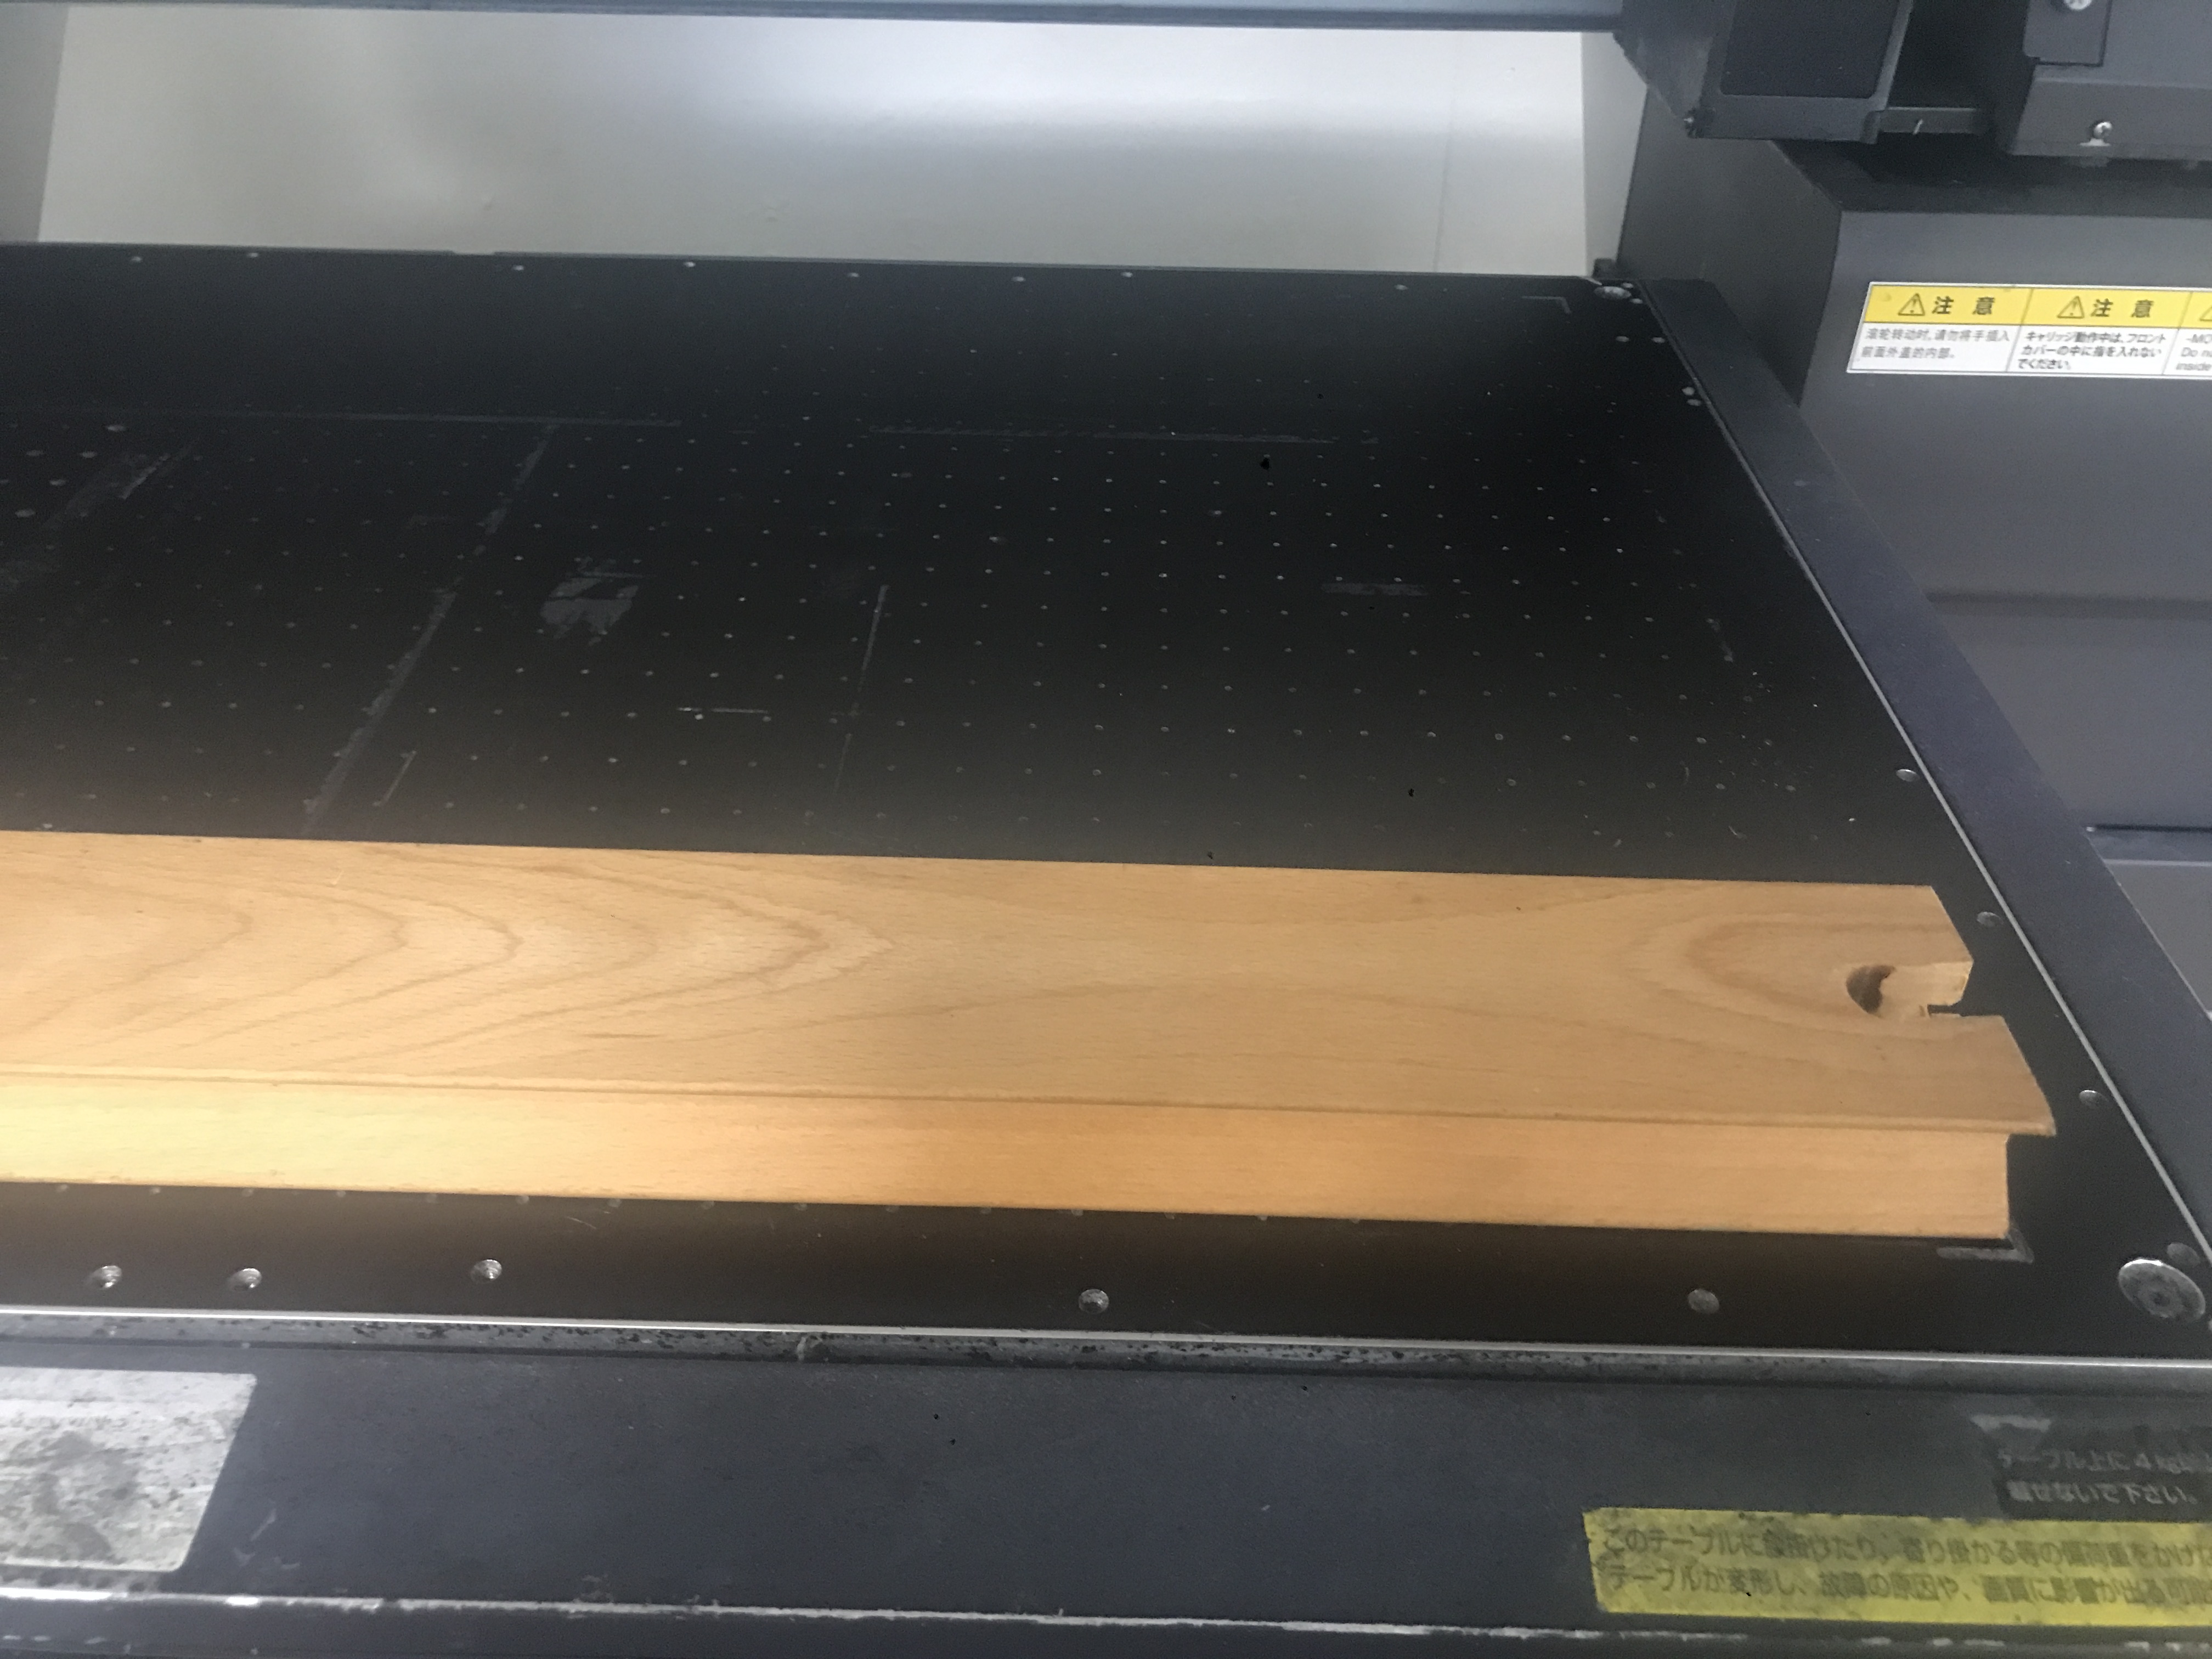
Placing your material on the flatbed
On the flatbed the material needs to be placed and secured properly, so it doesn’t move while printing.
Click the REMOTE button and the printing should start.
