Quickstartguide:Gluebinder: Difference between revisions
m Maytals moved page Quickstartguide:Bookbinder to Quickstartguide:Gluebinder |
|||
| (8 intermediate revisions by 3 users not shown) | |||
| Line 1: | Line 1: | ||
{{Template:Quickstartguide}} | {{Template:Quickstartguide}} | ||
=How to use the glue binder= | |||
To bind a book using the glue book binding machine you will need to have your pages loose '''(b)''', and your cover '''(a)''' prepared as a spread. | To bind a book using the glue book binding machine you will need to have your pages loose '''(b)''', and your cover '''(a)''' prepared as a spread. | ||
| Line 19: | Line 21: | ||
* Support the contents with your hand while the cover is attached to the content pages | * Support the contents with your hand while the cover is attached to the content pages | ||
* Let the binding and cover clamp to fully disengage before you remove your booklet | * Let the binding and cover clamp to fully disengage before you remove your booklet | ||
=''Advanced trick'': Making a perfect bind without a cover= | |||
This tutorial was written by 2nd year Graphic Design student Côme Roger-Dalbert (2023). | |||
'''Friendly advice: Use this technique if you are already familiar with the glue binder. If you want to try this, ask Wilco at the Printmaking Studio for help.''' | |||
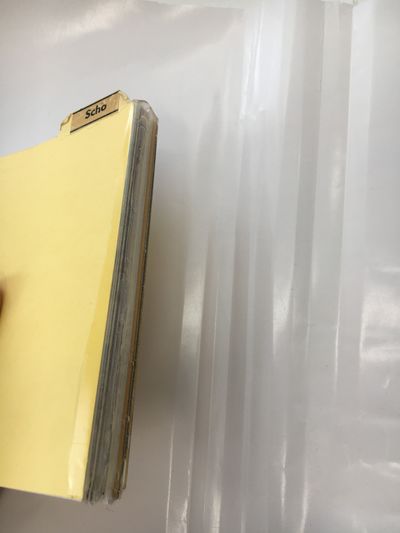
Something trendy nowadays is to create books with an open spine. One way to do it is to bind your book by hand, but this is actually possible with the glue binding machine too, using a few tricks. | |||
[[File:sideview of the spine.jpg|400px]] | |||
==How does it work and what you need== | |||
To do a perfect bind without a cover, you need some sticker-backing paper. It is the kind of paper where the vinyl for the plotter or the sticker paper for the Canon printers are stuck on. You can ask for some of this paper '''at the Printmaking studio'''. | |||
Instead of the cover you would use for a common glue binding with the machine, you will use this paper instead. This paper doesn't hold glue. Therefore, after the glue is dry, you will be able to peel the paper off the book block, with a layer of glue only on its spine. | |||
The good thing is you can use this technique to glue even sewn book blocks. You'll see the yarn trapped in the glue layer. (see picture below) | |||
[[File:Stitched spine glue binding.jpg|400px]] | |||
==STEP 1: Preparing the machine for glueing== | |||
*Set up the machine as if you would use it normally. | |||
*In the case of an already '''stitched book block''', make sure to '''switch "milling" OFF'''. If you don't have a stitched book block, you can leave it on. | |||
[[File:Glue Binding Machine params.jpg|400px]] | |||
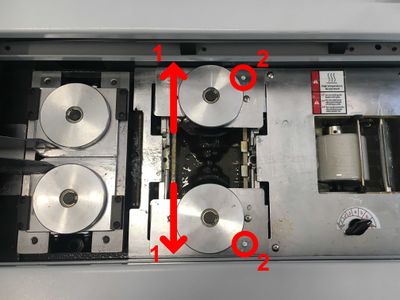
Look now at the top of the machine. There, you have two wells. The first one from the left applies glue on the sides of the book block. For a better finish, you have to block the two wheels on the sides. To do so: | |||
*use a metal stick to push them all the way to the sides (1). '''DON'T DO THIS BY HAND''', the wheels are extra hot! | |||
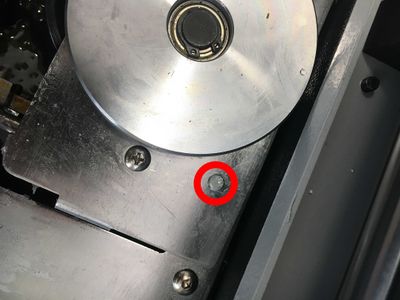
*Insert a small screw (usually left handy next to the machine) in the hole you can see immediately next to the wheel. (2) | |||
*Take this step with both wheels. | |||
[[File:Jaws opening glue machine 1.jpg|400px]] | |||
[[File:Pics wiki 2.jpg|400px]] | |||
==STEP 2: Glueing== | |||
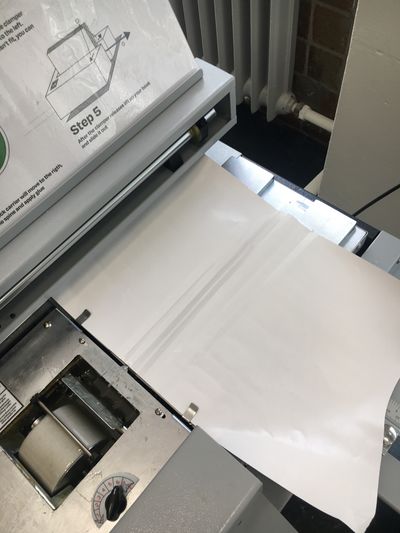
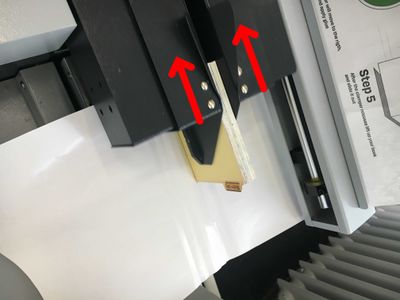
*Place the sticker backing paper at the end of the machine, like you would usually do with a normal cover. | |||
[[File:Placing the paper.jpg|400px]] | |||
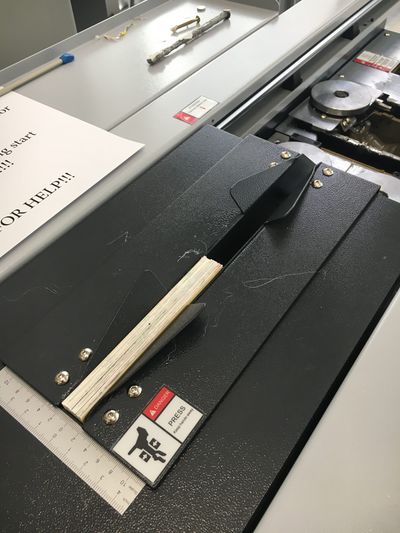
*Place your book block in the holder at the beginning of the machine (including what you'd consider being your front and back covers) | |||
[[File:Loading bookblock.jpg|400px]] | |||
*Press 'START' | |||
*After the machine released the pressure, remove the book block and the backing paper softly so you don't make the pages move too much. The holder will move back to it original place. | |||
[[File:Release block.jpg|400px]] | |||
==STEP 3: Drying== | |||
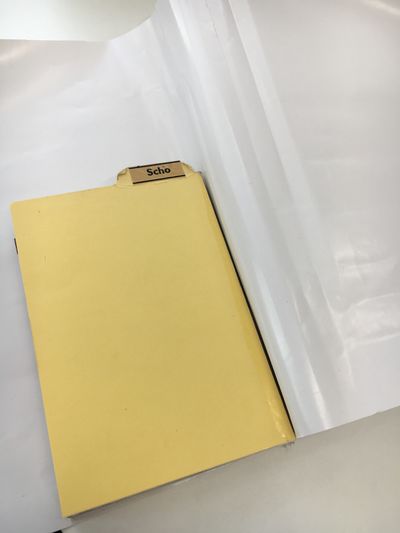
*Leave the cover on the book block for a good minute. The spine should feel cool enough. | |||
*After a minute, peel the paper off the book block. If the paper doesn't come off easily and still sticks a bit to the book block, wait some extra time: if you force it off, the outcome will look messy. | |||
[[File:Peeling.jpg|400px]] | |||
[[File:Peeling off completely.jpg|400px]] | |||
You are done! | |||
==STEP 4: Cleaning== | |||
'''Before you go, always make sure you leave the machine as you found it, so others do not get problems with their own designs.''' | |||
*Carefully remove the screws '''USING MAGNETS''' so you don't burn your fingers. Take your time and move slowly. Ask Wilco for some help if necessary. | |||
*Put the settings back to their original state. | |||
*Bring any extra sticker backing paper remaining to the station instructors at '''PRINTMAKING STUDIO''' if you borrowed it from them, so others can use it too. | |||
==TIPS== | |||
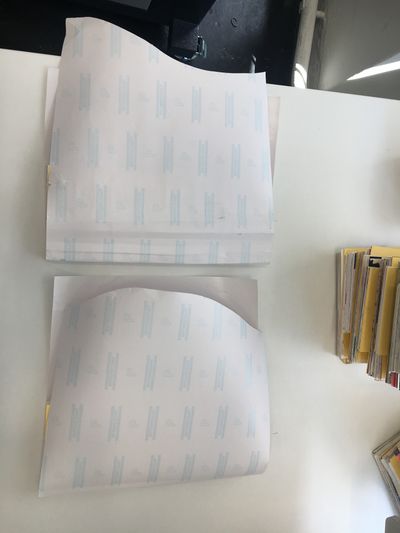
*If you have a range of copies to bind, cut a couple of backing papers in advance. This way, you can let one book dry on the side when you bind the other one. | |||
[[File:Binding simultaneously.jpg|400px]] | |||
*Don't be too hasty when peeling the paper off, the glue needs to be dry enough! | |||
*The glue will eventually bleed slightly on the front and back page of the book block. To avoid this, you can cut a stripe of backing paper and place it close to the edge of the spine. Make sure it is straight and placed as close as possible to the spine. You may fold this stripe a bit inside the pages so it doesn't move when glueing. When dry, you can peel the glue off just as easily as the cover. | |||
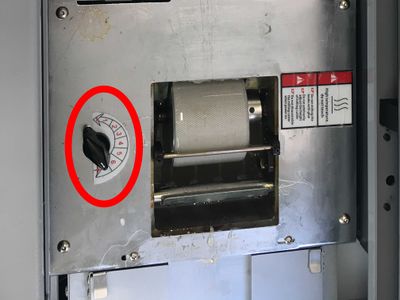
*For a better finish and longer life expectations, push the glue rake parameters to its maximum (see picture). This way, the machine will apply a thicker amount of glue on the spine. | |||
[[File:Glue Rake.jpg|400px]] | |||
Latest revision as of 15:55, 18 August 2023
How to use the glue binder
To bind a book using the glue book binding machine you will need to have your pages loose (b), and your cover (a) prepared as a spread.
- Wait until the machine heat is 155 degrees
- Place your contents into the left hand side slot
- Place your cover sheet on the right hand side
- Line up the center of your cover with the red arrow
- Tighten the clamp until it will not tighten any further by pressing the button illustrated below
- Press the green button on the front
- Support the contents with your hand while the cover is attached to the content pages
- Let the binding and cover clamp to fully disengage before you remove your booklet
Advanced trick: Making a perfect bind without a cover
This tutorial was written by 2nd year Graphic Design student Côme Roger-Dalbert (2023).
Friendly advice: Use this technique if you are already familiar with the glue binder. If you want to try this, ask Wilco at the Printmaking Studio for help.
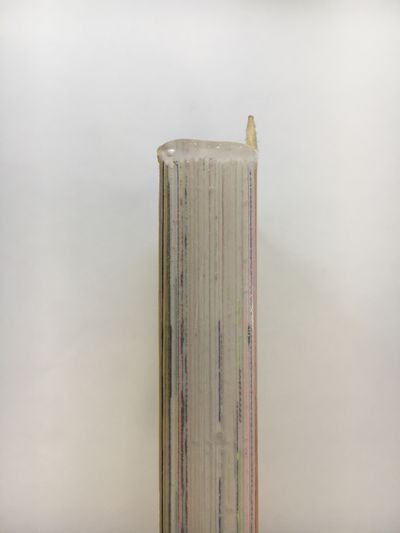
Something trendy nowadays is to create books with an open spine. One way to do it is to bind your book by hand, but this is actually possible with the glue binding machine too, using a few tricks.
How does it work and what you need
To do a perfect bind without a cover, you need some sticker-backing paper. It is the kind of paper where the vinyl for the plotter or the sticker paper for the Canon printers are stuck on. You can ask for some of this paper at the Printmaking studio.
Instead of the cover you would use for a common glue binding with the machine, you will use this paper instead. This paper doesn't hold glue. Therefore, after the glue is dry, you will be able to peel the paper off the book block, with a layer of glue only on its spine.
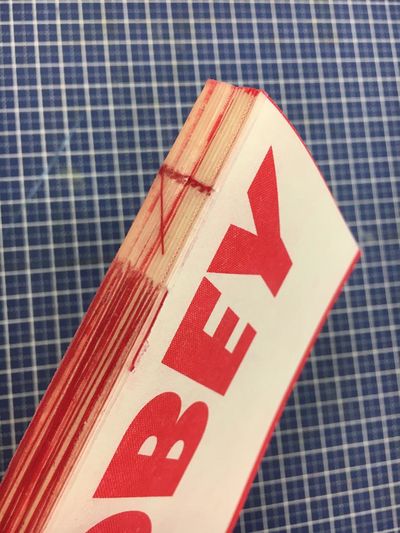
The good thing is you can use this technique to glue even sewn book blocks. You'll see the yarn trapped in the glue layer. (see picture below)
STEP 1: Preparing the machine for glueing
- Set up the machine as if you would use it normally.
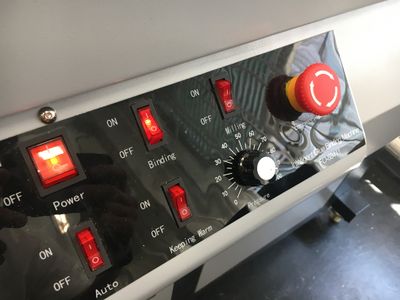
- In the case of an already stitched book block, make sure to switch "milling" OFF. If you don't have a stitched book block, you can leave it on.
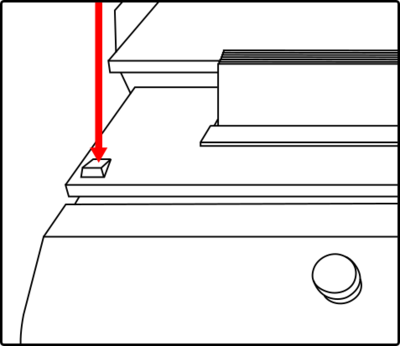
Look now at the top of the machine. There, you have two wells. The first one from the left applies glue on the sides of the book block. For a better finish, you have to block the two wheels on the sides. To do so:
- use a metal stick to push them all the way to the sides (1). DON'T DO THIS BY HAND, the wheels are extra hot!
- Insert a small screw (usually left handy next to the machine) in the hole you can see immediately next to the wheel. (2)
- Take this step with both wheels.
STEP 2: Glueing
- Place the sticker backing paper at the end of the machine, like you would usually do with a normal cover.
- Place your book block in the holder at the beginning of the machine (including what you'd consider being your front and back covers)
- Press 'START'
- After the machine released the pressure, remove the book block and the backing paper softly so you don't make the pages move too much. The holder will move back to it original place.
STEP 3: Drying
- Leave the cover on the book block for a good minute. The spine should feel cool enough.
- After a minute, peel the paper off the book block. If the paper doesn't come off easily and still sticks a bit to the book block, wait some extra time: if you force it off, the outcome will look messy.
You are done!
STEP 4: Cleaning
Before you go, always make sure you leave the machine as you found it, so others do not get problems with their own designs.
- Carefully remove the screws USING MAGNETS so you don't burn your fingers. Take your time and move slowly. Ask Wilco for some help if necessary.
- Put the settings back to their original state.
- Bring any extra sticker backing paper remaining to the station instructors at PRINTMAKING STUDIO if you borrowed it from them, so others can use it too.
TIPS
- If you have a range of copies to bind, cut a couple of backing papers in advance. This way, you can let one book dry on the side when you bind the other one.
- Don't be too hasty when peeling the paper off, the glue needs to be dry enough!
- The glue will eventually bleed slightly on the front and back page of the book block. To avoid this, you can cut a stripe of backing paper and place it close to the edge of the spine. Make sure it is straight and placed as close as possible to the spine. You may fold this stripe a bit inside the pages so it doesn't move when glueing. When dry, you can peel the glue off just as easily as the cover.
- For a better finish and longer life expectations, push the glue rake parameters to its maximum (see picture). This way, the machine will apply a thicker amount of glue on the spine.


