Print a Booklet with the Canon: Difference between revisions
| (3 intermediate revisions by the same user not shown) | |||
| Line 22: | Line 22: | ||
[[File:2B_BookletPrinting_2side.png |590x590px]]<br> | [[File:2B_BookletPrinting_2side.png |590x590px]]<br> | ||
<br> | <br> | ||
[[File:Full-page_design_example_2b.jpg]] | [[File:Full-page_design_example_2b.jpg |450x450px]] [[File:Short-edge_flipping_example_4.jpg |450x450px]] | ||
[[File:Short-edge_flipping_example_4.jpg]] | |||
==Define Booklet Structure== | ==Define Booklet Structure== | ||
Latest revision as of 14:51, 14 September 2023
Upload your file
Transfer your files to the computers next to the Cannon printer: drag them from Downloads to the HELD section of the printing software.
Double-click the file to open job properties.
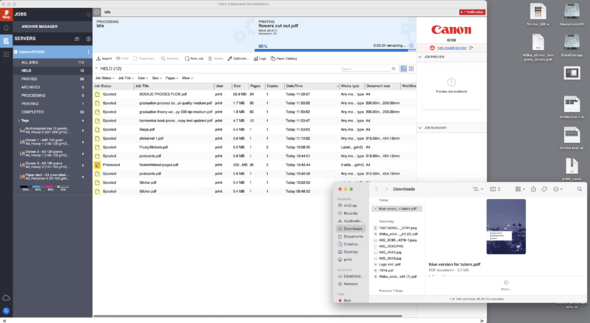
Choose a preset
Select one of the existing presets, based on your page size and your paper choice.
explanation: your paper size is your page width x2 (=a spread).
for example, if your booklet has a page size of A5 or smaller = your preset is an A4 Booklet.
if your page size is A4 or smaller = your preset is an A3 Booklet.
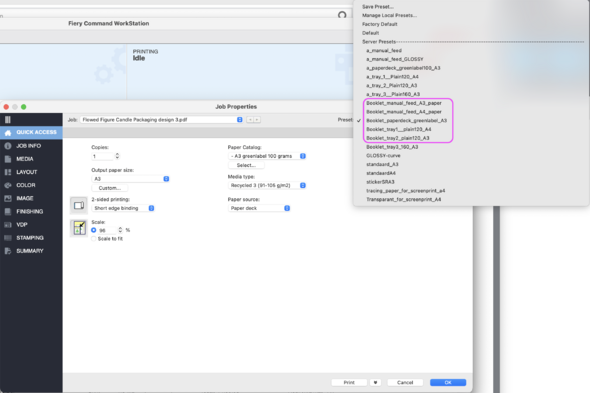
Control paper size and type
On the left-side menu select: Quick Access.
1. Check your Output Paper Size - see that it matches your spread size, as defined in the preset.
2. Check your paper in the Paper Catalogue.
- If you are printing on your own paper, change the Media Type to choose the right paper weight.
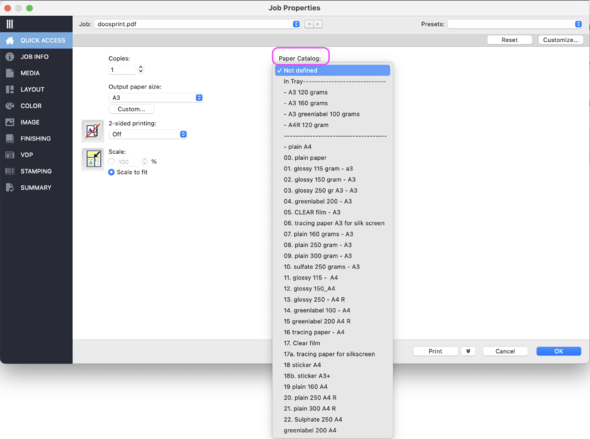
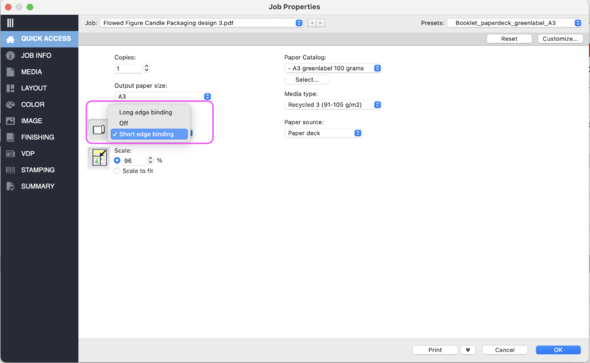
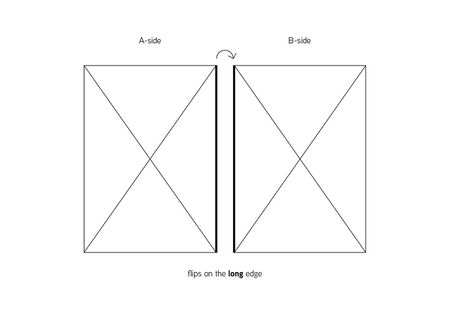
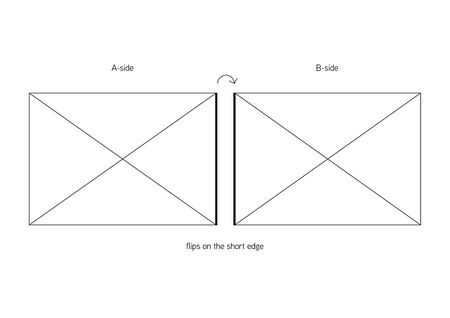
3. select from the 2-sided Printing options:
Define Booklet Structure
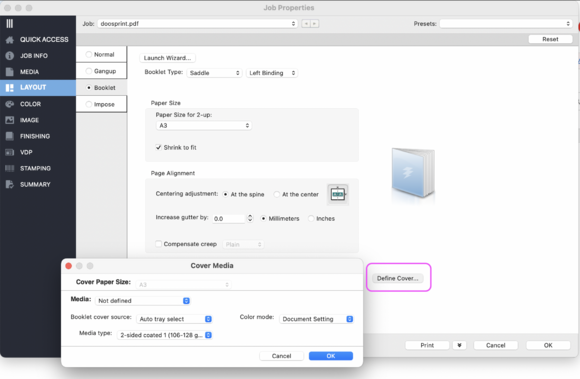
On the left-side menu select: Layout.
1. select from the small menu "booklet" and click OK.
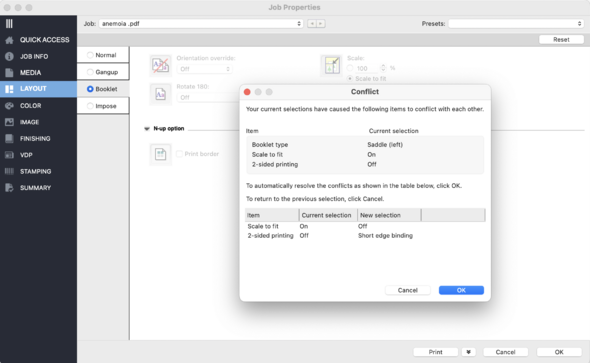
2. Select Booklet Type.
- use Saddle for a booklet with 1 signature (max 24 pages)
- use Nested Saddle for multiple signatures
- use Perfect for Japanese binding
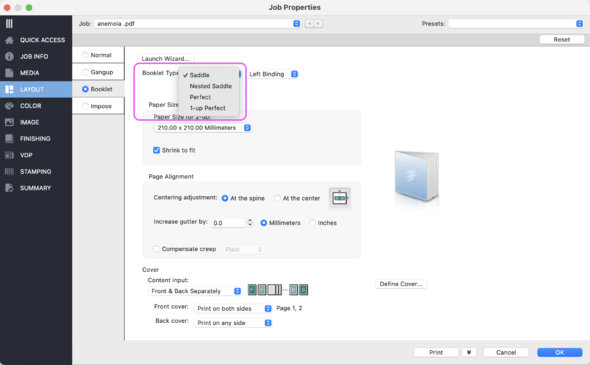
3. Under "Paper Size" make sure you select the same output Paper Size as you did before.
Please note: "shrink to fit" is set on as default. To maintain your original design size click it out.
Cover
It is most recommended to print the cover as a separate file. However, for zines and small booklets it is also possible to have the cover printed together with the internal pages.
Under 'Cover' select "Define Cover".
if you are printing the cover without the intern pages: Choose the paper for the cover under "Media" - use the same paper as for the intern pages.
if you are printing the cover with the intern pages: Choose the paper for the cover under "Media". If you are using your own paper choose the multipurpose tray.
Staple Option
If you want your booklet to be directly folded and staples you can do it the following way.
please note: the Maximus pages for this depends on your paper thickness. Max for 120gr paper is 32 pages.
1. Go to Finishing and scroll down to see the Stapler Mode
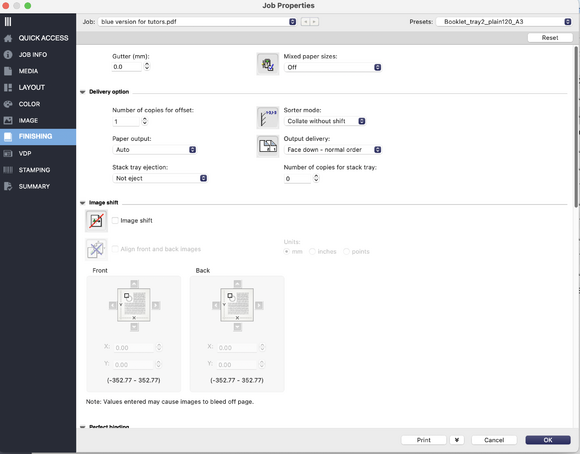
2. Select Saddle Stitch in the Stapler Mode
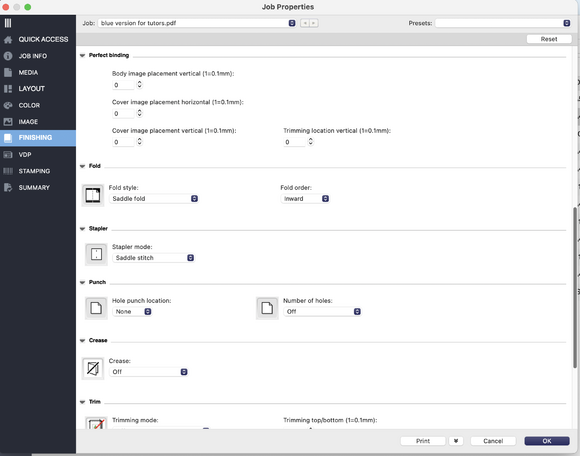
Multiple Signatures
When designing a book with many pages, it is handy to have multiple signatures. An ideal signature combines 4-5 sheets of paper (16-20 pages). you can define the division of your signatures under "Finishing".
Print and control the Canon
When you're done with your settings, click 'Print' to send it to the Canon.
Go to the Canon and control its dashboard. Update the paper selection to match your defined paper. Double-click OK.
