Difference between revisions of "Quickstartguide:HolePuncher"
From Publication Station
(Created page with "{{Template:Quickstartguide}} === Step 1. Place your paper in the slit on top === === Step 2. Punch the holes using the peddle on the right of the machine === === [if necessary] Step 3. How to adjust the punch holes? === * Release the punching unit by turning the handle on the right side of the machine towards you (counter-clockwise) * Pull out the punching unit * Remove the metal place holder by pulling it up * The row of individual punches has appeared. Remove the...") |
|||
| Line 1: | Line 1: | ||
{{Template:Quickstartguide}} | {{Template:Quickstartguide}} | ||
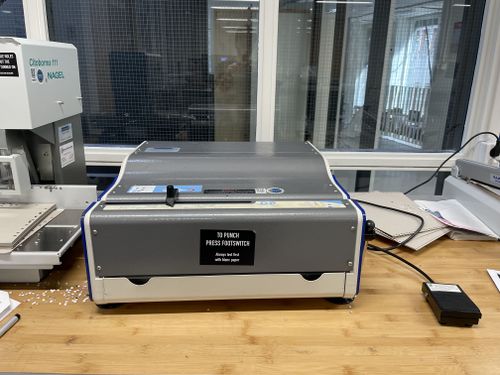
[[File:Hole Puncher.jpg|500px]] | |||
<br><br> | |||
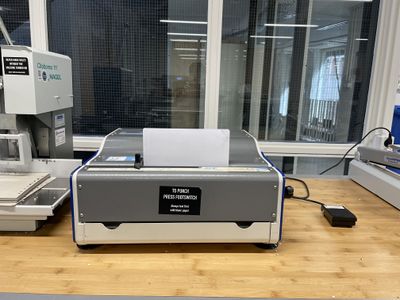
=== Step 1. Place your paper in the slit on top === | === Step 1. Place your paper in the slit on top === | ||
<br> | |||
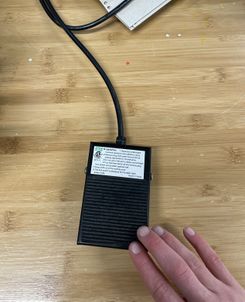
[[File:InsertPaper.jpg|400px|left]][[File:Peddle.jpg|245px]]<br><br> | |||
=== Step 2. Punch the holes using the peddle on the right of the machine === | === Step 2. Punch the holes using the peddle on the right of the machine === | ||
<br> | |||
[[File:Outcome.jpg|245px]] | |||
<br> | |||
<br> | |||
=== [if necessary] Step 3. How to adjust the punch holes? === | === [if necessary] Step 3. How to adjust the punch holes? === | ||
<br> | |||
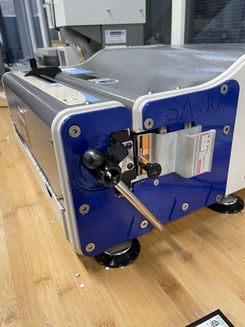
* Release the punching unit by turning the handle on the right side of the machine towards you (counter-clockwise) | * Release the punching unit by turning the handle on the right side of the machine towards you (counter-clockwise) | ||
<br><br> | |||
[[File:Side.jpg|245px]] | |||
<br><br> | |||
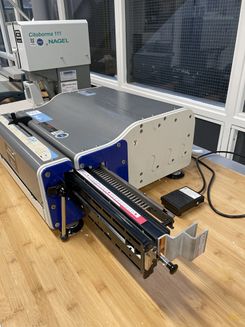
* Pull out the punching unit | * Pull out the punching unit | ||
<br><br> | |||
[[File:Release Punching unit.jpg|245px]] | |||
<br><br> | |||
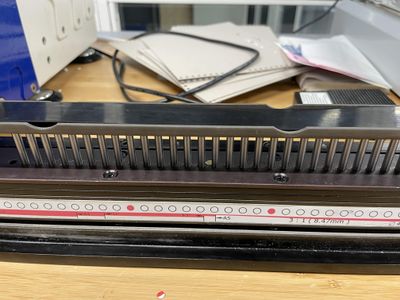
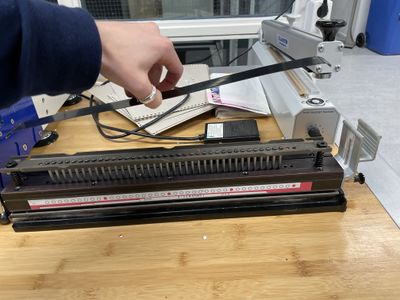
* Remove the metal place holder by pulling it up | * Remove the metal place holder by pulling it up | ||
<br> | |||
[[File:Metalholder.jpg|400px|left]][[File:MetalHolder2.jpg|400px]] | |||
* The row of individual punches has appeared. Remove the desired punches | * The row of individual punches has appeared. Remove the desired punches | ||
<br> | |||
* Return the metal place holder | * Return the metal place holder | ||
* Place the punching unit back in the machine | * Place the punching unit back in the machine | ||
Revision as of 14:31, 8 April 2022
Step 1. Place your paper in the slit on top
Step 2. Punch the holes using the peddle on the right of the machine
[if necessary] Step 3. How to adjust the punch holes?
- Release the punching unit by turning the handle on the right side of the machine towards you (counter-clockwise)
- Pull out the punching unit
- Remove the metal place holder by pulling it up
- The row of individual punches has appeared. Remove the desired punches
- Return the metal place holder
- Place the punching unit back in the machine
- Lock the punching unit back in place by turning the handle away from you (clockwise).
Twist until the green light on the top left of the machine lights up - Now you can go back to step 1
- If you have removed any of the punches, please put them back when you are done using the machine.
