Crop marks: Difference between revisions
No edit summary |
No edit summary |
||
| Line 10: | Line 10: | ||
If you are using InDesign, add the Crop Marks in the pdf export options window. Add 3 mm Bleed. | If you are using InDesign, add the Crop Marks in the pdf export options window. Add 3 mm Bleed. | ||
[[File: | [[File:crop_bleed.jpg]] | ||
Revision as of 08:20, 3 February 2023
Printing with Crop Marks
Want to print a folded booklet/magazine in an odd size with Crop Marks? Here’s what to look out for!
Create the PDF
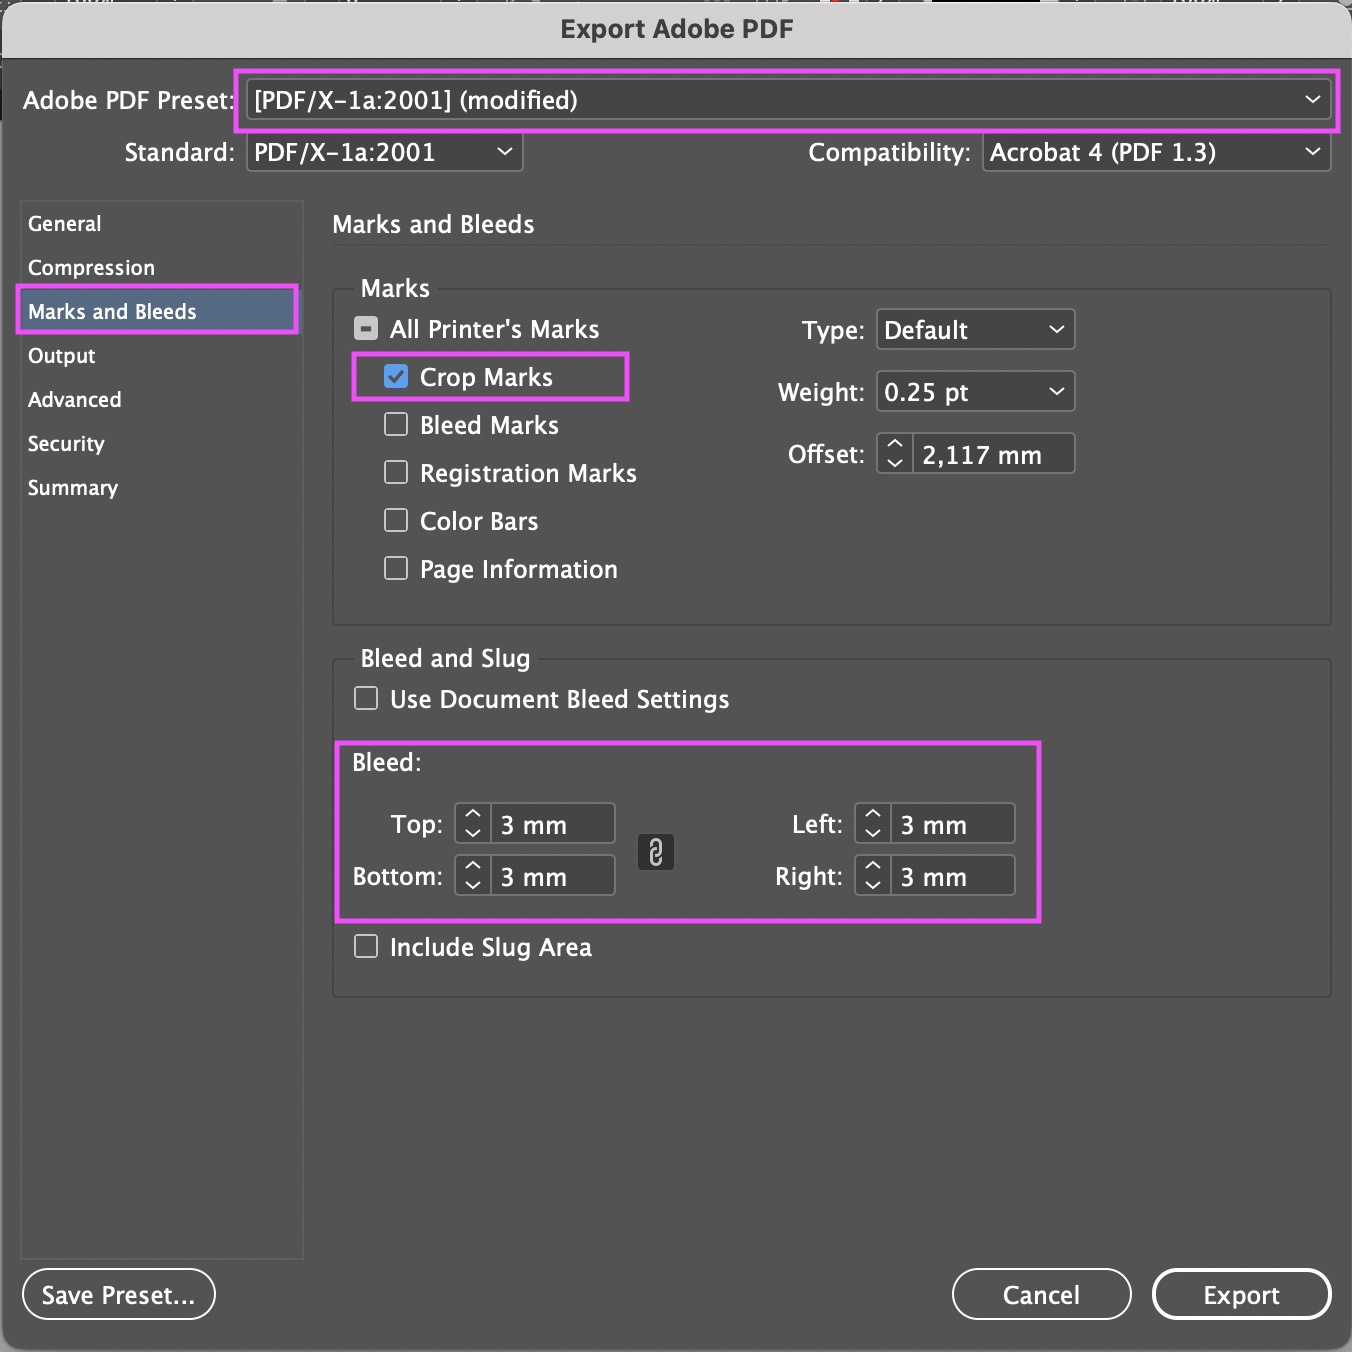
Make sure to export your file with preset PDF/X-1a:2001, using pages (not 'spreads').
If you are using InDesign, add the Crop Marks in the pdf export options window. Add 3 mm Bleed.
Set properties in Fiery
Open your file in the Fiery Command Workstation program, drag your file into the Held folder and open the properties window.
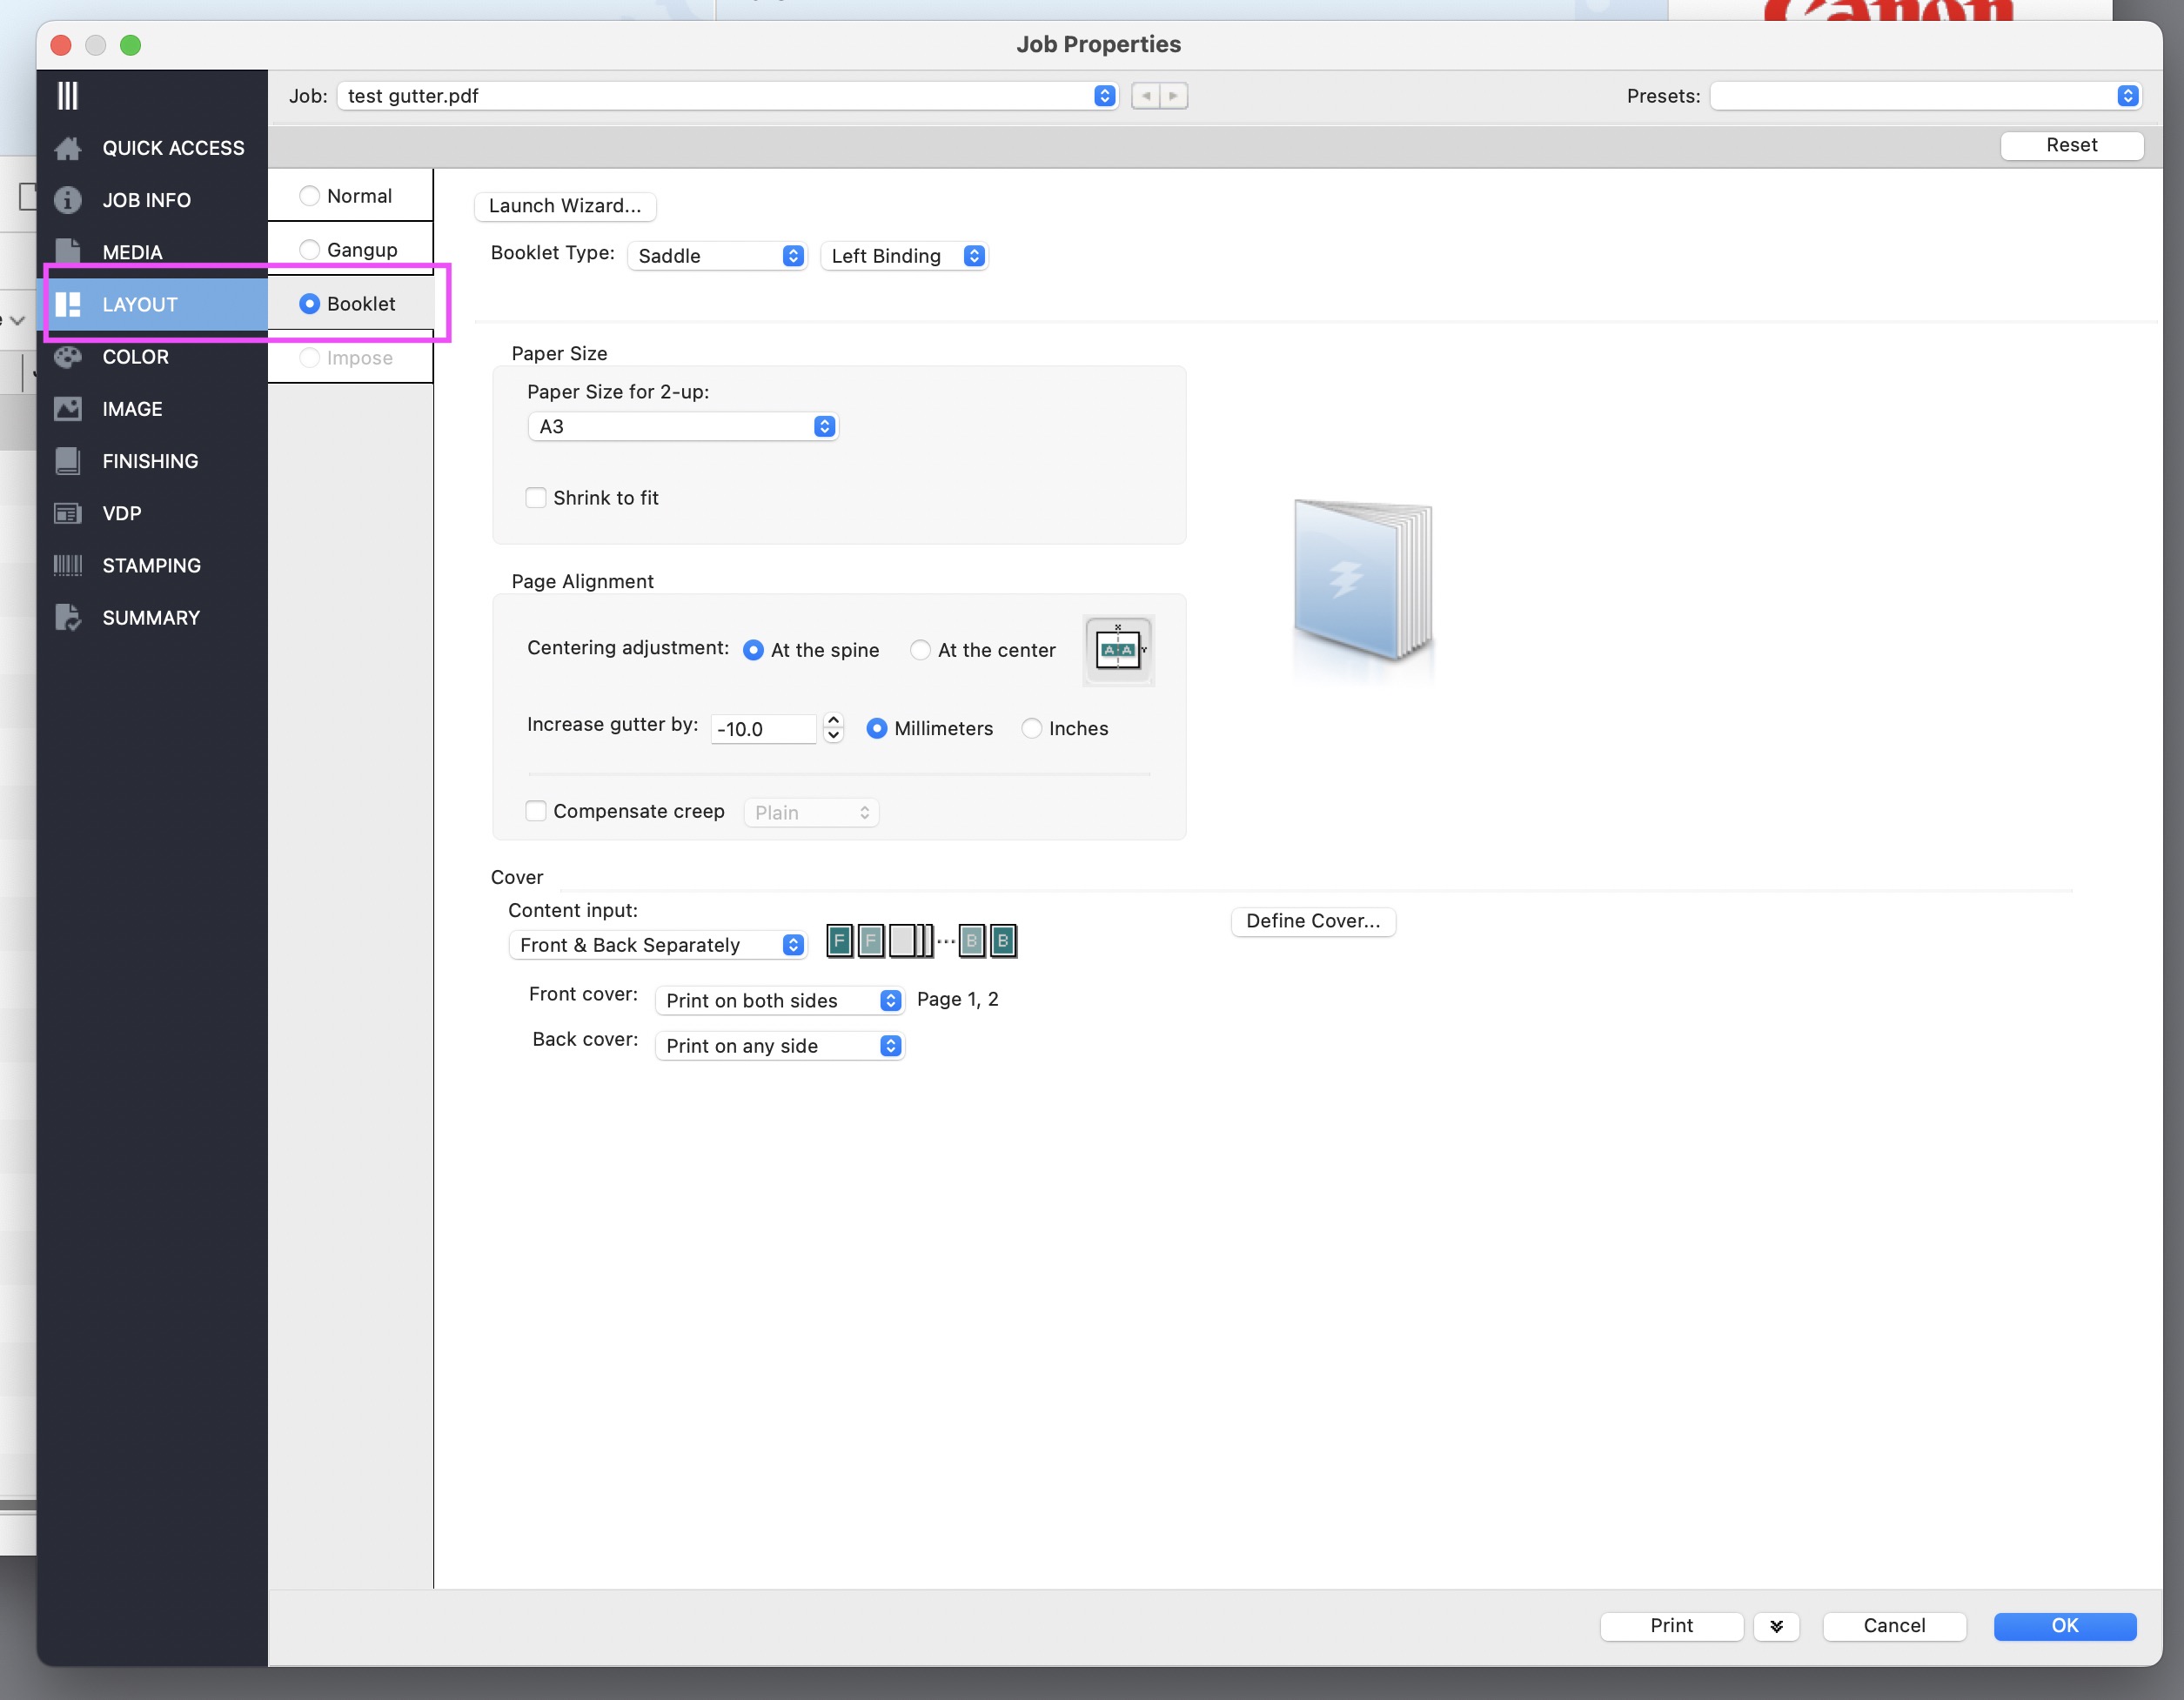
Go to booklet settings, open the layout window.
Check Size
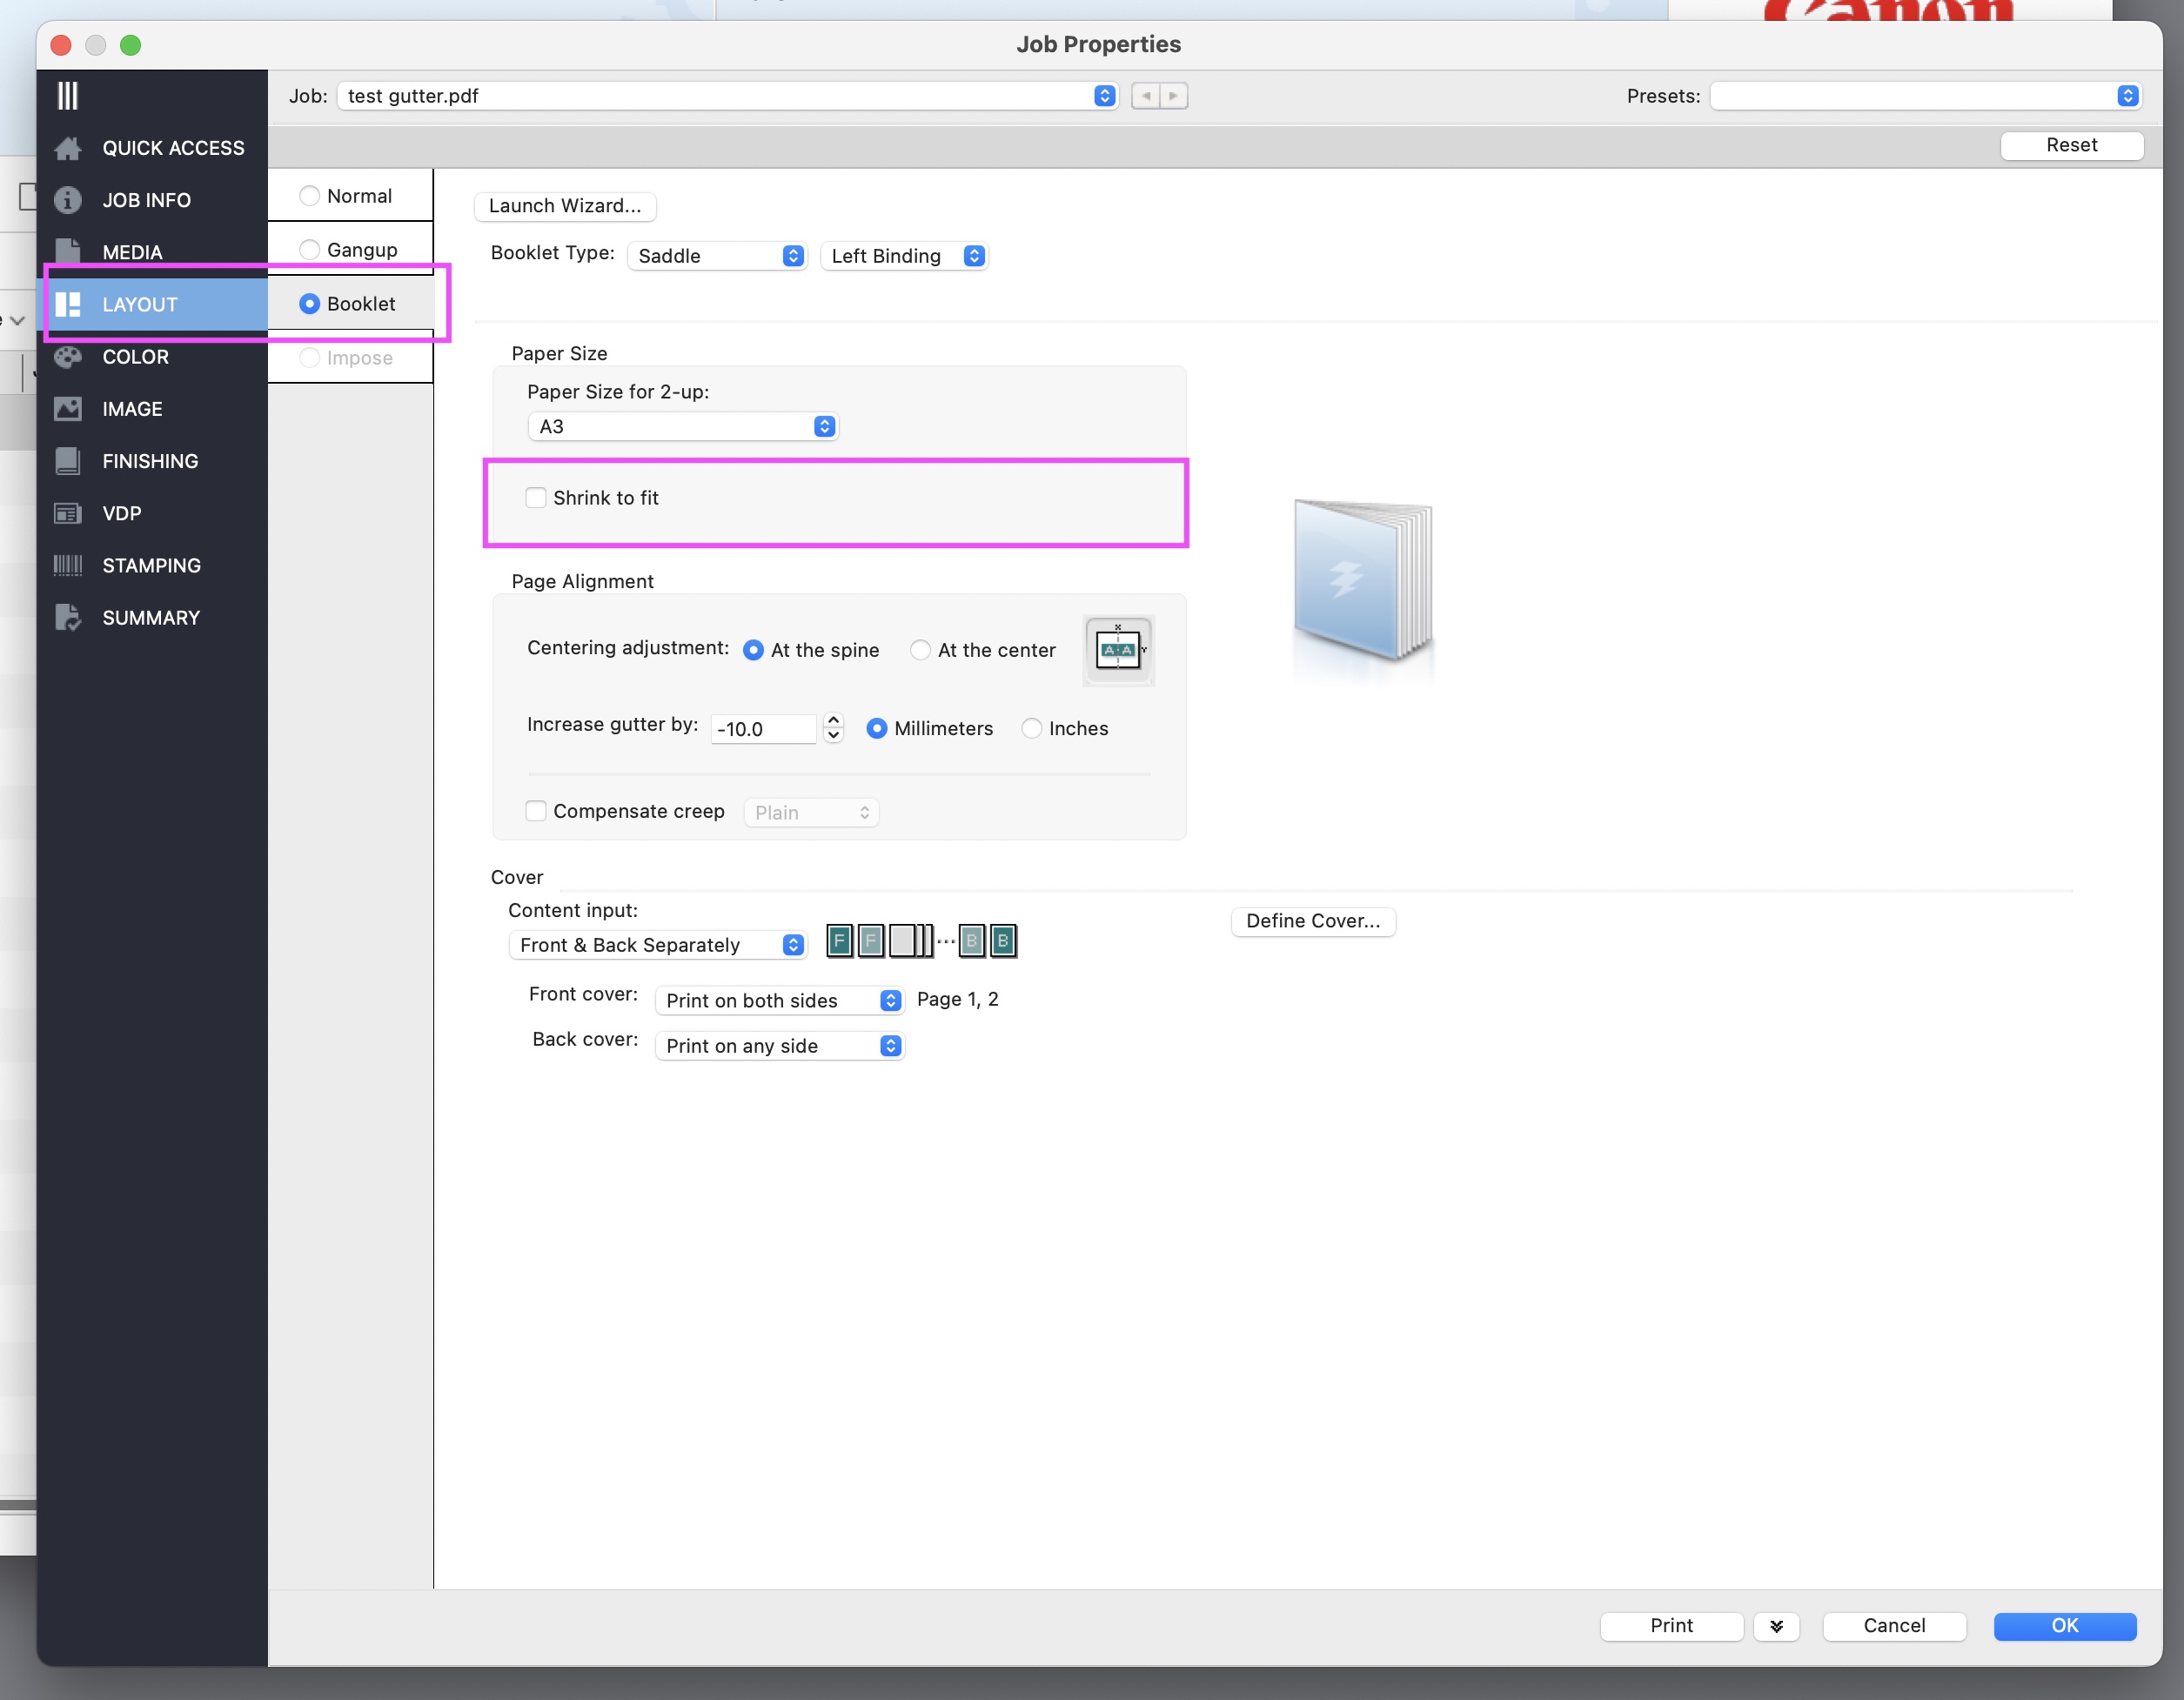
To make sure your booklet is printed at the actual size, check the paper size for two up and make sure 'shrink to fit' is turned off.
Adjust Gutter
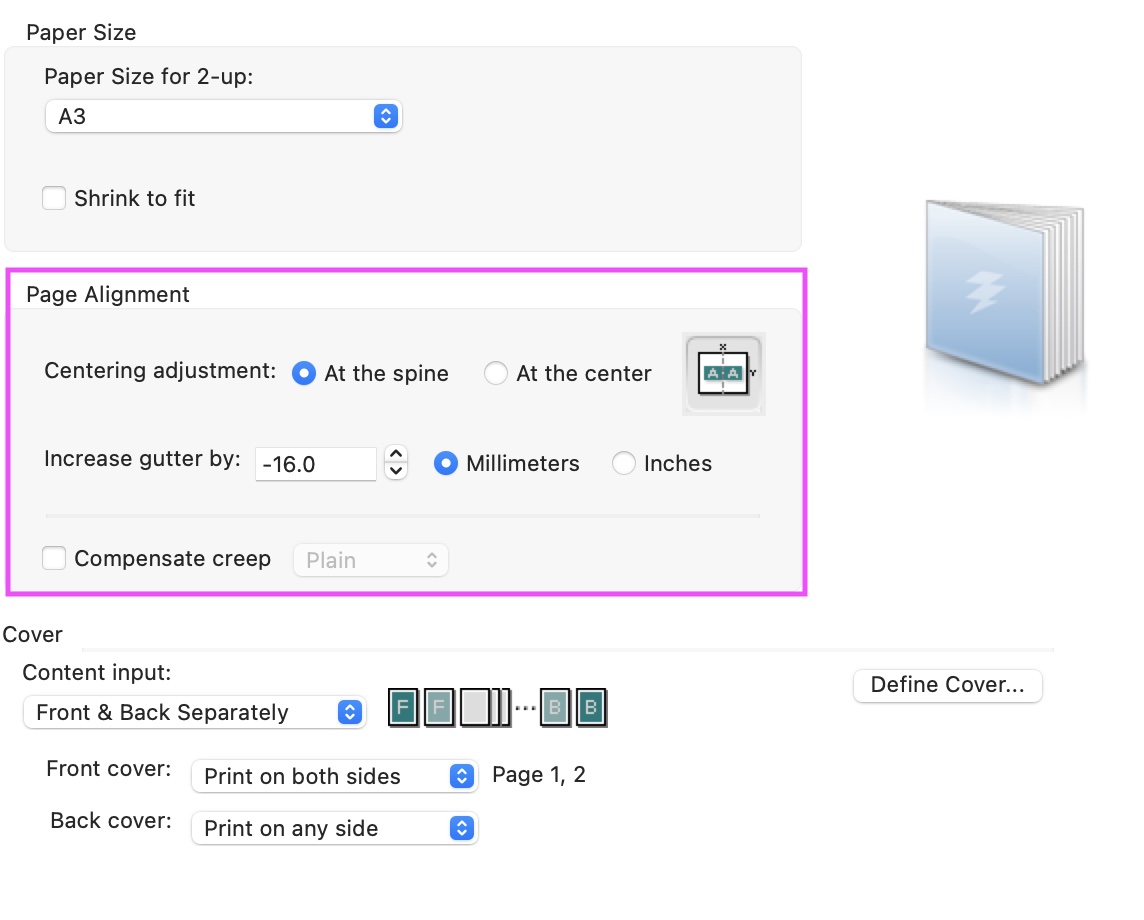
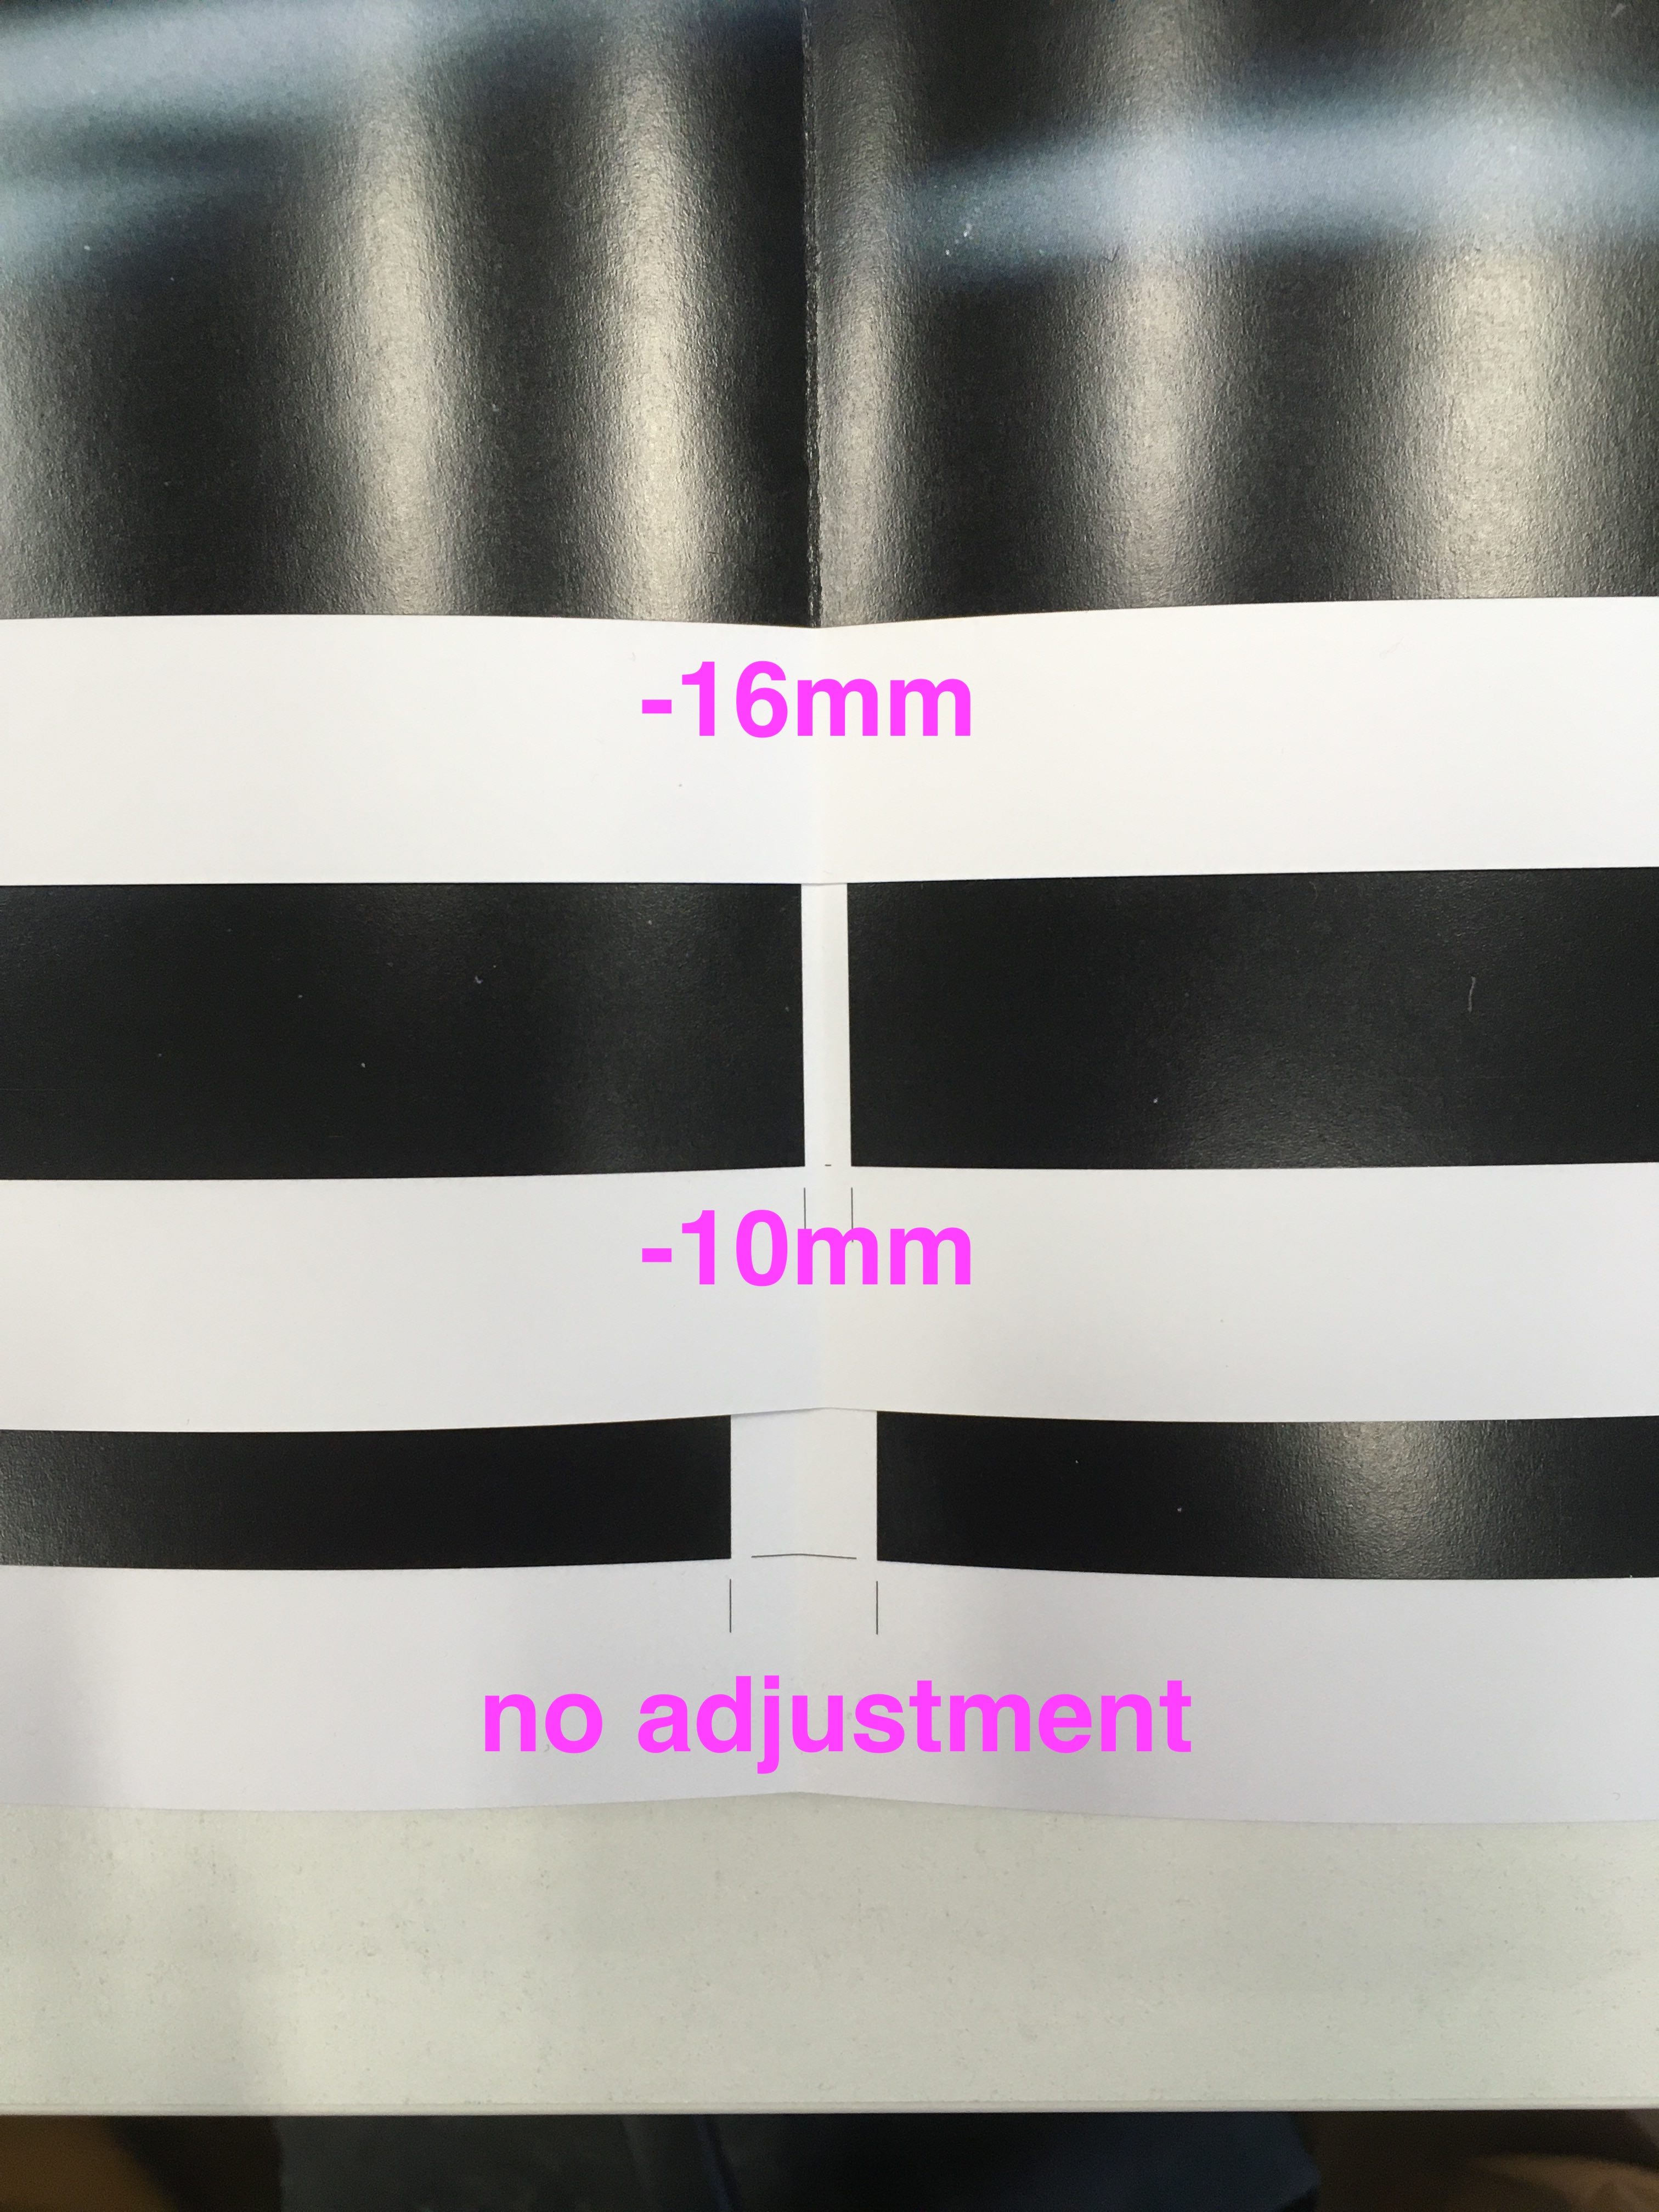
To make sure the Crop Marks remain at the edges of your print you have to decrease the gutter at the spine by 16mm. If you don’t do this, the Crop Marks will cause you to have extra white space in the spine.
results
If you follow these steps you will have a booklet without Crop Marks in the centre, with Crop Marks at the edges. This will allow you to cut your book to size accurately.
