Quickstartguide:Riso
There are two stages involved in printing on the RISO. First Master creation, then Printing.
Content
CREATE YOUR MASTER
- STEP 1. Choose the colour
- STEP 2. Master creation
- STEP 3. Printing the master
- 3.1 Opening the printing dialogue window
- 3.2 Output the file on the RISO printer
MAKE MORE PRINTS!
- STEP 4. Paper
- 4.1 Paper Thickness switch
- Spectrolite download
MASTER CREATION
Step 1. Choose colour
- Turn on the RISO printer
- Open the front of the RISO
- Press the blue button to release the drums
- Wait until the button is solid blue
- Roll out the colour that you wish to change
- Pick it up by the blue handles
- Take out the colour you wish to use
- Place into the empty drum tray and roll it back in until it clicks closed
- Close the door
Step 2. Master Creation
with the Computer
- Create a pdf file or layer per colour you want to print in greyscale
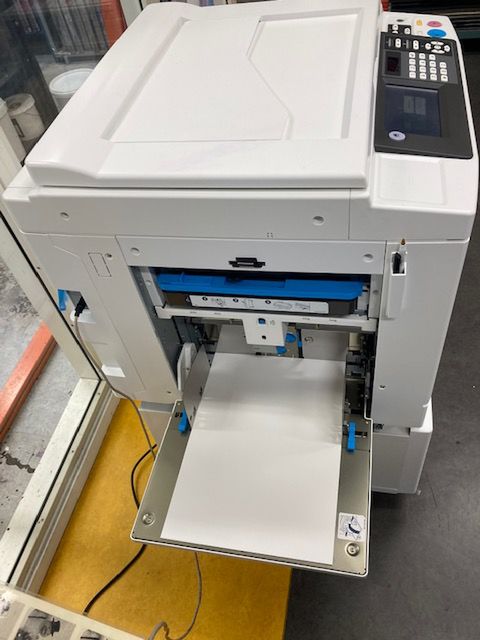
- Place the paper into the RISO. For the first prints, you can pick some paper from the misprints box. The best paper you can use for the RISO printer is uncoated paper, similar to sketch paper. The grammage can vary from 80 to 250 gsm.
Step 3. Printing the Master
3.1. Opening the printing dialogue window
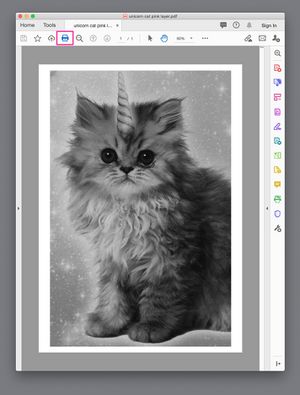
- Open the pdf file with the black and white image in Acrobat
- Click the printing icon on the top left
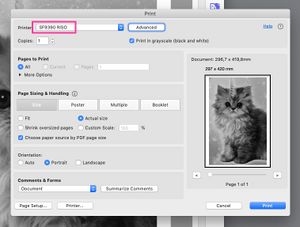
Selecting the right settings for the RISO printer
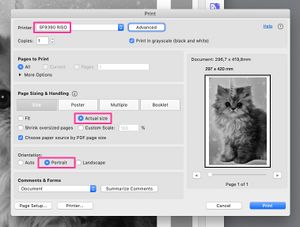
- Make sure the printing dialogue is directing you to the right RISO printer (you can see the name above, ex. SF9390 RISO)
- Check the desired settings in the main dialogue window (actual size, orientation and the right page number in the document)
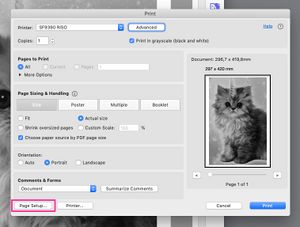
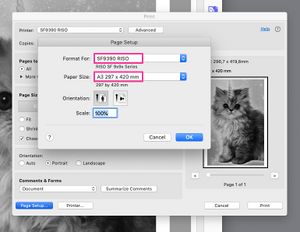
- Set the right size of the paper on the Page Setup button (ex. A3, A4) and the format for the selected printer. Then click OK
Change the Coloring Settings
- To change the coloring settings, click on the “Printer...” button
(image)
- In the small menu list, you can go to the Coloring settings. Here you can choose different effects. If you need to print a photograph or an illustration, check the Photo setting. For type, it is often recommended to select Line. In addition, you can play with other printing effects called Grain Touch or Screen Covered (see the final effect on the RISO Color Overview sheet above the printer for reference).
There is no need to change the colour of the ink through this window, it will automatically recognize it later while making a master
- When everything is selected, click Print.
Finally send your design to the RISO printer by clicking the blue Print button
[[1]]
3.2 Output the file on the RISO printer
After having sent the file to the printer, there are still a few steps you have to take beofre having your first master print.
- When sending a master, the RISO printer will receive data from the computer. You can check it on the RISO printer display by clicking the Data-Map button.
(image)
- When opening this window, you can check the name of the file. If you have accidentally sent the wrong file, press the Clear button. If the file has been paused by the printer, continue by clicking Output.
(image)
- If the printer is warning you that the color is wrong even if you previously put the right ink drum, just press continue.
(image)
Step 4. Make more prints!
Now that your master is done and looks well saturated with your chosen colour, you can make as many prints as you like!
- Place your paper in the feed tray
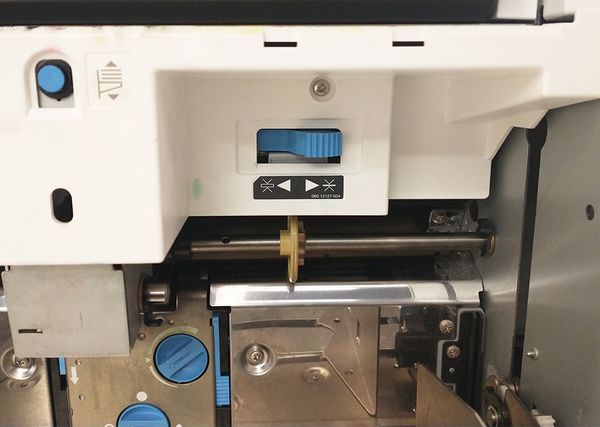
- Check the paper switch at the back of the printer. Turn in on the right if you are printing on thin paper and on the left (80gsm-120gsm) if you are working with thick paper (150gsm-300gsm)
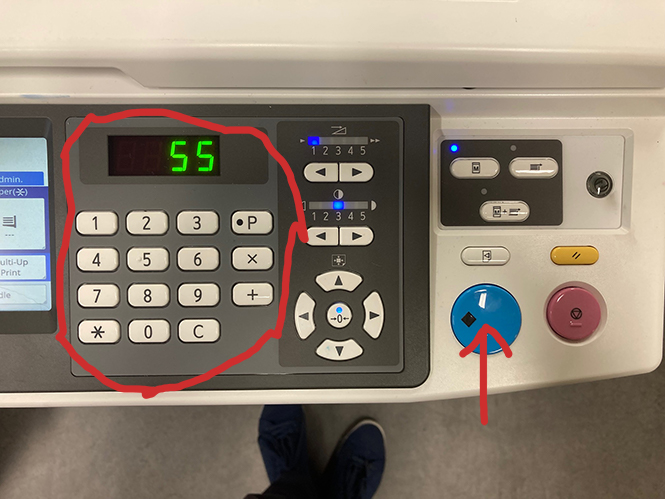
- Select how many copies you would like to make and press the blue button
spectrolite is a program that can help you to make colour separations for the Riso

