Quickstartguide:StickersCutting
From Publication Station
Revision as of 12:48, 17 April 2020 by Wilco (talk | contribs) (→How to cut printed stickers with our Roland vinylcutter)
How to cut printed stickers with our Roland vinylcutter
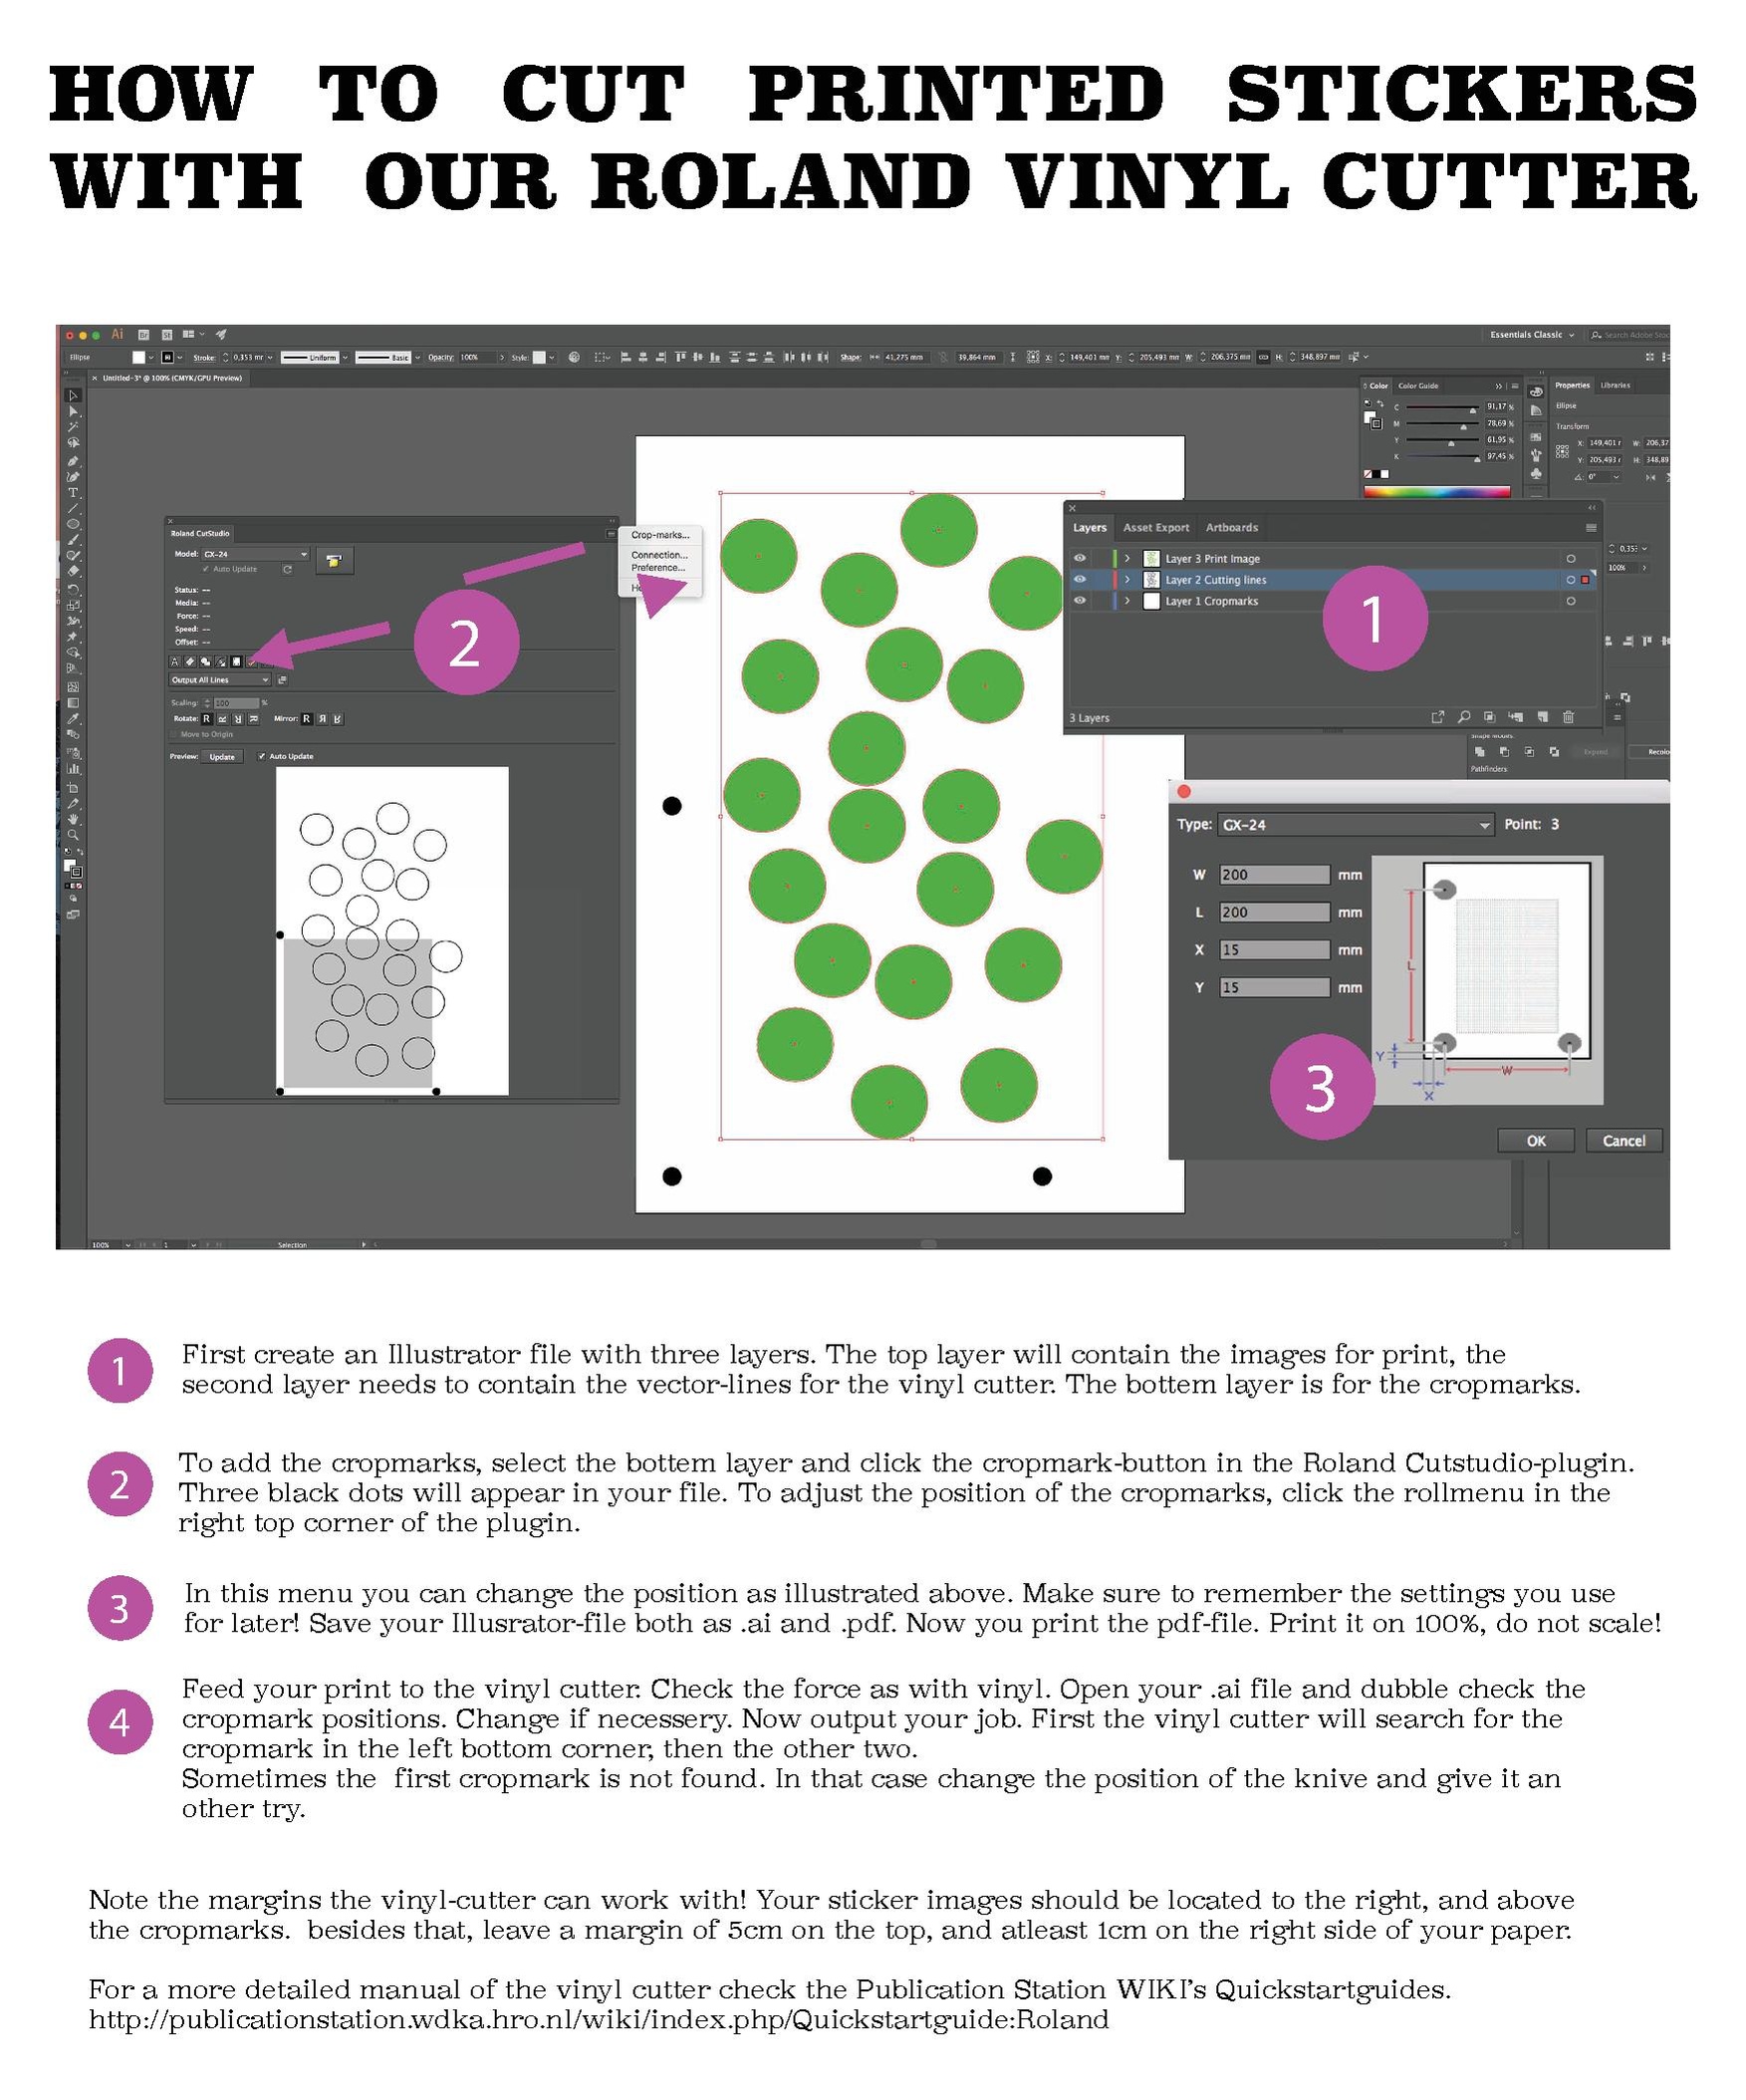
- Create an Illustrator file with three layers. The top layer will contain the images for print, the second layer needs to contain the vector-lines for the vinyl cutter. The bottom layer is for the crop marks.
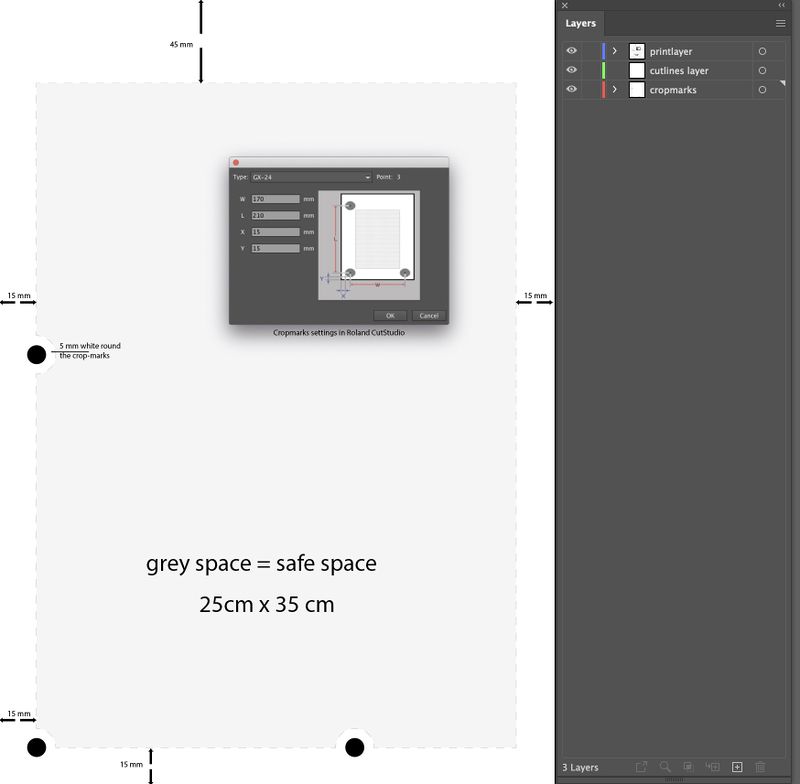
- Add the crop marks, select the bottom layer and click the crop mark-button in the Roland Cut Studio plugin (Window>>Extentions>>Roland Cut Studio). Three black dots will appear in your file. To adjust the position of the crop marks, click the rollmenu in the right top corner of the plugin.
- Save your Illustrator file both as .ai and .pdf. Now you print the pdf-file. Print it on 100%, do not scale
- Feed your print to the vinyl cutter. Check the force as with vinyl. Open your .ai file and output your job. First the vinyl cutter will search for the crop mark in the left bottom corner, then the other two.
Sometimes the first crop mark is not found. In that case change the position of the knife and give it an other try.
Note the margins the vinyl-cutter needs! Your sticker images should be located to the right, and above the crop marks. besides that, leave a margin of 5cm on the top, and at least 1cm on the right side of your paper.
For a more detailed manual of the vinyl cutter, check the Publication Station WIKI’s Quickstartguides. [[1]]

