Quickstartguide:Laser Cutter
Prepare file in Illustrator
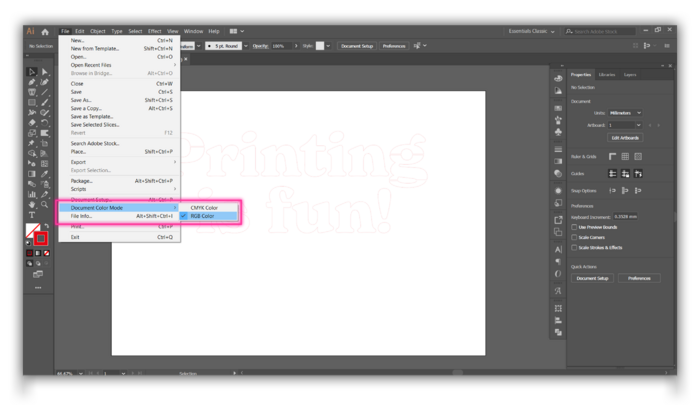
- Open your file in Illustrator. Make sure that your file is in RGB mode via File>Document>color mode>RGB.
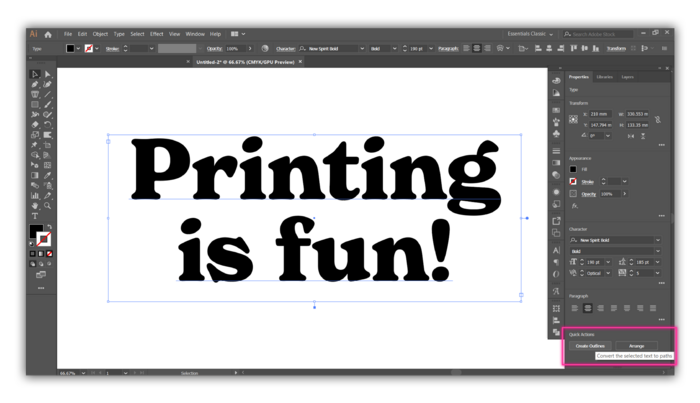
- Make sure your work has outlines. If you have text, make sure you have made them into outlines. You can do it by selecting your text box and look for the option "Create Outlines" in quick actions or ---> (Type>Create Outlines/Shift+Ctrl+O)
Lines that you want to CUT should be less than 0,025 mm thick and RED (RGB 255, 0, 0).
Lines that you want to ENGRAVE should be less than 0,025 mm thick and BLUE (RGB 0, 0, 255).
Areas that you want to engrave should be in grayscale
Select the lines or areas you would like to cut/engrave (to select everything, click ctrl+A/cmnd+A)
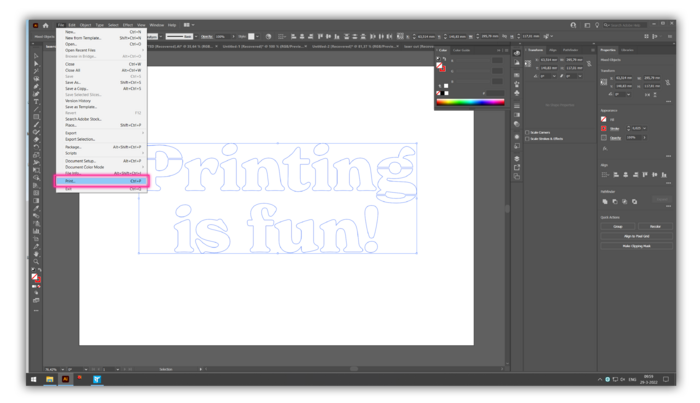
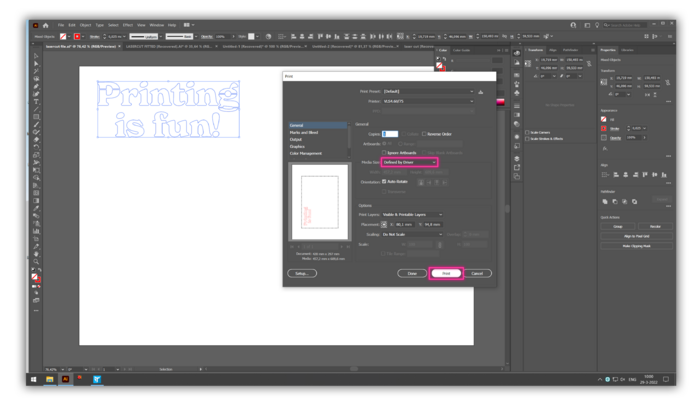
- Print your file (CMD+P).
VLS software
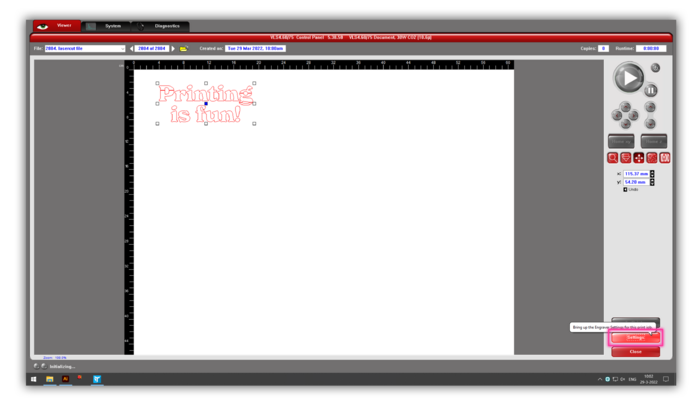
Your file is now open in the VLS software (the red icon). Open the VLS software.
Are all the colors still OK? If you had BLUE or RED in your illustrator and they aren’t here anymore, double-check the color mode and line thickness in Illustrator and print again.
Settings
- Click Settings
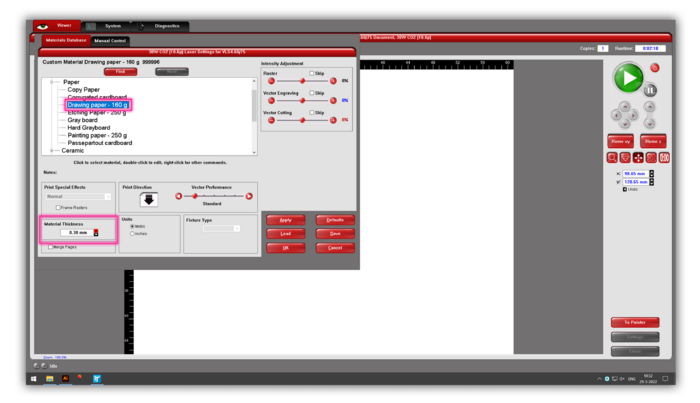
- In the materials database, choose what material you are using and enter the correct thickness.
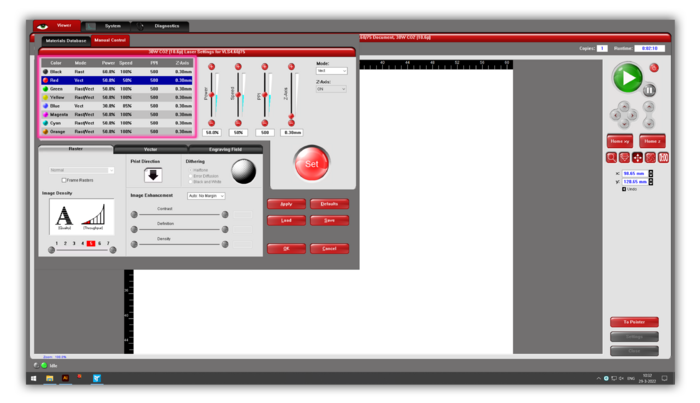
- In the next window, specify which action you are going to do in the Manual control (cutting, engraving lines or full areas)
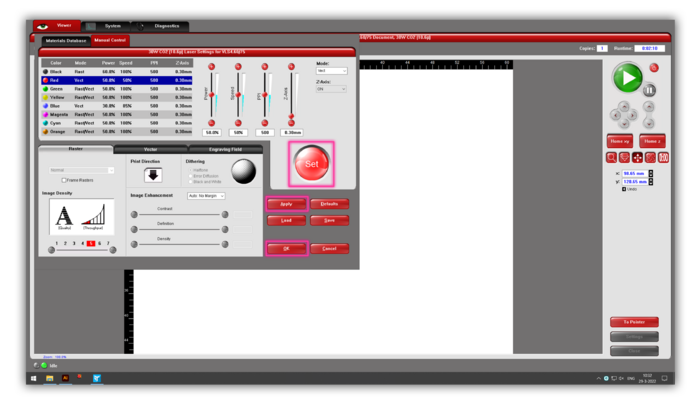
- Click Set, Apply and OK in order
Start Cutting
- Before cutting anything, turn on the air vacuum next to the laser cutter. If you don't the program shows a warning window of low air pressure.
Side Bar Settings
- Now you can play with some more setting in the side bar menu to utilize the design and the material better.
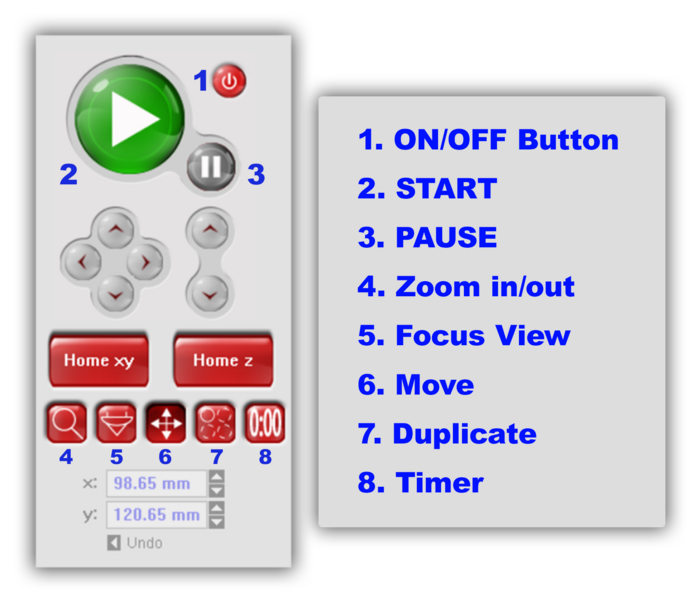
- Start Button: Click when you want to start cutting your design
- Focus View: Click anywhere in your design on the screen to see where the laser ends up in the machine. (Useful for positioning your material)
- Move your design
- Calculate how long the machine will take with the current settings
- Duplicate your design
Now you can press the START button to cut or engrave. If anything goes wrong, press the PAUSE button.
Extra:
If your are using non-standard materials, experiment with the Manual Control.
By changing the Speed, Power en PPI (Pulses Per Inch), you can get different results.
The z-axis stands for the material thickness. If you are ready, click ‘Set’, ‘Apply’ and ‘OK’.
Useful links
- templatemaker.nl Create and download custom sized papercraft and packaging templates for free.
- MakerCase is a web-based application for designing boxes or project cases for laser cutters and CNC routers.
