User:Willemhampson
Contents
Hello
Name: Willem Hampson
Email: willemhampson@hotmail.co.uk

Digital Craft
The moment I knew What I wanted to do
I think it has always been an ambition of mine to work in the arts but I do not remember a specific moment, my interest in making illustration my profession is a result of a culmination of inspirations, for example books such as the 'Tintin' series that entertained me as a child and continue to inspire me now.


What do you make?
I'm still trying to figure out a consistent way of working for myself. I start the majority of my work by drawing in pen or pencil but where it goes after that can vary.


What is your topic of interest?
One of my current topic of interest is publishing and how various forms of printing could advance my work, I haven't done very much of either however I find having your own work turned into some kind of physical edition highly rewarding.
What is your medium?
My answer to this is similar to the question of "what do you make?" in that I haven't settled on one specific medium, I like to work in pencil, pen, paint and ink. Softwares are becoming more important to my work, mainly Photoshop, Indesign and Illustrator (depending on the brief or project).
Circuit Board
We connected a touch sensitive circuit board to LED lights and a speaker in small groups.

Video link here -> [1]
Personal Project
I enjoy accidental and unintentional textures/marks that are made in my work. I would like to make some kind of machine that could make such marks for me. Something that reacts fairly unpredictably to the actions of the user.


Inspiration

Gerhard Richter is an artist who paints with materials that do not dry immediately, he will then takes a large rubber implement and drags it across the work, pulling all the wet paint with it. Although this effect is intentional, there's no way he can know exactly how the paint will react.

Ralph Steadman is an illustrator and cartoonist. Although his drawings are not abstract, he makes marks by splashing and blowing ink across the page, before working in to it.


Project experimentation and development
I decided a vibrating motor would be essential to my machine and started by getting hold of one of those. I thought it would be interesting to experiment with using the touch sensor to activate it. I simply replaced the speaker (shown in the 'circuit board' video link earlier) with the vibrating motor. This achieved a small amount of success and although the motor responded, it would not have been enough to result in the movement of other components. Instead I tried to make a circuit using a switch instead of a touch sensor.
 This had a much better result so I decided to test it and attached a pen to the vibrating motor.
I began experimenting by attaching a variety of pens to to the motor and seeing what kind of marks I could get on paper. Watch video experimentation link -> [2]
As shown in the video, I tried to attach 4 mark making items at once to a ruler to imitate my final machine. Perhaps there was too much weight in this as the motor was not powerful enough to create interesting movement. 
To try and resolve this I assumed an extra motor might give the extra power that I needed. Unfortunately this did not work and only one of the motors vibrated. I may look into the appropriate circuit to make both of them work.

Despite that, the rest of the experiment was fairly interesting. Here is the result.

I really liked the small dashed lines made the pen with a thin nib, with this in mind I made a quick sketch of a friend of mine with the motor switched on.


Further development
With the basic model made, I started to work on improving it. At the end of my last video I had attached the motor to a ruler and four mark making items. I found that the brushes did not react much to the motor due to the soft tip touching the paper. These I would simply replace with other pens or try to figure out a way of applying more power in the vibration. I also assumed that the weight in the ruler would have held down the four points of contact on the paper, and reduced the affect of the motor, for this reason I selected a lightweight foam board to test out my product.
Stage 1

I cut the foam board piece after measuring and drawing it out. On the four corners I put extensions with grooves to hold the pens. These were also held by elastic bands above and below the foam board. This was impractical however, and the pens kept slipping out. Instead I decided to go for two pieces with grooves for the pens, and only one elastic band per pen.
Stage 2

For increased strength and stability I cut away the corners of the square as slots for the pens. This stage worked to some extent however I felt that it was almost too stable to react much to the vibrating motor.
Stage 3

Due to four pens attached at once having little movement, I decided to go for 3 instead (hence the triangular shape). I needed both pieces to be identical so that the pens would be held in place properly so I laser cut them.

watch video
[3]
More marks


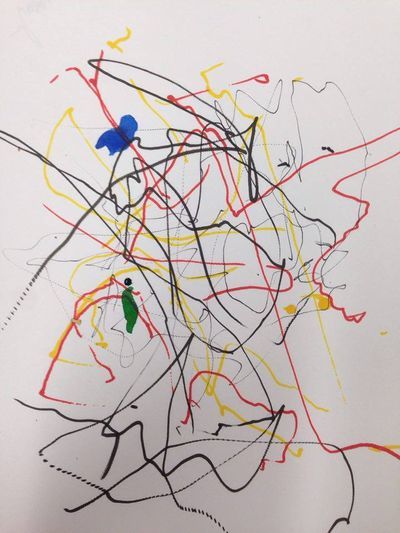
Here are a couple of pages made displaying the marks made by my product. One interesting result was that the machine would sometimes draw perfectly circular lines, due to the vibration creating a weight to one direction.
Evaluation and next steps if carried on
The final point above about the machine occasionally making circles sparked an idea for where I might further develop the work. If I was able to manipulate the machine in ways of my choice, I could create a variety of mark making machines, each with it's own intended purpose (an 'expanded toolbox' of mark makers).
I used the same vibrating motor component throughout my project which, when I look back on, was restrictive to some extent. If I were to continue I would experiment with several more, varying the power, size, and what they are mounted to. However this may be focussing too much on the finer details. At the end of the project I discovered the installation 'ADA' by Karina Smigla-Bobinksi. This was a project in which the artist attached hundreds of charcoal sticks to the exterior of a helium balloon, allowing viewers to interact with the balloon and covering a whole room in charcoal marks.

The discovery of this project made me question whether I was thinking about progression in the right direction. My initial concept was to design something as a sort of mark making aid to my own artwork. Something that would create a base for me to build on, however I like the idea of altering this concept to a design that is the ultimate outcome in itself, and does not just provide me with the starting point of more work, like 'ADA'. To do this would require a lot more experimentations however the obvious starting point would be to go bigger, creating some kind of spectacle for a viewer. I would look into industrial vibrating motors such as this one I found online.

This direction lends the product to be used in an exhibition space rather than practical application, here is a rough idea of how it could be put in to practice.

I would attach some kind of components that would allow materials such as ink to be splattered when thrown over the motor. This job wouldn't necessarily have to be done by a person as it could be quite messy, however this could also add another exciting element to the interaction. The vibrating motor could also be substituted for other moving electrical or mechanical products such as a fan. This is a starting point but could lead to an expanded toolbox of exhibition based mark makers.
Mimicking Machines
Assignment 1
I Draw. You Draw. It Draws
The first assignment involved drawing our favourite machine with instructions for someone else to imitate this drawing. I used a grid format with an x and a y axis as I thought the instructions for this would translate easily and someone would be able to follow it. The machine I drew was a guitar amplifier.

We also took our own vector drawings and had them digitally drawn on a machine usually used for cutting shapes with a blade. The blade was simply replaced with a ballpoint pen.

Assignment 2
3D letters
I started by sketching a letters in pencil, when I was settled on a design I scanned it and used Adobe Illustrator to trace over it. This vector file was then taken into sketchup where I made it a 3D digital file.

