Difference between revisions of "Quickstartguide:Riso"
From Publication Station
| Line 39: | Line 39: | ||
* Open the front of the RISO | * Open the front of the RISO | ||
* Press the | * Press the blue button to release the drums | ||
* Wait until the button is solid blue | |||
* Roll out the colour that you wish to change | |||
[[File:Risoooo.jpg]] | |||
[[File: | |||
* Pick it up by the | * Pick it up by the blue handles | ||
* Place it carefully | * Place it carefully into the color box | ||
* Take out the colour you wish to use | * Take out the colour you wish to use | ||
* Place into the empty drum tray and roll it back in until it clicks closed | * Place into the empty drum tray and roll it back in until it clicks closed | ||
* Close the door | * Close the door | ||
* Print! | * Print! | ||
Revision as of 13:37, 11 May 2021
There are two stages involved in printing on the RISO. First Master creation, then Printing.
Step 1. Master Creation
with the Computer
- Create a file or layer per colour you want to print in greyscale
- Open your file
- Place the colour that you want into the RISO Don't know how?
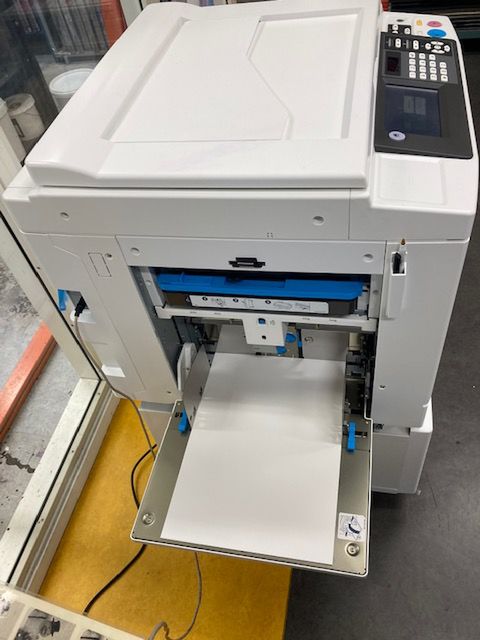
- Place paper into the RISO
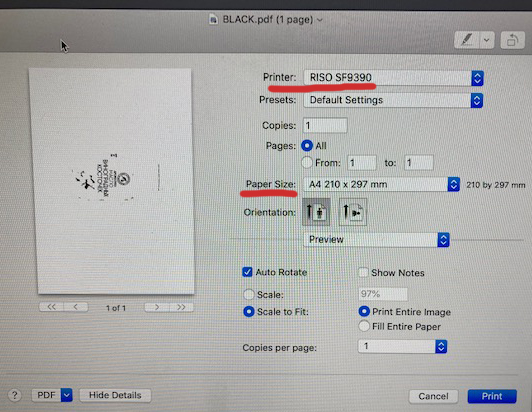
- Choose the RISO SF9390 printer, then check and set any other settings you like. (paper size etc) When done press Print to create the master
Step 2. Printing
- First make your Master(s) (see above)
- Place your paper in the feed tray
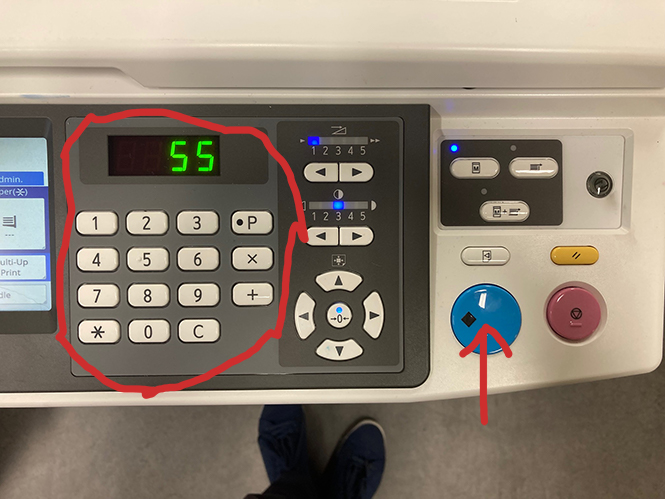
- Select how many copies you would like to make and press the blue button
Switching Colours
- Open the front of the RISO
- Press the blue button to release the drums
- Wait until the button is solid blue
- Roll out the colour that you wish to change
- Pick it up by the blue handles
- Place it carefully into the color box
- Take out the colour you wish to use
- Place into the empty drum tray and roll it back in until it clicks closed
- Close the door
- Print!


