User:Sara
Contents
PRESENTATION PROJECT "SoundGarden"
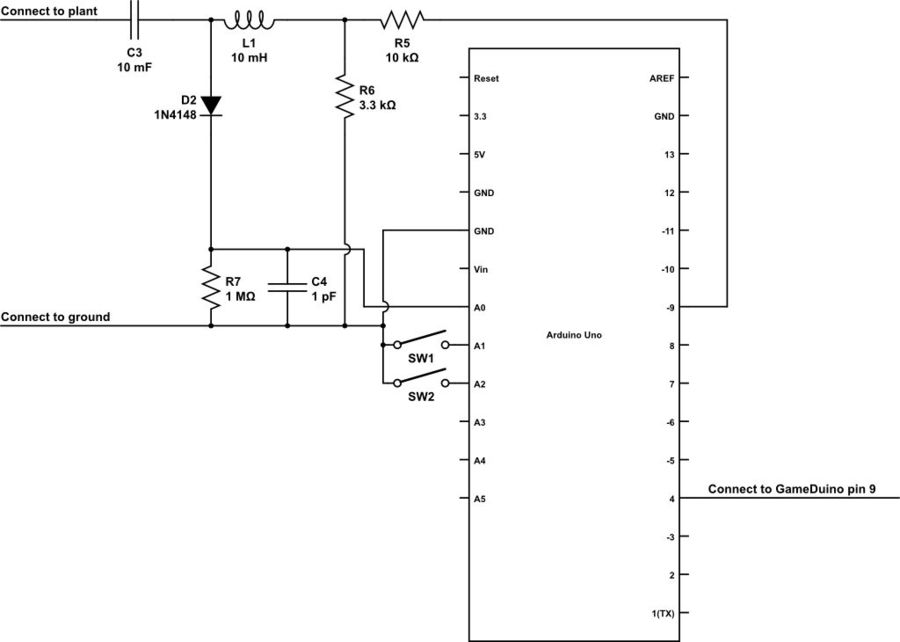
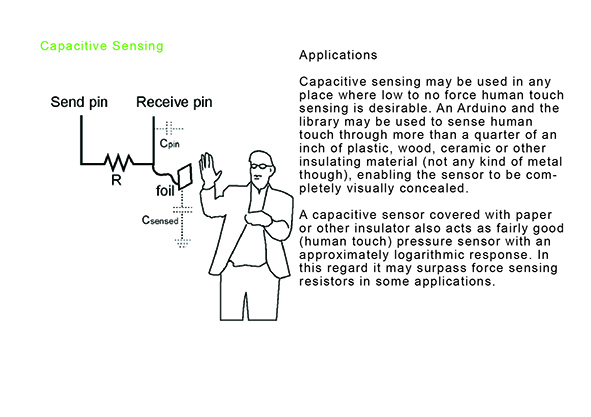
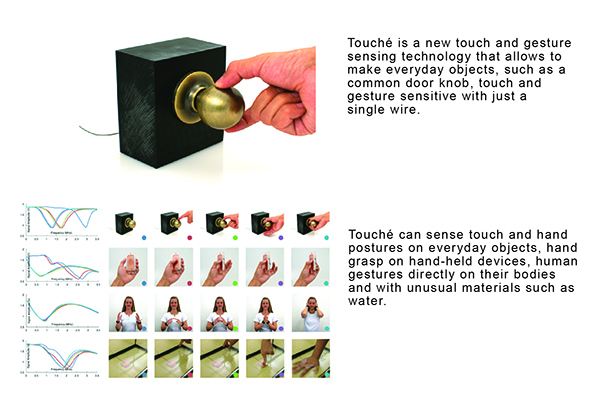
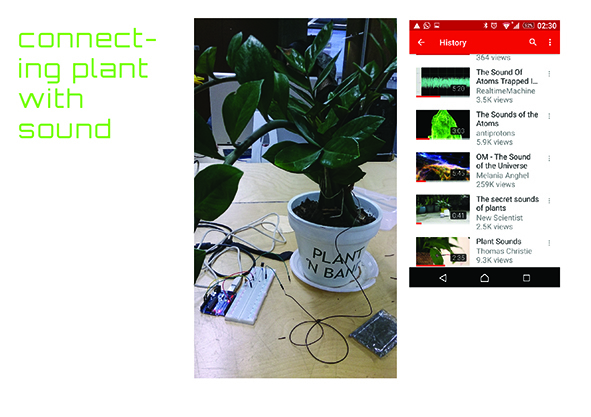
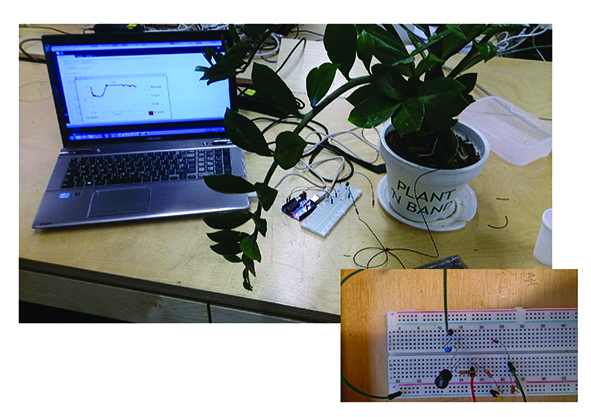
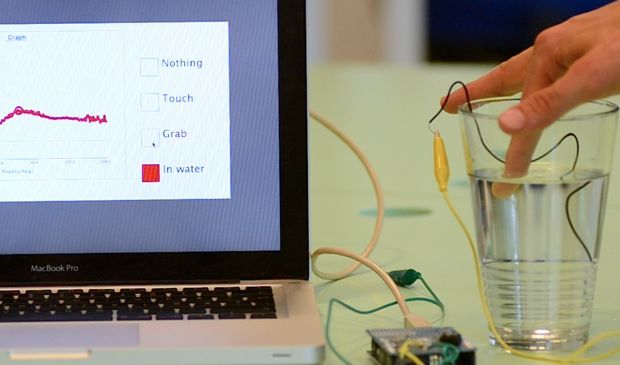
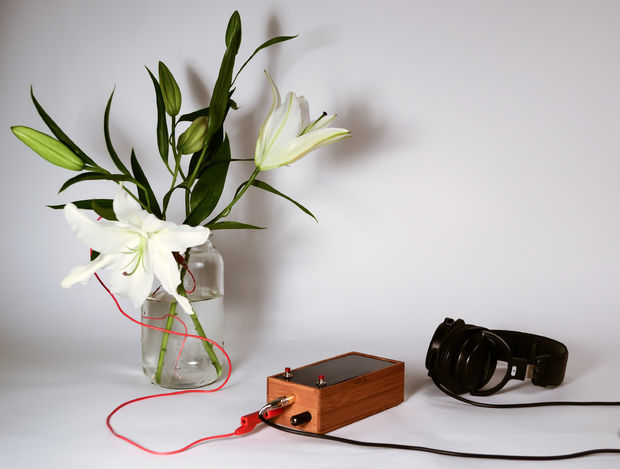
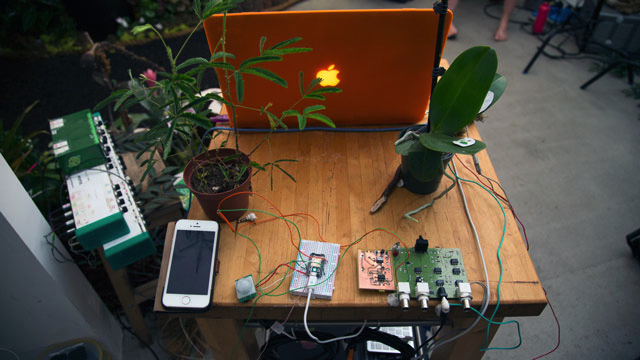
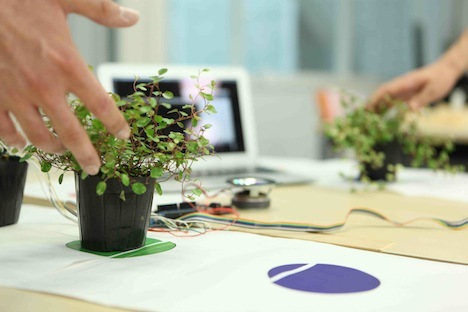
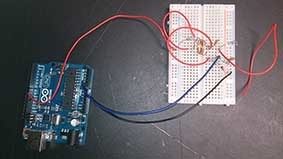
The idea of the project was to make a connection with a living organism -plant- and electronics in order to sense the plant in a different light. Like every living organism, plants have their own language that humans can't hear. We don't know what kind of emotions the plants are manifesting in different circumstances or what is the sound of their communication. I have made a lot of researches in order to get an idea of the subject, and how to make the plant "speak" to us. In this project, I have used Arduino and processing. For the part of coding Arduino which works as capacitive touch sensor. The sensor works when the two objects are conductive; you can measure the capacitance between them (like metal, water, human bodies, and plants). By connecting a capacitance sensor to a plant is possible to detect if people are touching it and convert the touch into sound.
COMPONENTS NEEDED:
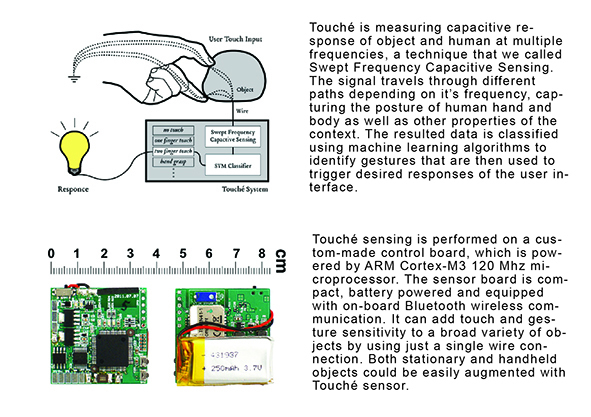
Components needed for the touche shield:
Prototyping shield
Pin headers
Resister: 10k, 1MOmh, 3,3k
Capacitor: 100pf, 10nf
Diode: 1N4148 diode
Coil / inductor: 10mH (cypax.dk part no: 07.055.0510)
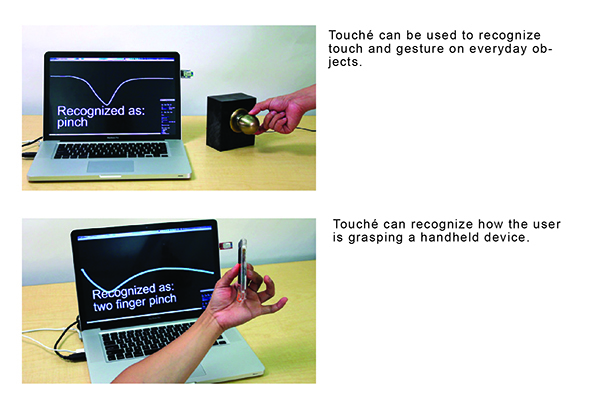
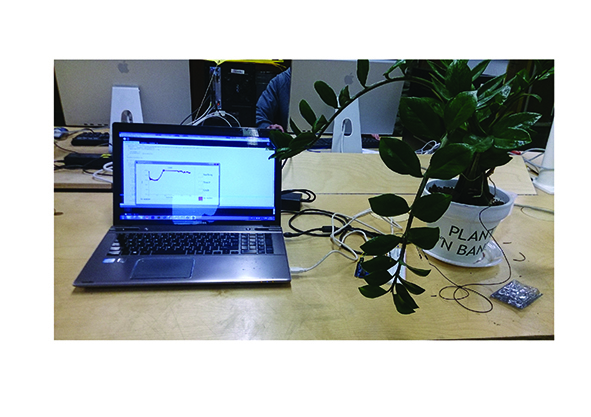
My idea was to try to measure the changes visible on the graph in Processing that are coming from the Arduino board, and based on the different input convert them into sound. This part of the project should be a final result of the real sound based on the touch and the changes of frequencies. In this project, I used instead two different sounds that in my opinion where something, as I immageine this plant communication, would sound like.
code arduino:
//****************************************************************************************
// Illutron take on Disney style capacitive touch sensor using only passives and Arduino // Dzl 2012 //****************************************************************************************
// 10n
// PIN 9 --[10k]-+-----10mH---+--||-- OBJECT
// | |
// 3.3k |
// | V 1N4148 diode
// GND |
// |
//Analog 0 ---+------+--------+
// | |
// 100pf 1MOmhm
// | |
// GND GND
- define SET(x,y) (x |=(1<<y)) //-Bit set/clear macros
- define CLR(x,y) (x &= (~(1<<y))) // |
- define CHK(x,y) (x & (1<<y)) // |
- define TOG(x,y) (x^=(1<<y)) //-+
- define N 160 //How many frequencies
float results[N]; //-Filtered result buffer float freq[N]; //-Filtered result buffer int sizeOfArray = N;
void setup() {
 TCCR1A=0b10000010;        //-Set up frequency generator
 TCCR1B=0b00011001;        //-+
 ICR1=110;
 OCR1A=55;
 pinMode(9,OUTPUT);        //-Signal generator pin
 pinMode(8,OUTPUT);        //-Sync (test) pin
Serial.begin(115200);
 for(int i=0;i<N;i++)      //-Preset results
   results[i]=0;         //-+
}
void loop() {
unsigned int d;
 int counter = 0;
 for(unsigned int d=0;d<N;d++)
 {
   int v=analogRead(0);    //-Read response signal
   CLR(TCCR1B,0);          //-Stop generator
   TCNT1=0;                //-Reload new frequency
   ICR1=d;                 // |
   OCR1A=d/2;              //-+
   SET(TCCR1B,0);          //-Restart generator
   results[d]=results[d]*0.5+(float)(v)*0.5; //Filter results

   freq[d] = d;
//   plot(v,0);              //-Display
//   plot(results[d],1);
 // delayMicroseconds(1);
 }
PlottArray(1,freq,results);
TOG(PORTB,0); //-Toggle pin 8 after each sweep (good for scope)
}
PROCESSING GRAPH CODE:
Graph MyArduinoGraph = new Graph(150, 80, 500, 300, color (200, 20, 20)); float[] gestureOne=null; float[] gestureTwo = null; float[] gestureThree = null;
float[][] gesturePoints = new float[4][2]; float[] gestureDist = new float[4]; String[] names = {"Nothing", "Touch", "Grab","In water"}; void setup() {
size(1000, 500);
 MyArduinoGraph.xLabel="Readnumber";
 MyArduinoGraph.yLabel="Amp";
 MyArduinoGraph.Title=" Graph";
 noLoop();
 PortSelected=1;      /* ====================================================================
  adjust this (0,1,2...) until the correct port is selected
  In my case 2 for COM4, after I look at the Serial.list() string
  println( Serial.list() );
  [0] "COM1"
  [1] "COM2"
  [2] "COM4"
  ==================================================================== */
 SerialPortSetup();      // speed of 115200 bps etc.
}
void draw() {
background(255);
 /* ====================================================================
  Print the graph
  ====================================================================  */
 if ( DataRecieved3 ) {
   pushMatrix();
   pushStyle();
   MyArduinoGraph.yMax=1000;
   MyArduinoGraph.yMin=-200;
   MyArduinoGraph.xMax=int (max(Time3));
   MyArduinoGraph.DrawAxis();
   MyArduinoGraph.smoothLine(Time3, Voltage3);
   popStyle();
   popMatrix();
   float gestureOneDiff =0;
   float gestureTwoDiff =0;
   float gestureThreeDiff =0;
   /* ====================================================================
    Gesture compare
    ====================================================================  */
   float totalDist = 0;
   int currentMax = 0;
   float currentMaxValue = -1;
   for (int i = 0; i < 4;i++)
{
     //  gesturePoints[i][0] =
     if (mousePressed && mouseX > 750 && mouseX<800 && mouseY > 100*(i+1) && mouseY < 100*(i+1) + 50)
     {
       fill(255, 0, 0);
       gesturePoints[i][0] = Time3[MyArduinoGraph.maxI];
       gesturePoints[i][1] = Voltage3[MyArduinoGraph.maxI];
     }
     else
     {
       fill(255, 255, 255);
     }
  //calucalte individual dist
     gestureDist[i] = dist(Time3[MyArduinoGraph.maxI], Voltage3[MyArduinoGraph.maxI], gesturePoints[i][0], gesturePoints[i][1]);
     totalDist = totalDist + gestureDist[i];
     if(gestureDist[i] < currentMaxValue || i == 0)
     {
        currentMax = i;
       currentMaxValue =  gestureDist[i];
     }
   }
   totalDist=totalDist /3;
   for (int i = 0; i < 4;i++)
   {
     float currentAmmount = 0;
     currentAmmount = 1-gestureDist[i]/totalDist;
     if(currentMax == i)
      {
        fill(0,0,0);
   //       text(names[i],50,450);
      fill(currentAmmount*255.0f, 0, 0);
      }
      else
      {
        fill(255,255,255);
      }
     stroke(0, 0, 0);
     rect(750, 100 * (i+1), 50, 50);
     fill(0,0,0);
     textSize(30);
     text(names[i],810,100 * (i+1)+25);
     fill(255, 0, 0);
  //   rect(800,100* (i+1), max(0,currentAmmount*50),50);
   }
}
}
void stop() {
 myPort.stop();
 super.stop();
}
ADDING SOUND FORM MY CODE:
minim.stop();
super.stop();
}
void keyPressed() {
 if (keyCode == LEFT) P1.unmute();
 if(keyCode == RIGHT) P2.unmute();
} void keyReleased() {
 if (keyCode == LEFT) P1.mute();
 if(keyCode == RIGHT) P2.mute();
}
FINAL PROCESSING CODE GRAPH AND SOUND:
Graph MyArduinoGraph = new Graph(150, 80, 500, 300, color (200, 20, 20)); float[] gestureOne=null; float[] gestureTwo = null; float[] gestureThree = null;
float[][] gesturePoints = new float[4][2]; float[] gestureDist = new float[4]; String[] names = {"Nothing", "Touch", "Grab","In water"};
import ddf.minim.*;
Minim minim; AudioPlayer P1; AudioPlayer P2;
void setup() {
size(1000, 500);
minim = new Minim(this);
 P1 = minim.loadFile("song1.wav");
 P2 = minim.loadFile("song2.wav");

 P1.loop();
 P2.loop();

 P1.mute();
 P2.mute();
 MyArduinoGraph.xLabel="Readnumber";
 MyArduinoGraph.yLabel="Amp";
 MyArduinoGraph.Title=" Graph";
 noLoop();
 PortSelected=1;      /* ====================================================================
  adjust this (0,1,2...) until the correct port is selected
  In my case 2 for COM4, after I look at the Serial.list() string
  println( Serial.list() );
  [0] "COM1"
  [1] "COM2"
  [2] "COM4"
  ==================================================================== */
 SerialPortSetup();      // speed of 115200 bps etc.
}
void draw() {
background(255);
 /* ====================================================================
  Print the graph
  ====================================================================  */
 if ( DataRecieved3 ) {
   pushMatrix();
   pushStyle();
   MyArduinoGraph.yMax=1000;
   MyArduinoGraph.yMin=-200;
   MyArduinoGraph.xMax=int (max(Time3));
   MyArduinoGraph.DrawAxis();
   MyArduinoGraph.smoothLine(Time3, Voltage3);
   popStyle();
   popMatrix();
   float gestureOneDiff =0;
   float gestureTwoDiff =0;
   float gestureThreeDiff =0;
   /* ====================================================================
    Gesture compare
    ====================================================================  */
   float totalDist = 0;
   int currentMax = 0;
   float currentMaxValue = -1;
   for (int i = 0; i < 4;i++)
{
     //  gesturePoints[i][0] =
     if (mousePressed && mouseX > 750 && mouseX<800 && mouseY > 100*(i+1) && mouseY < 100*(i+1) + 50)
     {
       fill(255, 0, 0);
       gesturePoints[i][0] = Time3[MyArduinoGraph.maxI];
       gesturePoints[i][1] = Voltage3[MyArduinoGraph.maxI];
     }
     else
     {
       fill(255, 255, 255);
     }
  //calucalte individual dist
     gestureDist[i] = dist(Time3[MyArduinoGraph.maxI], Voltage3[MyArduinoGraph.maxI], gesturePoints[i][0], gesturePoints[i][1]);
     totalDist = totalDist + gestureDist[i];
     if(gestureDist[i] < currentMaxValue || i == 0)
     {
        currentMax = i;
       currentMaxValue =  gestureDist[i];
     }
   }
   totalDist=totalDist /3;
   for (int i = 0; i < 4;i++)
   {
     float currentAmmount = 0;
     currentAmmount = 1-gestureDist[i]/totalDist;
     if(currentMax == i)
      {
        fill(0,0,0);
        println("currentmax " + currentMax);
        // do stuff here!!
        // i is the thing happened (grab, touch, etc, etc, ...)
        if (i == 0) {
          // nothing
        } else if (i == 1){
          //touch
          P1.unmute();
          P2.mute();
        } else if (i == 2) {
          //grab
          P2.unmute();
          P1.mute();
        } else if (i == 3) {
          //in water
          P1.mute();
          P2.mute();
        }

          text(names[i],50,450);
      fill(currentAmmount*255.0f, 0, 0);
      }
      else
      {
        fill(255,255,255);
      }
     stroke(0, 0, 0);
     rect(750, 100 * (i+1), 50, 50);
     fill(0,0,0);
     textSize(30);
     text(names[i],810,100 * (i+1)+25);
     fill(255, 0, 0);
  //   rect(800,100* (i+1), max(0,currentAmmount*50),50);
   }
}
}
void stop() {
 P1.close();
 P2.close();

 minim.stop();
 myPort.stop();
 super.stop();
}
VIDEO: [1]
Project RESEARCH and TESTING
research
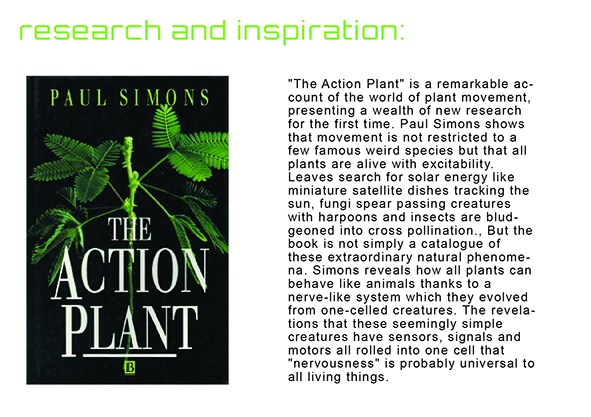
'CAPACITIVE SENSING WITH ARDUINO' [2]
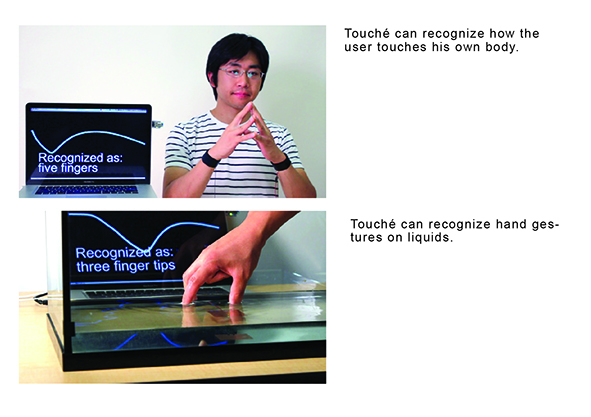
'Touche for Arduino: Advanced touch sensing' [3]
'Singing plant'
[4]
'capactive touch sensor'
[5]
'The Exquisite Sounds of Plants'
[6]
Mileece mentions using galvanic skin response sensors, which measure variations in resistance between 2 points (leaf and roots perhaps) and EEG (Electroencephalography) (I don't think that a plant has an encephalo to electrically graph but it's Mileece term) which means measuring micro voltage changes.
From the article it looks like Mileece is using an arduino or similar device to monitor these sensors and feeds the output into a sound synthesiser.
'Singing Plants at Damanhur' [8]
'sound of plants'
[9]
An interactive sound installation sourced from a plant.
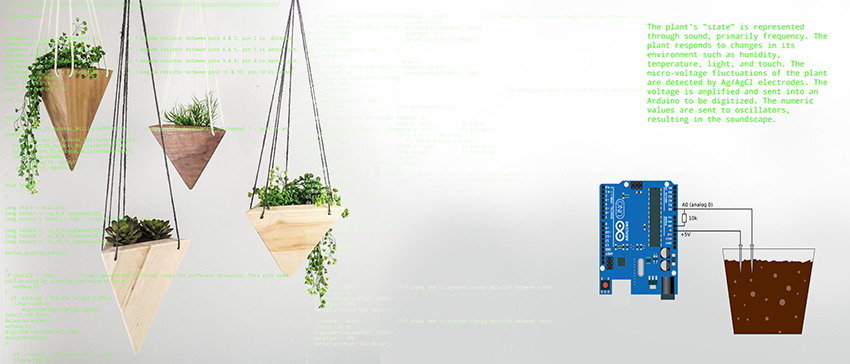
The plant's "state" is represented through sound, primarily frequency. The plant responds to changes in its environment such as humidity, temperature, light, and touch. The micro-voltage fluctuations of the plant are detected by Ag/AgCl electrodes. The voltage is amplified and sent into an Arduino to be digitized. The numeric values are sent to oscillators, resulting in the soundscape.
Installation by Thomas V. Christie
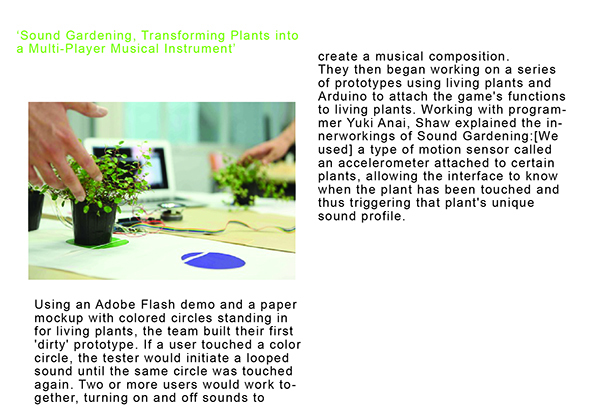
'Sound Gardening, Transforming Plants into a Multi-Player Musical Instrument'
'Hacking House Plants To Make Music When They’re Touched'
[11]
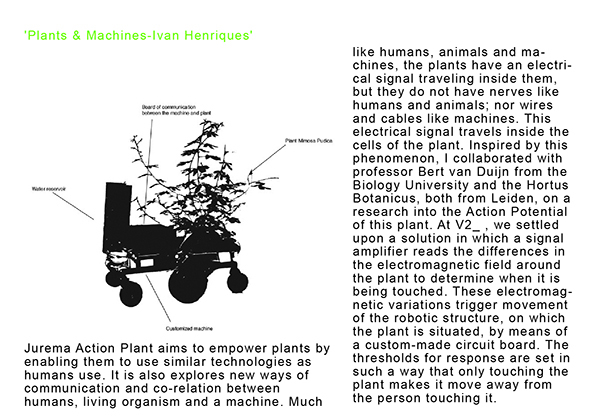
'Plants & Machines-Ivan Henriques'
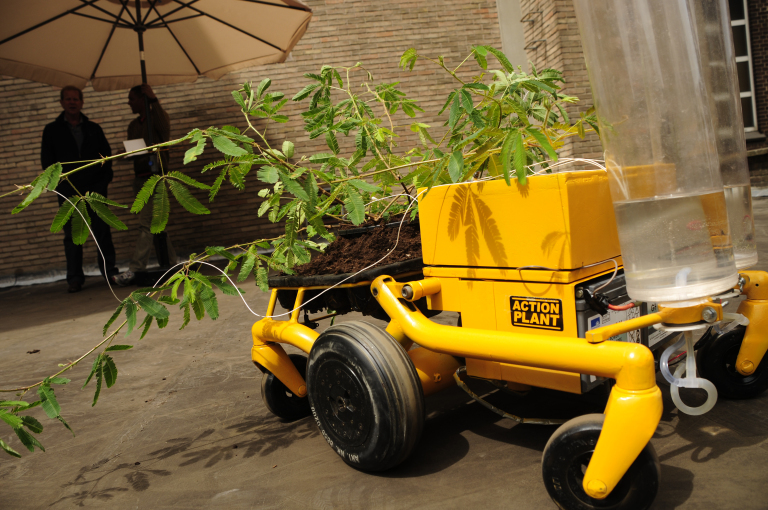
The project Symbiotic Machine is a continuation of the project Jurema Action Plant (JAP, 2011/12). JAP was developed during the summer residency at V2_ Institute for the Unstable Media in Rotterdam, and part of a research with scientist Bert van Duijn, expertise in plant electrophysiology and biodynamic. Much like humans, animals and machines, plants have an electrical signal traveling inside them, but they do not have nerves like humans and animals; nor wires and cables like machines. Machines operate with high voltage and stable current – plants, humans and animals operates with low voltage and unstable current. Would it be possible to straighten electric-mechanical systems from machines to operate with such low energy source, like most biological systems do? Would be possible for a plant power a machine? In JAP we were reading electrical signals of the plant Mimosa Pudica. The result of this collaboration is a hybrid robot – the machine interfaces the plant – enabling it to enjoy technologies similar to the ones humans use. When someone touches the leaf of the plant, electrical signals are changed enabling the machine to drive. This project also explores new ways of communication and co-relation between machines, humans and other living organisms.
'project sketch'
TESTING
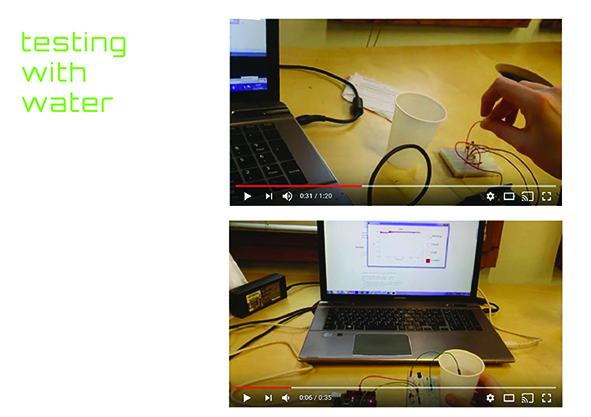
'ARDUINO CODING CAPACTIVE SENSOR'
VIDEO:
VIDEO:
testing with a proper inductor
Q9 Unreveal The Code V/ Practice 2016-2017
workshop 1
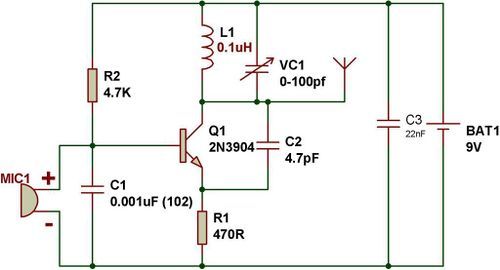
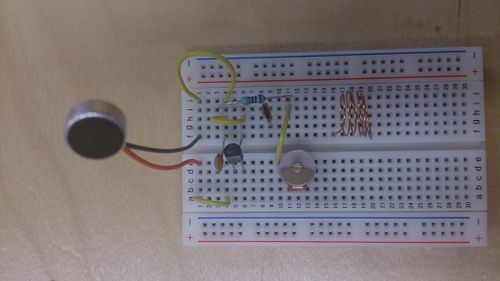
On the first workshop, working together with Caio we tried to make an FM Transmitter using a breadboard.
We follow this tutorial How to make FM transmitter.
We were able to plug everything right, but we couldn't find the right tune to listening to the transmitter.
On the tutorial, they gave tihs formula to find out the right tune,
L = [(d^2)(n^2)] / [18d + 40l]
L – in uH (inductor)
d – in inches (coil diameter)
l – coil length in inches
n – number of turns
Unfortunately we couodn't find the problem and make it work. The transmitter was exposed together with the other students work at the Radiation - Digital Craft exhibition.
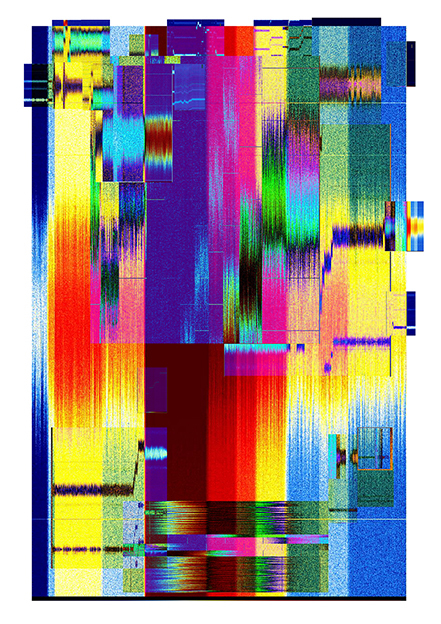
experimenting radio
creating sound patterns
SOUNDGARDEN RADIO
[14] Poster 4 the project
Q8 The Expanded Toolbox / Practice 2015-2016
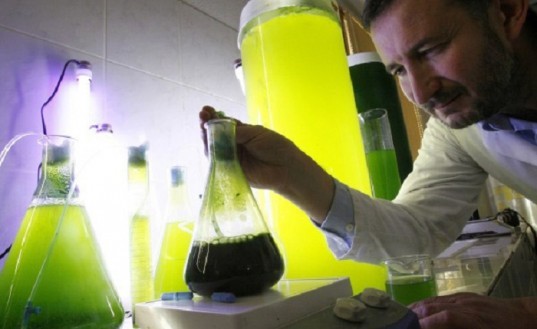
algae research
This Algae Battery Could Power A Tesla With 200X The Charge
In a small lab, near a lake at the edge of West Berkeley, sits the prototype of what could revolutionize battery power as we know it. The secret to this power? Algae.
OK, just hang with me here. Lots of research has already been done on algae’s possible power capabilities. Prototype creator Adam Freeman says this new kind of battery, the one he’s working on, could power even a Tesla. And he says it could do it 200X greater than the current lithium-based battery used today.
He’s created a research company called alGAS that aims to prove just that.
Freeman says the algae battery also charges faster and lasts longer than current ion batteries used in, say, your cell phone, iPad… or a Tesla. As Freeman explains, paper-thin fibers in algae provide an easier surface for ions to get through, resulting in a charge in as little as 11 seconds, not minutes or hours.
Here is how a current battery charges, using lots of what we currently mine may be going extinct or, worse, cause cancer: File:Al21.jpg
Previous tests prove algae has a charge and could theoretically work as battery power, but what’s not known is how much of a charge and how much of it will be needed to power, say, a car. Freeman believes he’s figured out the answer. What he needs now is the funding to bring it into mass production.
Those materials currently used in ion batteries (cell phones, etc.) — 95 percent of which are shipped from China — are hard to extract. This makes them quite expensive.
Tesla pledged to use U.S. materials only, which does cut the cost. Still, it’s got to be more than what it costs to grow and use algae powered batteries, right? Right, according to Freeman. He says he only needs $1,500 for the prototype and that he can have his algae battery ready for mass production for a mere $5,000 by this summer.
The implications for this go beyond cars. In theory you could power your entire house. Yes, a living, breathing algae plant could make your house “go.” A French biochemist already powered a streetlight with the stuff.
What makes Freeman’s prototype different from previous tests is the use of a bio-safe polymer. The polymer is a critical element that binds the fibers together to create a better interaction with the electron charge.
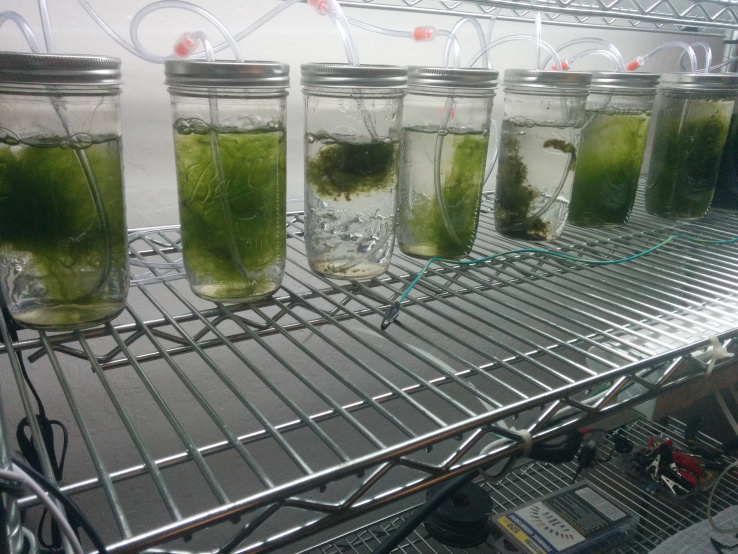
While the prototype is still basically just a bunch of jars full of algae on the shelf of some lab, the potential, according to Freeman, is very big.
“Think of driving your car on a living battery that charges in seconds with a battery that costs almost nothing and is actually good for the environment.”
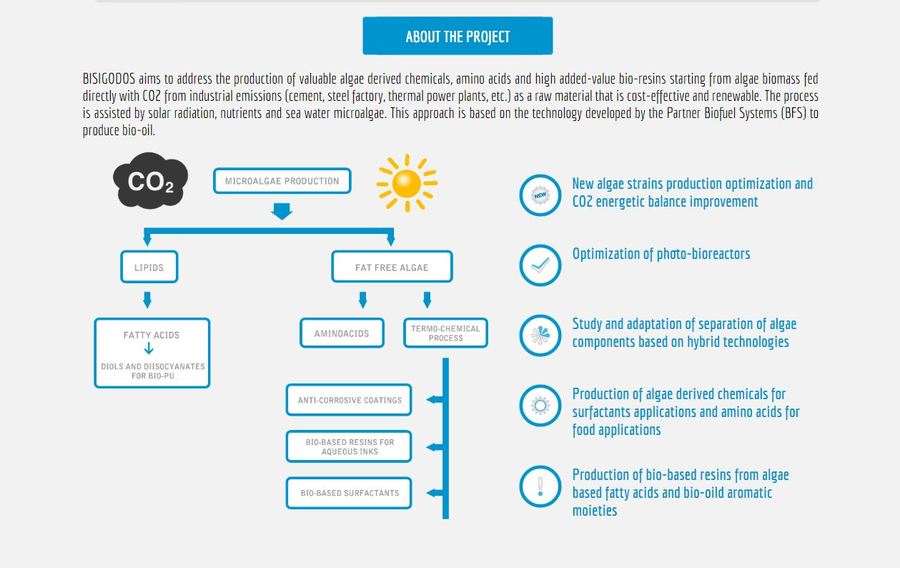
bisigodos
______________________
Algae living ink
Over the years, we’ve admired many drawings created with unconventional materials, but this might be the most off-beat yet. Thanks to the team at Living Ink Technologies, algae is now a viable option for image-making, with a special added component: algae acts as an invisible ink that appears after a few days of exposure to sunlight. Its creators refer to this as “time lapse ink,” and they put this unique mixture into a pen intended for drawing and writing secret messages.
Living Ink utilizes the material's inherent scientific properties to produce their innovative product. Each pen contains very tiny amounts of cyanobacteria, algae, and chlorophyll, which, at first, are invisible to the naked eye. But with added sunlight, the algae and bacteria reproduce at an exponential rate in a process called binary fission. This results in billions of cells that become so dense, we can see them as a single green mass.
The world’s first algae ink comes in two varieties: a pink pen, which contains “fast ink” that grows in a couple of days; and a blue pen that has “slow ink” that takes three or four days to appear. This allows a design to have a playful two-part reveal over the course of a week.
After drawing your illustration, there’s one simple step left in the Living Ink process. Insert the artwork inside a compact greenhouse/picture frame, which is filled with a nutrient dense material that promotes growth. After a little time and some sunlight, your creation will appear.
Living Ink Technologies has taken to Kickstarter for funding its product. There, you can pre-order your own set of pens that celebrate the fusion of art and science. File:Ink.jpg
The Top 10 Most Innovative Algae-Powered Designs
Algae isn't just a bunch of seaweed: it's an amazing natural resource that can power everything from a light bulb to an entire city. New technology is exploring the various uses of algae to fuel big and small things cleanly, and scientists are asking whether a whole city could be run on algae, or if algae could power devices ranging from night lights to aircraft. The result of these inquiries is a wide array of solutions that can help us harness the power of this phenomenal plant to reduce our dependence on fossil fuels to power our modern world.
Algae has many different qualities that we can draw upon, from edible varieties that make their way onto our dinner plates, to those whose bioluminescence can be harnessed for glow-in-the-dark technology. Algae regenerates quickly, and as one of the most abundant plants on the planet, it is one of our greatest sources of oxygen. Read on to learn about ten of the most innovative algae-powered designs that have been created recently, from miniature to gargantuan.
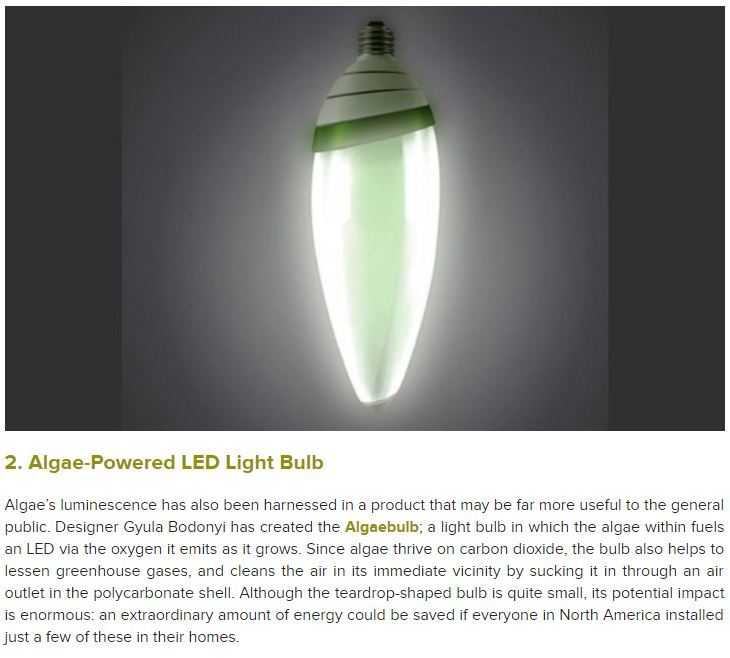
Algae-Powered LED Light Bulb***
Algae’s luminescence has also been harnessed in a product that may be far more useful to the general public. Designer Gyula Bodonyi has created the Algaebulb; a light bulb in which the algae within fuels an LED via the oxygen it emits as it grows. Since algae thrive on carbon dioxide, the bulb also helps to lessen greenhouse gases, and cleans the air in its immediate vicinity by sucking it in through an air outlet in the polycarbonate shell. Although the teardrop-shaped bulb is quite small, its potential impact is enormous: an extraordinary amount of energy could be saved if everyone in North America installed just a few of these in their homes.
Living Microalgae Lamp Absorbs CO2 from the Air*** French biochemist Pierre Calleja has designed a fascinating eco-friendly lamp that could light up streets and parking garages while cutting CO2 emissions. It runs completely free of electricity, powered solely by a tube filled with glowing green algae. The lamp uses the energy created by the algae’s own photosynthesis process to power the light within, while the algae itself lives on CO2 in the air outside
The lamp is designed so it can store the energy from photosynthesis for later use. That way, when it’s transported into low-light areas, it can glow without the need for any external power source. A single lamp could absorb roughly a ton of carbon from the air in just one year — the same amount as 150 or 200 trees. If these lamps could go into mass production, they could go a long way toward fighting climate change and reducing air pollution.
Interestingly enough, the lamp isn’t the only novel application Calleja has found for microalgae. He and his team at FermentAlg are already using microalgae for all kinds of applications, from a sustainable source of Omega 3 supplements to a base for natural cosmetics. They’ve even figured out how to harness algae as a source of biofuel.
jelly algae
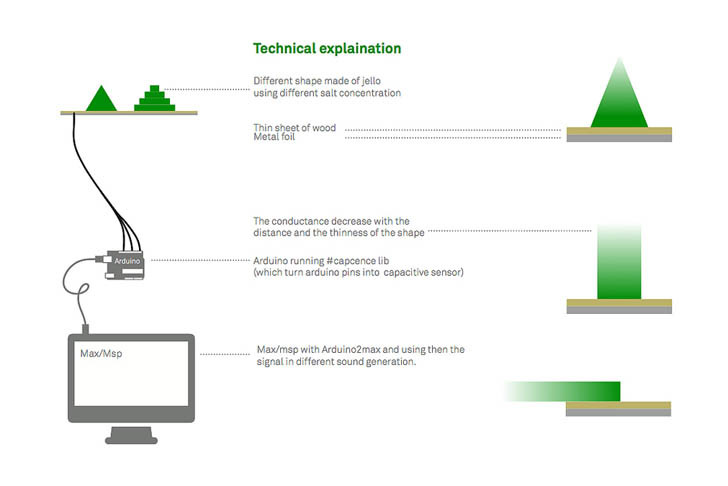
French students Marianne Cauvard and Raphaël Pluvinage have come up with a fantastically weird project that uses agar-agar — red algae — jelly to create music. Dubbed Noisy Jelly, the project involves cooking colored jelly with a few grams of algae powder and then molding it into different geometric shapes. The shapes are then placed on a sensor board that creates music when each one is touched! So how does it work? Technically the game board is a capacitive sensor that creates different sounds according to the shape of the figures, salt concentration, and finger pressure. A weird experiment or a fun tasty game, Cauvard and Pluvinage’s Noisy Jelly gives a fresh, wobbly new aesthetic to musical instruments.
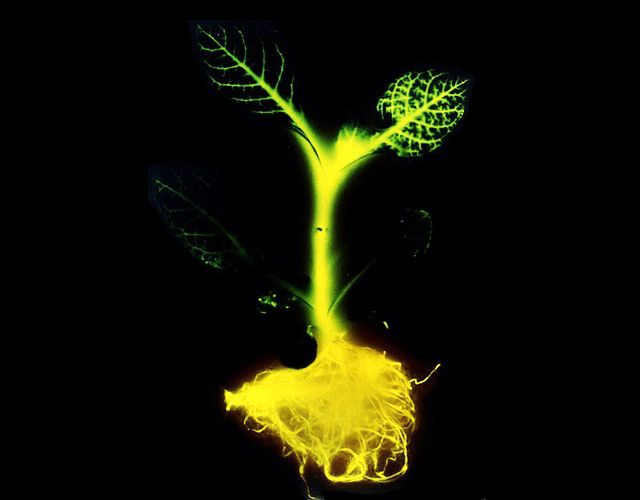
Glowing Plant Project Creates Bioluminescent Plants for Natural Lighting
Why use a light bulb to illuminate your home when you could just fill it with glowing plants? That’s the question asked by Antony Evans, the head of a team of bio-engineers in San Francisco, California. The team has launched a Kickstarter campaign to fund a project that will use the glowing genes from fireflies and bacteria to create plants that shine. By using synthetic biology and Genome Compiler software, the have already managed to modify Arabidopsis plants, and they’re working on glowing roses. To make the glowing plants, the team first uses the Genome Compiler software to identify a plant’s DNA. Cambrian Genomics then custom prints the sequence. The genes are then inserted into an Arabidopsis plant, which is closely related to mustard and cabbage. The main sequence responsible for making the plant glow is known as luciferase (it can also be found in fireflies). While this is not the first time that luciferase has been used to make a plant light up, it is the first instance where scientists have been able to get the gene to recycle itself and make the plant especially bright.
Not surprisingly, the team has already surpassed their $65,000 Kickstarter goal. Through their project, they hope to educate the public on the potential for bioluminescent lighting, and to one day help curb the energy needed to power lighting systems. Backers who pledge $40 or more will receive a packet of 50-100 seeds that will only be available through Kickstarter. A pledge of $150 or more will get you a fully grown glowing plant that is ready to brighten up your home or office. The project is a part of a growing movement to promote biological engineering for the next generation of design.
plant energy
A Barcelona startup wants to help regular people harness the power of photosynthesis. Bioo is the world’s first planter that can charge electronic devices like cell phones and tablets, and the company’s Indiegogo campaign has already raised nearly three times the original goal amount – with a month left. The designers at Arkyne Technologies took cues from NASA research to link contemporary design with renewable energy in a way that has us all taking another look at our houseplants.Bioo is a funky form of alternative energy that is as practical as it is inspirational. The high-tech planter pot isn’t exactly cheap, at around $135 each plus shipping, but it’s a conversation starter like no other. It looks like a simple, square planter pot, with enough space to grow an average sized houseplant, but it also includes a USB port cleverly disguised as a rock.
The planter is nearly as smart as your smartphone. The bottom holds all the magical power-generating components (unless you count the greenery itself), which captures elements the plant expels after photosynthesis and transforms them into electricity. The result is a portable, self-sustaining source of power that fits into any home’s decor, and offers up clean energy for as long as your green thumb can keep a plant alive. File:Al9.jpg
paper research
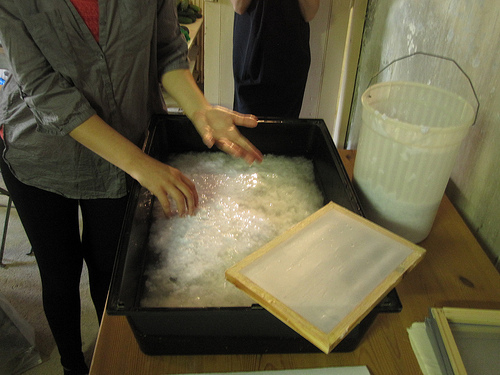
Paper making with conductive materials
Sharing an introduction on papermaking with paper, fabric rags and plants, we propose to develop “eCotton-paper” by integrating conductive and light emitting elements in between the paper sheet, during the making process. Once your “eCotton-Paper” will be up and running you will be able to program it through Arduino to make beautiful patterns and lighting effects!
Materials: Paper (copy paper) Cotton balls
tools: bucket blender cooking pot oven top cooker
Preparation Paper Cut the paper into small pieces by hand and soak it in water for over night (24 hours if possible)
Preparation Cotton Cut the cotton into small pieces by hand and soak it in water for few hours. Then add chlorine and pour it into cooking pot. Bring it to boil on oven top and cook it for few hours. After cooking, drain it with kitchen strainer, wash it with cold water. Add the cotton and some water into the blender and blend it until the cotton fibers are broken. Pour it back to a big bucket and it is ready to use.
http://www.glatfelter.com/files/products/carbonless/Moisture_Humidity.pdf
lab starter
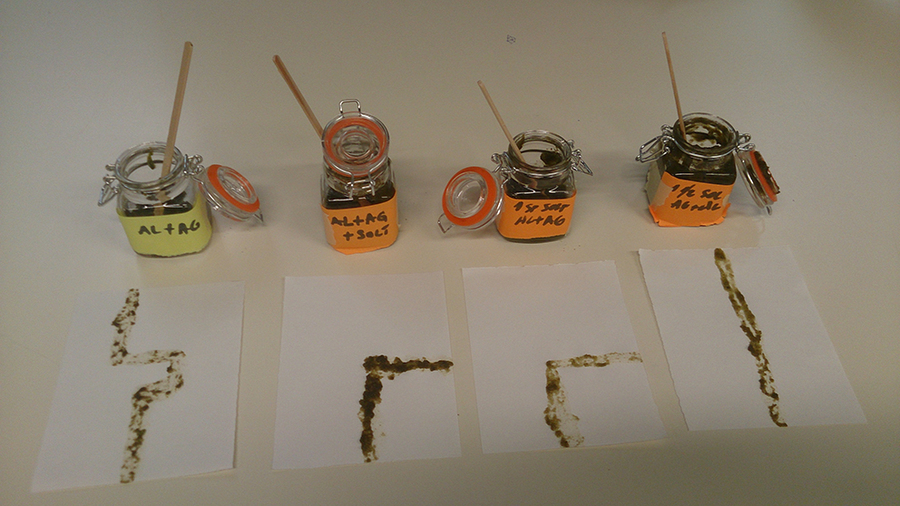
I started the experiment with blending algae and making a sort of pigment, to be more precise, a smoothie :) that will be used as ink base! I made a few variations in the algae mix:
adding every time a bit more of agar-agar and salt! PROBLEM!!!!!!
The reason of adding agar-agar was because I wanted to preserve the algae moist, and I assumed this might work out...but....well agar-agar is not the best gelatine if you want to have a nice and smooth gelly substance...and also it was very uneven since I had to add it to the algae when it was already cold and then blend together.
Adding salt also not the smartest solution... but I got to the conclusion to add in the next portion saline solution, like the one in the eye drops...
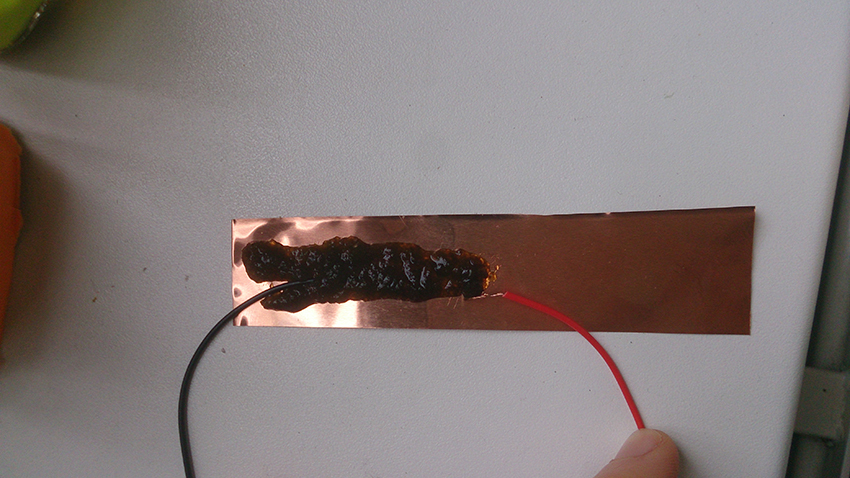
The result when measuring with the multimeter was a bit disappointing, but also expected since this kind of research takes time and a lot of chemistry knowledge. The simple combination of alage and a bit of agar-agar about 250mv, which ciuld be used if creating a Joule thief.
I also tried some other fruit and vegetables pigments, like strawberry, raspberry, blueberry and spinach but those didn't shoew any reaction.
TESTING TO BE CONTINUED............
The moment I knew what I wanted to do
What do I make?
I like to explore and combine different techniques and merge them into the graphic design field.
I have been exploring the possibilities with electronics and interactive design...like interactive posters.
The goal for the future work is to achieve more skills in digital crafts and make my own unique visual and create new tools to be used in my field of study.
What is my topic of interest?
bio-sustainable conductive ink, plants and conductivity, make a conductive ink by using plant pigment
What is my medium?
silk screen/ bio-ink/ arduino (or/and additional things to be added)
Sara Pavicic
0901438@hr.nl
