DIY Synthesizer Builders : Prototype
Go back to the overview page.
What
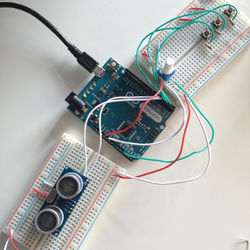
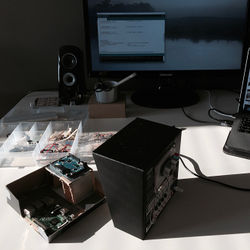
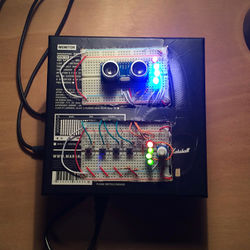
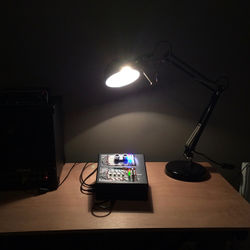
A synthesizer controller build in an old cardboard headphones box with simulated/programmed oscillators that work through an Arduino Leonardo and a Raspberry Pi with the Processing IDE. The synthesizer is powered by a rechargeable 9 volt battery
Why
To show to members of the DIY Synthesizer Building Community and give them an lo-fi example of the goals of this project and get their input through a physical example. The aim of this project is to create an open platform that enables DIY Synthesizer Builders to easily integrate renewable energy and the influence of nature into their instrument building. A key aspect of the DIY Synthesizer Building Community is that hey are continuously looking for new sounds. By using cardboard and an Arduino a lot of modules, controllers and renewable energy power sources can be quickly made. This makes use of their unusual knowledge to build oscillators out of almost anything. A cardboard kit with filled with a set of components and the knowledge that almost anything can be a oscillator is a way of sharing this knowledge and gives both the more advanced and lesser advanced members of the community the ability to play with this and build their own spin-offs.
How
Ingredients
- 1 Cardboard box
- 1 Arduino Leonardo
- 1 Raspberry Pi
- 2 breadboards
- 4 Push buttons
- 8 resistor 220 ohm
- 4 resitors 2.2 KOhms
- 1 Potentiometer 10kOhms
- 1 Ultrasound sensor
- 1 9volt battery
- 1 USB to micro-USB cable
- 8 LED's (3 blue, 3 green, 2 red)
- A lot of connection wires
- Headphones / Speakers
This is a concise roadmap of how the protoype was build:
- Use a mobile phone or similar recording device to record the sound of the wind. Preferably for about 5 minutes.
- Install Processing 2.0.0 on the Raspberry Pi.
- In the Processing IDE, use the Minim library to program four different oscillators and two controllers (examples: volume and panning of the sound) with the recording of the wind as source-file.
- Use the Arduino IDE to program the Arduino Leonardo to trigger the oscillators through the push buttons and trigger the controllers through the ultrasound sensor and potentiometer
- Connect the Arduino to the Raspberry Pi with the USB to Micro-USB cable.
- Build everything into the cardboard box and connect your speakers or headphones to the Raspberry Pi Audio Port.
- Experiment! Use the push buttons to select one of the four oscillators and use the potentiometer and ultrasound sensor to control it.
Watch a video of the working prototype here here.
Community Reactions
A showcase video was made of the prototype and together with a description emailed to five members of the DIY Synthesizer Building Community. This were their responses:
- "The sound the prototype generates is very beautiful. The way it oscillates the wind recordings works like a charm. I especially like the fact that you were able to make this in one day and build it into a cardboard box (translated from Dutch)."
- "Even though the oscillators are programmed and not analogue they emulate the desired effect. It's nice that you build the synthesizer in a headphone box. Perhaps using cardboard as a case is something to look into?"
- "Great! This shows quite nicely what you're trying to achieve. The breadboard and cardboard aesthetic are pretty nice. I also like the sound you managed to program with the oscillators."
- "I really enjoy the sound even though I can hear the ultrasound sensor messing with the recording. It´s an interesting way of controlling a synthesizer. More and more people are searching for new ways to control the instruments. (translated from Dutch)"
Keywords: raspberry pi, arduino, cardboard, nature, renewable energy
- by Dylan


