Difference between revisions of "AE Scripts"
Arjensuijker (talk | contribs) |
|||
| (14 intermediate revisions by 2 users not shown) | |||
| Line 24: | Line 24: | ||
'''step 3''' <br> | '''step 3''' <br> | ||
Alt + Stopwatch >wiggle (4,40)<br> | Click Option (Alt on Windows) + Stopwatch >wiggle (4,40)<br> | ||
[[File:CountDown3.png|500px]] <br> | [[File:CountDown3.png|500px]] <br> | ||
'''step 4''' <br> | '''step 4''' <br> | ||
Range Selector >offset | Set the Range Selector > offset to 0% in the beginning of the timeline, and to 100 % on another point in the timeline. This will create a new keyframe. Adjust this keyframe to you will: closer to the beginning for shorter countdown, further for longer countdown.<br> | ||
Adjust keyframe to you will: closer to the beginning for shorter countdown, further for longer countdown.<br> | |||
[[File:CountDown4.png|500px]] <br> | [[File:CountDown4.png|500px]] <br> | ||
[[File:CountDown6.png|500px]] <br> | [[File:CountDown6.png|500px]] <br> | ||
| Line 43: | Line 41: | ||
== Guide: Multiple Wiggles == | == Guide: Multiple Wiggles == | ||
This short assignment | This short assignment demonstrates how to adjust multiple layers at the same time.<br> | ||
[[File:WiggelingSquares_s.gif|500px]] <br> | [[File:WiggelingSquares_s.gif|500px]] <br> | ||
| Line 56: | Line 54: | ||
'''step 1''' <br> | '''step 1''' <br> | ||
create multiple shape on your background | create multiple shape layers on your background.<br> | ||
[[File:WigglingSquares1.png|500px]] <br> | [[File:WigglingSquares1.png|500px]] <br> | ||
| Line 70: | Line 68: | ||
'''step 4''' <br> | '''step 4''' <br> | ||
add another slider with command D and name them: Time and Position.<br> | add another slider with command D and name them: Time and Position.<br> | ||
add values to each slider. you can change and adjust these values later.<br> | |||
Lock the Effects panel to keep it visible.<br> | Lock the Effects panel to keep it visible.<br> | ||
[[File:WigglingSquares4B.png|500px]] <br> | [[File:WigglingSquares4B.png|500px]] <br> | ||
'''step 5''' <br> | '''step 5''' <br> | ||
Open the top layer's Position and Alt-click the Stopwatch.<br> | Open the top shape layer's Position and Alt-click the Stopwatch.<br> | ||
Write wiggle and keep the brackets empty.<br> | Write wiggle and keep the brackets empty.<br><br> | ||
connect the values with the Time , Position sliders using the PickWhip.<br> | connect the values with the Time , Position sliders by using the PickWhip:<br> | ||
1. drag the PickWhip next to position first to the Time Slider <br> | |||
2. add coma , <br> | |||
3. drag again the pickWhip next to position to the second slider | |||
[[File:WigglingSquares5.png|500px]] <br> | [[File:WigglingSquares5.png|500px]] <br> | ||
| Line 90: | Line 92: | ||
[[File:WigglingSquares8.png|500px]] <br> | [[File:WigglingSquares8.png|500px]] <br> | ||
<br> | <br> | ||
== Guide: Font Weight == | == Guide: Font Weight animation == | ||
This | This guide demonstrates how to animate text weight by using and editing a given code. <br> | ||
You can follow the original tutorial showing 3 ways to animate text weight >>here (expression Strats at 6:51) <br> | You can follow the original tutorial showing 3 ways to animate text weight >>[https://www.youtube.com/watch?v=EGi_-k9o-OM here] (expression Strats at 6:51) <br><br> | ||
[[File: | [[File:FontWeight.gif|500px]] <br> | ||
{| class="wikitable" | {| class="wikitable" | ||
|- | |- | ||
| skills || copy-and-adjust code | | skills || copy-paste-and-adjust code | ||
|- | |- | ||
| || layer control expression | | || layer control expression | ||
| Line 109: | Line 110: | ||
'''step 1''' <br> | '''step 1''' <br> | ||
Add a text layer. Choose a typeface with multiple weights.<br> | Add a solid layer and add text layer. Choose a ''typeface with multiple weights''.<br> | ||
'''step 2''' <br> | '''step 2''' <br> | ||
add a Null | add a Null object > rename it 'control'.<br> | ||
[[File:FontWeight1.png|500px]] <br> | [[File:FontWeight1.png|500px]] <br> | ||
| Line 121: | Line 122: | ||
'''step 4''' <br> | '''step 4''' <br> | ||
click your text layer drop-down arrow > open the 'TEXT' drop down menu.<br> | click your text layer drop-down arrow > open the 'TEXT' drop down menu.<br> | ||
next to the Source stop watch alt(Option)-click > paste in the following code:<br><br> | next to the Source stop watch alt(Option)-click > paste in the following code:<br><br><syntaxhighlight lang="javascript"> | ||
var array=[ | |||
"ChakraPetch-ExtraLight", | |||
"ChakraPetch-Light", | |||
"ChakraPetch-Regular", | |||
"ChakraPetch-Medium", | |||
"ChakraPetch-SemiBold", | |||
"ChakraPetch-Bold" | |||
]; r = Math.round(thisComp.layer("control").effect("font weight")("Slider")); style.setFont(array[r]); | |||
</syntaxhighlight><br> | |||
[[File:FontWeight3.png|500px]] <br> | [[File:FontWeight3.png|500px]] <br> | ||
[[File:FontWeight4.png|500px]] <br> | |||
<br> | <br> | ||
| Line 141: | Line 150: | ||
'''step 6''' <br> | '''step 6''' <br> | ||
mark | mark inside the brackets of r=Math.round() from (thisComp to "slider")> connect the whip-pick next to the code with the font weight slider. your text and null layer should now be connected. <br> | ||
[[File:FontWeight5.png|500px]] <br> | |||
'''step 7''' <br> | '''step 7''' <br> | ||
start animating: set the slider on 0 and the indicator in the beginning of the timeline. click the stop-watch next to the slider under the control layer.<br> | start animating: set the slider on 0 and the indicator in the beginning of the timeline. click the stop-watch next to the slider under the control layer.<br> | ||
your text and null layer should now be connected. <br> | |||
[[File:FontWeight6.png|500px]] <br> | |||
move forward in time and set the control slider on 5 (when using 6 fonts). go further in time and set it bak to 0. | move forward in time and set the control slider on 5 (when using 6 fonts). go further in time and set it bak to 0. | ||
| Line 153: | Line 165: | ||
2. [https://www.youtube.com/watch?v=kbjsL0i0sPM Things Wiggle can do] <br> | 2. [https://www.youtube.com/watch?v=kbjsL0i0sPM Things Wiggle can do] <br> | ||
3. [https://www.youtube.com/watch?v=hBCBAbR-B5w&t=317s Wiggle multiple objects] <br> | 3. [https://www.youtube.com/watch?v=hBCBAbR-B5w&t=317s Wiggle multiple objects] <br> | ||
4. [https://www.youtube.com/watch?v=37a3YHq4suE&t=12s | 4. [https://www.youtube.com/watch?v=37a3YHq4suE&t=12s Wiggle text colors]<br> | ||
5. [https://www.youtube.com/watch?v=9f8l_Fugc2Q | 5. [https://www.youtube.com/watch?v=9f8l_Fugc2Q Random color expressions]<br> | ||
6. [https://youtube.com/shorts/2dkyocGqGHM?feature=share Flicker/ Glitch] <br> | 6. [https://youtube.com/shorts/2dkyocGqGHM?feature=share Flicker/ Glitch] <br> | ||
7. [https://www.youtube.com/watch?v=2T_4ndZ6Nr8 Random letter reveal] <br> | 7. [https://www.youtube.com/watch?v=2T_4ndZ6Nr8 Random letter reveal] <br> | ||
Latest revision as of 11:52, 18 October 2024
On this page you will find a series of guides to create short animations combined into one. You will be adding Scrips into Adobe After Effects.
For this demo I chose the words 'Visual Coding' + square shape + the colours #260340 and #d3e52b on a 5:4 canvas ratio.
Guide: Text Reveal/ Countdown
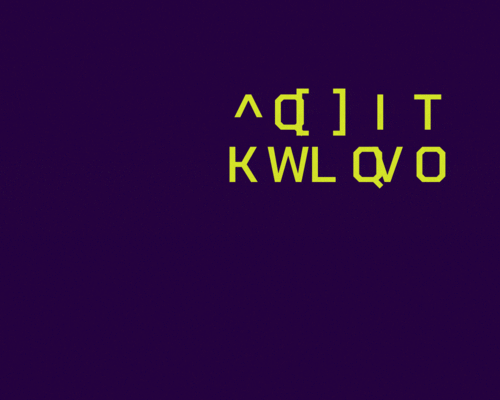
This short assignment demonstrate how to create a generative text animation.
| skills | wiggle expression |
| time to complete | 10 minutes |
step 1
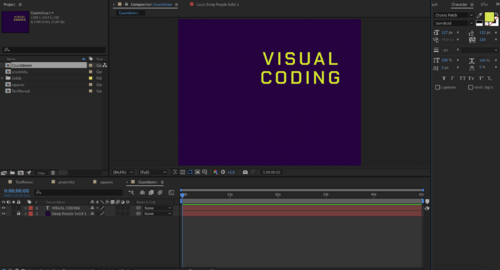
write text on your background (or solid background layer for creating GIFs).
center your anchor point [ - command double-click on your anchor icon - ]
step 2
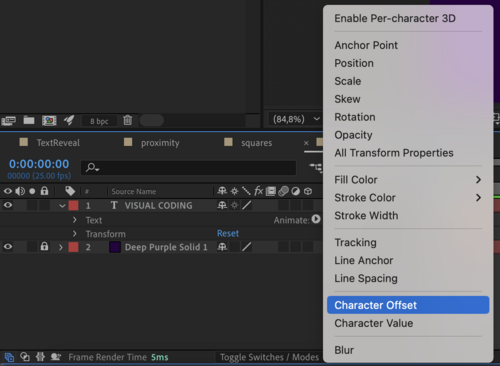
open your text layer > animate > character offset
step 3
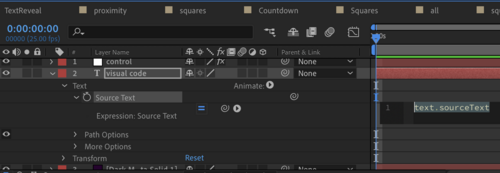
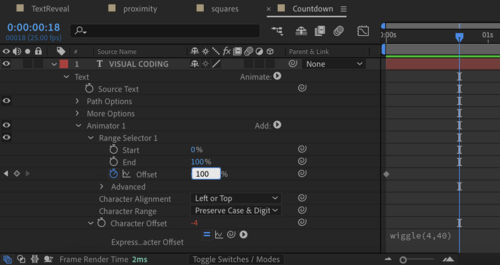
Click Option (Alt on Windows) + Stopwatch >wiggle (4,40)

step 4
Set the Range Selector > offset to 0% in the beginning of the timeline, and to 100 % on another point in the timeline. This will create a new keyframe. Adjust this keyframe to you will: closer to the beginning for shorter countdown, further for longer countdown.

step 5
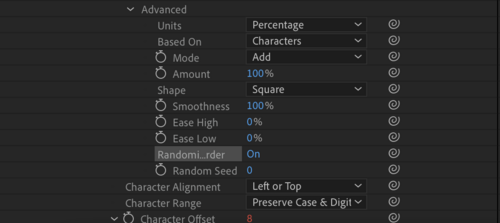
Advanced > Random order ON
Random seed: 6
=== TIP === You can use the 'wiggle' expression to create a random color text animation as well! follow >>this tutorial
Guide: Multiple Wiggles
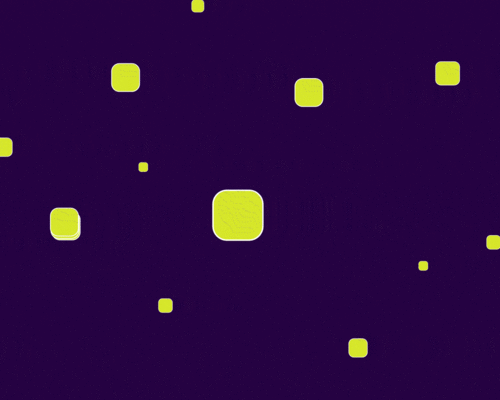
This short assignment demonstrates how to adjust multiple layers at the same time.
| skills | wiggle expression |
| layer control expression | |
| time to complete | 17 minutes |
step 1
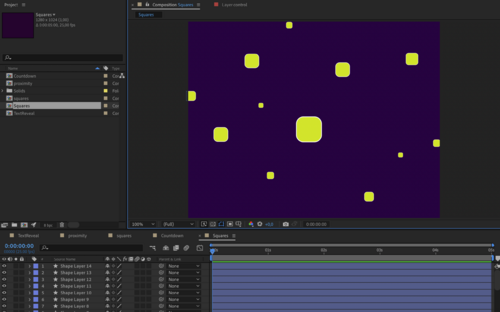
create multiple shape layers on your background.
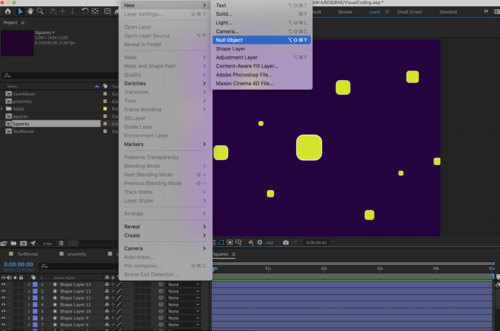
step 2
add a Null layer > rename it 'control'.

step 3
add Expressions Effect > Slider Control to your control layer.
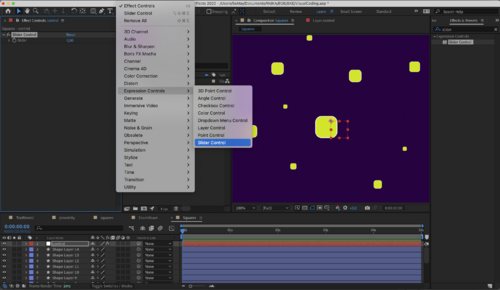
step 4
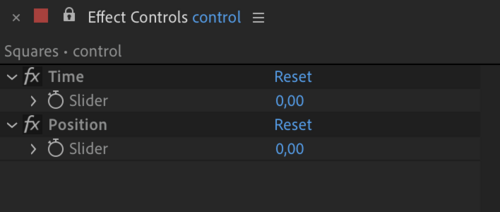
add another slider with command D and name them: Time and Position.
add values to each slider. you can change and adjust these values later.
Lock the Effects panel to keep it visible.
step 5
Open the top shape layer's Position and Alt-click the Stopwatch.
Write wiggle and keep the brackets empty.
connect the values with the Time , Position sliders by using the PickWhip:
1. drag the PickWhip next to position first to the Time Slider
2. add coma ,
3. drag again the pickWhip next to position to the second slider

step 6
control-click (right-click) the Position stop watch > select 'Copy Expression Only'

step 7
select all there rest of the shape layers > paste.
step 8
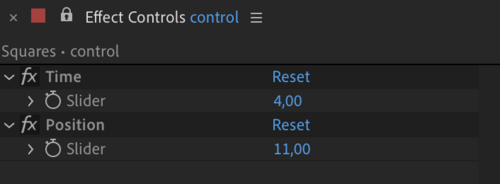
You can now adjust the wiggle values of all the layers together.
Guide: Font Weight animation
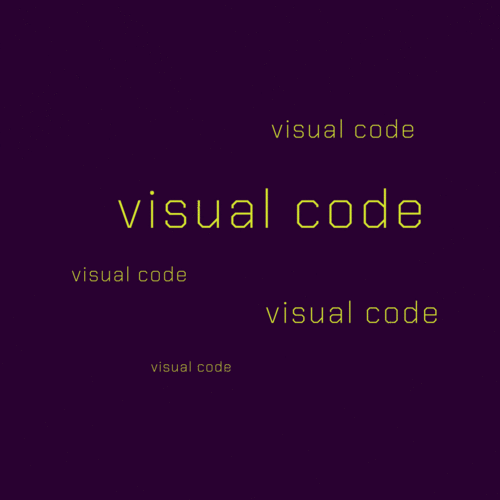
This guide demonstrates how to animate text weight by using and editing a given code.
You can follow the original tutorial showing 3 ways to animate text weight >>here (expression Strats at 6:51)
| skills | copy-paste-and-adjust code |
| layer control expression | |
| time to complete | 21 minutes |
step 1
Add a solid layer and add text layer. Choose a typeface with multiple weights.
step 2
add a Null object > rename it 'control'.
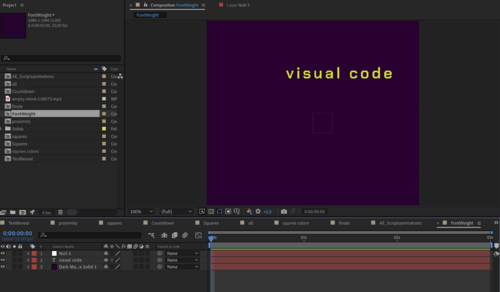
step 3
add a Slider Control effect to the Null layer > rename it 'font weight'.
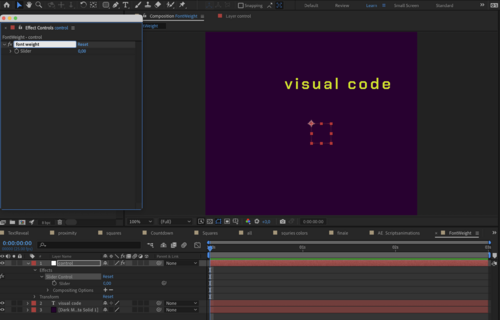
step 4
click your text layer drop-down arrow > open the 'TEXT' drop down menu.
next to the Source stop watch alt(Option)-click > paste in the following code:
var array=[

"ChakraPetch-ExtraLight",

"ChakraPetch-Light",

"ChakraPetch-Regular",

"ChakraPetch-Medium",

"ChakraPetch-SemiBold",

"ChakraPetch-Bold"

]; r = Math.round(thisComp.layer("control").effect("font weight")("Slider")); style.setFont(array[r]);
step 5
adjust the code content - change the names of the fonts to your own selection.
step 6
mark inside the brackets of r=Math.round() from (thisComp to "slider")> connect the whip-pick next to the code with the font weight slider. your text and null layer should now be connected.

step 7
start animating: set the slider on 0 and the indicator in the beginning of the timeline. click the stop-watch next to the slider under the control layer.
your text and null layer should now be connected.

move forward in time and set the control slider on 5 (when using 6 fonts). go further in time and set it bak to 0.
Recommended Tutorials
You can watch our pre-tested video tutorials to create the above and more.
1. introduction to Expressions
2. Things Wiggle can do
3. Wiggle multiple objects
4. Wiggle text colors
5. Random color expressions
6. Flicker/ Glitch
7. Random letter reveal
8. Random options
9. Random XYZ Position
10. Five copy-paste Expressions
11. Adobe Expressions Examples
