Difference between revisions of "AE Scripts"
| Line 32: | Line 32: | ||
[[File:CountDown7.png|500px]] <br> | [[File:CountDown7.png|500px]] <br> | ||
== Guide: | == Guide: Multiple Wiggles == | ||
This short assignment demonstrate how to adjust multiple layers at the same time.<br> | |||
[[File: | '''step 1''' <br> | ||
create multiple shape on your background/ solid.<br> | |||
[[File:WigglingSquares1.png|500px]] <br> | |||
'''step 2''' <br> | |||
add a Null layer > rename it 'control'.<br> | |||
[[File:WigglingSquares2.png|500px]] <br> | |||
[[File:WigglingSquares2B.png|500px]] <br> | |||
'''step 3''' <br> | |||
add Expressions Effect > Slider Control to your control layer.<br> | |||
[[File:WigglingSquares3.png|500px]] <br> | |||
'''step 4''' <br> | |||
add another slider with command D and name them: Time and Position.<br> | |||
Lock the Effects panel to keep it visible.<br> | |||
[[File:WigglingSquares4B.png|500px]] <br> | |||
'''step 5''' <br> | |||
Open the top layer's Position and Alt-click the Stopwatch.<br> | |||
Write wiggle and keep the brackets empty.<br> | |||
connect the values with the Time , Position sliders using the PickWhip.<br> | |||
[[File:WigglingSquares5.png|500px]] <br> | |||
'''step 6''' <br> | |||
control-click (right-click) the Position stop watch > select 'Copy Expression Only'<br> | |||
[[File:WigglingSquares6.png|500px]] <br> | |||
'''step 7''' <br> | |||
select all there rest of the shape layers > paste.<br> | |||
'''step 8''' <br> | |||
You can now adjust the wiggle values of all the layers together.<br> | |||
[[File:WigglingSquares8.png|500px]] <br> | |||
<br> | <br> | ||
== Guide: Random Color == | == Guide: Random Color == | ||
Revision as of 14:39, 26 June 2023
For this demo I choose the words 'Visual Coding' + square shape + my site's colours on a 5:4 canvas ratio.
Guide: Text Reveal/ Countdown
This short assignment demonstrate how to create a generative text animation.
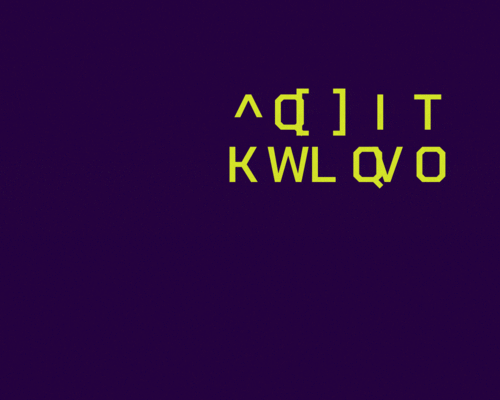
step 1
write text on your background (or solid background layer for creating GIFs).
center your anchor point [ - command double-click on your anchor icon - ]
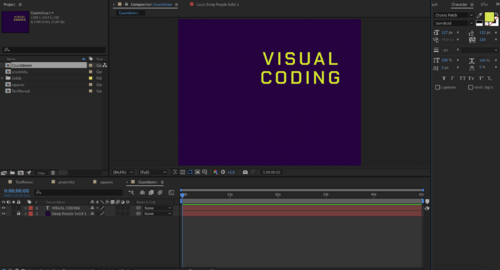
step 2
open your text layer > animate > character offset
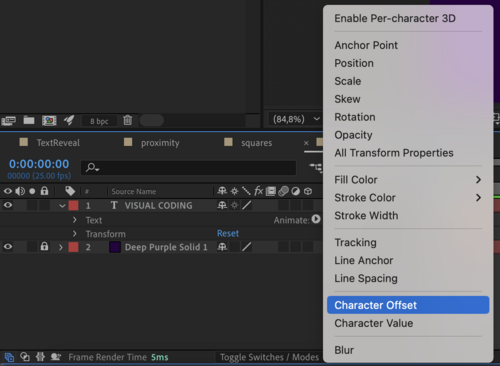
step 3
Alt + Stopwatch >wiggle (4,40)

step 4
Range Selector >offset
Stopwatch on 0% >keyframe 100%
Adjust keyframe to you will: closer to the beginning for shorter countdown, further for longer countdown.

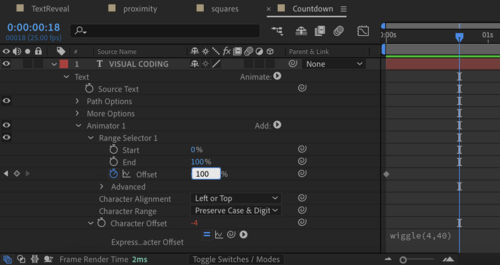
step 5
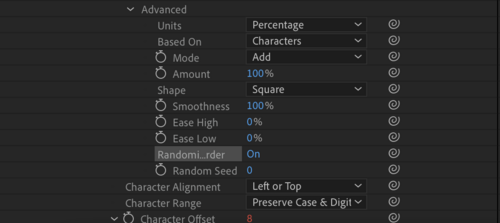
Advanced > Random order ON
Random seed: 6
Guide: Multiple Wiggles
This short assignment demonstrate how to adjust multiple layers at the same time.
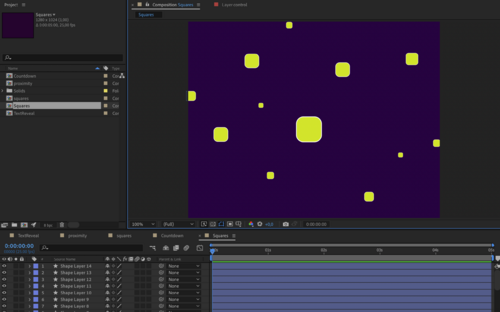
step 1
create multiple shape on your background/ solid.
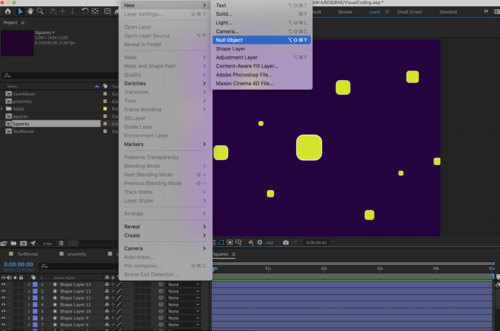
step 2
add a Null layer > rename it 'control'.

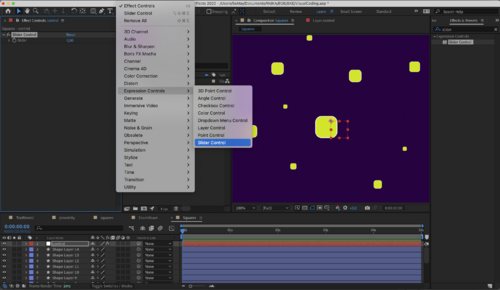
step 3
add Expressions Effect > Slider Control to your control layer.
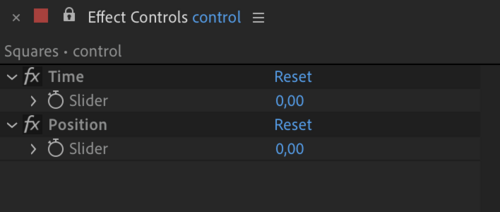
step 4
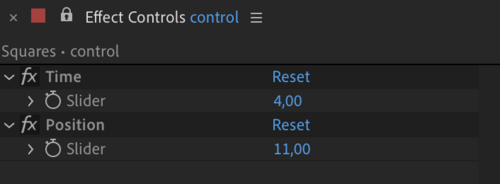
add another slider with command D and name them: Time and Position.
Lock the Effects panel to keep it visible.
step 5
Open the top layer's Position and Alt-click the Stopwatch.
Write wiggle and keep the brackets empty.
connect the values with the Time , Position sliders using the PickWhip.

step 6
control-click (right-click) the Position stop watch > select 'Copy Expression Only'

step 7
select all there rest of the shape layers > paste.
step 8
You can now adjust the wiggle values of all the layers together.
Guide: Random Color
- Depending on the setting, you may have to select everything in your graphic you want to plot
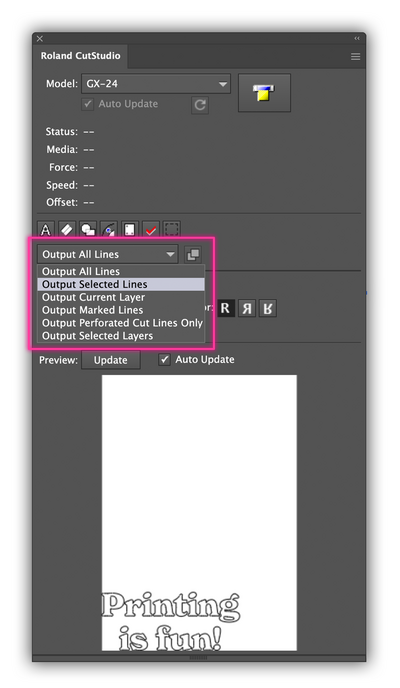
- You can also set what you would like to cut through the window highlighted in the screenshot.
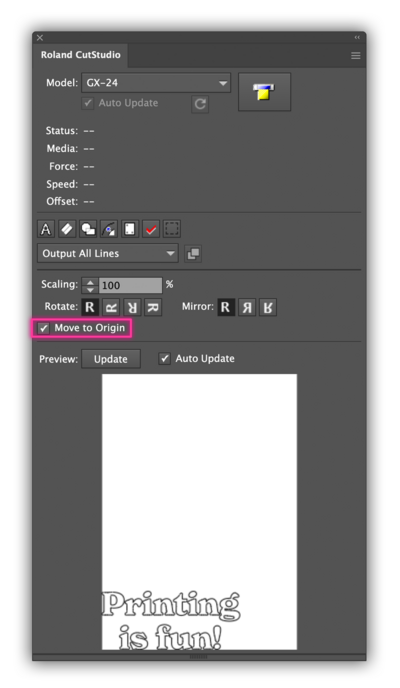
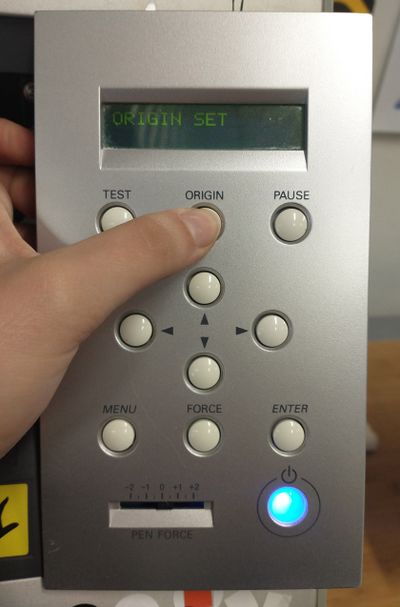
- To make the knife start cutting/drawing in a given position on the piece of vinyl/paper, move the knife with the arrows and then press the button "Set Origin" on the plotter. Then make sure to tick the "Move to origin box on the Roland Cut Studio extension window as shown here.
Recommended Tutorials
You can watch our pre-tested video tutorials to create the above and more.
1. introduction to Expressions
2. Things Wiggle can do
3. Wiggle multiple objects
4. Flicker/ Glitch
5. Random letter reveal
6. Random options
7. Random XYZ Position
8. Five copy-paste Expressions
9. Adobe Expressions Examples
10. Using ChatGPT to Create AE Animations
