Riso patterns: Difference between revisions
| (4 intermediate revisions by the same user not shown) | |||
| Line 28: | Line 28: | ||
5. Make sure to check only the box "Wrap around"<br> | 5. Make sure to check only the box "Wrap around"<br> | ||
[[File:4_Offset_Settings.png.png|400px]]<br> | [[File:4_Offset_Settings.png.png|400px]]<br> | ||
<br> | |||
<br> | |||
'''Tip:''' You can also use the gradient tool to create beautiful grayscale designs.<br> Make sure you do that before applying the Offset Filter! <br> | |||
<br> | |||
[[File:_new_gradient_layer2.png|400px]]<br> | |||
<br> | |||
[[File:_new_merge.png|400px]]<br> | |||
<br> | |||
[[File:_new_gradient_layer3.png|400px]]<br> | |||
<br> | |||
<br> | <br> | ||
6. To make the pattern completely centred, you should move the:<br> | 6. To make the pattern completely centred, you should move the:<br> | ||
| Line 36: | Line 48: | ||
7. Once the filter is applied, you can finish your pattern by adding elements in the formed empty space in the middle so it can achieve a seamless effect.<br> | 7. Once the filter is applied, you can finish your pattern by adding elements in the formed empty space in the middle so it can achieve a seamless effect.<br> | ||
[[File:5_Additional_Design.png|400px]]<br> | [[File:5_Additional_Design.png|400px]]<br> | ||
<br> | <br> | ||
| Line 63: | Line 66: | ||
3. Make sure you check the box "Scale to Fit Media"; it is important that the edges of your design are printed, since this is what is going to make the pattern seamless.<br><br> | 3. Make sure you check the box "Scale to Fit Media"; it is important that the edges of your design are printed, since this is what is going to make the pattern seamless.<br><br> | ||
'''Important:''' Make sure the copy count is set to 1! You make more copies from the RISO machine, and not from the | '''Important:''' Make sure the copy count is set to 1! You make more copies from the RISO machine, and not from the computer! More information in the last step of this tutorial!<br><br> | ||
[[File:7_Fit_Media.png|400px]]<br> | [[File:7_Fit_Media.png|400px]]<br> | ||
<br> | <br> | ||
| Line 80: | Line 83: | ||
=== Making the Master === | === Making the Master === | ||
1. '''Change the ink''' in the RISO machine with the colour of your liking<br> | 1. '''Change the ink''' in the RISO machine with the colour of your liking<br> | ||
2. Make sure there | 2. Make sure there are at least 2 papers in the paper tray<br> | ||
3. Press "Print" on the computer<br> | 3. Press "Print" on the computer<br> | ||
4. A dialogue panel will show on the Riso that would say that the colours do not match > Press continue<br> | 4. A dialogue panel will show on the Riso that would say that the colours do not match > Press continue<br> | ||
Latest revision as of 17:27, 12 April 2024
How to create beautiful seamless patterns with the Riso?
Manual patterns
[edit]1. Draw your visual on an A3 sheet.
2. Fold it in 4 and cut.
3. Shift the squares vertically.
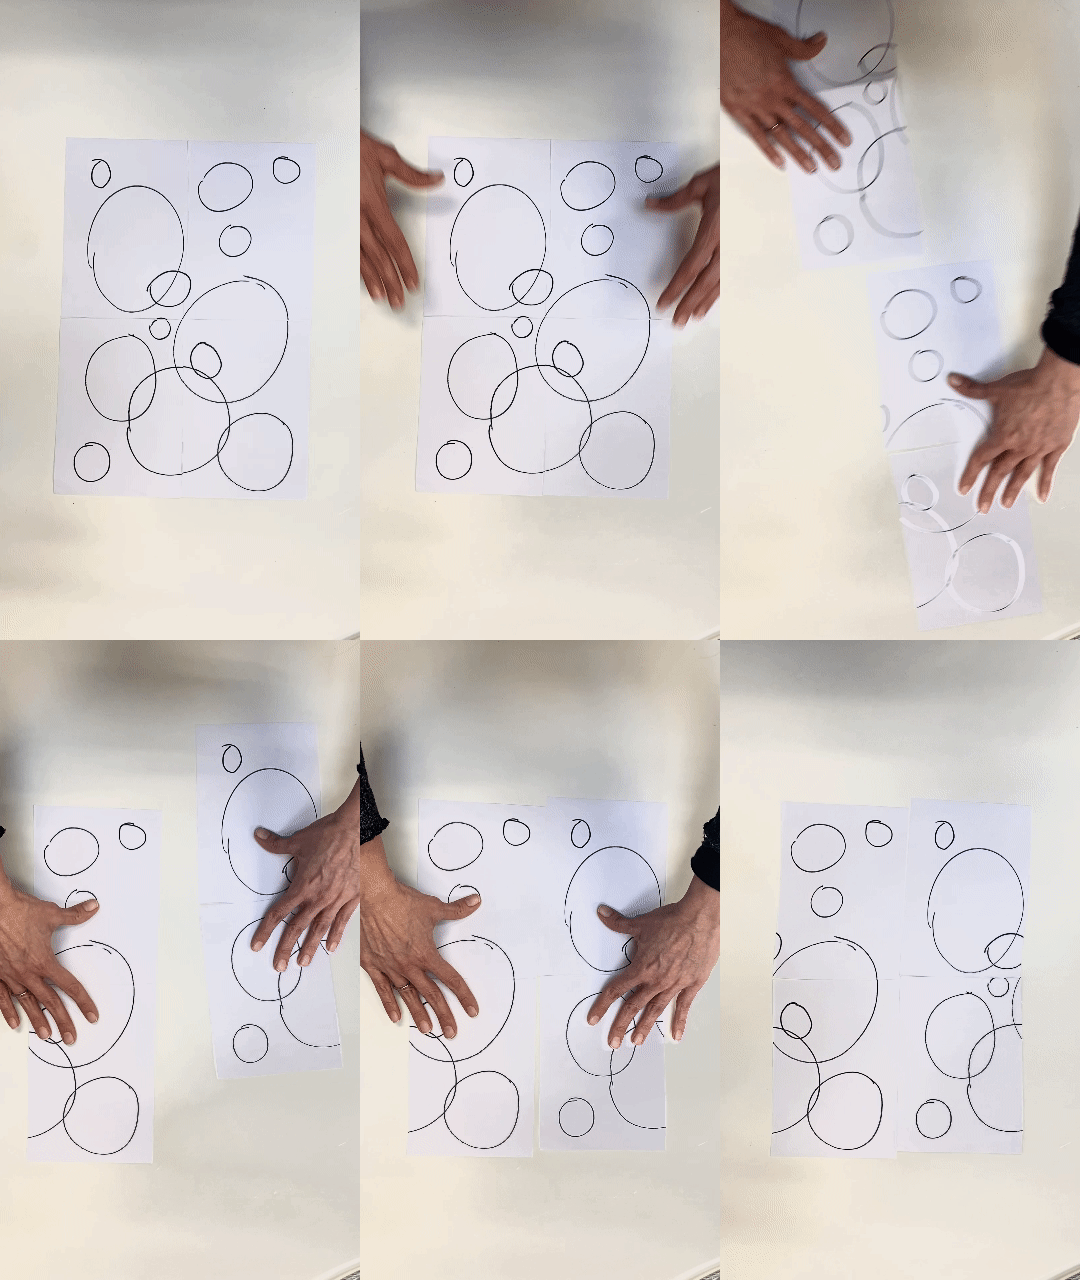
4. Shift the squares horizontally.
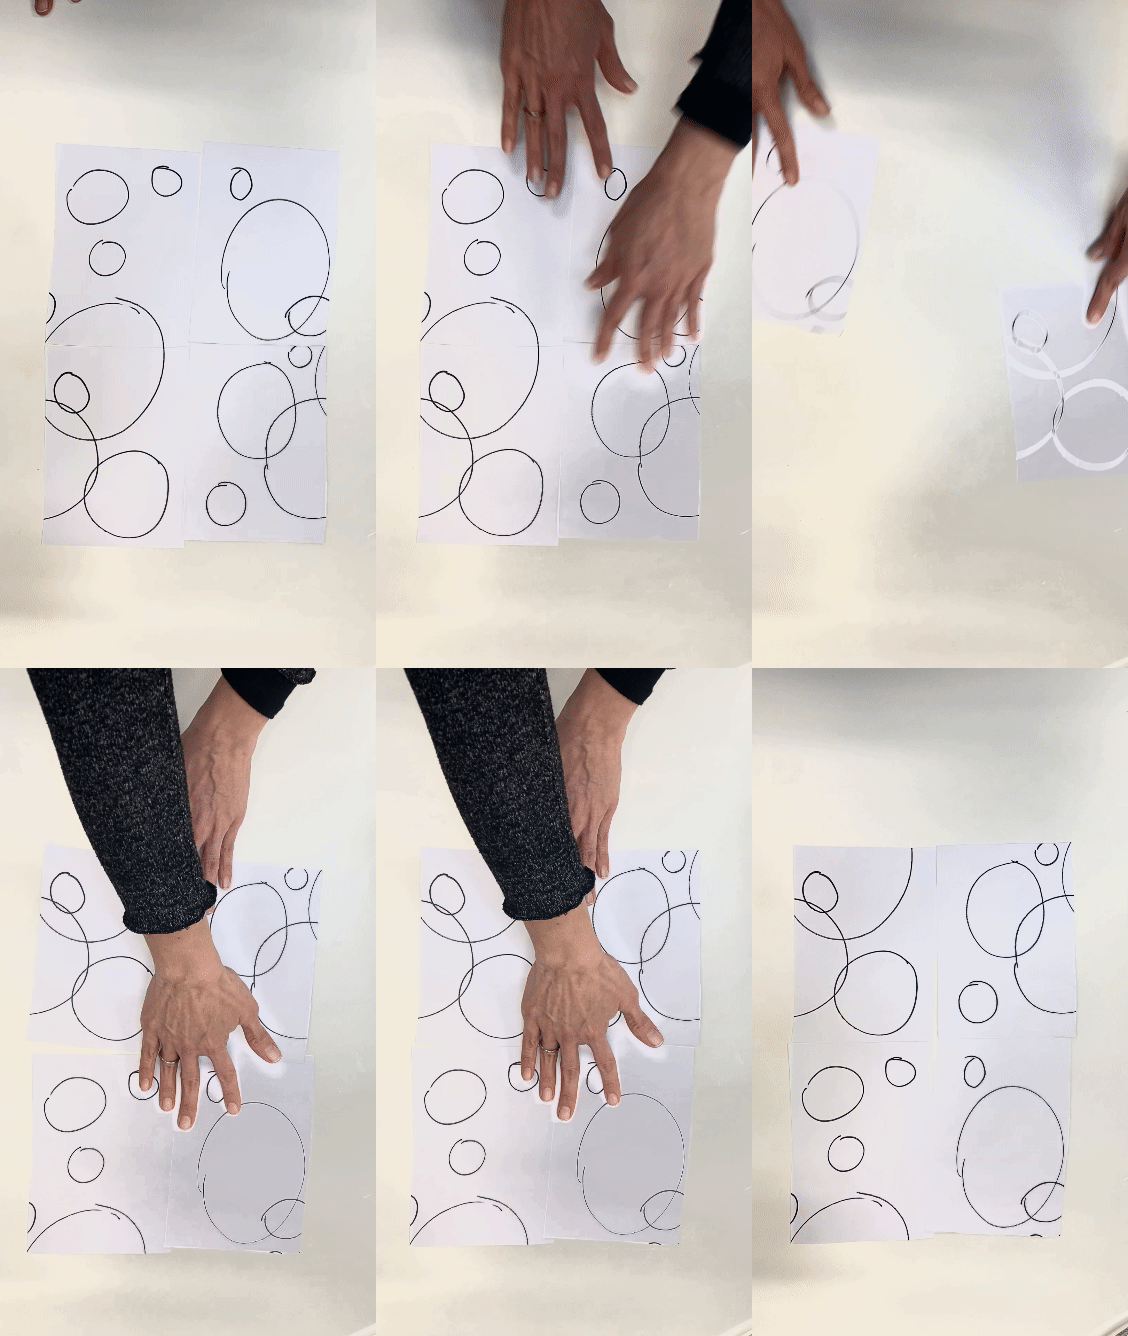
5. You can add elements to the centre of the page.
6. Scan your image in the Riso printer.
7. Make a master and print!.
Photoshop patterns
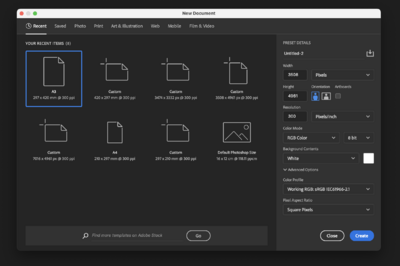
[edit]1. Open Photoshop
2. Create a new file with your desired size; make sure to note somewhere the dimension in pixels;
for A3 size 300dpi, the dimensions are - W:3508px by H:4961px
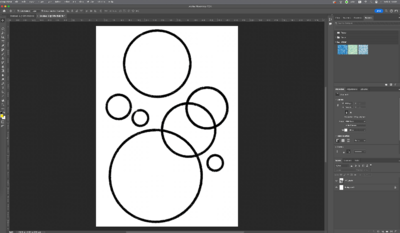
3. Create your design; make sure you are working in black and white.
4. Go to Filter > Other > Offset
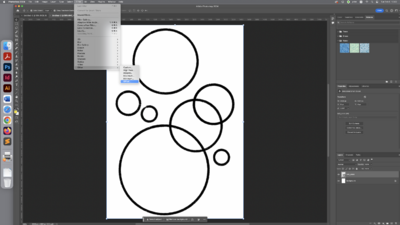
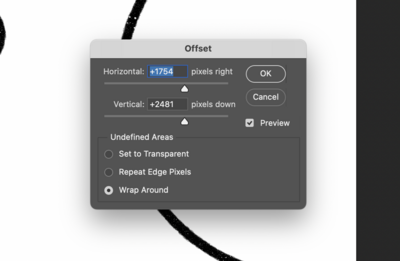
5. Make sure to check only the box "Wrap around"
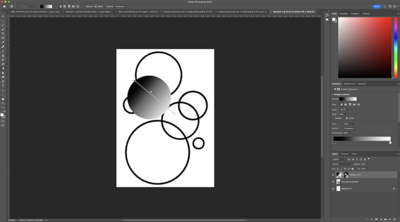
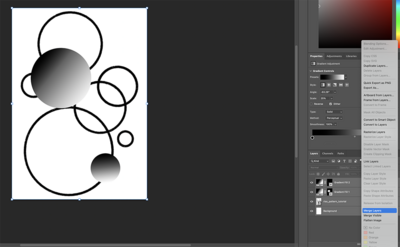
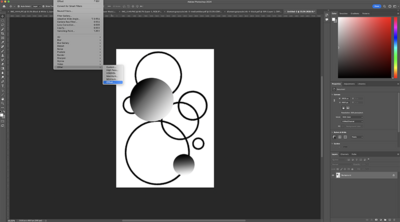
Tip: You can also use the gradient tool to create beautiful grayscale designs.
Make sure you do that before applying the Offset Filter!
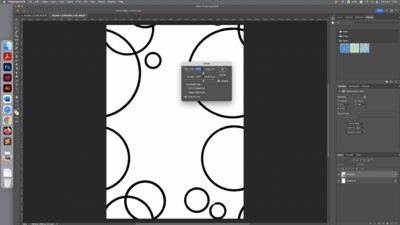
6. To make the pattern completely centred, you should move the:
- "horizontal pixels right" bar half the way of the original width (3508px / 2 = 1754px);
- "vertical pixels down" bar half the way of the original height (4962px / 2 = 2481)
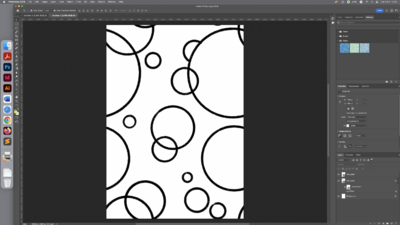
7. Once the filter is applied, you can finish your pattern by adding elements in the formed empty space in the middle so it can achieve a seamless effect.
Printing the pattern with the Riso
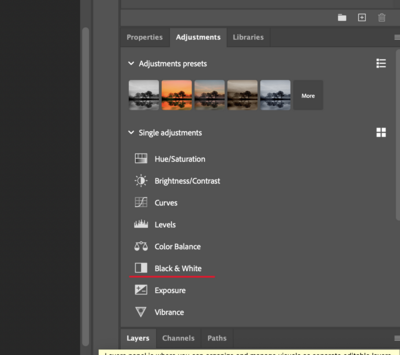
[edit]1. Make sure the design in black and white! If it is not, you can apply the Black and white filter by
Adjustments > Black and White.
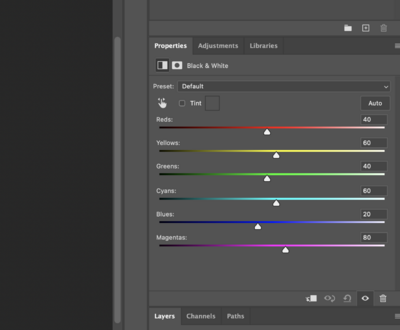
Reminder: The black parts of your design will make the ink you have put in the machine the most saturated it can get. Check the swatch cards laying on the printers to have an idea how your colours will turn out.
2. Press Cmnd + P or go to File>Print
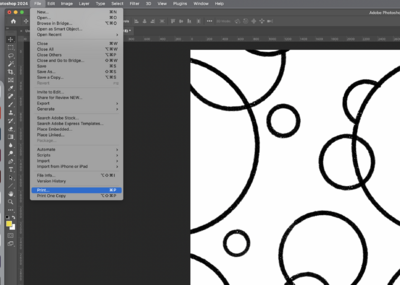
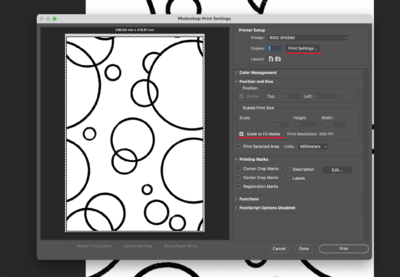
3. Make sure you check the box "Scale to Fit Media"; it is important that the edges of your design are printed, since this is what is going to make the pattern seamless.
Important: Make sure the copy count is set to 1! You make more copies from the RISO machine, and not from the computer! More information in the last step of this tutorial!
4. Go to "Print Settings" > Layout button > Colouring
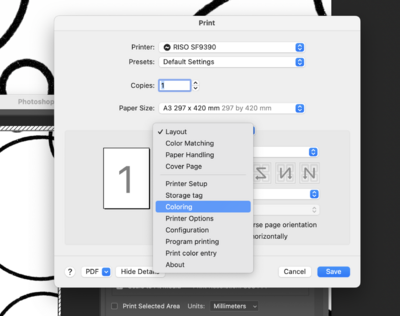
- from this panel, you can change the halftone effect of the gray parts of your design;
- make sure the settings are in the mode "Screen-covered" and the colour remains black.
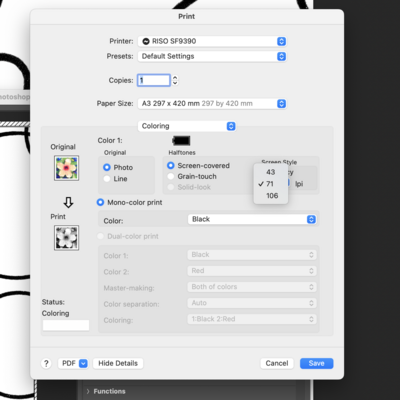
Do not press print before checking the next steps!
Making the Master
[edit]1. Change the ink in the RISO machine with the colour of your liking
2. Make sure there are at least 2 papers in the paper tray
3. Press "Print" on the computer
4. A dialogue panel will show on the Riso that would say that the colours do not match > Press continue
5. The masters will be made.
6. If you want to make more copies, select the amount from the Riso machine and press the big blue button; and do not hit print on the computer again!
The Printed Pattern
[edit]You will need 4 prints to see the pattern.
Enjoy your new prints!
